Machine Creation Services (MCS) is a single image management solution from Citrix that allows you to easily create multiple virtual machines based off a gold Virtual Machine by performing thin or full linked clone copies of a master virtual image.
Note: This post assumes you already have an image created and prepared to be used with MCS.
To read up on the new MCS write-cache feature available in XenApp/XenDesktop 7.9 to reduce write IOPS on MCS virtual machines see https://jgspiers.com/machine-creation-services-storage-ram-disk-cache/
To read up on updating the MCS Master Image so that you can update MCS VMs see https://jgspiers.com/updating-an-mcs-master-image/
The steps that occur when creating machines based off a gold image using MCS are similar to the below:
- You create a master virtual machine, installing the OS, patching and installing applications etc.
- Create a Machine Catalog specifying MCS to provision machines. MCS will automatically create a snapshot of the master image you select during Machine Catalog creation. You can also manually create a snapshot and select it during the Machine Catalog creation wizard. This step ensures a full snapshot is created on your storage repository alongside the master virtual machine.
- MCS copies this snapshot to each storage repository configured within your hosting connection.
- MCS creates a preparation machine with it’s network disconnected. The preparation machine is created based off the snapshot created earlier.
- The preparation machine has a small instruction disk attached to it by MCS. This disk contains the image preparation steps such as steps to rearm the OS using KMS, rearm office using KMS (if Office 2010+ is detected) and to enable DHCP so no IP conflicts are encountered. A PvD inventory is performed if using PvD.
- The preparation machine is powered on, the image preparation process steps begins with the snapshot being updated and then the machine is shut down when complete.
- MCS receives the results of the preparation and the instruction disk is then deleted.
- The preparation machine is deleted completely.
- MCS replicated the updated snapshot to all repositories defined within the hosting connection. This snapshot now contains the information to allow each created VM to have unique identities.
- MCS creates identity disks for each VM that is being created.
- MCS creates all virtual machines by attaching identity disks and creating and attaching differencing disks. Virtual machines link back to the base disk on each storage repository. This base disk is shared between all VMs and is read-only.
Note: VMs in XenApp/XenDesktop 7.11 can use full clones allowing each virtual machine to have a separate copy of the base disk.
Note: The differencing disks that each VM receives is used for writes and is thin-provisioned on the Hypervisor. It can grow to the size of the VM however gets flushed during machine reboot. In the 7.9 version of XenApp and XenDesktop you can move the differencing disk on to RAM and storage that is separate from the base OS disk. See https://jgspiers.com/machine-creation-services-storage-ram-disk-cache/
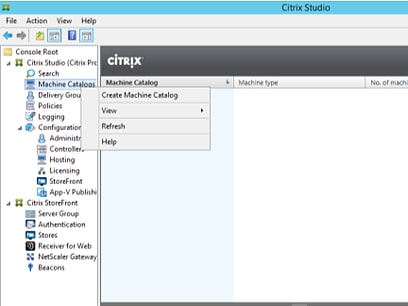
To get started and use MCS (Machine Creation Services) to deploy machine, within Citrix Studio, right-click Machine Catalogs -> Create Machine Catalog.
Click Next on the Introduction page.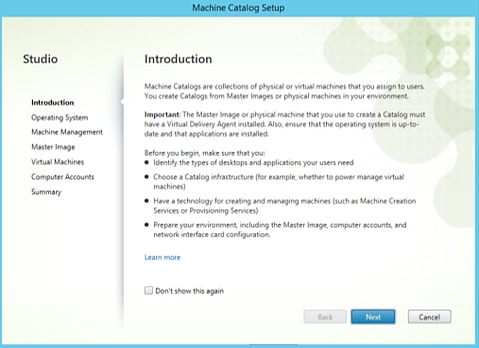
Depending on your requirements, select the appropriate option. For me, I am deploying Windows Server OS machines to host applications. Click Next.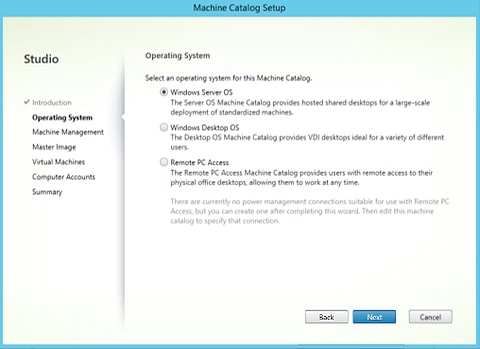
Choose to deploy machines using MCS and click Next.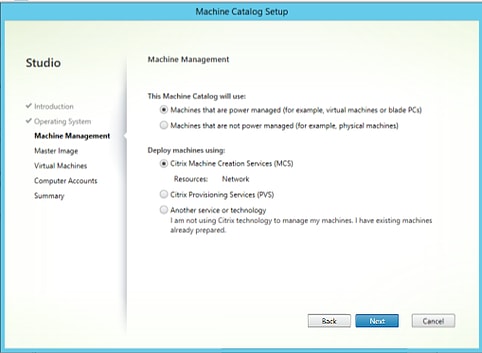
Select the prepared gold image virtual machine or snapshot. Specify the installed VDA version and click Next. Note that if using Microsoft Hyper-V, Generation 2 VMs are only supported in XenApp and XenDesktop 7.15. Older versions do not support Generation 2 VMs with MCS and those VMs will not show up on this list.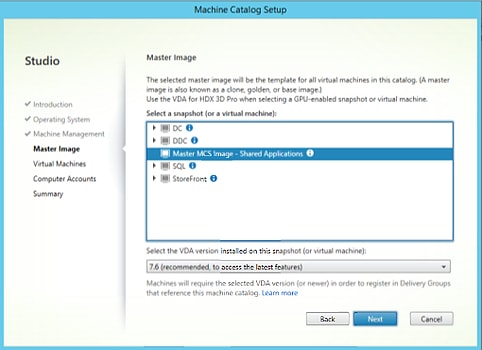
Specify the amount of machines you want to create and the hardware resources required. The vCPU and RAM fields will be pre-populated based on the amount assigned to the gold image machine. These values can be adjusted at any time. Click Next.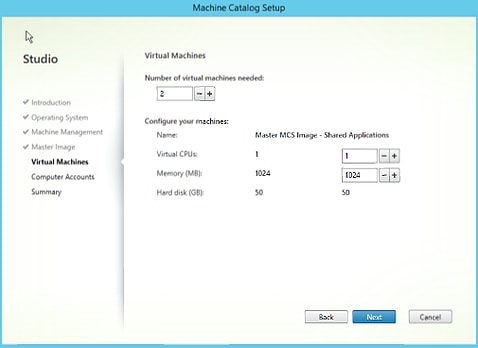
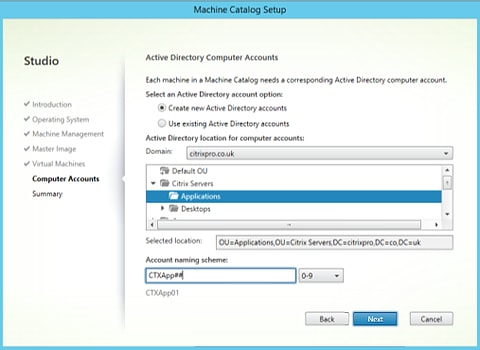
Choose the Active Directory location to store your new machine accounts. Provide a naming scheme and click Next. You can use existing accounts if they have been created
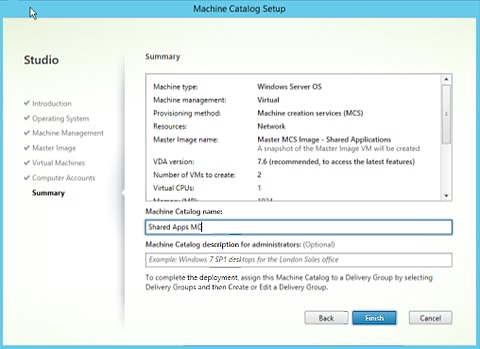
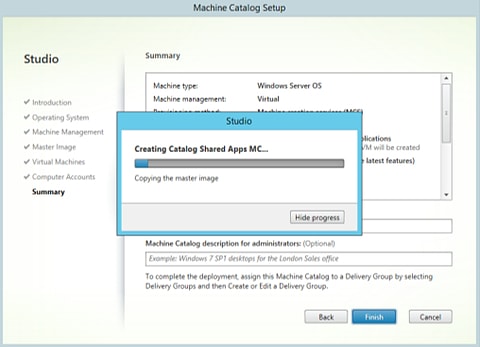
Specify a name for the Machine Catalog and click Finish.
MCS is now provisioning the machines.
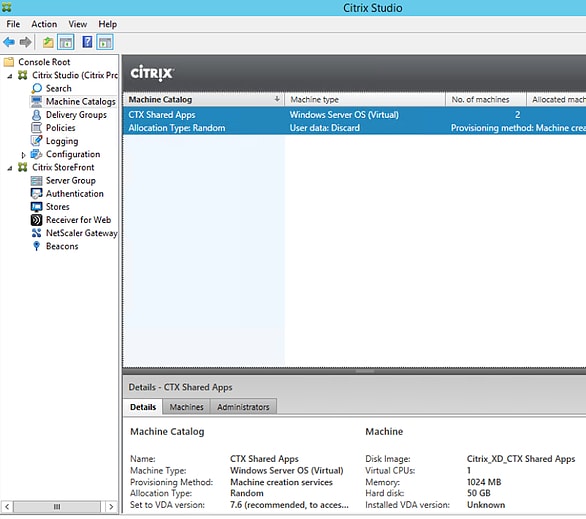
Once done the newly Machine Catalog appears.
The two Worker VMs are present.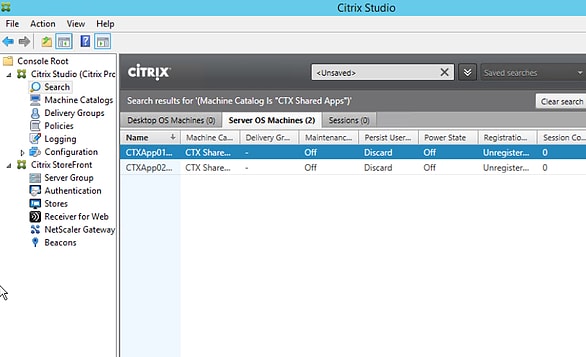
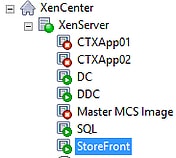
Machines CTXApp01 and CTXApp02 listed in XenCenter.
The Worker VMs are now started and registered against the Delivery Controller.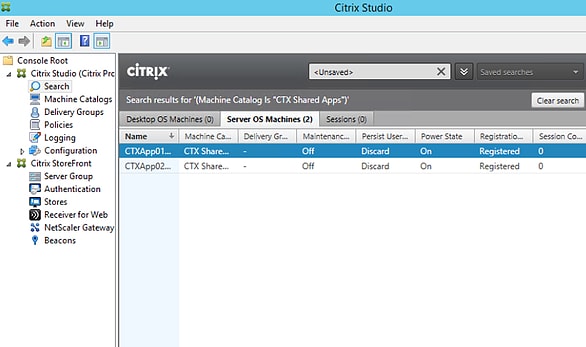
Troubleshooting Steps
- If Microsoft Office rearms are failing but you are confident they can be ignored run the following command on a Delivery Controller – Set-ProvServiceConfigurationData -Name ImageManagementPrep_Excluded_Steps -Value OfficeRearm. Office Rearm failures can occur if you are not using a KMS edition of Microsoft Office for example or the rearm count has exceeded.
- If OS rearms are failing but you are confident they can be ignored run the following command on a Delivery Controller – Set-ProvServiceConfigurationData -Name ImageManagementPrep_Excluded_Steps -Value OSRearm. OS Rearm failures can occur if you are not using a KMS edition of Windows for example or the rearm count has exceeded.
- If image preparation is failing and there is no clear reason why you can bypass the image preparation step. Not that by doing so tasks such as rearm and DHCP enabling will not take place and this may invalidate your image. Run the following command on a Delivery Controller – Set-ProvServiceConfigurationData -Name ImageManagementPrep_DoImagePreparation -Value $false.
- To enable logging on the preparation VM complete the following:
- On the master image create a DWORD registry value with a name of LOGGING and a value of 1. Create this value within HKLM\Software\Citrix\MachineIdentityServiceAgent\
- Shut down the master image and create a new snapshot
- On a Delivery Controller run command Set-ProvServiceConfigurationData -Name ImageManagementPrep_NoAutoShutdown -Value $true
- Create a new Machine Catalog and when the image preparation virtual machine is created log on and extract Image-prep.log and PvsVmAgentLog.txt from C:\
Note: Don’t forget to reverse the commands you use above once troubleshooting is complete.
CG
October 8, 2019Hello George,
We use the latest version of Citrix Virtual Apps and Desktops and my question are
Is the MAK activation still not supported?
If the only option is to use kms activation with MCS do I need to install a KMS host in order to support kms activation for both windows2019 and office2016 installation
Thanks in advanced.