Here I discuss how to install and configure eG Enterprise version 6.3 on Windows Server 2016.
Introduction:
eG Enterprise is a complete end-to-end IT performance monitoring solution capable of monitoring VDI infrastructure, hypervisors, storage, servers, web applications, custom applications, and so much more. You can see the full list of supported platforms by clicking on this link: https://www.eginnovations.com/product/platforms-supported
Our main interest is that the solution can monitor Citrix deployments from Delivery Controllers and StoreFront to VDAs all in the 7.x FMA architecture. It can also go further down the stack to the hypervisors that host our Citrix VMs, the storage that these VMs run from and the network on which they communicate across.
The product itself quite simply consists of a Manager, Agent and backend database. Agents are installed on to the machines you want to monitor, that is, the Delivery Controllers, VDAs, StoreFront servers and so on. The Manager collects measurements from Agents, processes them based on configured thresholds and sends them to a backend database for archiving.
Measurements are monitoring pieces which run against machines such as your Delivery Controller to determine the health of many different components and services. For example, monitoring the disk space of a server would be performed by one measurement and measuring the response from SQL database queries would be another. The product ships with thousands of pre-created measurements that you get to choose for deployment to monitored servers or applications. Measurements are processed against thresholds and if that threshold is breached an alert can be generated and sent to a group of administrators in several ways.
Contents:
- eG Manager Hardware Prerequisites
- eG Agent Hardware Prerequisites
- eG Manager Database Prerequisites
- Supported Web Browsers for eG Manager Access
- Install eG Manager
- Troubleshooting the eG Manager installation
- Configure SSL on eG Manager
- Install eG Agent
- Troubleshooting the eG Agent
- Configure eG Agent to trust the eG Manager SSL certificate
- Performance of eG Agent
- Configure browsers for use with eG Manager
- Configure eG Manager Redundancy
- Agentless Monitoring
- Allocate more memory to eG Manager
- Allocate more memory to eG Agent
- How to back up and restore eG Manager
- Considerations when using eG Manager across environments
eG Manager Hardware Prerequisites:
| Required RAM (minimum) | 32-bit (4GB) 64-bit (8GB) |
| Required Disk Space | 1GB |
| Supported Operating Systems | Range of Linux OS, WS2008-2016, W7-W10 |
eG Agent Hardware Prerequisites:
| Required RAM (minimum) | 512MB |
| Required Disk Space | 1GB |
| Supported Operating Systems | Range of Linux OS, WS2008-2016, W7-W10 |
eG Manager Database Prerequisites:
| Supported Databases for Production | SQL Server 2008-2016, Oracle, Azure SQL Database |
| Supported Databases for Evaluation | SQL Server Express 2005-2012 |
Additional Database Prerequisites:
- When installing SQL, make sure that the collation is set to Case Insensitive and that the Simple Recovery mode is set. Also make sure that the database server has a tablespace with at least 100MB of space for hosting the eG database.
- You can configure pruning to purge any old data from the database periodically.
- Consider whether to set SQL authentication to mixed mode. A database user will be dedicated to storing measurements received from eG Manager in the database. You can either use a SQL account or Windows account. If using Windows, you have to pre-create the account and assign the necessary permissions as discussed further on in the topic.
- Information regarding the eG Managers database connection is maintained in the file eg_db.ini which exists under \manager\config\. By editing this file you can modify the database that the eG Manager will use.
Supported Web Browsers for eG Manager access:
- Internet Explorer 10, 11, Edge.
- Firefox v18+.
- Chrome v28+.
Install eG Manager:
Before you begin:
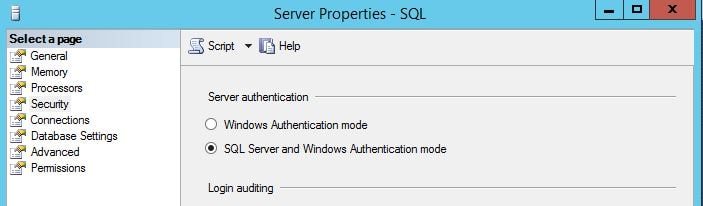
- Before you begin installing eG Enterprise, if you are going to use a SQL account to either create the database or the database user for storing measurements, set SQL authentication mode to SQL Server and Windows Authentication. If you don’t you’ll get a Cannot connect to database installation error.
- Make sure no other Tomcat server is installed on the eG Manager server.
- Install the manager on a dedicated host unless you have 5 or less agents running.
- Keep the Manager server close to SQL to minimise network bandwidth usage and response times.
- Keep the Manager server as close as possible to the agents deployed in your target environment(s).
- Create forward and reverse DNS lookups for the eG Manager server name.
- You can install a 32-bit version of eG Manager on a 64-bit machine, but the prerequisite here is to install a 32-bit version of the Java JDK.
The eG Manager:
- Handles communication with the database.
- Discovers and keeps an inventory of agents.
- Instructs agents on which measurements to run.
- Receives measurements from agents for permanent storage.
- Receives alerts from agents if measure thresholds have been breached.
- Determines if problems exist in your environment.
- Sends out email/SMS alerts of problems to configured recipients, and so on.
Right-click eGManager_win2016_x64.exe and select Run as administrator.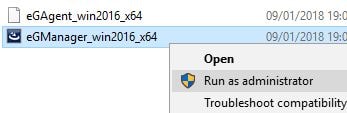
Click Next.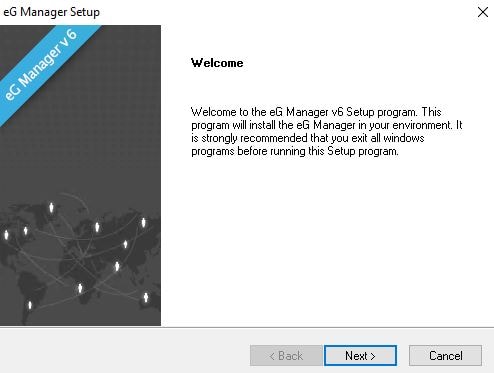
Click Yes on the License Agreement.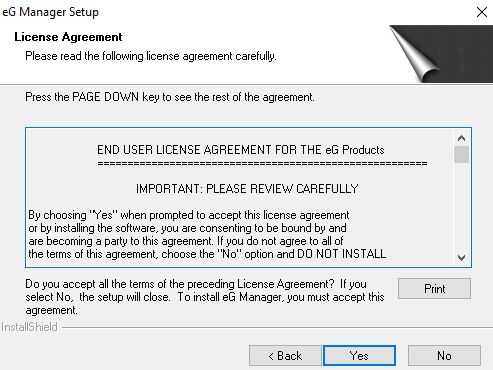
Setup at this stage detects if there are any pre-installed versions of the JDK on your machine. You can select an existing version if you are given the option. Otherwise, choose to use the default JDK (Java Development Kit) that is pre-bundled with the installation media. Version 1.7 is installed. Note that version 1.8 is not currently supported. Click Next.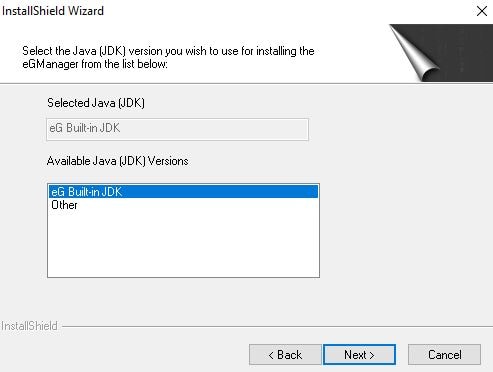
You should have a static IP set against the eG Manager server. You can specify a different port from the default of 7077. The port can also be changed any time after install. Click Next.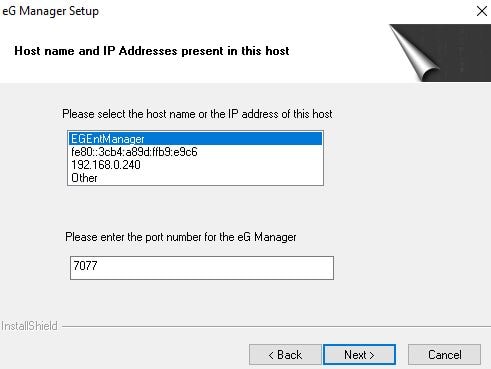
Click No unless you have a requirement for East Asian languages.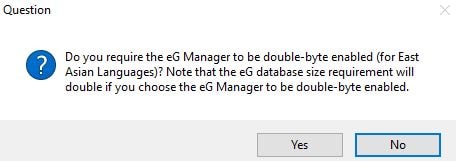
Click Yes to SSL enable eG Manager.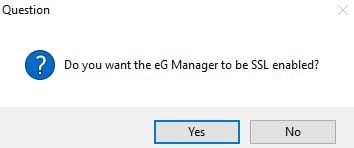
Specify MsSql server and click Next.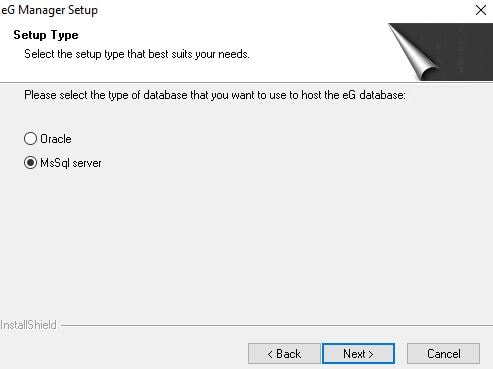
Click Yes.
Click Yes.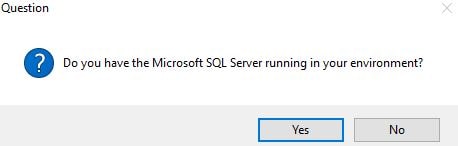
AlwaysOn is supported for SQL databases. Enter the name and port of your SQL server and click Next.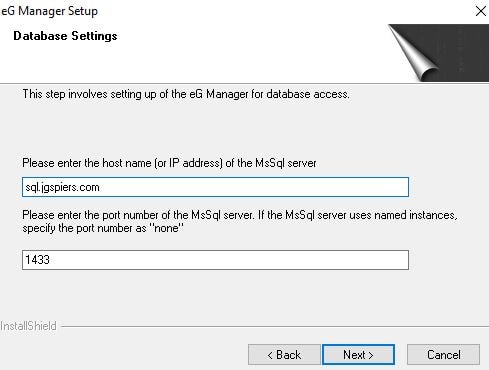
If you have SSL configured for SQL, click Yes, otherwise click No.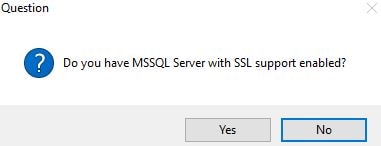
Click Yes to create a new database.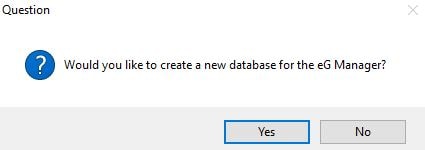
Enter a database name and click Next.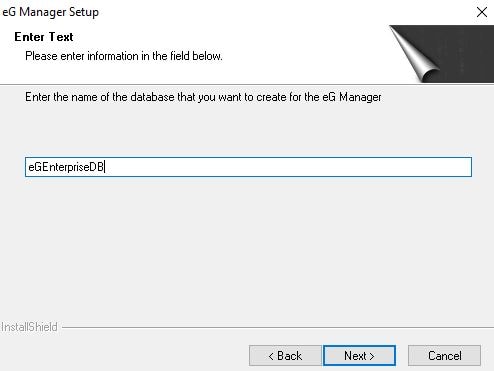
Enter details of an account that can create the eG Manager database. If you want to use a SQL account but not the sa account, then pre-create an account that has the following roles:
- Securityadmin,
- Serveradmin,
- Public.
You must use a strong password for this account or the eG Manager installation will fail (unless you have turned Enforce password policy off in SQL). A strong password is made up of 6 characters, numbers, lowercase and uppercase or non-alphanumeric characters such as # or &.
Click Next.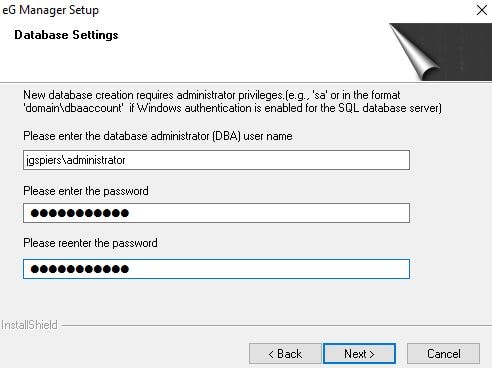
Enter an account name and password for the eG Manager database user account. This could be a domain account that has db_owner set against the eG Database. If you have mixed mode enabled and prefer to specify a SQL account, then one will be created by setup and made db_owner of the database. Click Next.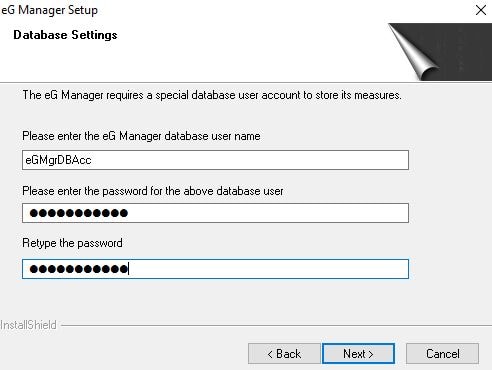
Specify an installation folder. I recommend you choose something such as C:\Program Files\eG Manager\. Click Next.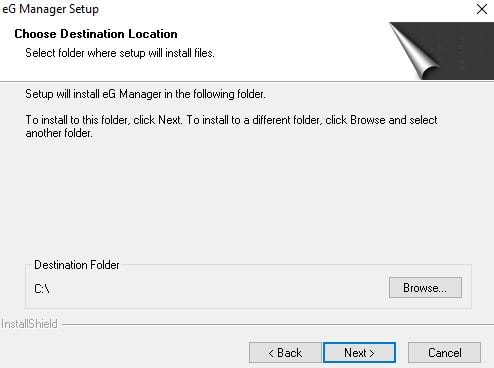
Review the installation details and click Next.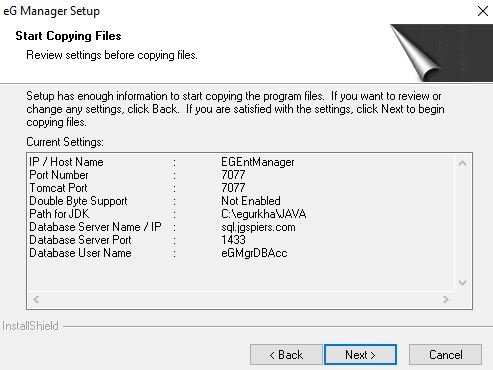
Finally click Finish and the server will restart to complete installation.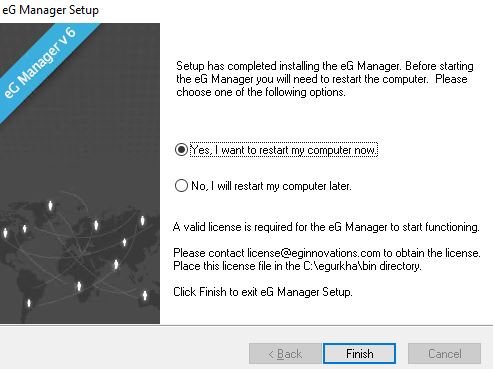
Once the server has come back online, you need to copy the license file for eG Enterprise to the bin folder. eG Manager will not start until you perform this step. The license file should be copied to C:\Program Files\eG Manager\eGurkha\bin or similar depending on where you installed eG Manager.
Now within the Start Menu, click on Start Manager. The following services are started during this process: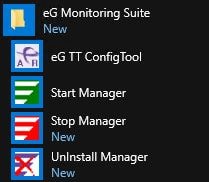
- eGmon – The Manager recovery process.
- eGurkhaTomcat – The core Manager process.
This step can take a minute or so. You will receive a message in the CMD window once the Manager has successfully started.
Once eG Manager has started, launch your web browser and browse to https://egurl.domain:7077. The default credentials are shown on screen.
Troubleshooting the eG Manager installation:
- If you cannot start the eG Manager after a successful installation, make sure you have a valid license copied to the bin directory as mentioned previously.
- From CMD, change directory to bin and run command viewCert license to make sure that the license has not expired.
- If you cannot start the eG Manager after a successful installation, make sure the eG user has permissions to read and write to all the eG directories. Also make sure you are logged in as an eG user in the first place.
- Make sure you have not uninstalled the Java JDK, which would stop eG Manager from working completely.
- Check the error_log file under \manager\logs\ for information on what is going wrong.
Configure SSL on eG Manager:
By default, an installation of eG Manager that is SSL enabled comes with a pre-installed certificate. 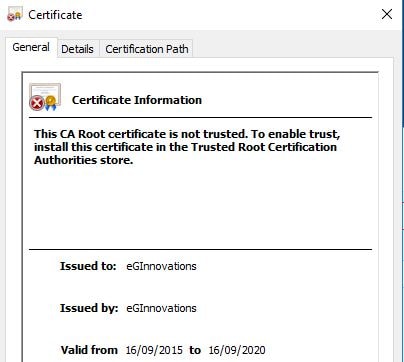
In many cases, we will want to publish our own certificate and use that against eG Manager.
To do so, on the eG Manager server, we have to configure tomcat to use a certificate that we specify. Launch command prompt as an administrator and run command %java_home%. Doing so should return the path contained within this variable which in my case is C:\egurkha\JAVA\JDK.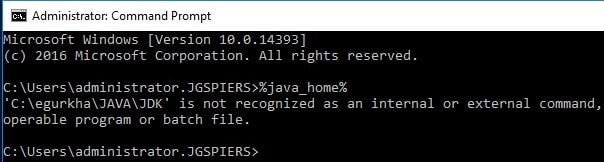
If no variable has been set, make sure you have restarted the server after installation of the eG Manager as it will automatically create this for you.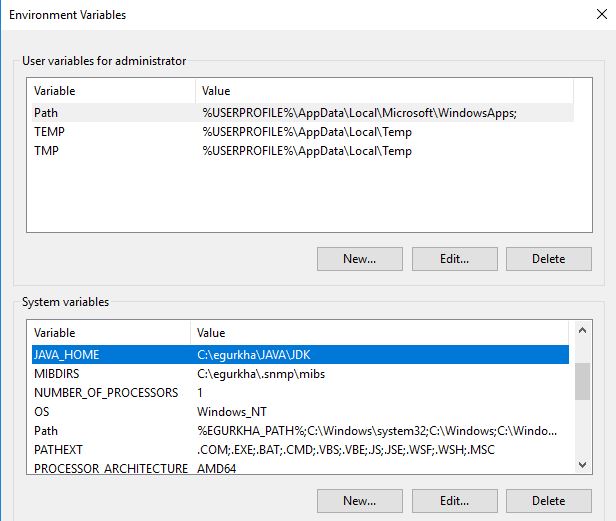
Next change directory to the bin folder and issue command keytool -genkey -alias eGManager -keyalg RSA -keypass yourpassword -keystore eGManager.keystore -storepass yourpassword -keysize 2048 -validity 730.
Make sure that the Keypass and Storepass values remain the same and the validity will ultimately match what is defined in the certificate template we use later to issue the certificate from Active Directory Certificate Services.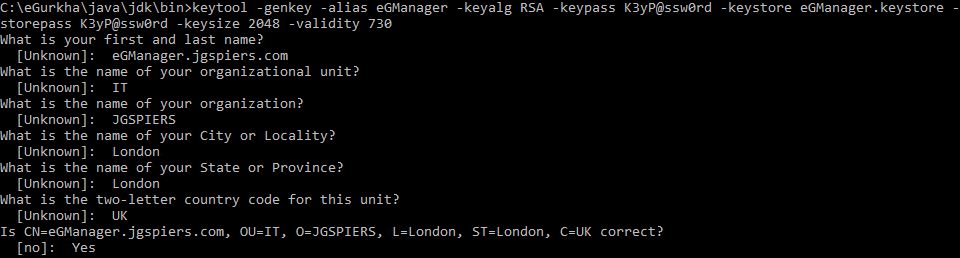
A keystore file will be generated in the bin folder.

Next to generate a CSR run command keytool -certreq -alias eGManager -keyalg RSA -file eGManagerCSR.txt -keypass yourpassword -keystore eGManager.keystore -storepass yourpassword.
Make sure that the passwords for Keypass and Keystore are the same ones you specified when creating the keystore file.![]()
The CSR will show in the bin folder, and we can now use this CSR to submit a certificate request to Active Directory Certificate Services.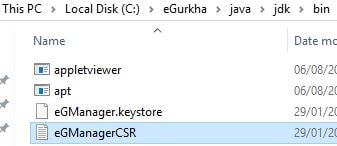
Run command certreq -attrib “CertificateTemplate:WebServer” -submit C:\eGurkha\java\jdk\bin\eGManagerCSR.txt. Adjust the certificate template name and CSR location name to your own values.
When you are asked to save the certificate, save it to the bin folder alongside the existing keystore and CSR files.
Now we want to import the certificate to the keystore file, but first we have to import the root certificate in to the keystore file. It is best at this stage to copy the root certificate to the bin directory.
Run command keytool -import -trustcacerts -alias rootca -file root.cer -keystore eGManager.keystore -keypass yourpassword -storepass yourpassword.
Make sure to use the same Storepass and Keypass that was used during keystore creation.
![]()
Enter Yes and press Enter. ![]()
Now we can go ahead with importing the server certificate to the keystore.
Run command keytool -import -trustcacerts -alias eGManager -file eGCert.cer -keypass yourpassword -keystore eGManager.keystore -storepass yourpassword.
Make sure to use the same Storepass and Keypass that was used during keystore creation. You should be returned a Certificate reply was installed in keystore message.![]()
Now we have to modify tomcat to use the newly created keystore file. Navigate to C:\eGurkha\manager\tomcat\conf and edit server.xml.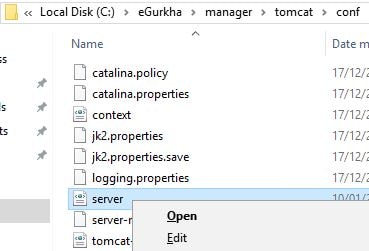
Locate the Define a SSL Coyote HTTP/1.1 Connector on port 8443 section.
Note that if this block is commented, it simply means that eG Manager was not SSL enabled during install and is only listening on HTTP port 8081. To SSL enable the eG Manager, uncomment this block.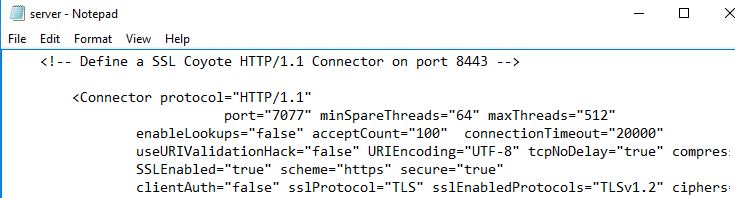
Note that if you want to block HTTP communication in favour of HTTPS, comment out the Define a non-SSL Coyote HTTP/1.1 Connector on port 8081 block.
Locate parameter keystoreFile and update it with the full path to your keystore file. Update keystorePass with your previously chosen password. Save the file.
Edit start_manager.bat under C:\eGurkha\lib and make sure the URL towards the bottom of the file matches https://your-fqdn:7077/final/servlet/upload.
Under the [MISC_ARGS] section of eg_services.ini which exists under C:\eGurkha\manager\config, make sure that the URL for MailHomeUrl is correct.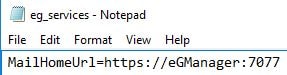
Finally start the manager.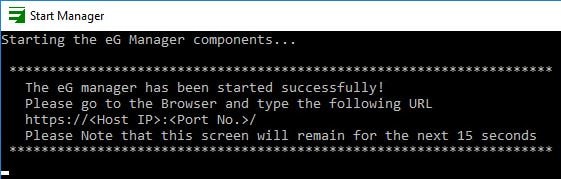
And upon browsing to the URL this time you will notice a secure connection can be made and the custom certificate is presented.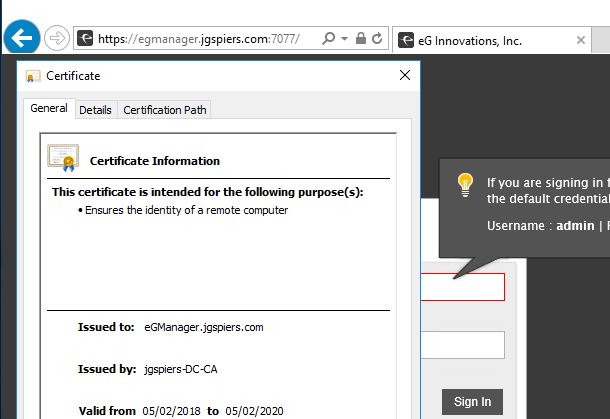
Install eG Agent:
Agents monitor the environment by running periodic tests which output measurements. These measurements are then used to determine the health of a system, application or network. Agents come in three different formats:
- Internal Agent – Internal Agents are installed on the same machines that they monitor and have the ability to run many tests. This will be the most common method of monitoring and is suitable for monitoring applications, servers, operating systems, etc. A single agent on a server can monitor any number of applications and also different types of applications (for example, web servers, middleware, messaging applications, enterprise applications, databases, etc.) running on it. Because of its multiple application support and one-agent-fits-all approach, this agent is also called a Universal Monitoring Agent.
- Remote Agent – Remote Agents are proxies for internal agents in the sense that they perform similar tasks – just that they are deployed outside of the target systems using protocols such as JMX, SSH, SMI-S, web services, APIs (e.g. virtual platforms), etc. for monitoring. This forms an agentless monitoring approach for servers and devices. Remote agents are typically used in cases where it is not recommended to install an internal agent – for example, on a VMware hypervisor where any software installation on the console operating system is to be avoided; or a storage device, where it is not possible to deploy an agent.
- External Agent – External Agents are mainly used for black box monitoring of network devices, servers, and applications. Typical functions include tracking network availability and responsiveness via PING tests and application availability and responsiveness by making TCP port connections. These agents also make protocol level requests for protocols such as HTTP, SMTP, FTP and other to report service availability and responsiveness. These same agents can be used to monitor network switches, routers, firewalls, printers and so on using SNMP. This also forms an agentless monitoring approach.
Note for Windows Server 2008: Before installing the agent on a Server 2008 host, make sure that the Visual C++ 2008 or above runtime engine exists. If you are using a 32-bit agent, then install the 32-bit Visual C++ 2008 runtime engine.
Download the appropriate agent for your operating system. Several versions exist such as eGAgent_win2008_x64.exe for Windows Server 2008/Windows 7 or eGAgent_win2012_x64.exe for Windows Server 2012/R2/Windows 8 and eGAgent_win2016_x64.exe for Windows Server 2016/Windows 10.
Right-click the agent installer and select Run as administrator.
Click Next.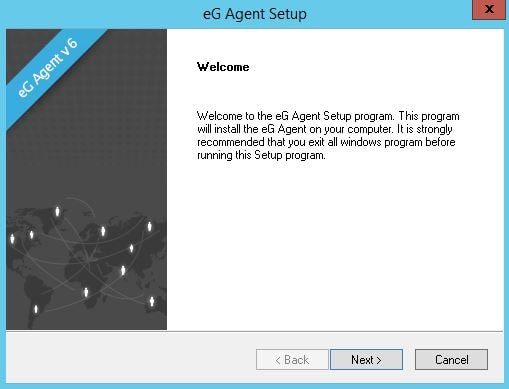
Click Yes on the License Agreement.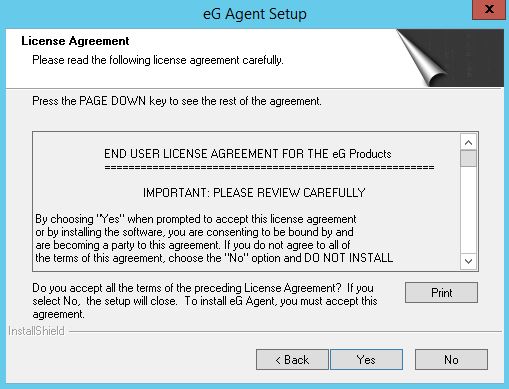
Specify an install destination path and click Next.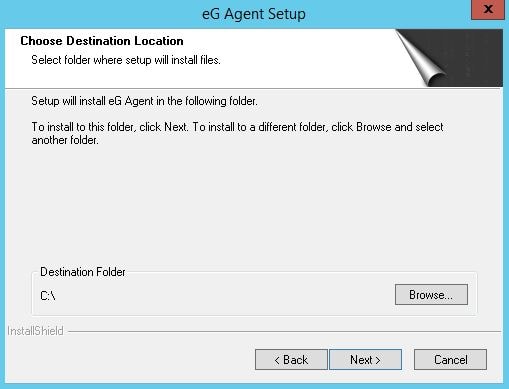
Click Yes to configure the eG Agent to use SSL communication with the eG Manager.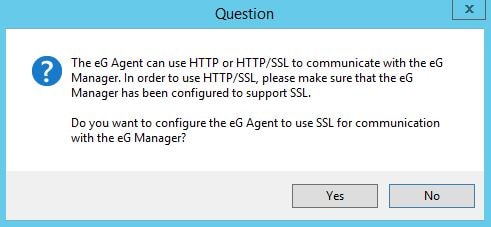
With this optional question, if you choose Yes, the eG Agent will only communicate with eG Manager if the certificate eG Manager presents is trusted. If you choose No, the agent will communicate regardless of whether it trusts the certificate or not. If you click Yes, there are some procedures you have to carry out on the agent machine before it will trust the certificate. If you choose No, these procedures do not apply. To show you the procedures, I will click Yes.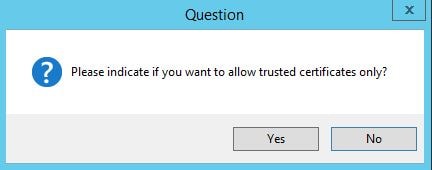
Now enter the eG Manager FQDN and SSL port and click Next.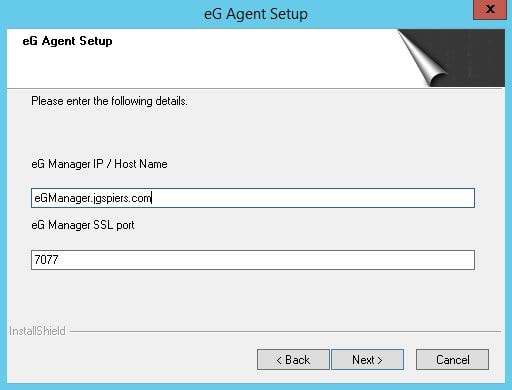
If you want to route communication through a proxy, click Yes and specify your proxy host details. Otherwise, click No.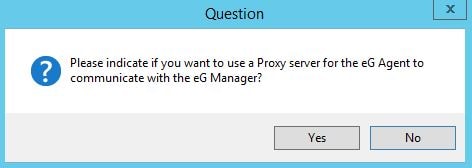
Click Next.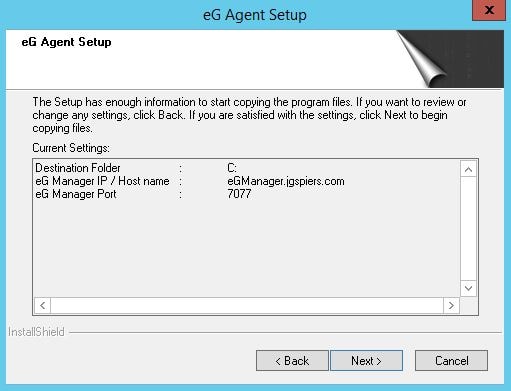
You can assign nick names to agents which allows you to manage the agents via nick name rather than by hostname or IP address. This can be useful for identification purposes, or if multiple agents share the same IP address across different networks. In this case, I will click No. Nick names can be assigned at a later stage if required.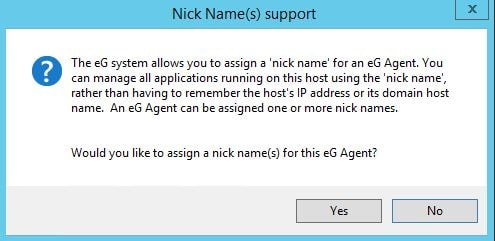
Click Finish.
After the agent has been installed, a reboot is not required. An agent will attempt to auto-start and communicate with the eG Manager but in my case, it will fail because I’ve instructed the agent to only communicate with a manager that is trusted, but I’ve not completed the steps required to trust the manager yet.
The error_log shows that the manager could not be contacted.
To trust the certificate, scroll down to the Configure eG Agent to trust the eG Manager SSL certificate section.
Troubleshooting the eG Agent:
- To start the agent, you must be a local administrator. There are two services that make up the agent:
- eGAgentMon – Agent recovery process.
- eGurkhaAgent – Core agent process.
If you are having trouble starting the agent, the first place to look is in the error_log file which resides under C:\eGurkha\agent\logs\.
Alternatively, you can turn on debug mode which records more error logs. Firstly, stop the agent.
Next run debugon.bat under the lib directory.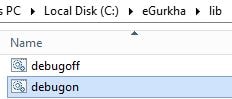
Start the agent again and two extra log files will be created:
- Agenterr.log – Runtime errors encountered by the agent are logged here.
- Agentout.log – Details of the tests ran and measures reported by the agent to eG Manager are logged here.
To turn off debug mode, simply return to the lib directory and run debugoff.bat.
If the eG Agent did previously work but has stopped, this may have occurred due to the Java Runtime Environment being uninstalled on the machine or JRE being upgraded. Reinstall JRE 1.7 to the same location.
Configure eG Agent to trust the eG Manager SSL certificate:
To trust the eG Manager certificate, firstly you must export the eG Manager certificate we generated earlier from the keystore. If you have the certificate file itself that you downloaded from Active Directory Certificate Services still residing in the bin folder then you can simply copy this certificate across to the eG Agent. Otherwise, follow the export step by logging on to eG Manager and running command keytool -export -alias eGManager -keystore eGManager.keystore -storepass yourpassword -keypass yourpassword -file ExportedCert.cer.
Make sure the Alias, Storepass and Keypass are the same values you specified when generating the keystore in earlier steps.![]()
Next copy the certificate to the agent and open command prompt, and then change directory to C:\eGurkha\JRE\bin\ and run command keytool -import -file c:\eGCert.cer -alias eGManager -keystore C:\eGurkha\jre\lib\security\eGManager.keystore -storepass yourpassword.
Note that the certificate name in my case has been renamed by me from ExportedCert.cer to eGCert.cer so do not be confused. Also make sure the Alias, Keystore and Storepass values are the same as when you created the keystore file.
Type Yes and press Enter.![]()
You should receive some output to confirm the certificate has been imported to the keystore. Make sure that value CN= matches your eG Manager’s fully qualified domain name.![]()
Next start the eG Agent via Start Menu or run the batch file. This time the agent will start and communicate successfully with eG Manager.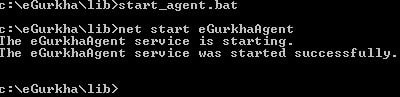
Performance of eG Agent
I know, you hear the phrase “It depends” all the time right? Well, performance of the agent is dependent on various factors including:
- The number of components that are being monitored by the eG agent.
- Specific component types to be monitored
- Frequency of monitoring.
- Whether the agent is monitoring applications in an agent based or agentless manner.
With that said, an internal agent monitoring a single application on the server at a 5-minute frequency typically:
- Consumes 0.1-0.3 percent CPU.
- Generates around 0.05-0.2Kbps network traffic.
- Consumes around 100MB of disk space.
- Consumes around 10-15MB RAM in addition to that of the Java Virtual Machine. In total the eG agent process consumes around 30-50MB memory.
Configure browsers for use with eG Manager:
Since eG Enterprise v6.1.2, many changes were made to harden SSL communication with eG Manager. These changes include:
- TLS v1 being the default secure protocol for browsers to use during communication with eG Manager.
- Message signing algorithm changes in the default SSL certificate that is bundled with eG Manager if you SSL enable the install.
- The Cipher Suite definition has been bundled into the Tomcat server on which eG Manager runs.
Note that these changes are not available if you upgrade any SSL enabled eG Manager from a lower version to v6.1.2 and above. To avoid this, after an upgrade you must harden SSL communication with the upgraded manager. Steps to do this are found in the installation guide.
There are also some steps that must be performed on browsers, to ensure they are configured correctly to be used with eG Manager.
Internet Explorer:
- The document mode should be set to Edge (Default).
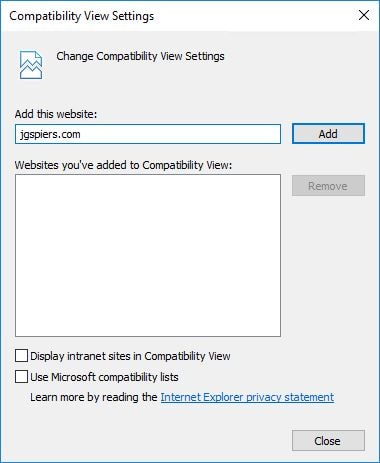
- Remove the eG Manager URL from Compatibility View and clear the check-boxes for Display intranet sites in Compatibility View and Use Microsoft compatibility lists.
- Security levels for the Intranet Zone should be set to Medium or Medium-high. If eG Manager is not in the Intranet Zone (for example if you are accessing the URL externally), then you should set the appropriate zone this URL falls under to Medium or Medium-high.
- Add the eG Manager URL to the pop-up blocker exceptions list.

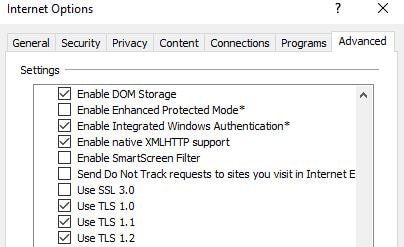
- Configure Internet Explorer to use TLS and not SSL. Whilst modern Windows browsers and Operating Systems have SSL 3.0 disabled by default, it is easy to check by navigating to the Advanced tab of Internet Options.
Google Chrome:
- Google Chrome should be configured to use TLS and not SSL. Furthermore, the security levels for the relevant Zone should be set to Medium or Medium-high. You can use Internet Options in Internet Explorer to configure these settings, they will then take effect on Chrome.
Mozilla Firefox:
- SSL 3.0 is disabled by default. To confirm that TLS 1.1 or 1.2 is enabled, in the search bar type about:config, search for and select security.tls.version.min; make sure it is set to a value of 1.

Configure eG Manager Redundancy:
Redundancy allows you to configure a second eG Manager server so that a secondary management console can act as an active or passive standby for the primary console. Redundancy also allows agents to fall back to the secondary manager whenever the primary is offline.
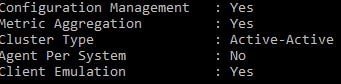
The redundancy piece is an add-on, so you must make sure you are licensed to use clustering. To check your license, run command viewCert license from the bin directory.
![]()
Make sure Cluster Type is set to Active-Active.
To enable redundancy for eG Manager, firstly install eG Manager on a second server. This server doesn’t have to be Windows, it could be a Linux server to highlight that there are no restrictions as to where eG Manager can be installed in a redundant configuration. During installation, specify that you want to create a new database.
When you create a new database and once redundancy is in place, the primary database where your configuration and data is stored will be replicated to this new secondary database.
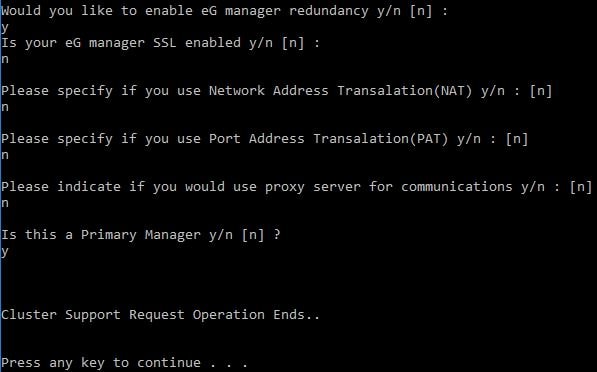
Once you have a second eG Manager server prepared, you have to run a batch file firstly on the Primary eG Manager server. The batch file is located in the lib folder. The batch file is called setup_cluster.bat and will ask a number of questions as shown in the screenshot.
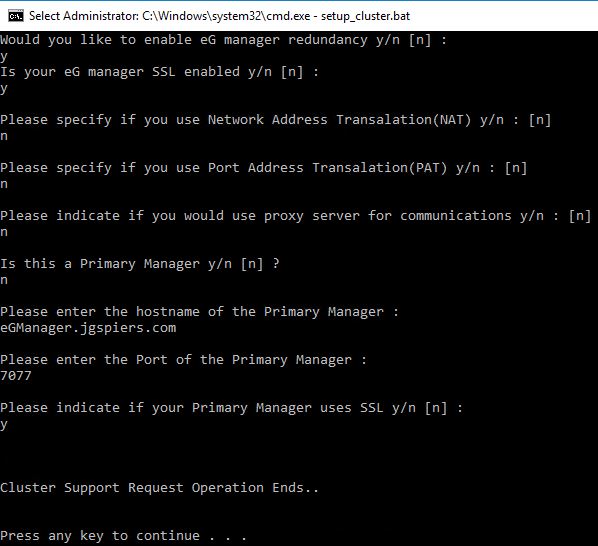
Now run the same batch file on the secondary eG Manager server. The questions this time around are slightly different as you are asked to specify information about the primary manager.
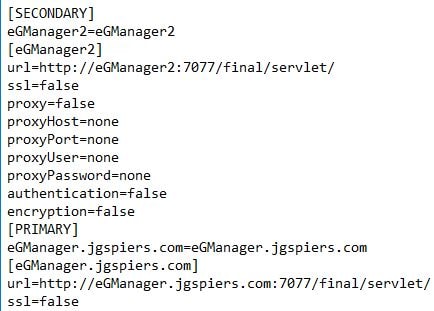
One handy file to check to make sure cluster configuration is correct is the eg_managers.ini file under directory eGurkha\manager\config. This file will reside on the primary eG Manager server.
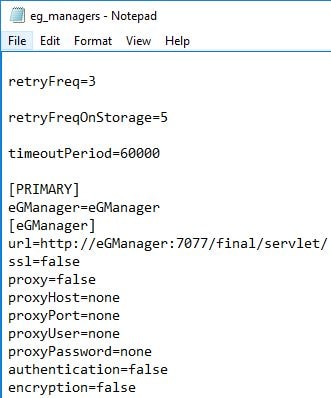
The same file will also reside on the secondary server. This file copy contains information on the primary server.
When you install agents, you point them towards the eG Manager primary server. From here on the agent will communicate with the primary manager server unless that manager goes offline, in which case the agent starts communicating with the secondary manager.
It is worth also noting that the secondary manager cannot be used to make configuration changes. If you need to make changes, you do so from the primary manager.
You can access https://localhost/final/admin/ReportingAgents.jsp to check the reporting status of agents to each manager that is part of the redundancy setup.
Agentless Monitoring:
If you have to monitor Microsoft Operating Systems and applications in an agentless manner, then in order to enable the eG remote agent to collect measurements from these applications using Perfmon counters, the following is required:
- A remote agent can monitor a Windows environment only if the agent is installed with an account that has administrative privileges over all the target hosts you want to monitor.
- NetBIOS should be enabled on the target hosts to be monitored.
- PerfMon should have at least READ access to the Perflib\LanguageID subkey on the remote computer. This key allows external access to PerfMon and is located under HKLM\SOFTWARE\Microsoft\Windows NT\CurrentVersion\Perfib\LanguageID. The 009 subkey is the English language.
- The Disk Performance Statistics Driver (diskperf) should exist on the target computer.
- Allow READ access explicitly to the user account for the following registry key and all subkeys: HKLM\SYSTEM\CurrentControlSet\Services\Diskperf.
- The monitored computer should be able to connect to IPC$. The following registry DWORD enables connecting to IPC$: HKLM\SYSTEM\CurrentControlSet\Services\LanmanServer\Parameters – REG_DWORD = AutoShareWks – Value = 0x1.
- At least READ access should be granted to the following registry subkey to allow you to remotely connect to the Windows Registry: HKLM\SYSTEM\CurrentControlSet\Control\SecurePipeServers\winreg. The permissions on this key determine who can remotely connect to the registry. If this subkey does not exist, all users can remotely connect to the registry. To remotely connect to a registry, a user must have at least READ access to the winreg subkey on the target computer.
- At least READ access should be granted to the following registry key on the remote computer: HKLM\SOFTWARE\Microsoft\WindowsNT\CurrentVersion\Perflib
Allocate more memory to eG Manager:
Since eG Manager runs as a Java process, the maximum heap memory that can be allocated to a 32-bit eG Manager process is limited to 1.5GB or 1/3rd of system memory, whichever is lower.
For a 64-bit manager on the other hand, 1/3rd of the total system memory is the maximum heap memory that can be allocated.
Where a large number of components are to be monitored, you may want to allocate more memory heap to the eG Manager process. In such a case, follow the steps below on your eG Manager server:
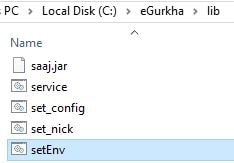
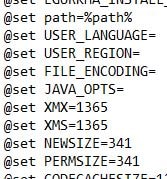
- Edit file setEnv.bat which resides under the lib directory.
- Search for the following entries:
@set XMX=
@set XMS= - The XMX an XMS values dictate heap memory allocations to eG Manager. If you want to increase the value to say 2GB, set the value to 2048.
- Save the file.
Allocate more memory to eG Agent:
Since eG Agent runs as a Java process, the maximum heap memory that can be allocated to a 32-bit eG Manager process is limited to 1.5GB.
For a 64-bit agent on the other hand, 1GB is the maximum heap memory that can be allocated.
Where a large number of components are to be monitored by the eG Agent, you may want to allocate more memory heap to the eG Agent process. In such a case, follow the steps below on your eG Agent server:
- Edit files debugoff.bat and debugon.bat which reside under the lib directory.
- Look for entry -Xmx in both files and modify the value to something such as -Xmx1024M which would assign 1GB of memory to the eG Agent.
- Save the file.
How to back up and restore eG Manager:
- Copy the eGurkha directory to unique location.
- If you want to restore the eG Manager to the same host that you took a backup from:
- Replace the existing eGurkha directory with the backed-up version to revert to a previous version of eG Manager if that is your goal. You will have to stop and restart eG Manager during this procedure.
- If you want to completely reinstall eG Manager on the same host, or move to a new host then:
- Uninstall the existing eG Manager installation, install eG Manager with the same settings as the old manager, provide a dummy database and then replace the eGurkha directory with the backed-up version.
- Run changeManagerSettings.bat and changeAgentSettings.bat files from the lib directory to change the IP address/hostname of the eG manager and agent.
- Replace the old eG Manager license with a new license generated for the new IP address/hostname.
Considerations when using eG Manager across environments:
When deploying eG Enterprise in a NATed environment, there are some things you need to consider. For example, you may have agents located across multiple locations, behind different firewalls and connected via many VPN links or tunnels. Some common scenarios are listed below:
-
Agent that is in a different location has to communicate with the eG Manager via the Manager’s public IP address:
- When installing the agent point it toward the eG Manager’s public IP. The Manager itself may be using a private IP, but NAT will make sure traffic reaches the destination.
Note: If the Agent has a private IP and eG Manager has an IP in a different network, set Authentication to Off under Agents -> Settings -> Communication in eG Manager. You do this because the Agent is not accessible to the eG Manager server in order to verify the Agent via IP directly.
-
eG Manager manages agents on multiple private networks and the same private IP could be used between different servers across the different networks:
- In this case if a server in one network that eG Manager is monitoring has the same private IP as a server in another network, you can identify the monitored servers using nicknames. Add each server to eG Manager using the same IP but with different nicknames.
Note: You should also check if eG Manager is configured to identify agents via their IP address or nicknames. Within eG Manager, navigate to Configure -> Settings and check the status of the Verify if agent is reporting from configured IP parameter in the MANAGER SETTINGS page. If the flag is set to No, then eG Manager is identifying agents using their nicknames and not IP address. If set to Yes, then changing this to No may break agent communication if they were not assigned a nickname during install. Therefore, before switching the setting to No you should set a unique nickname on each agent.
Since manual nickname assignment could take a long time to perform, eG Enterprise does provide a more automated solution found in their documentation.
eG Enterprise is an end-to-end IT performance monitoring solution. For more information on eG Enterprise, visit www.eginnovations.com. You can get a full-featured free trial for 15 days.
Alvis
May 8, 2018Thanks a lot ….This document is highly useful.
Raj
May 8, 2018Appreciate your work.. this doc is useful
Leela
May 11, 2018Appreciate all your time and effort to prepare this document.. very useful.. bookmarked 🙂