The Virtual Apps and Desktops service is a Citrix Cloud offering that allows an organisation to host all the backend management components needed to run a Virtual Apps and Desktops site, in the cloud. Not only do the management components shift to the cloud; Citrix install, configure, upgrade, and monitor those components; leaving you to manage the applications, desktops, and data.
Article Contents
- Overview of Virtual Apps and Desktops Service
- End of public cloud support for on-premises
- Citrix Cloud Service Level Agreement
- Technical Security Overview
- Customer-managed StoreFront
- Citrix Gateway service
- Identity Providers
- Administrators and Subscribers
- Citrix Cloud Connector
- Resource Locations
- Create a resource location
- Install Cloud Connector
- Manage Cloud Connector update schedules
- Virtual Apps and Desktops service – Initial Setup
- Citrix Provisioning
- Connecting to resources from on-premises, customer-managed StoreFront
- Local Host Cache
- Local Host Cache in operation
- Configuration Logging
- Delegated administration
- Monitor
- Licensing
- Using Workspace with Active Directory + Token
- Citrix Gateway service
- Rendezvous protocol
- Autoscale
- Network Location Service (Technical Preview)
- Enlightened Data Transport Protocol (Adaptive Transport)
- United States
- European Union
- Asia Pacific South
- SQL Server
- Citrix Director
- Citrix Delivery Controllers
- Citrix Studio
- Citrix License Server
- Citrix StoreFront*
- Optionally you can still make use of StoreFront on-premises.
- Citrix Gateway*
- Optionally you can still make use of your own Citrix Gateway.
- To be able to host workloads in public clouds, you can leverage the Virtual Apps and Desktops service in Citrix Cloud.
- Remain on version 1912 LTSR or the 7.15 version which included up to 5 years of mainstream support.
- User Credentials: For customers continuing to use StoreFront with their Virtual Apps and Desktops service deployment, user credentials are encrypted by the Cloud Connector using AES-256 encryption and a random one-time key generated for each launch. The key does not get passed to Citrix Cloud, but rather returned by the Cloud Connector to Workspace app, and then passed to the VDA by Workspace app where it is used to decrypt the user password during session launch.
- Administrator Credentials: When you authenticate against Citrix Cloud, you use the Citrix Online sign-on system. This generates a one-time signed JSON Web Token (JWT) which gives the administrator access to the Virtual Apps and Desktops service.
- Hypervisor Passwords: On-premises Hypervisor credentials used for the purpose of machine deployment from the Virtual Apps and Desktops service have a password stored in the SQL database in Citrix Cloud. Peer keys are managed by Citrix to ensure that hypervisor credentials are only available to authenticated processes.
- Active Directory Credentials: Machine Creation Services (MCS) uses the Cloud Connector to create machine accounts in Active Directory. The Cloud Connector only has read access to the customer’s Active Directory, so the administrator is prompted for credentials each time they create or delete machine accounts. Credentials to support these operations are only stored in memory and held for a single provisioning event.
- On-premises Active Directory
- Active Directory + Token
- Azure Active Directory
- Citrix Gateway
- Okta (Tech Preview)
- Install Cloud Connectors in your domain
- From Citrix Cloud, browse to Identity and Access Management
- Under the Authentication tab, click Detect. Citrix Cloud should display a Connected message
- Complete the On-premises Active Directory steps to connect your Active Directory domain to Citrix Cloud
- Under the Authentication tab of Identity and Access Management, click the ellipsis button and select Connect. Citrix Cloud should display a Connected message
- Browse to Workspace Configuration and under the Authentication tab select Active Directory + Token.
- Browse to the Workspace sign-in page and select Don’t have a token?
- Enter your Active Directory username
- Citrix Cloud will send you an email that contains a verification code, enter that code along with your Active Directory password and click Next
- If successful, a QR code will display. Scan this code using an app such as Citrix SSO or Microsoft Authenticator. You can also type the code manually. Click Finish and Sign In once complete
- Administrators can use the Recovery option from the Citrix Cloud portal to reset a user’s device. The administrator searches for the user, clicks Reset Device and then the user runs through the enrolment process again. This option will likely be used as a security measure if a phone is stolen or lost
- An end-user can enrol a new device by simply following the same steps they took originally. Enrolling a new device or re-enrolling an existing device removes the previous device registration
- A Cloud Connector must be installed and joined to the domain that is synchronising to Azure AD
- VDA 7.15.2000 LTSR or 7.18 Current Release or higher is required
- The UPN and SID entries of user accounts must be synchronised from your on-premises domain to Azure AD
- Nested groups are not supported for federated authentication using Azure AD
- To enable Azure Active Directory authentication, you must use an Azure AD user who has Azure Global administrator permissions
- Users and groups should be managed using Libraries in Citrix Cloud. Do not assign users or user groups to Delivery Groups in the cloud-hosted Studio
- Users sign into Workspace using an Azure-based sign-in page
- To achieve SSO to applications and desktops, FAS must be used, but this technology is currently in Tech Preview as previously discussed. Without FAS, end-users are prompted twice for their credentials. Once when authenticating to Workspace, and a second time during session launch
- User browses to Citrix Workspace
- Citrix Workspace redirects user browser to Azure sign-in page
- User enters Azure AD credentials
- User browser is redirected back to Citrix Workspace
- User launches apps or desktops from Workspace
- Active Directory integration with Citrix Cloud
- Users must be Active Directory users to authenticate with Workspace, as Citrix Cloud requires AD attributes to allow users to sign-in successfully
- An on-premises Gateway running 12.1 build 54.13, or 13.0 build 41.20 Advanced edition or later
- An OAuth IDP authentication policy is configured on Gateway using the generated client ID, secret and redirect URL obtained from enabling Citrix Gateway as an identity provider in Citrix Cloud
- User browses to Citrix Workspace
- Citrix Workspace redirects user browser to Gateway sign-in page
- User completes authentication with Gateway using any authentication method configured on Gateway
- User browser is redirected back to Citrix Workspace
- User launches apps or desktops from Workspace
- FAS server deployed to your resource location
- SSO is only available to users in resource locations where FAS servers are present
- Domains that can be used to provide identities are managed under Identity and Access Management -> Domains.
- Cloud Connectors can enumerate all domains from the single forest in which they are installed.
- Disabling a domain from Citrix Cloud does not prevent subscribers from using identities that have already been allocated access to Library objects. New identities are prevented from being selected.
- Server 2012 R2, 2016 or 2019 (no Server Core support).
- .NET Framework 4.7.2 or later.
- Deploy to dedicated virtual machines.
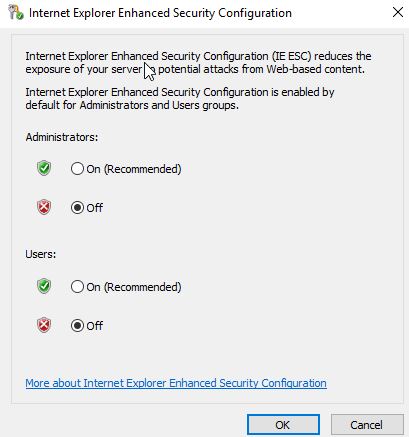
- Disable IE ESC (IE Enhanced Security Configuration).
- Failure to do this can result in the Cloud Connector having problems connecting to Citrix Cloud.
- https://dl.cacerts.digicert.com/DigiCertAssuredIDRootCA.crt
- https://dl.cacerts.digicert.com/DigiCertSHA2AssuredIDCodeSigningCA.crt
- http://*.digicert.com
- https://*.digicert.com
- Each AD forest you plan to use with Citrix Cloud should be reachable by two Cloud Connectors at all times.
- The Cloud Connector should be joined to the domain that contains the users and resources you will use.
- The Cloud Connector must be able to reach the parent (root) domain controllers as well as child domain controllers in the AD infrastructure in which the Cloud Connector is installed.
- Your forest and domain functional levels should be Windows Server 2008 R2 or later.
- For external traffic to Citrix Cloud, Cloud Connectors only require TLS 443 outboud.
- Traffic between Cloud Connectors and VDAs is encrypted using Kerberos message-level security.
- For internal traffic:
- Cloud Connectors require port 80 inbound and outbound to the VDAs, plus 1494 and 2598 inbound if using the Citrix Gateway service.
- Cloud Connectors require access to your AD domain controllers, and Hypervisors. Required Hypervisor ports can be found in the Hypervisor documentation.
- Citrix Gateway, if the Cloud Connectors are configured as a STA. This is port 80 inbound. SSL is not yet supported.
- SSL decryption on certain proxies might prevent the Cloud Connector from connecting to Citrix Cloud. See CTX221535 for information on resolving this issue.
- The Connector may attempt to access internal resources through the web proxy. Resources may also not be able to connect to the Connector and Virtual Apps and Desktops service. To reduce this risk, add the FQDN or IP address of each resource to the proxy bypass list on the Cloud Connector machine. More information can be found in CTX241222.
- Scale and sizing considerations for Cloud Connectors
- Scale and sizing considerations for Local Host Cache
- Workspace cannot authenticate users from the user forest.
- Resources can only be displayed for users and groups residing in the resource forest.
- Citrix maintains the Citrix Cloud connector upgrades, so you should not manually try to upgrade a Connector.
- Do not move the Cloud Connector to a different domain. If the machine needs to join a different domain, uninstall the Cloud Connector software, and re-install after the machine is joined to the different domain.
- Installation logs can be found: %LOCALAPPDATA%\Temp\CitrixLogs\CloudServicesSetup.
- After installation, logs are added to C:\ProgramData\Citrix\WorkspaceCloud\InstallLogs.
- Installing the Cloud Connector on a machine template (before cloning) is not supported as all Cloud Connector machines need to have a unique SID and connector ID for Citrix Cloud to be able to communicate with them properly.
- Event messages are written to the Windows Event Viewer.
- Logs are written to C:\ProgramData\Citrix\WorkspaceCloud\Logs.
- Check Windows Event Viewer or the logs from C:\ProgramData\Citrix\WorkspaceCloud\Logs.
- If the Cloud Connector is “disconnected” and the logs do not indicate why, contact Citrix Support.
- If the Cloud Connector is in an “error” state, install the Connector on a new machine, or failing that, contact Citrix Support.
- CTX221535 covers common issues when installing or using Cloud Connector.
- Host connections
- Machine Catalogs
- Applications
- Users
- Citrix Gateway
- StoreFront
- A requirement for LHC
- Maximum resource location name length is 64 characters.
- A resource location must not match any other resource location name.
- You cannot use the following characters in a resource location name:
- #, $, %, ^, &, ?, +
- Braces: [], {}
- Pipes: |
- LT or GT symbols: <>
- Does the resource location have the best connectivity to your domain?
- Is the resource location closest to your Citrix Cloud console? An example of this is your console which resides at https://eu.cloud.com.
- The update could not be installed at your preferred schedule time within 48 hours of the update being available. For example, maybe your Cloud Connector was offline. In this scenario, the update pushes out immediately when the Connector comes back online.
- The update contains a fix for a critical security or feature issue.
- Citrix Hypervisor:
- Use an account that has VM Power Admin or higher permissions when creating a hosting connection.
- Use HTTPS to secure communications with Citrix Hypervisor by replacing the default SSL certificate. See CTX128656.
- Microsoft Hyper-V:
- The SCVMM console must be installed on all Cloud Connectors.
- VMware vSphere:
- Add the vCenter certificate to each Cloud Connector.
- Provide the hosting connection with credentials to a service account that has vCenter permissions listed here.
- Amazon AWS:
- Provide the API key and secret key for your AWS account.
- Provide the region where your private cloud is located, the availability zone, VPC name, subnet addresses, your domain name, security group names, and credentials.
- Microsoft Azure:
- Each resource group can hold 240 VMs.
- Citrix Broker PowerShell snap-in
- Citrix Configuration Logging Service PowerShell snap-in
- Citrix Configuration Service PowerShell snap-in
- Citrix Delegated Administration Service PowerShell snap-in
- Citrix Host Service PowerShell snap-in
- Make sure the old PowerShell snap-ins are removed.
- Make sure the Remote PowerShell SDK is installed on your Provisioning Console machines and confirm it is installed using the cmdlets mentioned above.
- Make sure the Cloud Connector can communicate with your Citrix Provisioning systems.
- Make sure the Provisioning account is a member of the local administrators group on your Provisioning servers.
- Make sure that Citrix Provisioning support in Citrix Cloud is enabled. Make sure that the PvsSupport feature is enabled against your Citrix Cloud account.
- Make sure the Citrix Remote Broker Provider service is running on your Cloud Connectors.
- The identities of users and groups who are specifically assigned resources published from the Site.
- The identities of users who are currently using or have recently used published resources from the Site.
- The identities of VDA machines configured in the Site.
- The identities (names and IP addresses) of Workspace app machines being actively used to connect to published resources.
- The Citrix Remote Broker Provider Service on a Cloud Connector accepts connection requests from StoreFront and communicates with Citrix Cloud to connect users to VDAs that are registered with the Cloud Connectors.
- The Citrix Config Synchronizer Service (CSS) check with the primary broker in Citrix Cloud approximately every two minutes to see if any configuration changes have been made in the Site database.
- If yes, CSS copies the changes to the Citrix High Availability Service, which writes them to the SQL Server Express LocalDB database on the Cloud Connector.
- The Citrix High Availability Service (secondary broker) starts listening for and processing connection requests.
- When VDAs next communicate with the secondary broker, they re-register with that secondary broker and pass their current session information along.
- The Brokering Principal continues to monitor the connection to Citrix Cloud and when connectivity is restored, this service informs the secondary broker to stop listening for connection information. The Brokering Principal takes over the role of listening for and processing connection requests. VDAs will re-register with the principal broker when they next communicate with it.
- The CSS service resumes the task of synchronising any configuration changes made in Citrix Cloud, copying them to the High Availability Service.
- Set OutageModeForced DWORD to 0x1 under HKLM\SOFTWARE\Citrix\DesktopServer\LHC
- The CSS service frequently provides the secondary broker with information about all Cloud Connectors in the resource location, allowing all secondary brokers to know about their peers.
- An alphabetical list of FQDN Controller names is used to determine which secondary broker will take over the duty of listening for and processing connection requests if LHC mode is activated. Any secondary broker that is not elected will reject incoming connection and VDA registration requests.
- If a connection to Citrix Cloud is lost, the secondary broker of the elected Controller in your resource location will listen for and process all requests. VDAs when they next communicate with this secondary broker will re-register with it.
- If that elected secondary broker also fails, or reboots during an outage, another secondary broker will take over according to the alphabetical list of FQDN Controller names. This will cause VDAs to re-register again.
- If the previously elected secondary broker comes back online, another VDA re-registration event will occur.
- When an outage ends, VDAs will re-register with any of the healthy Controller’s Brokering Principal in your resource location a further time.
- Monitoring data from your VDAs is not sent to Citrix Cloud.
- Machines appear in an unknown power state, and no power operations can be executed.
- Published application and shared desktop users may end up with more than one session, even with session limits configured.
- Applications and desktops can only be launched from the Zone that contains an elected secondary broker.
- If scheduled restarts are due to occur during the time of an outage, the restarts begin when the outage ends.
- Raise a support call to have Citrix override the default behaviour site wide. They will issue command: Set-BrokerSite -ReuseMachinesWithoutShutdownInOutageAllowed $true
- For each pooled VDI Delivery Group you want to make available, run Set-BrokerDesktopGroup -Name “name” -ReuseMachinesWithoutShutdownInOutage $true
- The LocalDB service can use up to 1.2GB of RAM.
- The High Availability Service can use up to 1GB RAM if an outage lasts for an extended period of time and there are many session launches during that time.
- Full Administrators in Citrix Cloud, Virtual Apps and Desktops service Cloud Administrators, and Read Only Administrators can view configuration logs in Studio.
- Full Administrators and Cloud Administrators can download a CSV report of the Configuration Logging information using PowerShell.
- Configuration Logging cannot be disabled.
- The Configuration Logging database location cannot be changed, since it is managed by Citrix.
- You can export the logs to CSV via PowerShell only. The on-premises product supports output to CSV or HTML from PowerShell or Studio.
- You cannot delete log content.
- Cloud Administrator – Can perform all tasks under the Manage and Monitor tabs of the Virtual Apps and Desktops service.
- Delivery Group Administrator – Can delivery applications, desktops and machines from the Manage tab. Can also manage power settings etc.
- Full Monitor Administrator – Can perform all tasks under the Monitor tab.
- Help Desk Administrator – Can see machine catalog and host information, manage sessions and machines etc from the Monitor tab.
- Host Administrator – Can manage host connections and their associated sessions from the Manage tab.
- Machine Catalog Administrator – Can create machine catalogs, provision new machines, and manage base images from the Manage tab.
- Probe Agent Administrator – Can access Probe Agent APIs.
- Read Only Administrator – Can see all objects under the Manage tab.
- You do not assign administrators with permissions to Virtual Apps and Desktops using their AD account. Instead, you assign permissions (roles and scopes) to their Citrix Cloud login.
- Administrators are created, edited and deleted from the Citrix Cloud console, not the cloud hosted Studio.
- You cannot produce delegated administration reports.
- The Cloud Administrator role is similar to the Full Administrator on-premises role, which is not present as a role in the Virtual Apps and Desktops service.
- For external connections, the ICA traffic path is from the VDA -> Cloud Connector -> Gateway service -> end-user device.
- For internal connections, the ICA traffic path is from the VDA -> Cloud Connector -> Gateway service -> end-user device.
- You have to use Workspace to access your resources, which also is true for being able to use the Gateway service.
- Your VDAs must run the Virtual Apps and Desktops 7 1912 LTSR version.
- The rendezvous protocol must be enabled via Citrix Policy (it is already enabled for all customers at a Citrix Cloud level).
- VDAs must be able to access https://*.nssvc.net including subdomains.
- A DNS Reverse Lookup Zone with PTR records for the VDAs must be configured.
- A particular SSL Cipher Suite order must be configured, which is easily accomplished via Group Policy.
Overview of Virtual Apps and Desktops Service
Virtual Apps and Desktops service is available in three locations:
Each region is capable of managing and providing access to resources across the world.
When an organisation subscribes to the Virtual Apps and Desktops service, the following components that make up the control plane sit within the Citrix Cloud hosted in Microsoft Azure, removing any requirement for those components to reside within your own datacentres:
Note that all of the above components are highly redundant and scalable, so if your Citrix deployment suddenly expands Citrix will scale and backend infrastructure automatically.
As a result of the above components being within Citrix’s control, all updates and upgrades to new software versions and patching are performed by Citrix. Additionally, hardware requirements to host the components and administration time is reduced and eliminated in some cases.
Update Method
Updates to services in Citrix Cloud such as a new release of the Virtual Apps and Desktops software, are released approximately every three weeks in a rolling fashion. Firstly Citrix internal sites receive the updates, and then updates will be pushed out gradually to customer environments. Delivering updates in this fashion reduces the risk of service impact and maximises availability for Citrix Cloud customers.
VDAs, which remain in the control of the customer, are not updated or upgraded by Citrix.
Resource Locations
Now that we have covered the control plane, the remaining pieces of a typical Virtual Apps and Desktops deployment are of course the applications, desktops and relevant data such as application data and user profiles. All these sit within your control, in resource locations. A resource location is simply a term used in Citrix Cloud to describe the location these pieces can be found. The resource location will also contain access to the domain, the hypervisors that host your VDAs, and optionally StoreFront and/or Citrix Gateway.
A resource location can be one or more datacentres your organisation controls on-premises, hosted in a private cloud running on VMware vSphere or Citrix Hypervisor for example. Alternatively, a resource location can be in a public cloud such as Microsoft Azure, Amazon AWS or Google Cloud (GCP).
At the time of writing, you can have up to 50 resource locations under a single Virtual Apps and Desktops service instance.
Citrix Cloud Connectors
The Citrix Cloud and your resource locations which host the VDAs are connected by using Citrix Cloud Connectors. The Cloud Connector power manages VDA machines and acts as the Citrix Desktop Service registration point for VDAs.
Cloud Connectors will be installed on Windows Server OS machines.
End of public cloud support for on-premises
In March 2020, Citrix announced that from the Virtual Apps and Desktops 7 2003 on-premises release onwards, hosting workloads (VDAs) in public clouds is an unsupported configuration. Customers have the following options:
Citrix Cloud Service Level Agreement
In short, Citrix’s “Service Commitment” is to maintain atleast 99.5% monthly uptime on Services. Monthly uptime is calculated by subtracting the minutes a service was in the state of “Unavailable” during a full month and calculating the percentage, known as the uptime percentage. The uptime percentage measurments exclude downtime that results from things such as regularly scheduled maintenance windows and customer failure to follow configuration guidelines and requirements for the service as documented by Citrix over on Citrix Docs. For more information on Citrix Cloud SLA, see: https://docs.citrix.com/en-us/citrix-cloud/overview/service-level-agreement.html
Technical Security Overview
Firstly, all data flows from Cloud Connectors within each of your resource locations to Citrix Cloud over TLS 443. Traffic is outbound from the Cloud Connector, with no traffic initiating from Citrix Cloud to your resource locations. This simplifies firewall configurations.
The Citrix Cloud control plane will have access to metadata such as usernames, machine names, and application shortcuts. Only the required metadata needed for brokering and monitoring a customer’s applications and desktops is stored by the Virtual Apps and Desktops Service.
Credential Handling
For types of credentials are handles by the Virtual Apps and Desktops service:
Deprecation of TLS versions
From March 2019, Citrix began blocking communication to Citrix Cloud services over TLS 1.0 and 1.1. For a list of the services affected, see https://support.citrix.com/article/CTX247067
If you have older Receiver versions that need to continue using TLS 1.0 or 1.1, install StoreFront in your resource location(s) and have those Receivers point to it. This forms a design decision.
Customer-managed StoreFront
As previously mentioned, a customer can optionally deploy and use Citrix StoreFront in their resource location.
A customer may choose to do this as StoreFront provides more flexibility for deployment architecture, greater customisation, and increased security.
The other advantage with using StoreFront is that it supports Local Host Cache, so that in the event your Cloud Connectors lose access to the Citrix Cloud control plane, new user sessions are not impacted. Local Host Cache is explained further on in this article.
Citrix Gateway service
The Gateway service is another offering from Citrix Cloud that you can use with your Virtual Apps and Desktops service deployment. Using the Gateway service is an effortless way to provide users with secure remote access to their applications and desktops through Citrix Cloud, and negates the need for you to deploy, configure and manage Gateway within your own datacentres.
When using the Gateway service, you must use Citrix Workspace, which is the Citrix Cloud edition of StoreFront.
There are a couple of considerations to keep in mind regarding traffic flow when the Gateway service is in use. I have gone into more details regarding this further on in this article.
Identity Providers
When you first start out with the Virtual Apps and Desktops service, the provider that authenticates your access requests is Citrix itself. Likely all organisations will move to using a different identity provider, specifically one of the below providers that Citrix Cloud currently supports as of March 2020:
Citrix FAS is also supported by Citrix Cloud to provide single sign-on to Workspace using Azure Active Directory authentication. Using FAS with Citrix Cloud is currently in Tech Preview, and currently only recommended to be used under testing purposes. For more information see here: https://docs.citrix.com/en-us/citrix-workspace/workspace-federated-authentication.html
Further on in this article, I will show the deployment of Active Directory with token authentication for Workspace.
Extra details on some of the popular identity providers available in Citrix Cloud is documented below.
On-premises Active Directory
Active Directory + Token
Citrix Cloud supports using tokens as a second factor of authentication for users authenticating against Workspace using their Active Directory accounts. Users generate tokens using any mobile app that supports the Time-Based One-Time Password standard, such as Citrix SSO or Microsoft Authenticator. Users can enrol one device at a time.
At this stage your users will now have to enrol their device for tokens using an app such as Citrix SSO or Microsoft Authenticator.
Register devices for two-factor authentication
Re-enrol devices
If an end-user obtains a new phone, or their original phone is broken, lost, stolen etc, there are a couple of options to re-enrol with a new device, or simply invalidate an existing device.
Azure AD
Requirements
Upon enabling Azure AD authentication
Azure AD authentication flow
Citrix Gateway
Using your Citrix Gateway on-premises as an identity provider gives you the ability to use many different authentication types such as RADIUS, MFA, certificate authentication etc.
Requirements
Gateway authentication flow
Citrix Federated Authentication Service (FAS) (Tech Preview)
As previously mentioned, Citrix FAS is also supported by Citrix Cloud to provide single sign-on to Workspace using Azure Active Directory authentication. Using FAS with Citrix Cloud is currently in Tech Preview, and currently only recommended to be used under testing purposes.
Requirements
Subscriber sign-out experience
If a user closes their browser instead of using the Log Off option in Workspace, they might remain signed into Azure AD.
Secondly, if Workspace times out in the browser due to inactivity, users will remain signed into Azure AD, which is by design to prevent a Workspace timeout forcing other Azure AD applications to close.
Administrators and Subsribers
Administrators perform the management of Citrix Cloud services, and subscribers are your users who consume those services.
Administrators
Administrators can use their MyCitrix account to sign into Citrix Cloud, or an email address and password after being invited to join Citrix Cloud by another administrator.
Authenticating to Citrix Cloud as an administrator uses the Citrix Online sign-on system.
To add a new administrator to Citrix Cloud, an existing administrator would browse to Identity and Access Management -> Administrators.
You can remove administrators in the same way. Once an administrator is removed from your Citrix Cloud account and if they are already signed in, access is revoked after one minute.
Subscribers
Subscribers are linked to Active Directory domain accounts, forming an identity which can be assigned to a Library offering, which authorises the subscriber/identity to that offering. An example of this is when you create a Delivery Group from Studio hosted in Citrix Cloud. Instead of adding users or groups to the Delivery Group, you can add subscriber’s identities to the Library object that will be created in conjunction, which grants the users access to the relevant applications or desktops.
Citrix Cloud Connector
Cloud Connectors, which are installed in each of your resource locations, are the secure channel between your resource location and Citrix Cloud. The use of a Cloud Connector reduces the complexity of enabling cloud management against your infrastructure. Traffic from each of your resource locations to Citrix Cloud is outbound only, over TLS 443. This results in simplified network and firewall configuration.
The Cloud Connector enables Active Directory management, allowing the use of AD forests and domains within your resource locations. They also enable provisioning of machines directly into your resource locations, and enable publishing of resources from those machines etc.
In other words, Cloud Connectors speak to your Active Directory domain controllers and to your hypervisors during a publishing event like the creation of new machines in your resource location using Machine Creation Services.
OS, .NET and Server requirements
Certificate validation requirements
The following certificates must be installed on each Cloud Connector machine to ensure the Cloud Connector software can be installed successfully:
All machines must be able to contact the following addresses to validate the above certificates:
HTTP port 80 is required to *.digicert.com as it is used during Cloud Connector installation and during periodic CRL checks.
Active Directory requirements
Network requirements
Connectivity requirements
Cloud Connectors require access to a number of services out on the internet, such as https://*.cloud.com. Firewalls and any outbound proxy servers should allow/whitelist access to these services so that Citrix Cloud can properly communicate with your resource location.
You should allow/whitelist FQDNs rather than IP addresses to avoid any outage if an IP address behind one of the FQDNs change. Additionally, whitelisting using wildcards prevents future connectivity issues to Citrix Cloud if Citrix introduce a new FQDN to improve the Citrix Cloud platform.
Citrix specifically call out:
Some critical functions of the platform, such as traffic failover based on geographical region, rely on being able to route calls under multiple subdomains. Whitelisting at the subdomain level increases the risk outage as these functions might use subdomains the customer hasn’t whitelisted. Whitelisting the wildcard domain allows these functions to work without placig an undue burden on the customer to whitelist a large number of subdomains for every Citrix Cloud service.
There are different FQDN exclusion requirements depending on which Cloud services you use. For the full list, see System and Connectivity Requirements.
Outbound proxy considerations
Size and scale considerations
Not sizing your Cloud Connectors appropriately can impact system performance. See the below two links to help with sizing:
High availability and load management
In each of your resource locations, install multiple Cloud Connectors. Citrix recommend two per resource location.
Connectors are stateless, so one failing does not cause impact. As long is one is available, a connection to Citrix Cloud will be maintained.
Load is distributed across all available Connectors under normal conditions, but if one fails, the others will maintain the connection.
Install location
Install Cloud Connectors on dedicated Windows virtual machines that do not contain any other roles or components. With the exception of Server Core, which is not supported, Server 2012 R2 and above is supported to run the Cloud Connector software.
Deployment scenarios across multiple domains and forests
Single parent domain, optional child domains
For organisations with parent and child domains, create one resource location and install a pair of Connectors in your parent domain. Citrix Cloud will pick up the parent and child domains and list them under Identity and Access Management -> Domains.
You might need to restart your Connectors before they can detect child domains.
Separate resource and user forests with full trust
Install a pair of Connectors in your resource forest, and another pair in your user forest. If you only installed Connectors in the resource forest, you would have the following issues:
When you install Connectors in both forests, the domains from each forest will appear under Identity and Access Management -> Domains.
Installation considerations
Installation logs
Cloned machine considerations
Cloud Connector health
The health of Cloud Connectors in relation to connectivity to Citrix Cloud can be viewed by navigating to Resource Locations in Citrix Cloud.
Antivirus best practices
Review Tech Zone article Endpoint Security and Antivirus Best Practices for recommendations on exclusions and practices.
Troubleshooting Cloud Connector
Resource Locations
Now that we have covered the control plane, the remaining pieces of a typical Virtual Apps and Desktops deployment are of course the applications, desktops and relevant data. These sit within your control, in resource locations. A resource location is simply a term used in Citrix Cloud to describe the location these pieces can be found. The resource location will also contain access to the domain, the hypervisors that host your VDAs, and optionally StoreFront and/or Citrix Gateway.
If you have resources in your own cloud or datacentre, those resources can remain where they are. You do not need to move them anywhere to use them with Citrix Cloud. Alternatively, your resources could be located in a public cloud.
There are no limits to how many resource locations you can have.
Zones
A resource location is considered a zone in a Virtual Apps and Desktops service environment. There are similarities with the Cloud version and on-premises Virtual Apps and Desktops zones. When you create a resource location and add a Cloud Connector to it, a zone is automatically created for you.
A zone can have the following:
You can set preferred zones for applications and users, allowing you to control for example where resources are launched in accordance to application data location, or where users launch resources from in accordance to user data location.
You can edit a zone’s description, but not the name. If you want to delete a zone, you have to delete the resource location.
See the Zones documentation for more detail.
Resource location naming restrictions
Primary resource location
The primary resource location is one you select as the most preferred. Cloud Connectors in a primary resource location are used for user logons and provisioning operations, so the resource location you pick should have Cloud Connectors that have the best performance and connectivity to your domain, which will allow your users to log on quickly to Citrix Cloud.
Two considerations when choosing a primary resource location:
If Cloud Connectors in the primary resource location are unavailable, logon and provisioning operations are switched to another Cloud Connector in the domain.
To delete, reset, or change the primary resource location, browse to Identity and Access Management -> Domains, expand the domain that contains the primary resource location you want to change.
Create a resource location
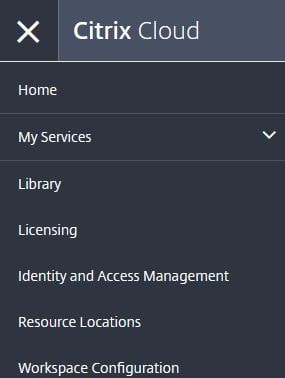
From the Citrix Cloud portal, navigate to Resource Locations.
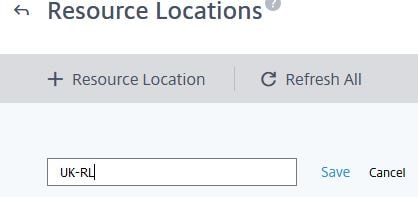
Click + Resource Location. Specify a name, click Save.
At this stage you are ready to add Cloud Connectors to your newly created resource location.
Install Cloud Connector
Before installing your Cloud Connector, make sure you have met all the prerequisites listed under OS, .NET and Server requirements, Certificate requirement, Active Directory requirements and so on.
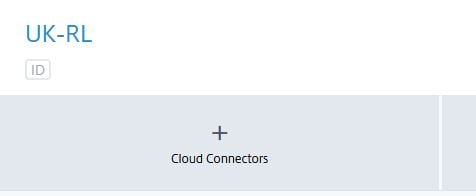
Browse to the Citrix Cloud management portal from the machine that will host your Cloud Connector. Navigate to the Resource Locations section of Citrix Cloud, expand your resource location and click + Cloud Connectors.
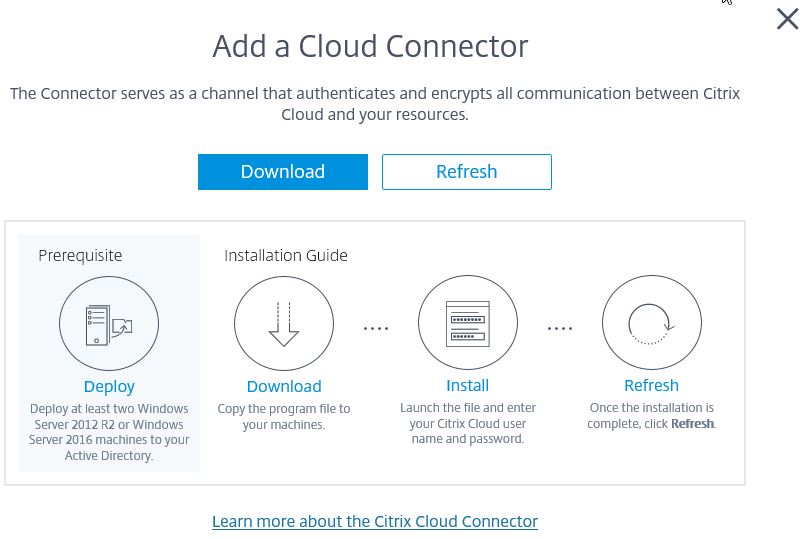
Click Download.
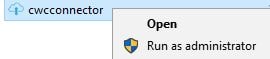
Run the cwcconnector.exe software as an administrator to begin the installation.
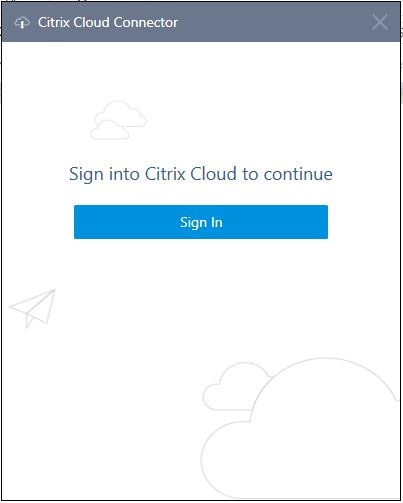
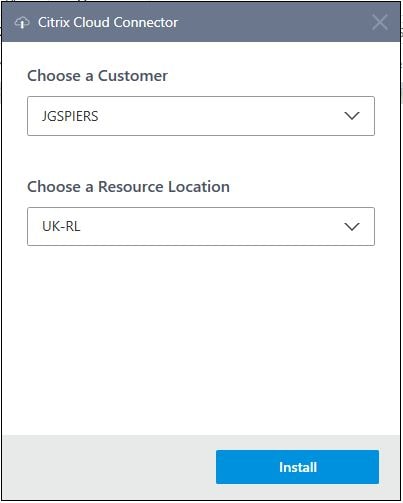
Click Sign In and sign in with a Citrix Cloud administrator account.
The Cloud Connector installer will discover the customers and resource locations present under your tenant. Once you have selected the resource location where this Cloud Connector will be located, click Install.
Click Close on the connectivity test, which checks connectivity to Citrix Cloud before finishing the install.

Returning to your resource location in Citrix Cloud, you will now see your Connector present, and it should be healthy. Notice the warning about the lack of cloud connectors available. Citrix recommend a minimum of two Connectors per resource location, so perform the same install steps on a second virtual machine in your resource location.

Manage Cloud Connector update schedules
To keep your Cloud Connectors performing optimally, secure, and reliably, Citrix manage the updates of your Cloud Connector software versions and do so in a way that there will always be one Cloud Connector available to maintain service for your organisation.
Customers can pick update schedule times, so that Cloud Connectors are only updated by Citrix during non-peak hours for example. Update schedules are defined per resource location, so apply to all Cloud Connectors within that resource location regardless of what time zone those machines are in.
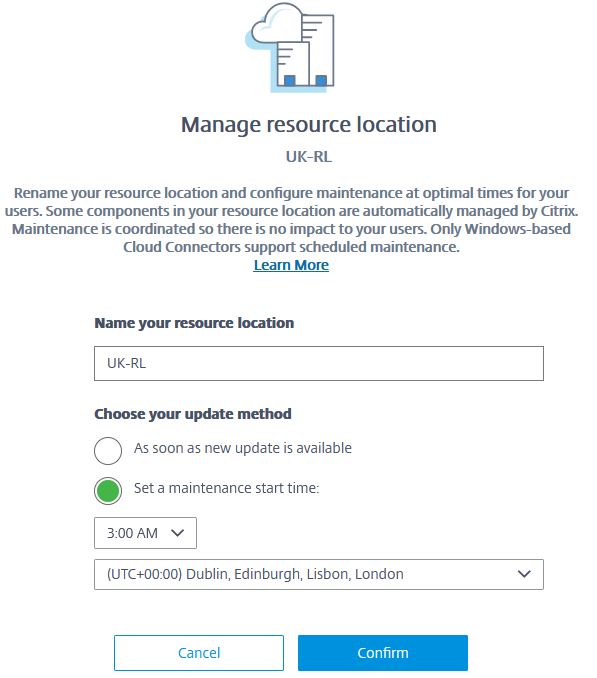
From the Citrix Cloud console, navigate to Resource Locations, locate your resource location, click the ellipsis and select Manage Resource Location.

Select Set a maintenance start time and choose the settings most appropriate for your resource location. Once done, click Confirm.
Unscheduled updates
There may be times where Citrix push out an update that does not conform to the schedules you have set. Scenarios such as:
Virtual Apps and Desktops service – Initial Setup
Hosting connection considerations
Before creating a connection to your on-premises hypervisor or cloud environment, there are a couple of things to keep in mind. For complete information, see https://docs.citrix.com/en-us/citrix-virtual-apps-desktops-service/install-configure/resource-location.html
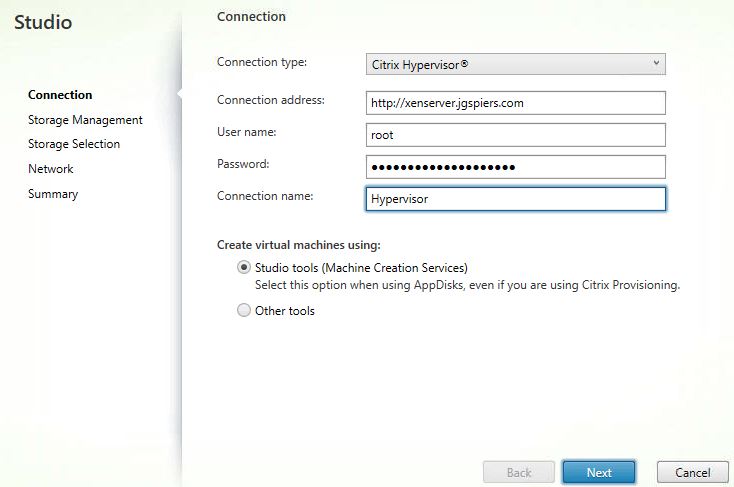
Create Hosting connection
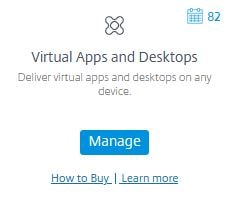
To begin your Virtual Apps and Desktops service journey, from the Citrix Cloud console, under the Virtual Apps and Desktops tile, click Manage.
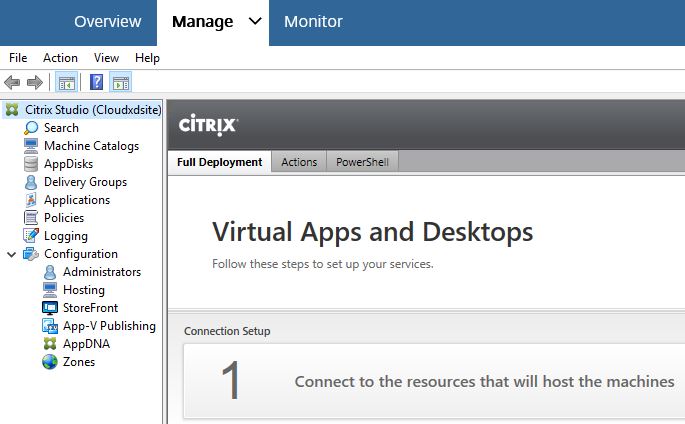
The Manage tab opens and you are taken to a cloud hosted Studio, which looks just like Studio when you first configure your Site. Click on Connect to the resources that will host the machines.
Create a Hosting connection to your private cloud or public cloud hosting location. In this example, I am connecting to Citrix Hypervisor which sits in my on-premises resource location. Click Next, define your storage and networking components and so on.
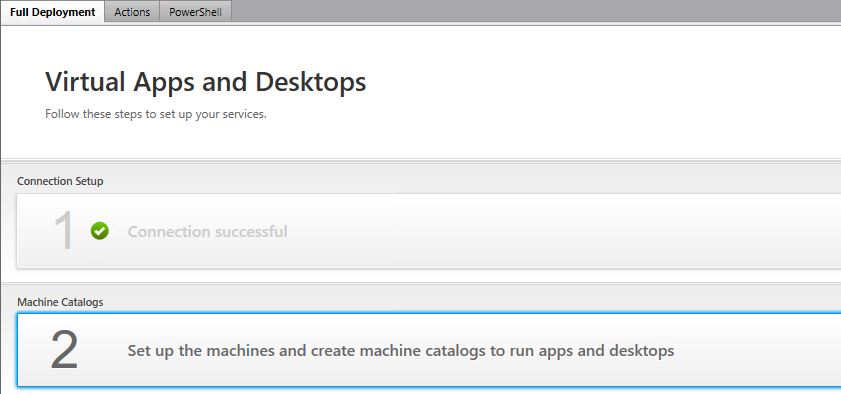
Create machine catalog (using MCS)
To create your first machine catalog which will deploy virtual machines to your resource location. In this example MCS will be used to deploy the machines. Click Set up the machines and create machine catalogs to run apps and desktops.
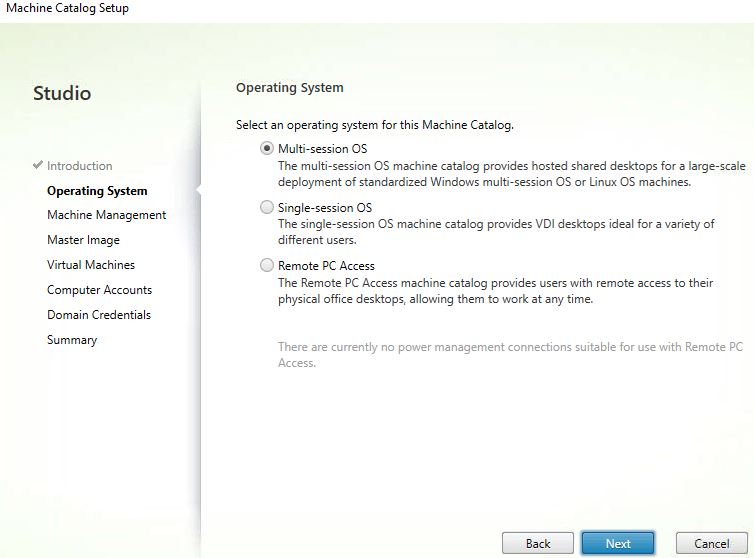
Select one of the following options based on the machines you are deploying and click Next.
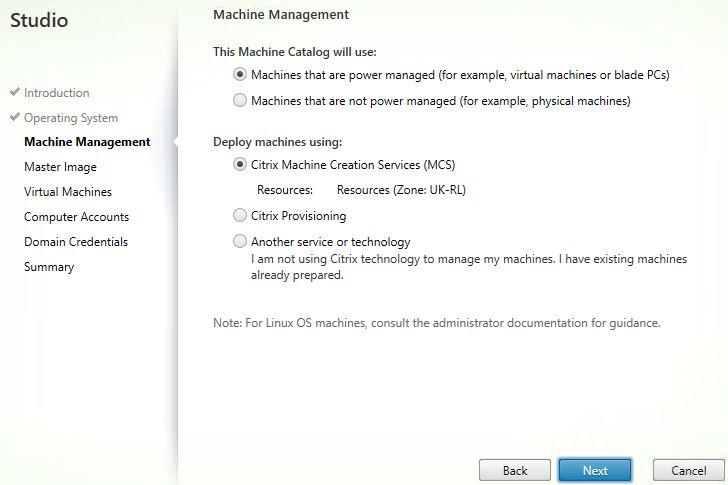
Select your deployment method. In my example, we will use MCS. Click Next.
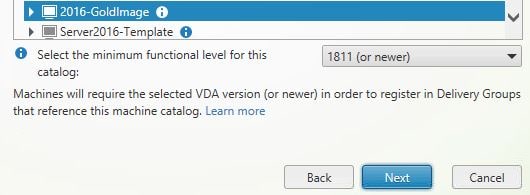
Specify your master image, set the minimum functional level for the catalog and click Next.
Choose how many machines you want to create, the RAM of each machine, and optionally MCS IO cache settings. Click Next.

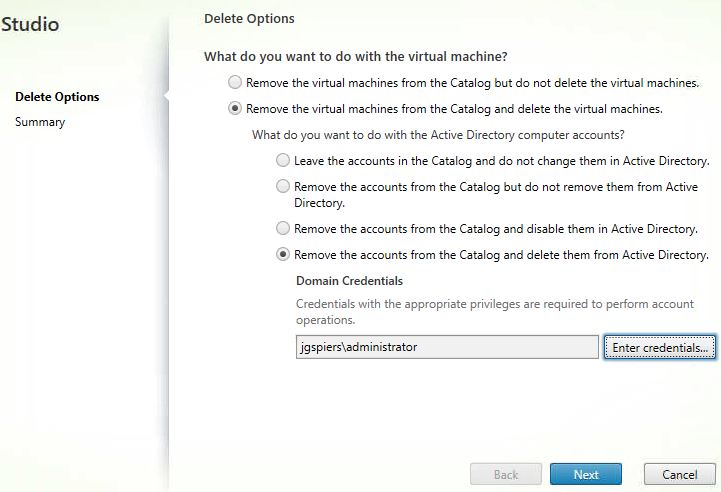
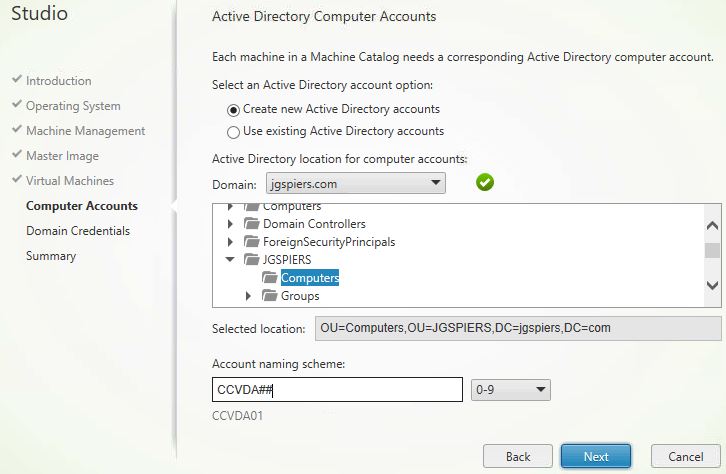
Give a location and naming scheme for your machines in your Active Directory. Click Next.
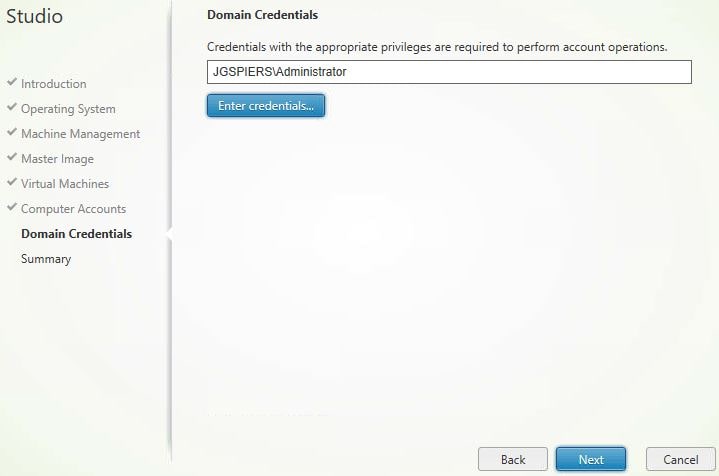
At this stage you are asked for domain credentials that will be used to create the machine accounts in Active Directory. This is one of the differences between an MCS deployment using Virtual Apps and Desktops service compared to the on-premises product.
The Cloud Connector which MCS uses to create the machine accounts in Active Directory only has read access to AD, this is why you are asked explicitly for credentials. Those credentials are stored in memory for this single operation.
Click Enter credentials, specify credentials and click Next.
Specify a name for your catalog and click Finish.

After some time, the virtual machine should appear in Studio and registered providing you pointed the machine at your Cloud Connectors for registration, which is explained below.
Configure VDAs
You install VDAs in the normal way but point them at the Cloud Connectors in your resource location.
For more information on the different registration methods you can use, see: https://jgspiers.com/how-to-configure-troubleshoot-vda-registration-delivery-controllers/
Create Delivery Group
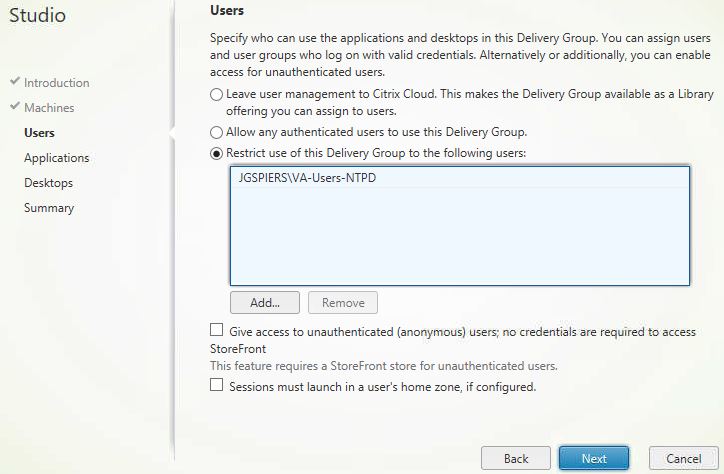
Create a Delivery Group in the normal way. One of the differences is when you are given the option to specify what users or groups can use resources from the Delivery Group.
You have the option Leave user management to Citrix Cloud.
This makes the Delivery Group available as a Library offering in Citrix Cloud under Libraries. You can then specify users or groups against that offering.
Citrix Provisioning
I demonstrated creating a Machine Catalog using Machine Creation Services, but you can also provision VDAs to your resource location using Citrix Provisioning, and then add those machines to your Machine Catalogs in Citrix Cloud.
Licensing
If you plan to use Citrix Provisioning with your deployment, an on-premises License Server is required.
The PVS\_CCLD\_CCS license type supports the Virtual Apps and Desktops service. This license type replaces the on-premises Citrix Provisioning licenses for desktops and provisioning for datacentres.
You use the Provisioning Services Configuration Wizard, or the Licensing tab to select the Cloud radio button for licensing. Changes to licensing options requires the stream service to be restarted.
Connecting Citrix Provisioning to Citrix Cloud
Citrix recommends using Provisioning 7.18 or later with Citrix Cloud.
Uninstall the Virtual Apps and Desktops SDK on your Citrix Provisioning console machine by removing the following snap-ins:
Now install the Citrix Virtual Apps and Desktops Remote PowerShell SDK which can be downloaded here. To install, issue command CitrixPoshSdk.exe PVS=YES and follow the prompts.
To verify the SDK installation, run cmdlet Add-PsSnapin Citrix.* followed by Get-BrokerServiceStatus and authenticate to Citrix Cloud. You should be returned with an OK ServiceStatus message.
Deploying machines using Citrix Provisioning
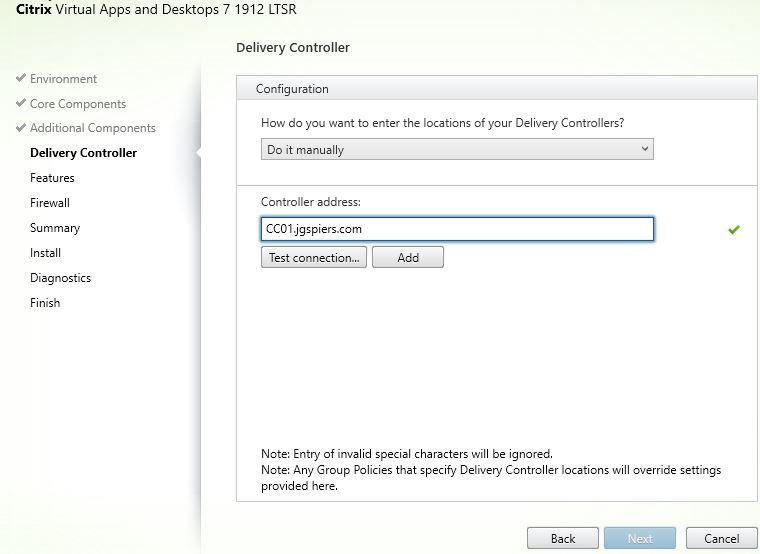
You can use the Virtual Apps and Desktops Setup Wizard as normal, but with some differences.
When asked for a Controller address, enter one of your Cloud Connector machines that exist in the same resource location. You will then be required to authenticate to Citrix Cloud.
Troubleshooting Citrix Provisioning with Citrix Cloud
Connecting to resources from on-premises, customer-managed StoreFront
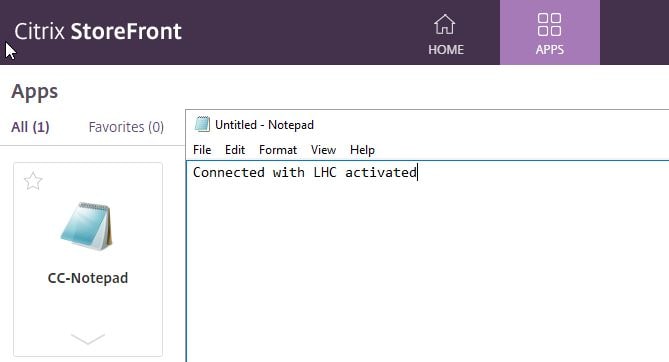
If you plan to use an on-premises StoreFront deployment, to enumerate resources from Citrix Cloud, add the Cloud Connectors in as Delivery Controllers to your StoreFront store.
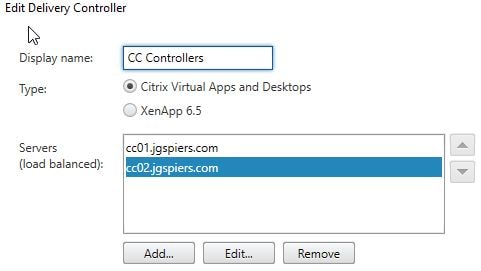
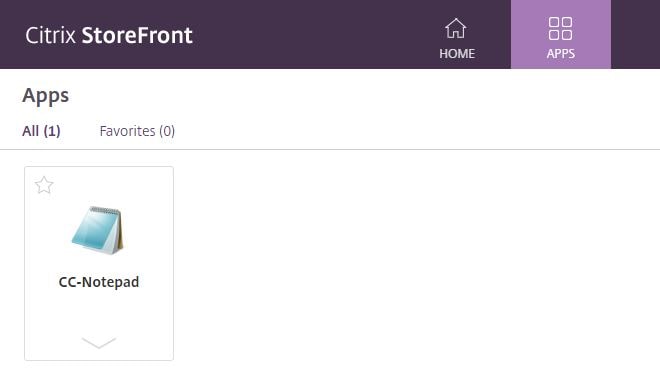
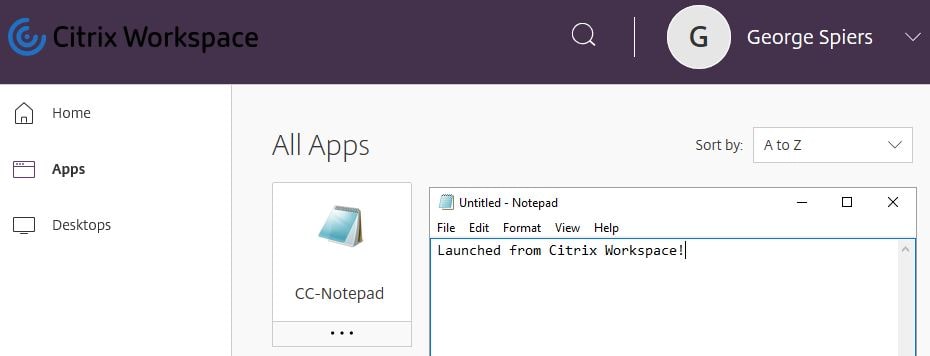
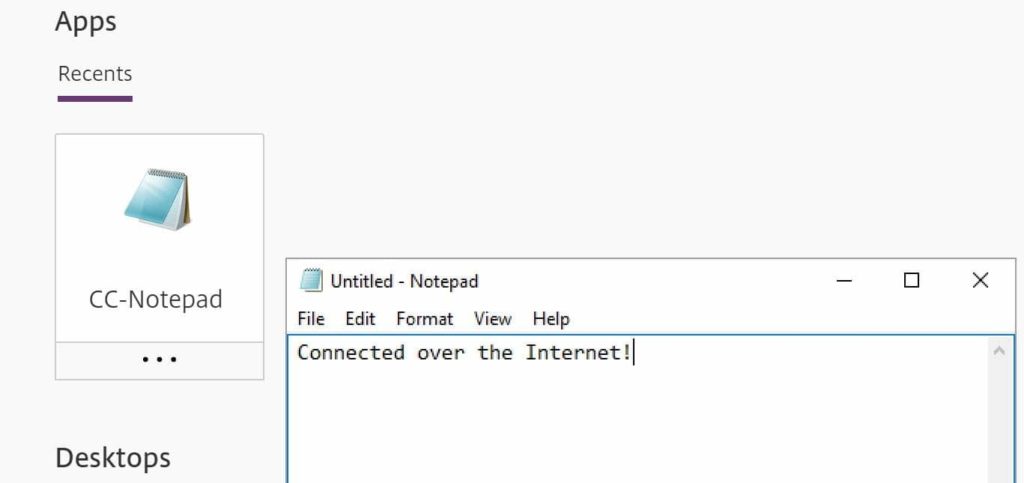
To test, browse to your StoreFront URL, or use Workspace app, and you should be able to see resources enumerated from Citrix Cloud.
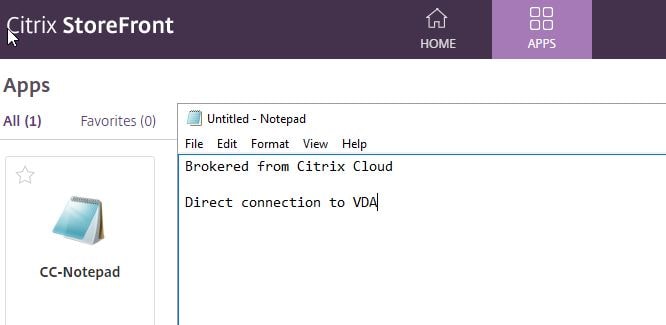
In this example, CC-Notepad is a published application created earlier from the Citrix Cloud hosted Studio.
Connecting to that resource locally makes a direct connection to the VDA. The session information from Citrix Cloud hosted Studio shows that.

Local Host Cache
As previously mentioned, one of the main benefits of deploying your own StoreFront servers to your resource location(s) is that you can use Local Host Cache if a connection from your resource location Cloud Connectors to the Citrix Cloud control plane is lost.
Local Host Cache is enabled by default for all Citrix Virtual Apps and Desktops service customers.
If you use Citrix Workspace, Local Host Cache does not work. This would equal an outage for any new session trying to establish during the outage.
Local Host Cache contains a subset of the information in the main Citrix Site database:
For more information on Local Host Cache, see https://jgspiers.com/citrix-local-host-cache/
Normal operations
Note that the LocalDB database is re-created each time synchronisation occurs. If there are no changes, configuration data is not copied.
Outage operations
Force outage
Forcing an outage can be used as a way to test your disaster recovery plan, or when there are intermittent network issues causing a connection between your resource location and Citrix Cloud to continuously drop.
The Current_HighAvailabilityService log under C:\ProgramData\Citrix\WorkspaceCloud\Logs\Plugins\HighAvailabilityService can be used to track events.
Other LHC considerations
VDA re-registrations
There are various events that cause all VDAs in a resource location to re-register with an elected secondary broker. A secondary broker is elected based on an alphabetical list of FQDN Controller names.
Each re-registration process causing temporary disruption to available resources, as VDAs cannot be used to take on sessions if they are in the middle of re-registering.
Whilst VDAs register with a broker, that broker may not have the complete set of information on current sessions, so a user connection request during this time may end up being a brand-new session, even if an existing session was available. This is unavoidable.
What is not possible during an outage
Pooled VDI desktops
LHC cannot be used with pooled VDI desktops that have the ShutdownDesktopsAfterUse property enabled, which they do by default. If you want those desktops to be used during an outage, then you must do two things:
Note that overriding the default behaviour of ShutdownDesktopsAfterUse does not affect desktops shutting down after use during normal operations.
RAM size considerations
These extra RAM considerations are in addition to the normal Cloud Connector RAM recommendations, so you will want to make sure that if you want to use LHC, you size the RAM on your Cloud Connectors appropriately.
CPU core and socket considerations
LocalDB is limited to a single CPU socket and supports up to 4 cores in a single socket, so do not add more sockets as a means to improve performance.
Because only one Controller is elected at a time during an outage, all VDAs from the same resource location will re-register with the secondary broker on that Controller. This, amongst all the other requests this Controller will now take on, will result in increased CPU usage above what is found under normal operations. This needs to be taken into consideration for all your Cloud Connectors that could end up being the elected broker.
Storage considerations
The more users you have launching sessions during an outage, and the longer that outage lasts, the more LocalDB grows. Citrix tested 10 logons per second and the database grew by 1MB every 2-3 minutes.
When an outage ends, the LocalDB is recreated and thus drops in size.
During an outage Local Host Cache adds around 3MB of writes per second to your elected Controller, with several hundred thousand reads.
Local Host Cache in operation
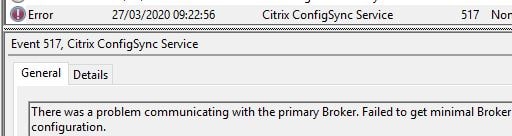
An outage begins by the Cloud Connectors failing to communicate with the primary Broker, in Citrix Cloud, for 20 seconds.
The Citrix Configuration Synchronizer Service (CSS) will also report an error connecting to the broker in Citrix Cloud to see if any configuration changes have been made that should be synchronised to LocalDB.
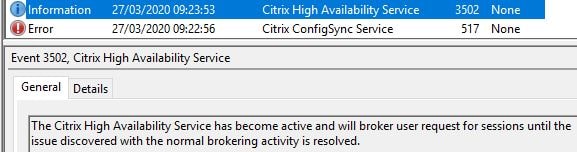
The Citrix High Availability Service on a Controller in your resource location will be elected to listen for and process requests.
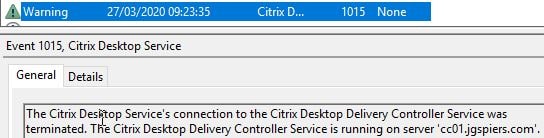
VDAs in your resource location will detect that a connection to the Brokering Principal is no longer possible.
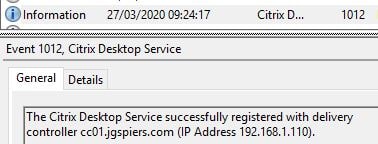
The VDAs will re-register, this time with the elected secondary broker residing on a Controller in your resource location. Again, election is performed using an alphabetical list of FQDN Controller names.
Connections launched from the customer-managed StoreFront are still possible.
Note that application enumeration under an outage is slightly faster as no traffic is going to Citrix Cloud.
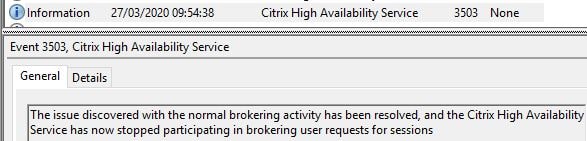
Once the outage ends, the Citrix High Availability Service stops listening for and processing requests, and the primary broker takes over.
Configuration Logging
Configuration Logging allows you to get a historic trail of configuration changes or actions taken within your Virtual Apps and Desktops deployment, such as updating HDX policies, logging off sessions, power managing machines, creating new Delivery Groups.
Configuration changes or activities executed from Studio (Manage), Director (Monitor), or from PowerShell will be logged. You will not see Citrix Cloud internal platform operations like database setups or management in the logs.
Having this logging at hand can help troubleshoot what changed if a new problem arises, report on administrative activity, and track configurations for change management.
You cannot delete or edit any Configuration Logging content from Studio. The Remote PowerShell SDK can be used to schedule periodic data deletion from the log, using cmdlet Set-LogSite -LoggingDBPurgeDurationDays. The default value is 0, meaning data is never deleted. If you set a different value, the database is checked every 120 minutes with data older than the retention period being deleted.
Configuration Logging permissions
Differences from on-premises edition
Delegated administration
Full Citrix Cloud administrators, who are added from Identity and Access Management -> Administrators, are assigned the Cloud Administrator role in Virtual Apps and Desktops service by default, which gives them full permissions.
You can instead assign them to any of the below roles, which are built-in to the Virtual Apps and Desktops service:
Custom Roles and Scopes
Like the on-premises version of Virtual Apps and Desktops, you have the option of creating custom roles and scopes. When you create a custom role and scope, the combinations will appear for selection under the Identity and Access Management -> Administrators portion of Citrix Cloud.
If you select an administrator, select Edit Access and choose the Custom access radio box, you will see your role and scope for selection.
Differences from the on-premises edition
For more information on roles and permissions, see Delegated Administration and Monitoring.
Monitor
If you are familiar with Citrix Director, the Monitor tab in Citrix Cloud is your access to cloud hosted Director. I am not going to go into detail here as things are much the same across cloud and on-premises. If you want more information see here: https://docs.citrix.com/en-us/citrix-virtual-apps-desktops-service/monitor.html
Licensing
Virtual Apps and Desktops licensing can be found under Licensing in the Citrix Cloud portal.
Here you can get a view of how many licenses have been assigned, and to what users/devices, with the ability to release licenses. You can export this data to CSV.
Using Workspace with Active Directory + Token
We have already connected to resources using an on-premises StoreFront server. Now I will show using Workspace from Citrix Cloud, and also using Active Directory + Token for authentication to the Virtual Apps and Desktops service.
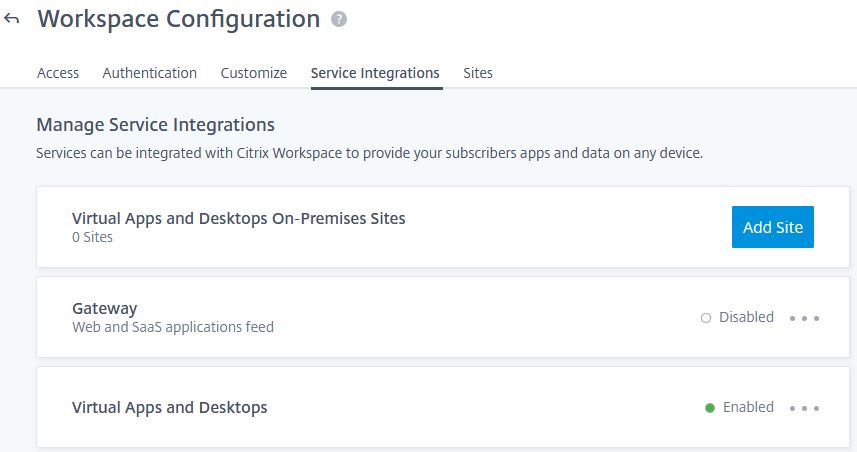
From the Citrix Cloud console, navigate to Workspace Configuration -> Service Integrations and make sure Virtual Apps and Desktops is set to Enabled.
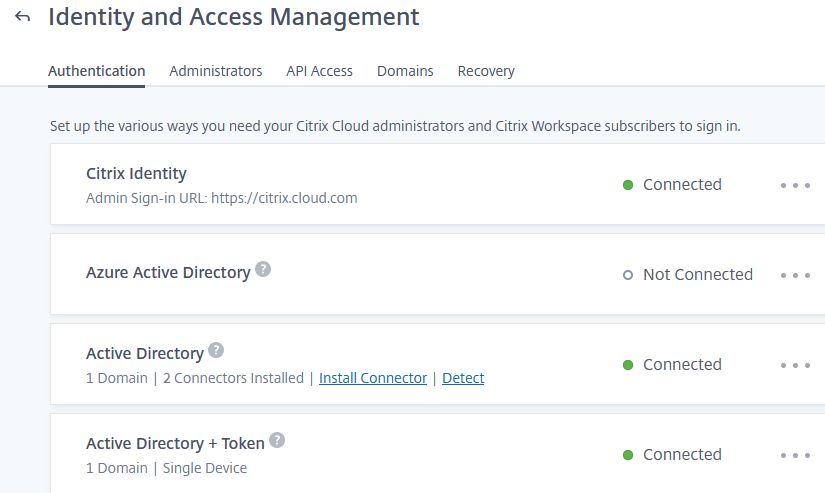
Navigate to Identity and Access Management -> Authentication and set Active Directory + Token to Connected.
Navigate back to Workspace Configuration.

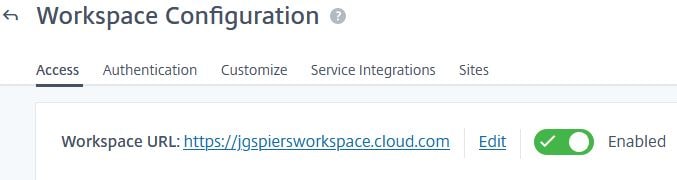
Under the Access tab, make sure that your Workspace URL is set to Enabled. If you want to change the URL, click Edit. This is the URL your end-users will use to access their resources either through a web browser, or from Workspace app.
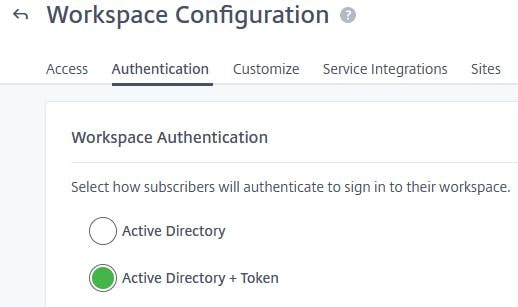
Click on the Authentication tab and select the Active Directory + Token radio box. This enables that authentication method against Workspace.
Registering for token
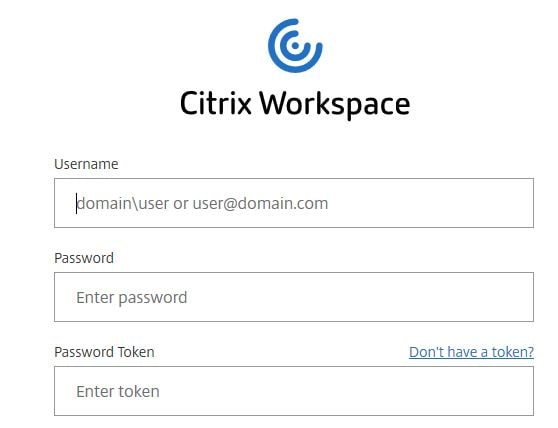
For an end-user to authenticate to Workspace, they must register a device for token authentication. To do this, browse to the Workspace URL for your organisation and click on Don’t have a token?
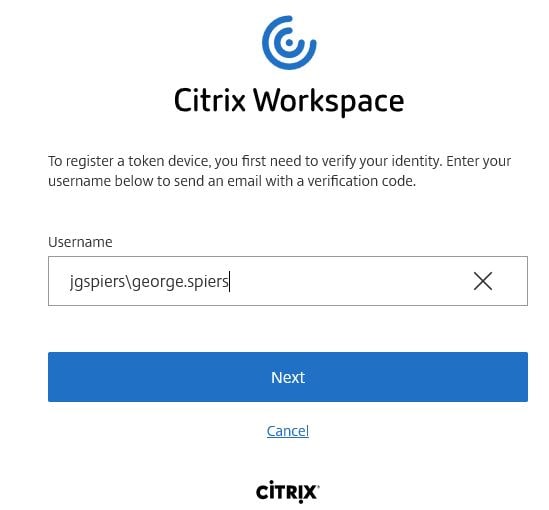
Enter your AD username and click Next.
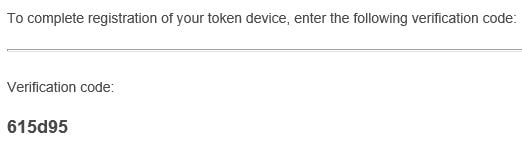
An email should be sent to your corporate address, with a verification code as below.
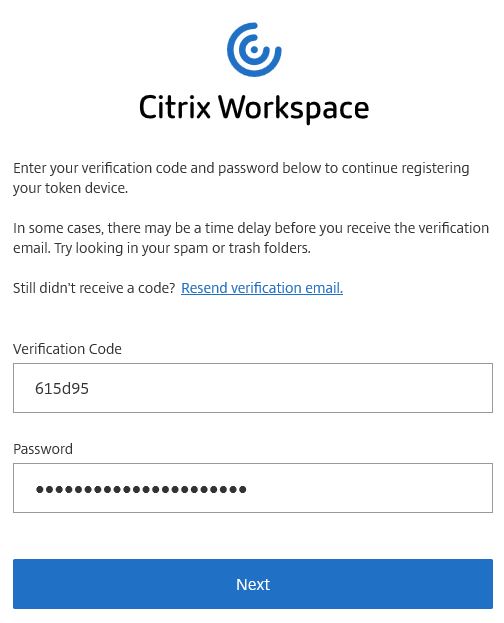
Return to your Workspace and enter the verification code, along with your AD password. Click Next.
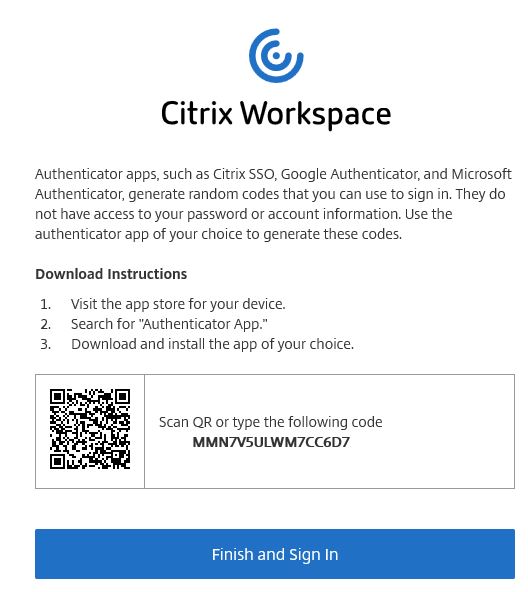
Using any mobile app that supports the Time-Based One-Time Password standard, such as Citrix SSO or Microsoft Authenticator, scan the QR code, or enter the code manually into the app. Click Finish and Sign in once complete.
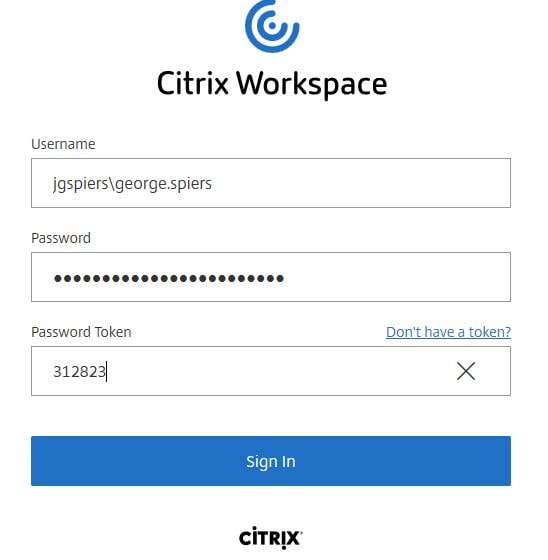
Now enter the relevant authentication details, click Sign In, and you will be authenticated to Workspace.
To verify, launch an application, and this time you will have taken the Citrix Cloud Workspace route to connect in.
Resetting a device
If an end-user obtains a new phone, or their original phone is broken, lost, stolen etc, the end-user can re-enrol a new phone themselves, or you can reset their existing device.
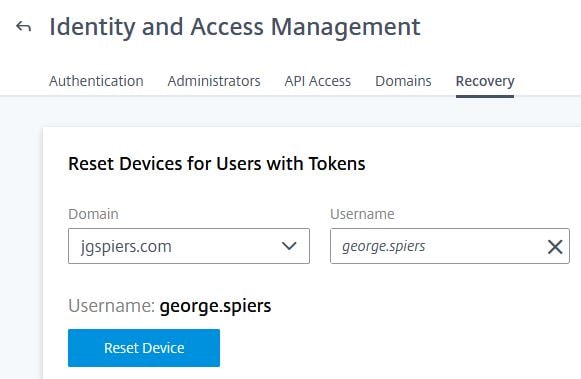
From Identity and Access Management -> Recovery, use the domain drop-down to select the user identities domain, search for the username and click Reset Device.
Citrix Gateway service
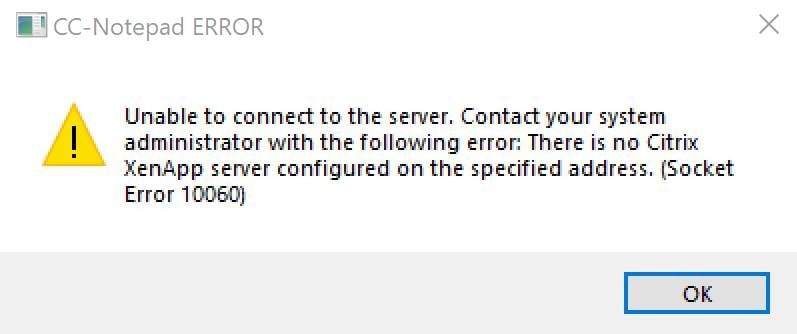
If you have internal access only configured against your Virtual Apps and Desktops resource location, external users that try and launch resources from Workspace will simply be denied access:
To allow users to access their VDAs from outside the corporate network, one of your options is to enable the Gateway service against your deployment. The Gateway service is an easy to deploy remote access solution, hosted in Citrix Cloud, that can be enabled in minutes and negates any need for you to deploy a Gateway within your own resource location, and configure the associated routing and firewall rules to make it work.
As of March 2020, there are more than 20 Gateway PoPs (points-of-presence) available globally across AWS and Azure. When you make a connection to resources through the Gateway service, you will be connected to one of these globally available PoPs by the Cloud Connectors, the one closest and best performing to your location.
PoPs make use of the Azure and AWS high-quality virtual WAN backbones which provide efficient routing, higher bandwidth, less latency and less congestion than your typical connection across the public internet.
When using the Gateway service, you must use Citrix Workspace. You cannot use StoreFront with the Gateway service.
Also, the HDX communication path changes:
Note that the internal traffic path can be altered using the rendezvous protocol, covered later in the article.
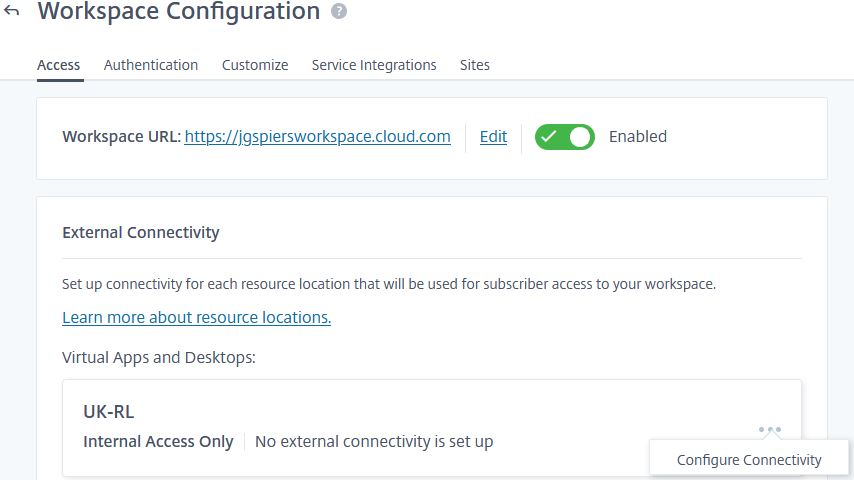
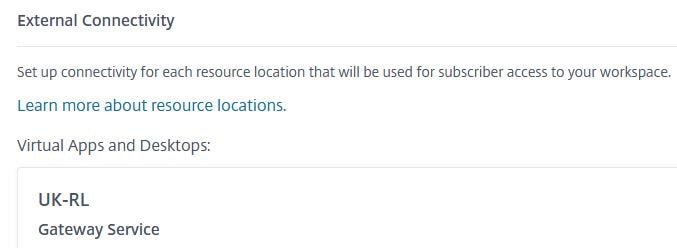
To enable the Gateway service, navigate to Workspace Configuration -> Access and under External Connectivity, click the ellipsis beside your resource location and select Configure Connectivity.
Select the Gateway Service radio box and click Save.
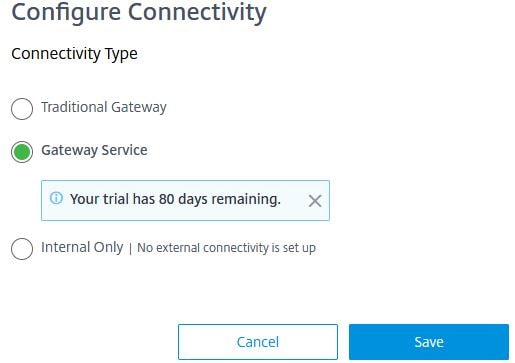
The resource location will now show as using the Gateway service. That’s it, done.
Browse to the Workspace URL from an internet device and you will be able to launch your published resources, securely through Gateway service.
However, when users are connected to the corporate network and use Workspace to launch their applications and desktops, the connection still routes through the Cloud Connectors and the Gateway service. As you can see below, one of my sessions is connected via the Cloud Connector IP address.

Wireshark also confirms that the Cloud Connector is sending and receiving ICA traffic from a Gateway service PoP.

This brings us on to the rendezvous protocol.
Rendezvous protocol
There is a new protocol, rendezvous, which allows connections to bypass the Cloud Connectors, eliminating this extra unnecessary traffic hop and increasing the scalability of your Cloud Connectors. Cloud Connectors can support up to 1000 concurrent sessions, but if growing above that, the Cloud Connector would become a bottleneck and you would have to deploy more.
The rendezvous protocol allows the VDAs to connect directly to the Gateway service, specifically the Flow Redirector, which is a component on the Gateway service, bypassing the Cloud Connectors in your resource location for HDX traffic once the session is established.
If the VDA cannot make a direct connection to Gateway service, then it will fall back to the Cloud Connectors.
For VDAs to be able to directly connect to the Gateway service, there are a few conditions that must be met:
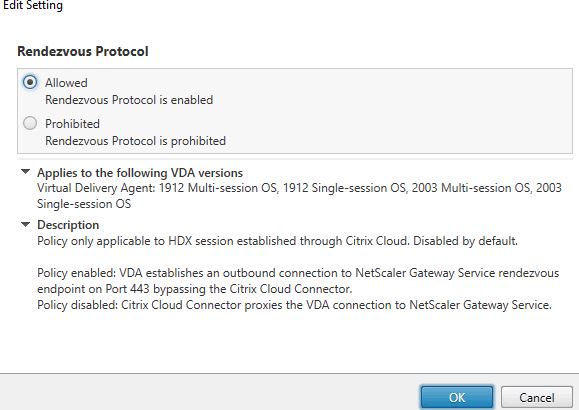
Enable Rendezvous Protocol policy
Set the Rendezvous Protocol policy to Allowed from Studio in Citrix Cloud.
Configure Cipher Suite order
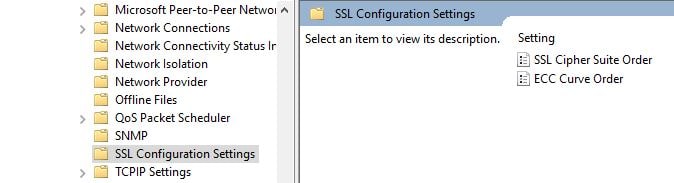
Using a Group Policy Object targeted against your VDAs, navigate to Computer Configuration -> Administrative Templates -> Network -> SSL Configuration Settings -> SSL Cipher Suite Order.
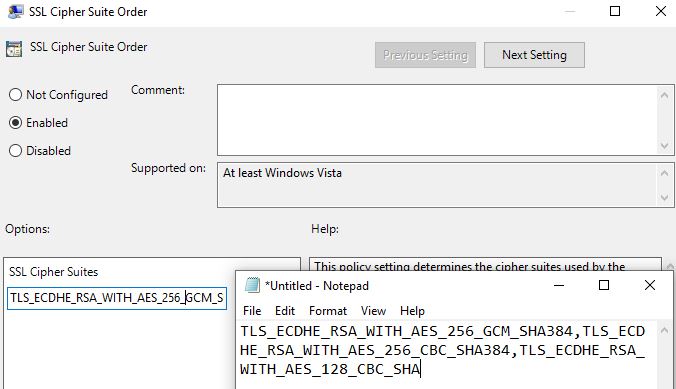
Make sure the Cipher Suite order begins with the below:
TLS_ECDHE_RSA_WITH_AES_256_GCM_SHA384,TLS_ECDHE_RSA_WITH_AES_256_CBC_SHA384,TLS_ECDHE_RSA_WITH_AES_128_CBC_SHAThere are many more Cipher Suites configured in Windows, so adjust those in the order as necessary. Click OK.
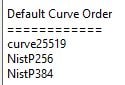
Note that there is no need to specify the ECC Curves in the Cipher Suite order. Windows defines those in a separate policy setting, the ECC Curve Order, which is already configured correctly by default.
Confirming Rendezvous
Now when you launch a resource from Workspace, it should connect via the Gateway service, rather than the Cloud Connector.

You can further confirm that rendezvous is working by viewing the session information from the VDA. The Local Address will be 0.0.0.0 with a random 5-digit port number at the end, and the Remote Address is showing the Gateway service IP the session is connected to.

Wireshark shows a PrepareRendezvousSession operation as part of a SOAP message.

The below capture shows my client IP (1.80) performing an SSL handshake with the Gateway service to secure the communication.

The Cipher Suite TLS_ECDHE_RSA_WITH_AES_128_CBC_SHA is agreed by both parties.

Rendezvous considerations
- Proxy support for Rendezvous is on the roadmap, but for now you cannot use it with a proxy.
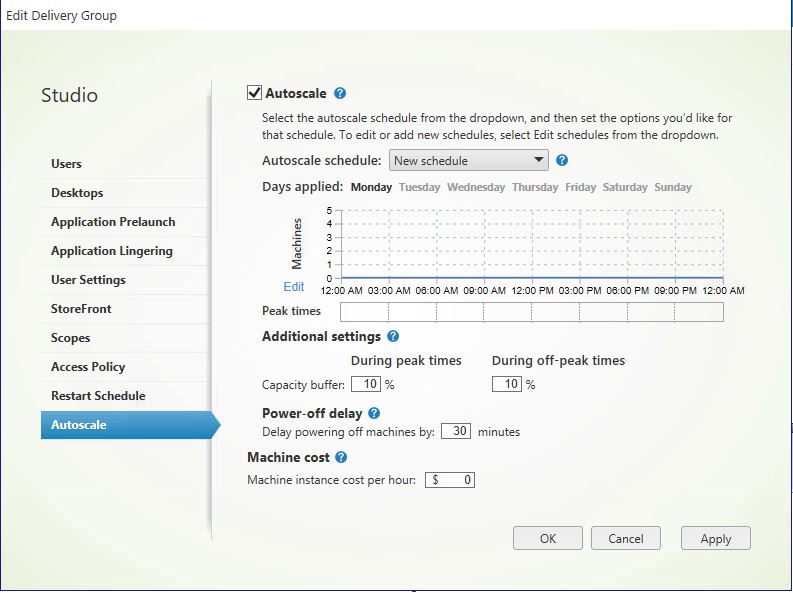
Autoscale
Autoscale is an exclusive Virtual Apps and Desktops service power management feature, which replaces the deprecated Smart Scale technology and integrates into the Studio power management solution. The focus of Autoscale is to address typical cloud use cases like burst, disaster recovery, high availability, seasonlity short-term scale, cost savings etc.
Autoscale support
- Autoscale supports all the platforms that Virtual Apps and Desktops service supports such as Citrix Hypervisor, Hyper-V, VMware vSphere, AWS, Azure, GCP etc.
- RDS and VDI workloads are supported for power management.
Migrating from Smart Scale
To migrate from Smart Scale to Autoscale, you export the data from the former and import to the latter. See CTX250034 for more information.
Autoscale power management capabilities
The capability of Autoscale can generally be described as three different categories:
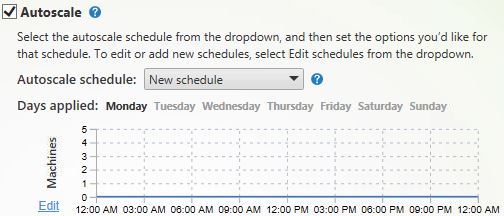
Schedule-based scaling
If there are set working patterns in your organisation, e.g. 9am-5pm, you can define the number of machines, or a percentage of the Delivery Group that must be powered on. You can create multiple schedules for different days of the week to suit your needs.
Load-based scaling
If work patterns are not so predictable, Autoscale can dynamically power on and off machines in a Delivery Group as the load increases and decreases. Load-based scaling works together with schedule-based scaling so that users do not have to wait on machines to power on if there is a sudden spike in new sessions being initiated.
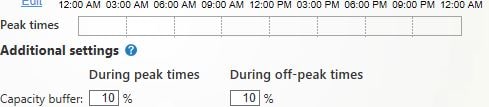
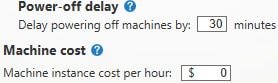
Miscellaneous settings
This section allows you to control how long a machine is kept powered on, between 0-60 minutes, until it is powered off, which helps to avoid machines going up and down during volatile session demands. You can also define the machine instance per hour, in $, which helps calculate the cost savings of all the Autoscale settings you configure against the Delivery Group. This information is viewable from Monitor -> Trends -> Machine Usage.
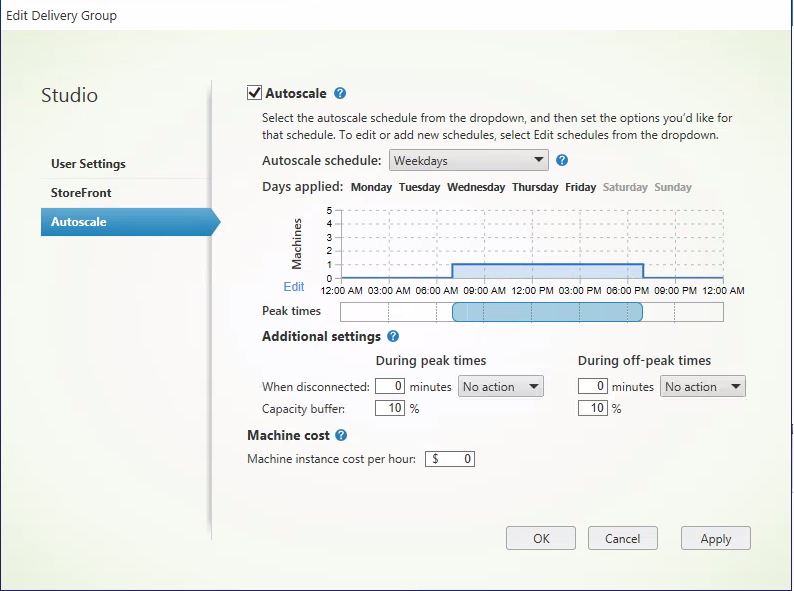
Autoscale user interfaces
There are slightly different user interfaces for the pooled VDI, static VDI, and RDS Delivery Groups. The settings are farily consistent though:
Pooled VDI
Static VDI
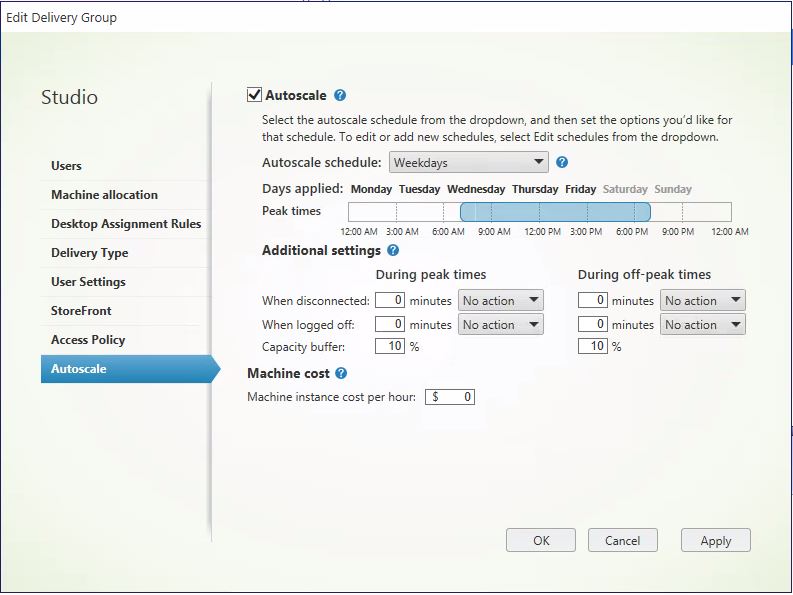
RDS
Enable Autoscale
By default, Autoscale is actually enabled for each of your Delivery Groups.
If you disable Autoscale, any machine in the Delivery Group that has been put into drain state by Autoscale will be taken out.
Schedules quick information
- Schedules operate based on the time zone configured against a Delivery Group.
- There are two default schedules:
- Weekdays: This schedule keeps one machine powered on from 7am-6:30pm, and non during off-peak times. The default capacity buffer is set to 10% during both peak and off-peak times.
- Weekend: This schedule keeps all machines powered off.
- Only machines that are registered are considered by the schedules. It does not make sense to include non-registered machines in capacity calculations.
- You can create multiple schedules against a single Delivery Group. A schedule can span one or multiple days. You use the Autoscale schedule drop-down to create new schedules, and also to select the schedules you want to define.
- For pooled VDI, a schedule can span all or multiple hours of the day, and you have full flexibility of how many machines are powered on during each hour, or the percentage of the Delivery Group that is powered on during each hour.
- For RDS Delivery Groups, you have full flexibility of how many machines are powered on during each half hour.
- You cannot create two schedules against a Delivery Group that target the same day. If you do, the schedule you created most recently will clear out the previous schedule.
- You cannot have duplicate schedule names.
- Schedule names cannot contain the following characters:
- \, /, ;, :, #, ., *, ?, =, “, ‘, `
- Braces: [], (), {}
- Pipes: |
- LT or GT symbols: <>
Disconnected VDI machines across time periods
If you have VDI machines with disconnected sessions in a peak or off-peak time period that has the When disconnected action set to No action, and those machines transition to a peak or off-peak time period that does have an action set, such as Shutdown, those actions are executed 10 minutes after the machine transitions to the new time period.
This was not the case in earlier releases. If you do not want this new behaviour to apply to your VDI machines:
- Set the LegacyPeakTransitionDisconnectedBehaviour DWORD under HKLM\SOFTWARE\Citirx\DesktopServer to 0x1
or
- Run PoSH command Set-BrokerServiceConfigurationData HostingManagement.LegacyPeakTransitionDisconnectedBehaviour -SettingValue $true
Before a machine can have a power action applied to it after a period transition, it must meet the following criteria:
- Have a disconnected session.
- Have no pending power actions.
- Belong to a VDI Delivery Group that transitions to a different time period.
- Has a disconnected session during a peak time for example that transitions to an off-peak period where a power action is set.
Capacity buffer
A capacity buffer can be set against a static VDI, pooled VDI or RDS Delivery Group, allowing a percentage of desktops to be powered on above the normal schedule, which helps prevent end-users waiting on desktops powering on in the event of a surge in new session launches.
Note for static VDI, unassigned desktops are powered on based on the total number of unassigned machines in a Delivery Group. The default capacity buffer is 10%. After all machines are assigned, the capacity buffer does not process any future power actions against the static VDI desktops.
Capacity buffers are set against peak and off-peak times.
For RDS Delivery Groups, the capacity buffer is defined as a percentage of the total capacity of the Delivery Group in regards to load index. For VDI Delivery Groups, the capacity buffer is defined as a percentage of the total number of machines in the Delivery Group.
When defining capacity buffers for your peak and off-peak times, consider the cost your organisation may incur versus user experience when it comes to waiting for a desktop to power on before a session can be established, more so when there is a sudden spike in the number of sessions being launched by your end-users.
Tags
You can use tags with Autoscale, so that only specific machines in a Delivery Group are power managed. Apply a tag to one or more machines, and then use the PowerShell SDK to set the tag against a Delivery Group you want Autoscale to power manage, using the Set-BrokerDesktopGroup -RestrictAutoscaleTagUid cmdlet.
Drain
When user sessions drop and the schedule does not require as many machines to be powered on, Autoscale always attempts to scale down the number of powered-on machines in a Delivery Group to match the configured schedule and capacity buffer. Any excess machine with the lowest number of sessions is placed into a drain state, and powered off when all sessions have cleared.
If there is a sudden surge in new connections, Autoscale will not power on new machines, but direct sessions to machines in a drain state if applicable.
Estimated savings
To get a view of how much savings your organisation makes when using Autoscale to power off machines when they are not needed, you can refer to the Monitor -> Trends -> Machine Usage section of the Virtual Apps and Desktops service. A pie chart will show you the estimated savings for each of your Delivery Groups that Autoscale is power managing.
Direct Workload Connection (Limited Preview / formerly Network Location Service)
DWC, which is currently in Limited Preview, is designed to overcome the undesired traffic flow found with internal connections using a Workspace deployment that has the Citrix Gateway service enabled. You see, when internal users with direct connections to their VDAs launch a resource from Workspace, and the Gateway service is enabled as previously discussed, the ICA traffic flows out of the client network, to the Gateway service, and back into the client’s network, rather than directly to their VDA. This understandably introduces some unwanted latency, and also introduces unnecessary traffic hops through Cloud Connectors if the Rendezvous protocol is not enabled or configured correctly.
The Network Location Service, which Direct Workload Connection uses, will allow end-users initiating internal connections to connect directly to their VDA resources, bypassing the Gateway service completely. This is achieved by configuring network locations, the public IP ranges of the networks your internal users will be connecting from, using the Network Location service PowerShell Module.
With this configured, and with users launching resources from one of the public IPs configured using the PowerShell module, Citrix Cloud will be able to determine that the user is coming from an internal network and routes the ICA connection direct to the VDA.
Network requirements
- If you have corporate and guest networks e.g. guest Wi-Fi, the networks must have separate public IP addresses otherwise only the corporate network connected users can launch Virtual Apps and Desktops sessions.
- Public IPs you configure for NLS must be of networks that have direct connections to the VDAs users will be attempting to connect to.
TLS requirements
- TLS 1.2 must be enabled in PowerShell to connect to the Network Location service. To force PoSH to use TLS 1.2, run command [Net.ServicePointManager]::SecurityProtocol =[Net.SecurityProtocolType]::Tls12
Workspace requirements
- You must be using on-premises VDAs to deliver virtual resources to your end-user workspace subscribers, with Virtual Apps and Desktops set to Enabled under Workspace Configuration -> Service Integrations.
Workspace app for HTML5
- If you have users connecting to resources using Workspace app for HTML5, you must secure the ICA traffic. See https://jgspiers.com/secure-ica-connection-vda-ssl/ for details on how to encrypt ICA traffic between client and VDA.
Required information for NLS
Besides your public IP addresses where internal users will connect from, you must also obtain your Citrix Cloud customer ID, client ID, and client secret.
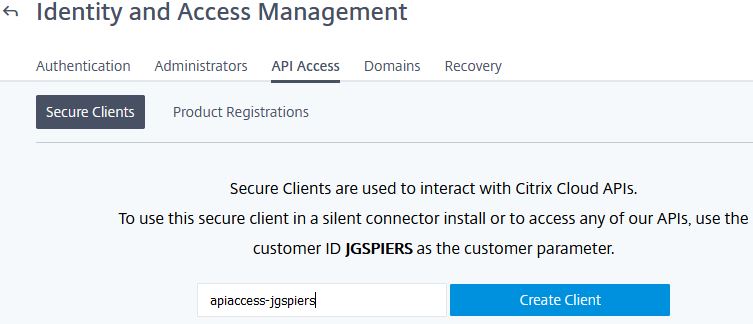
To obtain your customer ID, create a client ID and client secret, from Citrix Cloud, browse to Identity and Access Management -> API Access.
Note the customer ID, in my case JGSPIERS. Enter a name for the client and click Create Client.
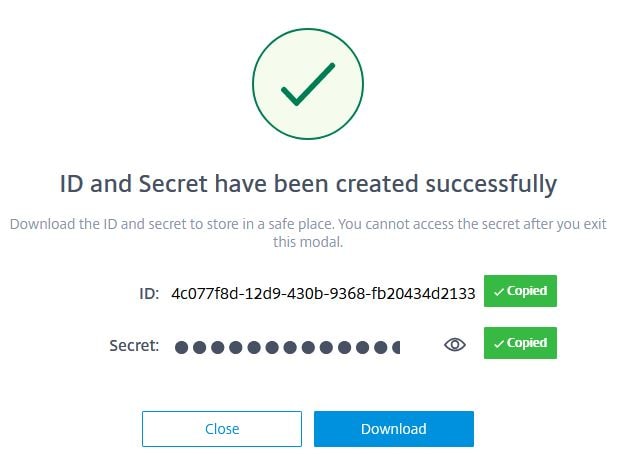
Copy your client ID and client secret, storing them in a safe place. These values cannot be viewed again from the Cloud console. Alternatively, you can click the Download button to download the values to a CSV file. Click Close.
Create network locations
Firstly download the Network Location service PowerShell module, nls.psm1 from the Citrix Github repository.
Open PowerShell and browse to the location where you previously downloaded the Network Location service PowerShell module, nls.psm1. Run cmdlet Import-Module .\nls.psm1 -force

Next create three variables for your customer ID, client ID and client secret.

Be sure to force PowerShell to use TLS 1.2 using command [Net.ServicePointManager]::SecurityProtocol =[Net.SecurityProtocolType]::Tls12

Connect to the Network Location service using the three variables created previously.

Now create a new NLS Site for each of your public networks. The command will be New-NLSSite -name “yourname” -tags @(“yourtags“) -ipv4Ranges @(“yourpublicIPv4range“) -longitude yourlongitude -latitude yourlatitude.

Verifying NLS
Now when an internal user launches a session from this public network, Citrix Cloud will detect the connection is coming from an internal network and route it direct to the VDA. You can see this from Studio.

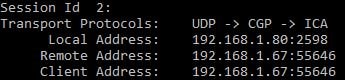
You can also see from the session details that the local address (VDA) and client address are on the same subnet, and EDT is being used to transport the ICA traffic.
Enlightened Data Transport Protocol (Adaptive Transport)
For those ICA packets to traverse the network using UDP, sessions brokered from the Virtual Apps and Desktops service must be internal/direct to the VDA or via an on-premises Citrix Gateway.
Citrix Gateway service currently does not yet support EDT. Citrix plan for a Tech Preview later this year. Also note that Rendezvous will be required for EDT through the Gateway service.
berks
May 21, 2020Excellent article George, thank you for sharing.
Pingback: Citrix Cloud Deployment Options | eG Innovations
Nishant Sharan
September 22, 2020Hi George,
Can Two Public Cloud be used as Resource Location? (Like Azure and AWS or Azure and Oracle)
Pingback: Citrix Cloud Issues – What is Citrix Cloud | eG Innovations
Rajat Patil
March 13, 2022Superb content!! Thanks for sharing such-a in depth and lucrative information on Citrix… I was looking for this and my search ends here…
It’s really a benchmark for young IT professionals…
Keep it up your great work…
Thanks once again!!!
J
March 2, 2026Requires a geolocation now…Get-Help is your friend.