In this article I explain steps that can be taken to secure management access to NetScaler ADCs. I also explain a common scenario where two NetScaler’s residing in a highly available configuration each need their own unique certificate for HTTPS management communication.
As a best practice, you shouldn’t enable management access on Subnet IPs even though that is possible. Many administrators do so especially when NetScaler is part of a highly available setup because it allows you to always reach the primary instance just by browsing to the SNIP address.
Instead, it is better to only allow management access to NetScaler IPs, also referred to as the management IP address of NetScaler. Other steps that are recommended to secure access to NetScaler is:
- Restrict access to the NetScaler IP using firewall rules so only certain management machines and personnel can browse to the NetScaler IP.
- Block port 80 TCP access to the NetScaler IP by again using ACLs either on your firewalls that sit in-front of NetScaler or on the NetScaler itself.
- Enable Secure Only on NetScaler so that only HTTPS communication is allowed to the appliance for management access.
- Create unique certificates on each NetScaler appliance that is part of an HA configuration and prevent those certificates from synchronising to their partner.
In this article you are shown how to:
- Configure ACLs directly on NetScaler to allow just a single management server access to the management portal of NetScaler over HTTPS.
- Configure NetScaler to allow only secure access to the management GUI.
- Install certificates on each appliance whilst blocking synchronisation to ensure browsers don’t flag certificate errors.
Contents:
- Configure ACLs on NetScaler to allow management access from a single server
- Configure NetScaler to allow secure access only
- Install unique certificates on each NetScaler that is part of HA
Configure ACLs on NetScaler to allow management access from a single server:
You firstly need to make sure that internal management communication is allowed. By default it is, but by running show l3param on the CLI of NetScaler you can confirm that implicitACLAllow is set to ENABLED.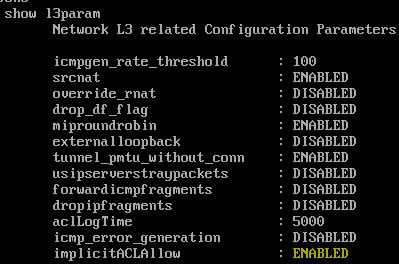
Next navigate to System -> Network -> ACLs -> Extended ACLs -> Add.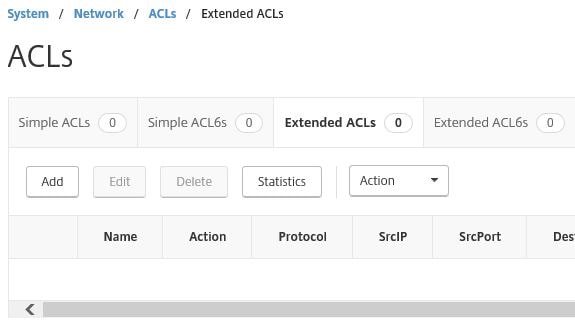
In this scenario we allow one single management server access to VPX1. Specify a Name, set the Priority to 1, specify the management server IP under Source IP Low and the destination NetScaler IP of VPX1 under Destination IP Low.
Set the Protocol to TCP and enter 443 under Destination port low.
Create a second ACL this time with a Priority of 2 and Destination IP Low set to the NetScaler IP address of VPX2.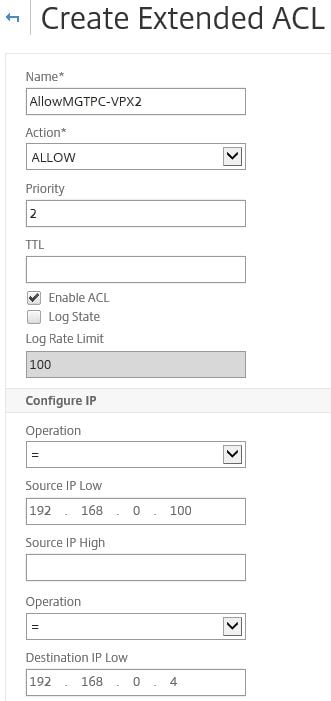
Specify TCP and 443 as before.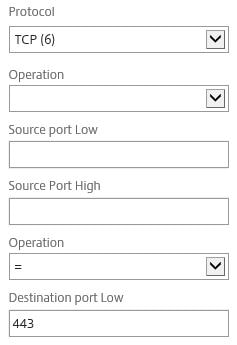
Create a final ACL for denying all other traffic. Specify a Priority of 100.
Enter the VPX1 and VPX2 NetScaler IP addresses under Destination IP Low and Destination IP High. Specify TCP under Protocol and 443 under Destination port low.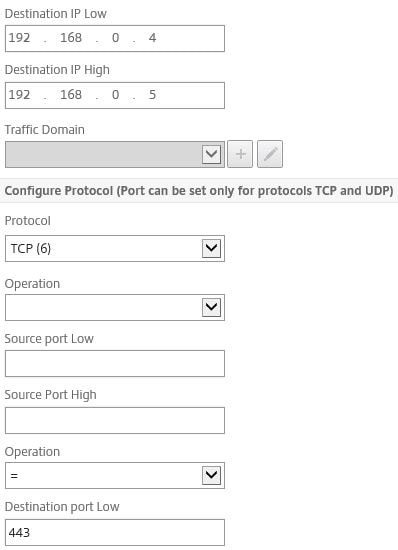
Whilst the ACLs have been created, they have not yet been applied. To apply, select Action -> Apply.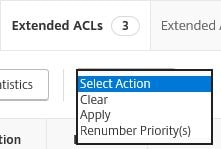
Click Yes.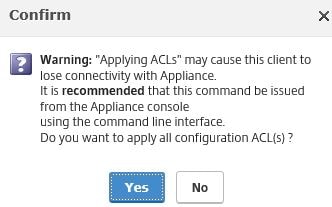
Test access to make sure that you can browse to the management portal of each appliance using your elected management server.
Configure NetScaler to allow secure access only:
By default, you can browse to the NSIP of NetScaler from your web browser over TCP port 80 or 443. By enabling Secure Access Only, we make sure that NetScaler does not accept connections over port 80. To enable this, log on to NetScaler and navigate to System -> Network -> IPs, click on the NetScaler IP and towards the bottom check Secure Access Only. Click OK.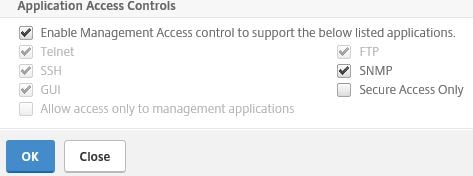 Click Yes.
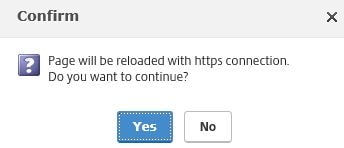 The page at this stage will be reloaded over an HTTPS connection.
Note that you must also enable Secure Access Only on the secondary appliance.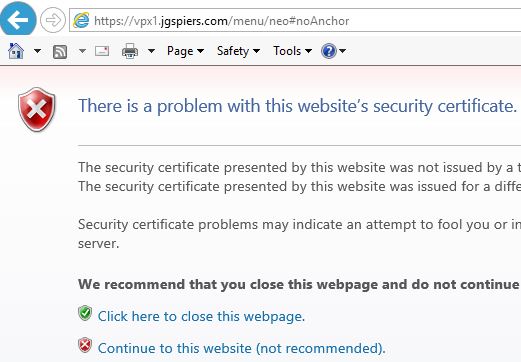
Install unique certificates on each NetScaler that is part of HA:
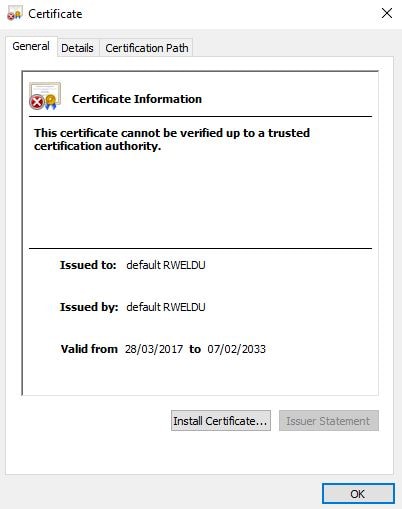
By default, both appliances share the same ns-server-certificate certificate/key pair. This certificate is synchronised between both appliances and the common name is the same.
If we were to browse to the NetScaler management address over HTTPS, by default we get a certificate warning because the common name of this default certificate does not match the URL we specify.
In the event we have two NetScaler appliances in a highly available configuration, we have to make sure that each NSIP management address is protected by a unique certificate that matches the hostname or identifier of the appliance. That causes some challenges because by default certificates in a high availability scenario replicate between both appliances.
So, for example, if I have a certificate for NetScalerOne and I’ve configured NetScaler to use this certificate for the management URL, that configuration will replicate to the second appliance so any browsing to the second appliance will bring about a certificate mismatch error because the certificate won’t match the secondary NetScaler’s management URL.
To get around this, we create two unique certificates (one for each appliance) and store them in a directory on NetScaler that is not synchronised between both appliances.
To begin, on the primary NetScaler navigate to Traffic Management -> SSL -> SSL Files -> Keys -> Create RSA Key.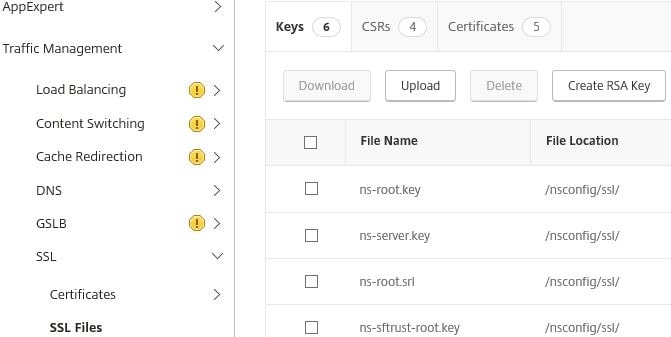
Specify a name. Set the Key Size(bits) to 2048 or above if required, set PEM Encoding Algorithm to DES3 and specify a PEM Passphrase. Click Create.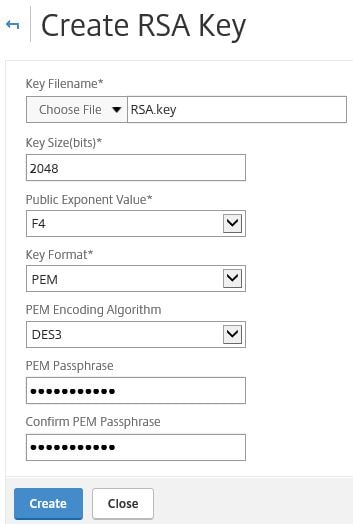
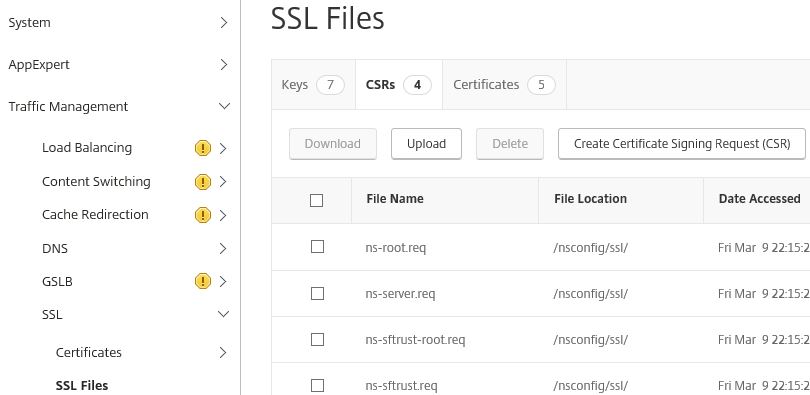
Click on the CSRs tab and click Create Certificate Signing Request (CSR).
Specify a new name for the CSR as below. Under Key Filename browse and select from the appliance the RSA.key file that was created earlier. Enter the PEM Passphrase set against the private key. Select SHA256 as the Digest Method. Under Common Name enter the FQDN of your primary NetScaler and then enter an Organization Name.
Specify a value for Sate or Province, Country and then click Create. 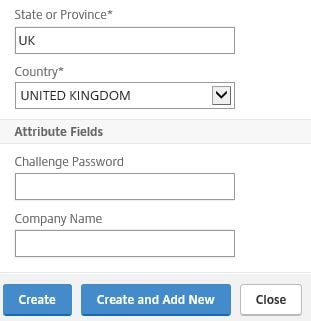
Select the new CSR and click Download. 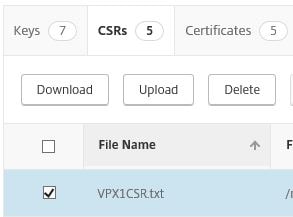
Against your Active Directory Certificate Services server, issue the certreq command against the CSR you created for the primary NetScaler so that you are issued a certificate. 
Save the certificate with an appropriate name to identify the certificate as being for the primary NetScaler. 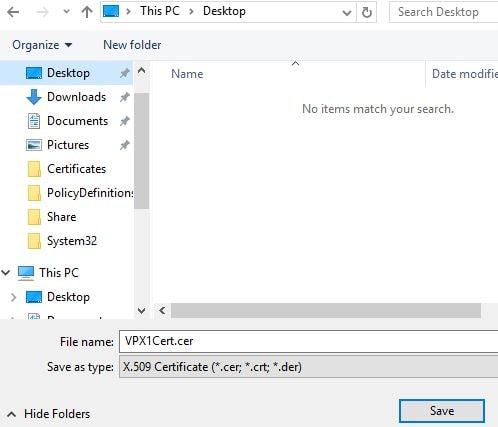
On your primary NetScaler, launch a program such as WinSCP and navigate to /flash/nsconfig/. Create a new directory naming it SSL_NOSYNC. 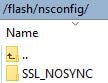
Within the SSL_NOSYNC directory copy the RSA.key key from /nsconfig/ssl/ and the certificate you have just been issued by your Certificate Authority. Place these files in the new SSL_NOSYNC directory.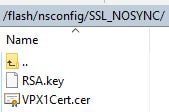
Rename the certificate to a name such as NSIPCert.cer. This certificate name will be the same on your secondary appliance. Delete the RSA.key key and CSR file from /nsconfig/ssl/ on your primary appliance.
At this stage repeat the same steps on the secondary appliance. You will be generating a new RSA key called RSA.key, generating a new CSR and submitting the request to your Certificate Authority. You will then copy both the issued certificate and RSA.key to the newly created SSL_NOSYNC directory on the secondary appliance and deleting the original RSA.key and CSR files from /nsconfig/ssl/.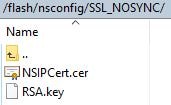
Now on both primary and secondary appliances issue command add ssl certKey NSVPXCert -cert /nsconfig/SSL_NOSYNC/NSIPCert.cer -key /nsconfig/SSL_NOSYNC/RSA.key -Password yourRSAKeypassword.
Save the running configuration by issuing command save nsconf.![]()
The certificate will show up on each appliance as below. Primary NetScaler will contain a certificate with Common Name set to the FQDN of the primary appliance and the secondary appliance will contain a separate certificate with Common Name set to the FQDN of the secondary appliance.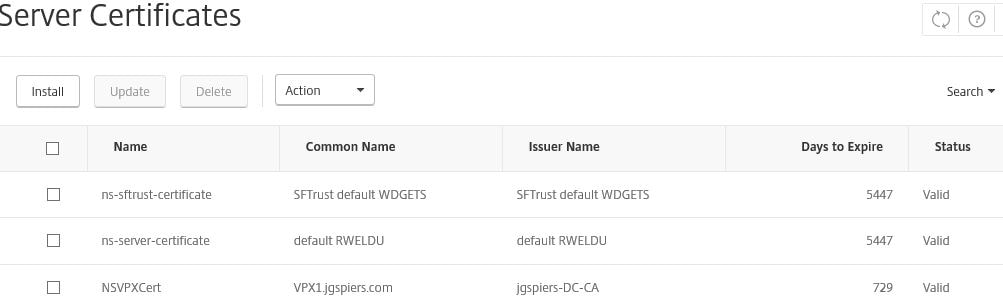
Next navigate to Traffic Management -> Load Balancing -> Services -> Internal Services and click into nshttps-127.0.0.1-443. 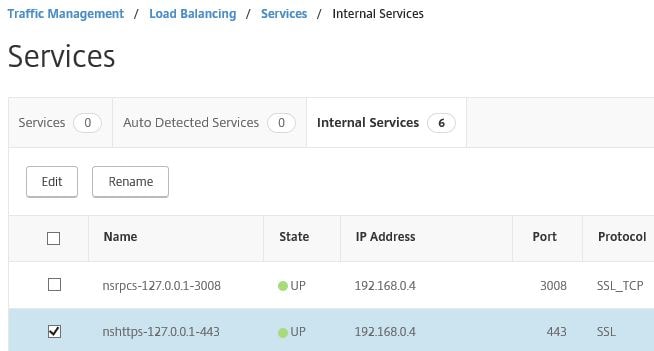
Click on 1 Server Certificate. 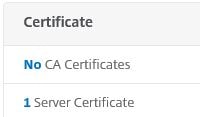
Select the existing ns-server-certificate and click Unbind. 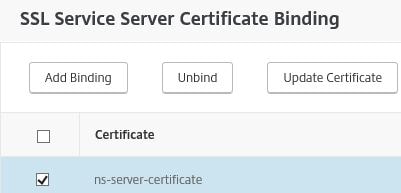
Click Yes. 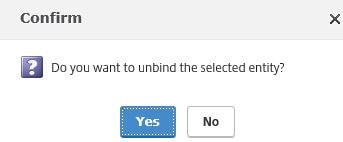
Click Add Binding. 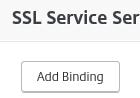
Click Click to select. 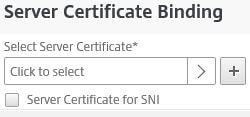
Select the newly imported certificate and click Select. 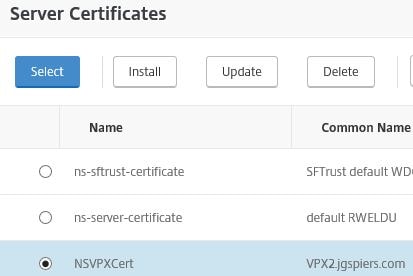
Click Bind. 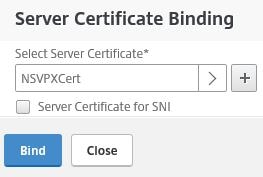
Click Close. 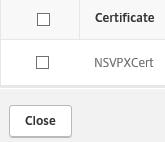
Click Done.
Now repeat the same steps on the remaining appliance.
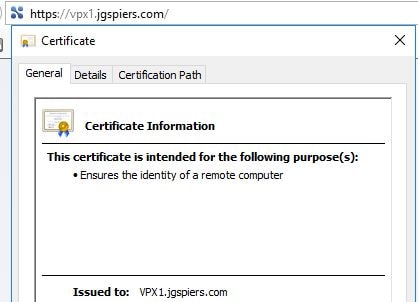
To test, browse to the primary and secondary NetScaler, confirming that you receive the correct certificate from both appliances and that no certificate errors are presented. 
Pingback: Detailed Change Log – Carl Stalhood
Pingback: NetScaler 12 System Configuration – Carl Stalhood
Pingback: NetScaler 12 Certificates – Carl Stalhood
Amit Kumar Singh
May 25, 2018What is source ip low and destination ip low ? Kindly explain as per my understanding management ip is NSIP then why two different ip address in both field.
George Spiers
May 25, 2018The source IP is where the management traffic to NSIP is originating from, in my case that was .100 (my management server). The destination IP is the NSIP (.5), as that is the destination IP receiving the management traffic.
Pingback: Site Updates – March 2018 – Carl Stalhood
Pingback: Certificates – Citrix ADC 13 – Carl Stalhood
Anonymous
April 3, 2020Why can’t we simply just import an SSL SAN Certificate that contains the common name on both of the NetScaler VPX’s and bind it to the Internal Services (x.x.xx:443)? Don’t forget enforce “Secure Access Only” on the NSIP.
George Spiers
May 22, 2020You can.
George Spiers
July 11, 2020You could do that. This article is for those that do not use a SAN certificate.
jeremy mcatee
May 2, 2023If i use a SAN cert for both appliance names; just install like a regular cert and allow it to sync over via HA?
Alan Dunne
July 23, 2020Why does my secondary NS keep getting its cert replaced by the default “ns-server-certificate” cert on the binding ?
The primary NS is fine and the secondary is setup to pull the cert from the SSL_NOSYNC folder.
When i apply the cert all is fine for maybe an hour or so, im assuming untill the primary syncs to the secondary NS , but whats strange is that its not putting the primary cert on its just going back to the default ns-server-certificate on the 443 binding.
Any help is much appreciated
Thanks
Roger Mialkowski
January 11, 2021Will we still need to use the CLI when the certificates come up for renewal? If we use the GUI, I think it would store the updated certificate in the ssl directory instead of SSL_NOSYNC, correct?
Thorsten Gosny
March 5, 2021Thanks George for this article. After some discussion, a acolleague and me tried using a SAN certificate, containing all DNS names for our HA setup. This prevents you from executing the steps to prevent snchronization across the nodes.
Seems to work fine, it can be synchronized across the HA nodes and creates no problems with hostname mismatch. You also have to do the import once, and on the second node only to bind the certificate.
Gourisj
May 13, 2021How can we check, what are list of VIP’s are listening on management interface on netscaler?
there is some wrong configuration done. need to figure it out the list of VIP’s which run on or listen to management interface.
~Thanks.
angel m
March 14, 2022Hi George.
What if I use the same key for both certs and just run the command on the primary vpx, thinking a bit like they do in another Citrix post?
My AD team is a bit slow giving the certificates, but before I found the post they were both created with the same key, and as I followed the configuration I pasted the same key in the SSL_NOSYNC folder and I can see the correct CN in both VPX.
Do you think this could result in an error in the future?
Ameenovv
January 31, 2023Greetings George, thank you for the clear explanation, will a wild card cert work for both appliances in HA ?