The NetScaler Management and Analytics Service was released in the 2nd quarter of 2017 as a cloud offering from Citrix Cloud. Using MAS allows you to automate the deployment, management and monitoring of NetScaler appliances hosted across single or multiple resource locations.
There also is an on-premises variant of MAS. For a detailed guide see https://jgspiers.com/citrix-netscaler-management-analytics-system/
For a list of what’s new, fixed and known issues with NetScaler MAS Service, see https://docs.citrix.com/en-us/netscaler-mas/netscaler-management-and-analytics-service/release-notes.html
The MAS Service supports NetScaler MPX, VPX, SDX, CPX, NetScaler Gateway and NetScaler SD-WAN appliances. To manage such appliances, you install a NetScaler MAS Agent in your Resource Location. The agent collects all required data from your NetScaler appliances and sends to the MAS Service within Citrix Cloud.
♣ Features not supported (October 2017)
♣ Supported web browsers
♣ MAS Service Agent System Requirements
♣ MAS Service Firewall Port Requirements
♣ Minimum NetScaler versions required
♣ Minimum XenApp/XenDesktop versions required
♣ Minimum Citrix Receiver versions required
♣ Thin Clients supported for HDX Insight
♣ HDX Insight data retention periods based on NetScaler licenses
♣ Install MAS Service Agent
♣ Add first Instance to MAS
♣ Automate a Load Balancing Deployment using StyleBooks
♣ MAS Dashboard
♣ Create Site
♣ Manage Instances
♣ Viewing Events generated from Instances
♣ Instance Groups
♣ Delete or view details of MAS Agents
♣ Viewing Reports from all Instances
♣ Viewing Event Messages for all Instances
♣ Configure Syslog
♣ Create Rules
♣ Configure Event Severity
♣ Viewing the SSL Dashboard and installing Certificates
♣ Configure Enterprise Policy Settings
♣ View SSL Audit Trail
♣ Create Configuration Job
♣ Maintenance Tasks
♣ Viewing Configuration Audit
♣ Create Audit Template
♣ Sites and IP Blocks
♣ Network Functions
♣ View and Manage Load Balanced Virtual Servers and Services
♣ Generate Reports
♣ Thresholds
♣ Analytics
♣ Deploy extra MAS Agents and Prune Events/Syslog messages
♣ Configure Role Based Access Control
♣ Change Data Record settings
♣ Configure how long data persists
♣ Create Threshold
♣ Manage Subscriptions and Auto-selection of managed Virtual Servers
♣ View Audit Log Messages
♣ Enable Insight
♣ Extract saved configuration from NetScaler and use in an Audit Template
Features not supported (October 2017):
Whilst NetScaler MAS from Citrix Cloud provides many of the features available in the on-premises version, the following features are currently not supported as of October 2017:
- Deployment
- Migrating Insight Center to NetScaler MAS Service.
- Integrating NetScaler MAS Service with Citrix Director.
- Application Analytics and Management
- Managing and monitoring HAProxy instances.
- Advanced analytics.
- Networks
- Support for NetScaler SD-WAN Enterprise Edition.
- Backup and restore of NetScaler instances.
- Physical downloads of backups from NetScaler instances.
- Physical download of SSL Certificates and Keys from NetScaler instances.
- Record and Play functionality in Configuration Jobs.
- NetScaler VPX check-in/check-out licensing.
- NetScaler pooled capacity.
- Web Insight, SSL Insight, TCP Insight, Video Insight and WAN Insight.
- Limited system settings.
- Orchestration
- Integration with OpenStack and VMware NSX Manager.
- NetScaler automation in Cisco ACI’s Hybrid Mode.
- Container Orchestration: Integration with Mesos/Marathon and Kubernetes.
Supported web browsers:
- Internet Explorer 11+.
- Chrome 19+.
- Safari 5.1.1+.
- Firefox 3.6.25+.
MAS Service Agent System Requirements:
An Agent is required within your Resource Locations that have a NetScaler presence. The Agent acts as the communication broker between your managed NetScaler instances and Citrix Cloud. The Agent can be installed on Azure, AWS, XenServer, ESX, Hyper-V or Linux KVM. The requirements for the MAS Agent are:
- 8GB RAM with 32GB RAM being recommended by Citrix for better performance.
- 4 vCPU with 8 vCPU being recommended by Citrix for better performance.
- 120GB HDD with 500GB recommended by Citrix for better performance.
- 1Gbps NIC.
MAS Service Firewall Port Requirements:
| Protocol | Port | From | To | Details |
| TCP | 80/443 | MAS Agent | NetScaler/SD-WAN | NITRO communication |
| TCP | 22 | MAS Agent | NetScaler/SD-WAN | SSH Communication |
| UDP | 4739 | NetScaler/SD-WAN | MAS Agent | AppFlow Communication |
| ICMP | MAS Agent | NetScaler/SD-WAN | Detect network reachability | |
| SNMP | 161, 162 | NetScaler | MAS Service | SNMP Events |
| Syslog | 514 | NetScaler/SD-WAN | MAS Service | Syslog |
| TCP | 5557 | NetScaler | MAS Agent | Logstream Communication |
Minimum NetScaler versions required:
- For StyleBooks – 10.5 and later.
- For Monitoring/Reporting and using Configuration Jobs – 10.5 and later.
- Note: Standalone Access Gateway Standard appliances are not supported by MAS.
- For HDX Insight – 10.1 and later.
- NetScaler 12.0.57.24 or 12.0.58.15 recommended to make use of NSAP virtual channel which processes AppFlow more efficiently.
- For Gateway Insight – 11.0.65.31 and later.
- For Security Insight – 11.0.65.31 and later.
Minimum XenApp/XenDesktop versions required:
- For HDX Insight – XenApp 6.5 and XenDesktop 7.0, build 3018.
- 7.16+ recommended to make use of NSAP virtual channel whcih processes AppFlow more efficiently.
Minimum Citrix Receiver versions required:
- Citrix Receiver for Windows 4.0.
- Advised to upgrade to 4.10+ to make use of the NSAP virtual channel which processes AppFlow more efficiently.
- Citrix Receiver for Linux 13.0.
- Citrix Receiver for Mac 11.8.2.
- Advised to upgrade to 12.8+ to make use of NSAP virtual channel which processes AppFlow more efficiently.
- Citrix Receiver for iOS and Android are not currently supported.
Thin Clients supported for HDX Insight:
- WYSE Windows, Linux and ThinOS based Thin Clients.
- 10Zig Ubuntu based Thin Clients.
HDX Insight data retention periods based on NetScaler licenses:
- NetScaler Enterprise – 5 minutes to 1 hour of HDX Insight data retention.
- NetScaler Platinum – 5 minutes to over a month of HDX Insight data retention.
Install MAS Service Agent:
Citrix recommend you install a MAS Agent in each datacentre that hosts NetScaler instances to be managed by MAS in Citrix Cloud. There is no high availability option atleast for the moment so all agents are active. To deploy multiple Agents, you deploy the first Agent as I am about to show you and then from the MAS Service in Citrix Cloud use the web application console to deploy any additional number of Agents.
To get started, log on to https://citrix.cloud.com and click Manage under NetScaler Management and Analytics Service.
Click Get Started. You have to deploy an agent to your Resource Location first before doing anything else.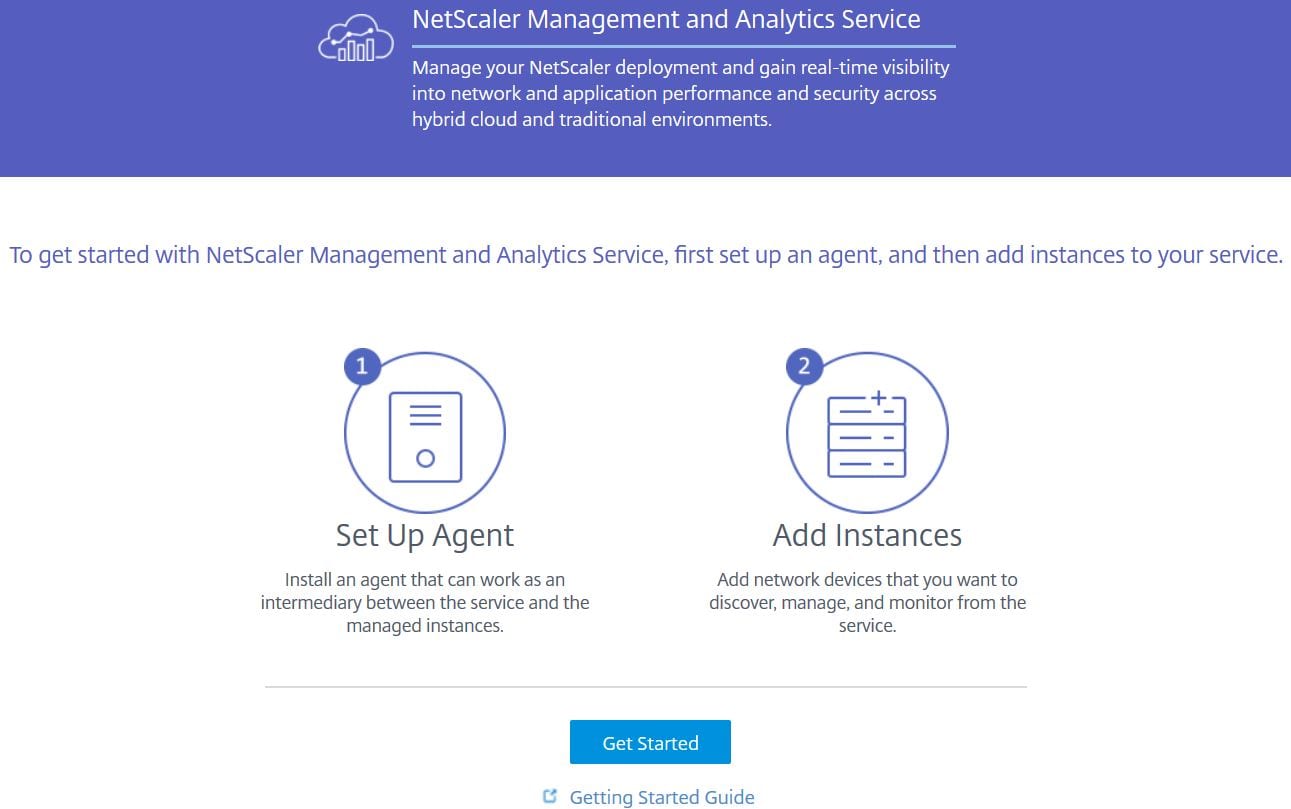
Select your hypervisor from the drop-down and then click Download Image. You can download an Agent image for Hyper-V, Linux KVM, XenServer, ESX or deploy on to Azure and AWS (no image download required). Deploying to Cloud does not require an Agent download, as the image already exists in the Azure/AWS marketplace.
In this guide, I use Hyper-V. Keep this page open as you’ll need to copy/paste the Activation Code and Service URL during Agent configuration. The Activation Codes are unique to each Agent. In the case of installing multiple Agents, you generate new Activation Codes from the MAS console.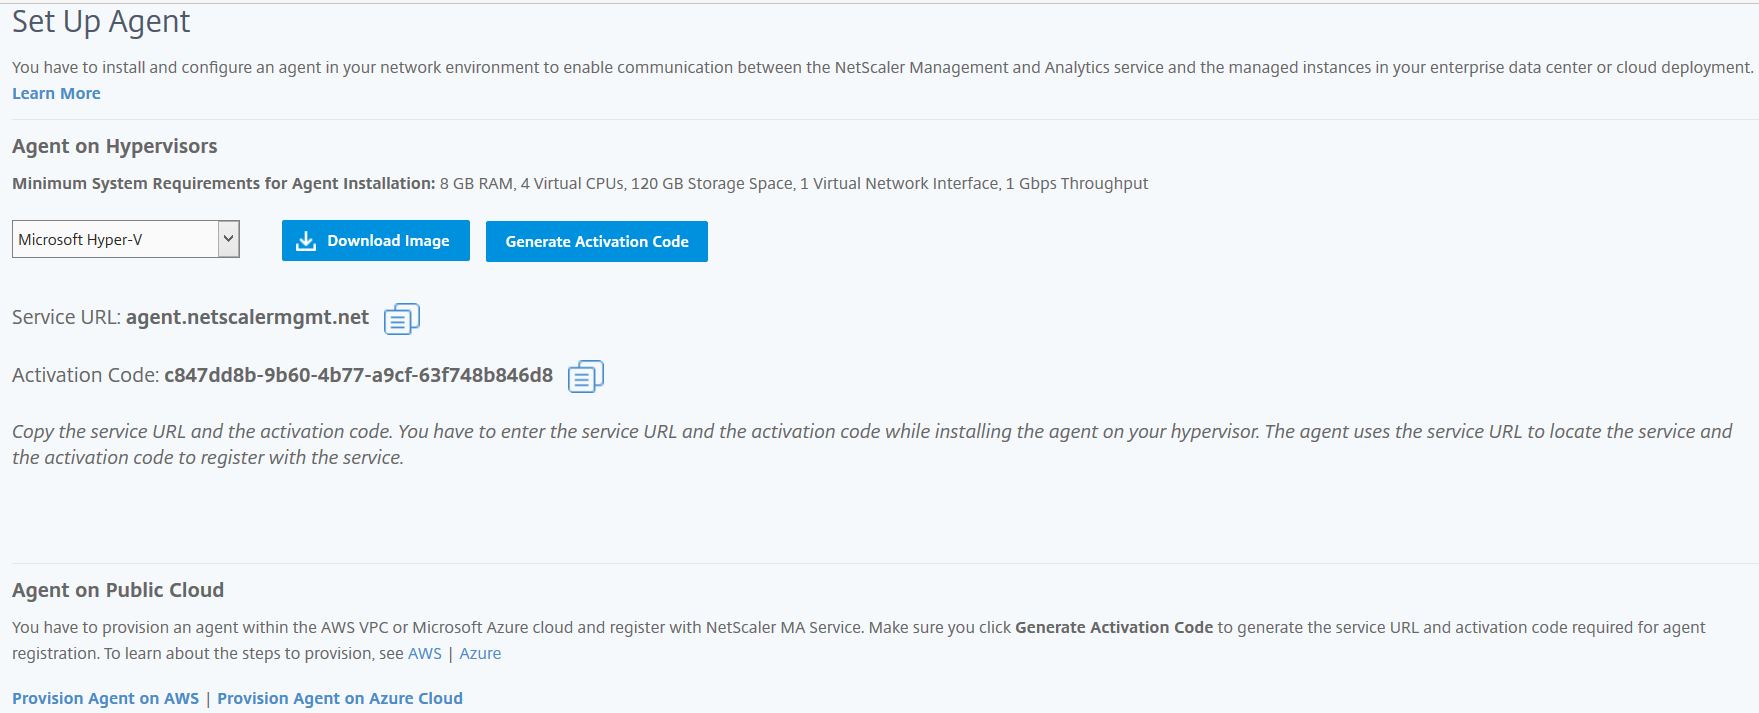
Once the image has downloaded extract it and then take a copy of the Dynamic VHD, uploading it to your Clustered Shared Volumes or datastores. Create a Virtual Machine, attaching the Dynamic VHD to the Virtual Machine to act as the system disk. In the case of ESX, import the downloaded OVF template.
Power on the virtual machine. You’ll reach the MAS initial network configuration section. Using the menu items, configure the network as below making sure the appliance can access the internet to contact Citrix Cloud. Save and quit.
Note: The default credentials for the MAS Agent is nsrecover/nsroot.
Note: If you need to later reconfigure network settings, run CLI command networkconfig.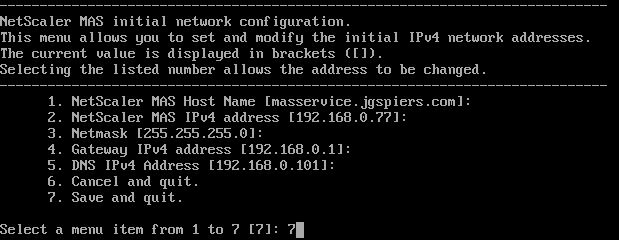
Enter the Service URL and Activation Code that shows on the Citrix Cloud portal. 
Add first Instance to MAS:
Return back to Citrix Cloud and your new agent should show under Discovered Agents. At this stage you can import a NetScaler instance to be managed by the MAS Agent. You can add MPX, VPX, SDX, CPX, Gateway, SD-WAN (WO) and HAProxy instances. Click Add Instances.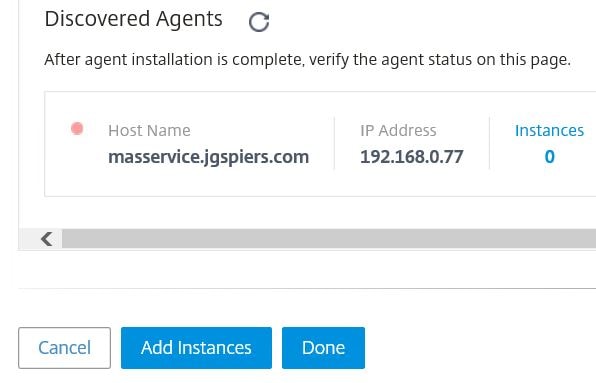
Enter the IP address (NSIP) of your NetScaler appliance to be added to MAS. If you have a NetScaler cluster, specify the Cluster IP address. If you are adding a High Availability pair, add the primary node and the secondary will follow. The ns_nsroot_profile contains default NetScaler credentials. Considering you will likely have a different set of credentials for nsroot, you can click the plus icon to add a new profile. Once ready, click OK.
Note: You can also add instances from a text file containing each instance IP address, using option Import from File.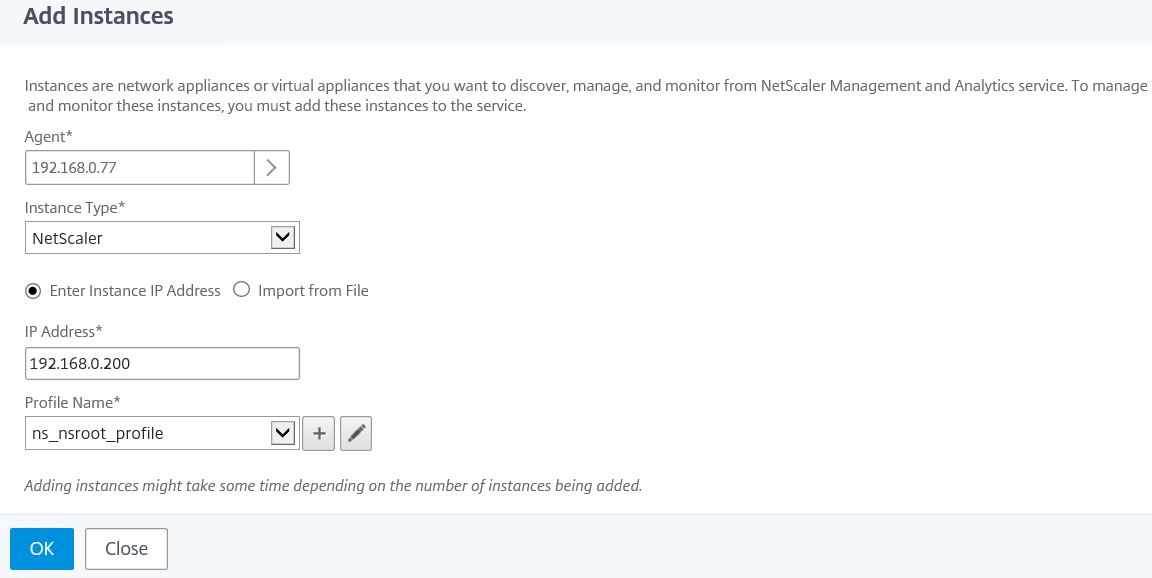
After a few moments, MAS should add the appliance and now Instances shows a value of 1. If you are done adding instances, click Done. If not, click Add Instances and repeat the process.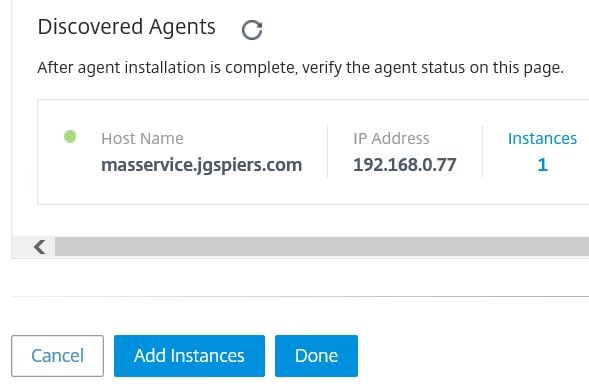
Click OK. 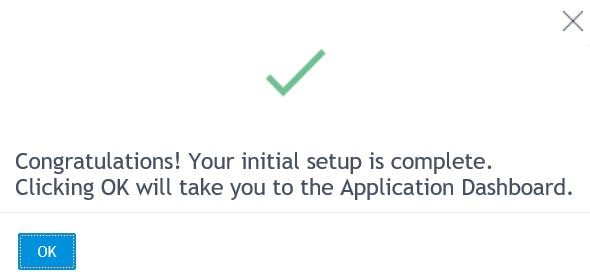
The Dashboard pane under Applications show different Load Balanced Virtual Servers discovered on your managed instances. You can click on each one to view the health status, application score, throughput and so on. The App Score defines how well an application load balanced through NetScaler is performing.
Automate a Load Balancing deployment using StyleBooks:
Under Configuration, a number of pre-built StyleBooks are available (with the option to import your own StyleBooks) that can be used on your managed instances for automation of configuration/deployments. For example, you can use the HTTP/SSL LoadBalancing StyleBook to automate deployment of a Load Balanced Virtual Server. Click on a StyleBook to start a deployment.
Note: To create your own StyleBook, see http://docs.citrix.com/en-us/netscaler-mas/12/stylebooks/how-to-create-your-own-stylebooks.html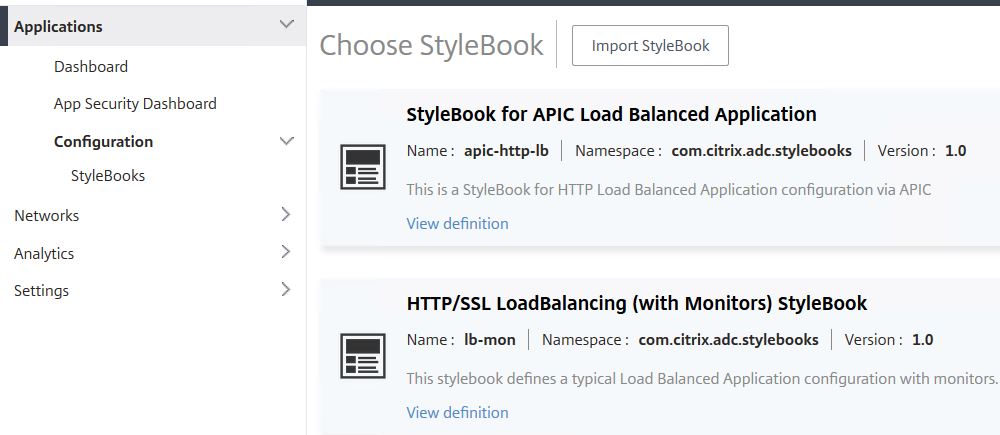
Enter the required details you would normally specify when creating a Load Balanced Virtual Server, including all the back-end server IPs, port and protocol.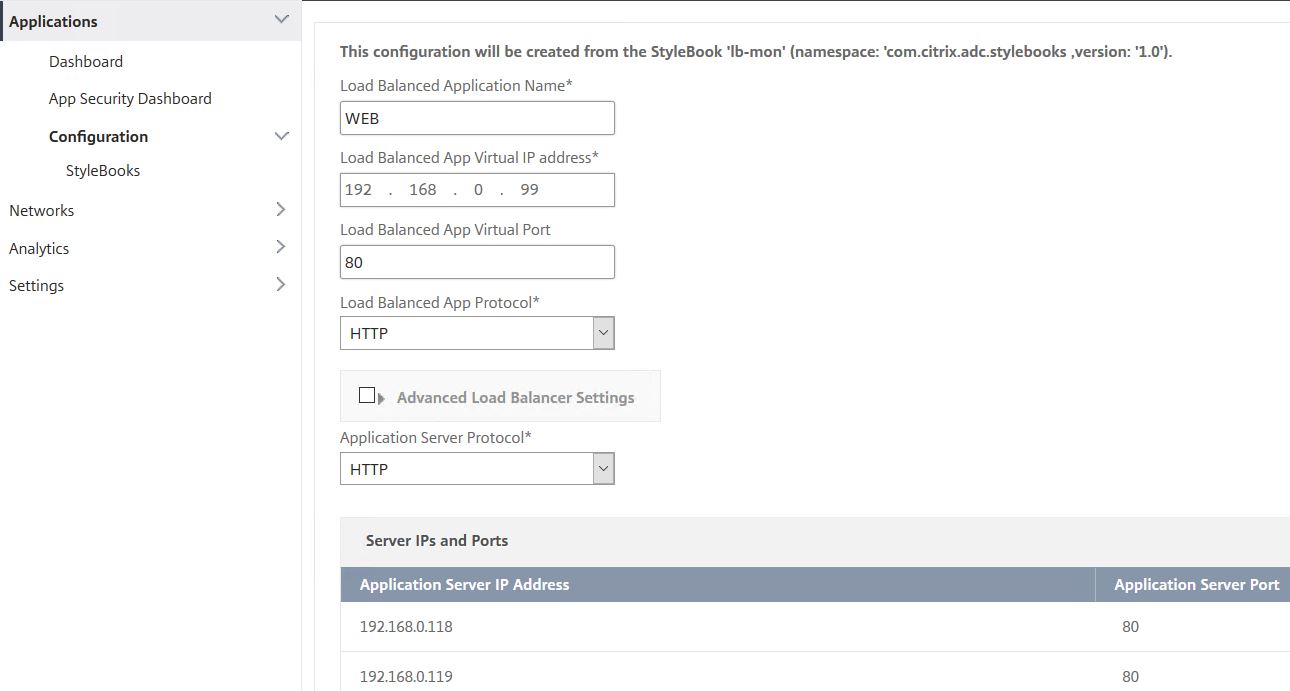
Specify if specific monitors or SSL certificates are required. Select which managed instance(s) you want to deploy the Virtual Server to under Target Instances. You can select multiple instances. You can also perform a Dry Run which won’t apply the configuration to your instances but will perform a test run for evaluation before you run it properly. Otherwise, click Create.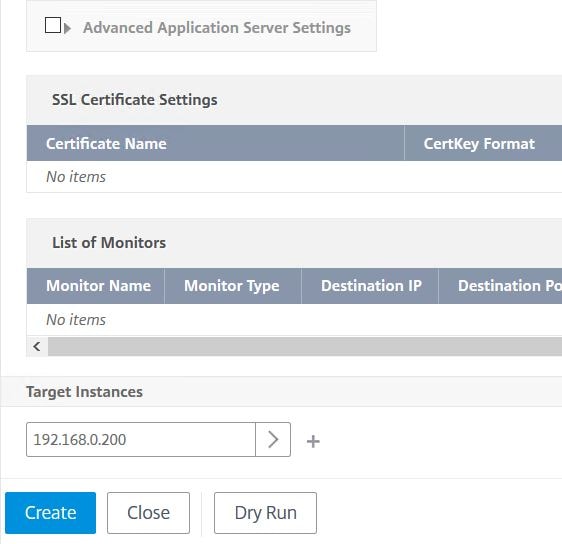
The deployment kicks off and runs through the multiple steps to create a Load Balanced Virtual Server including Server, Service Group and Virtual Server creation and all the bindings. 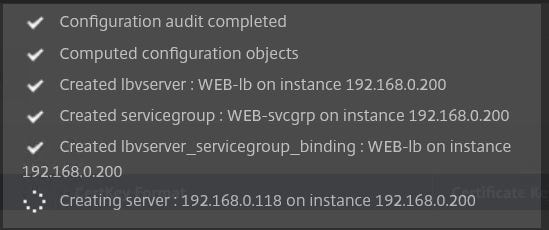
Once done, you’ll receive the successfully created alert. 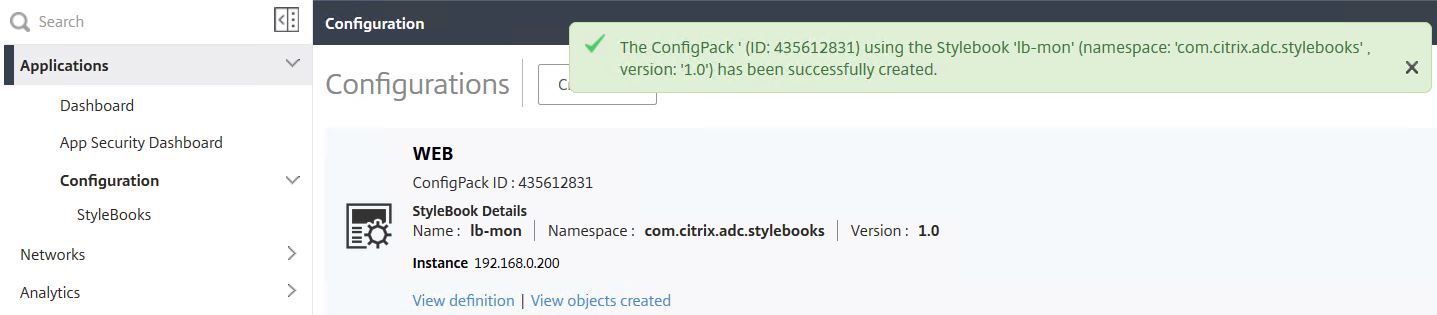
Over on NetScaler, the new Virtual Server shows successfully and appears to be configured as desired. 
MAS Dashboard:
The Dashboard pane under Networks shows a wealth of information for all your managed services. As shown below, you can see a summary of the number of Certificates, Applications, NetScalers and so on that are discovered by MAS. There is also a map which has the ability to show you where each Virtual Server/Application resides.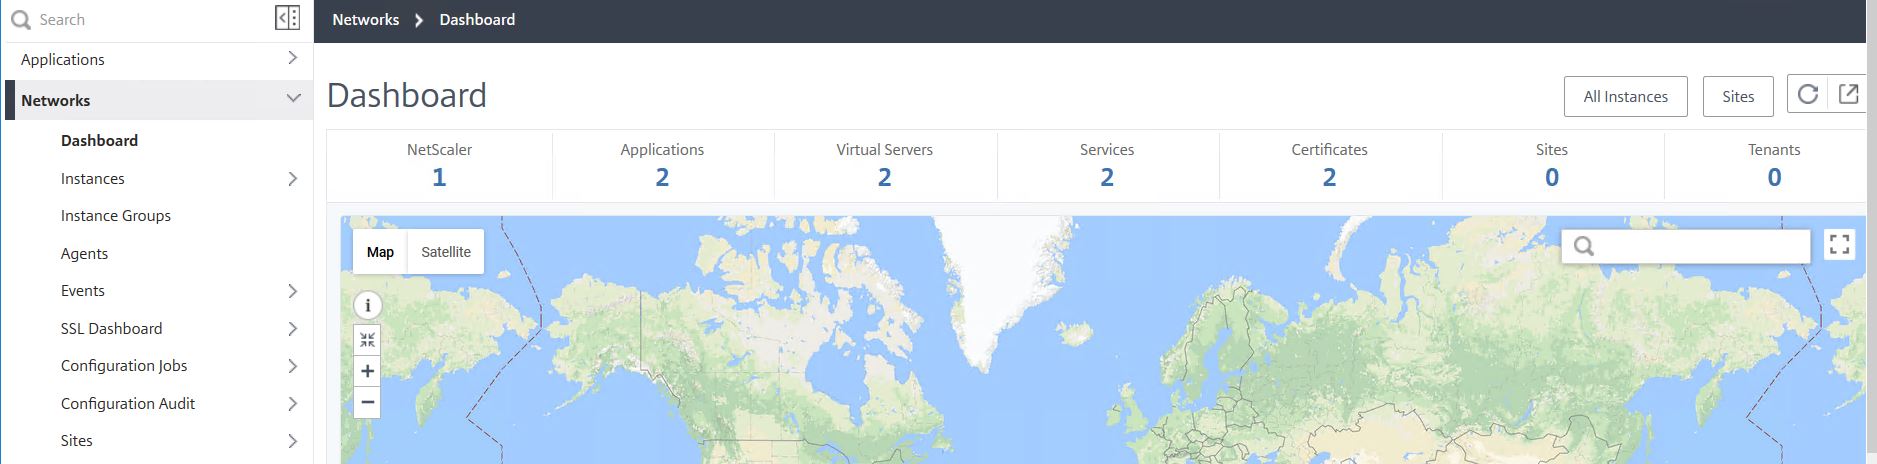
You also see s aummary of events by severity and up time which can be filtered from 5 minutes to 1 month.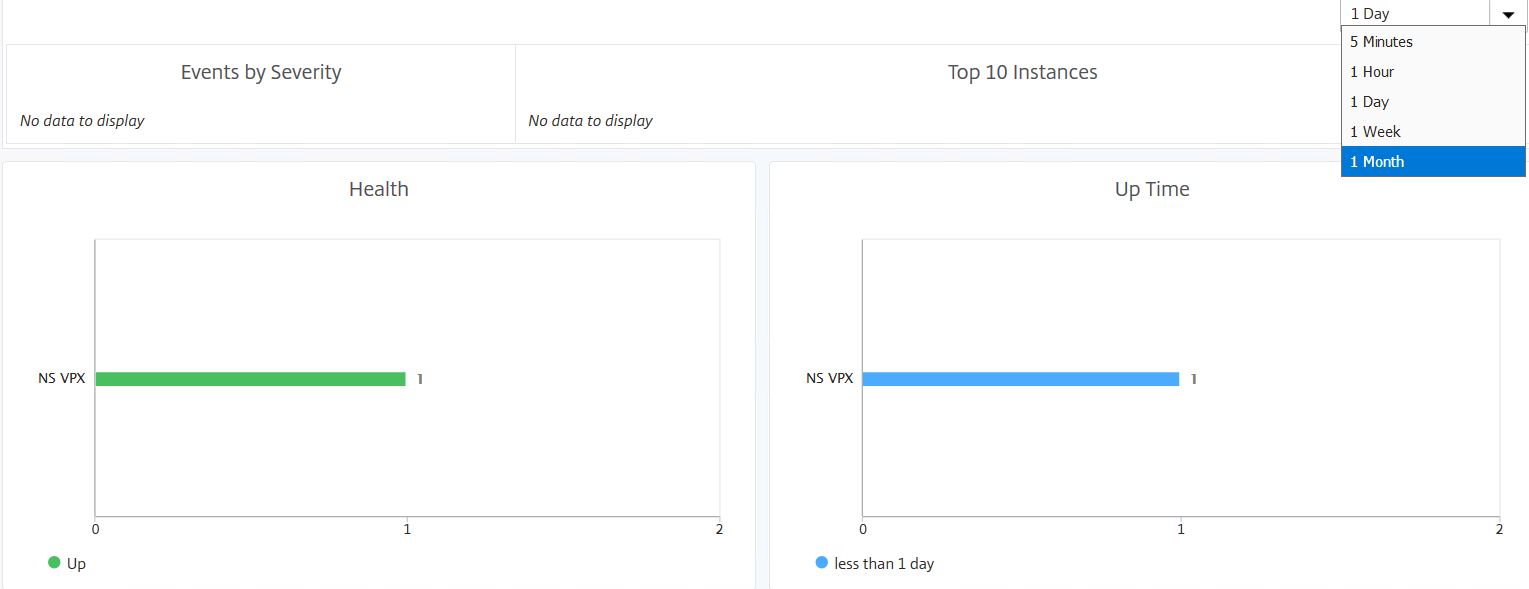
Further down you can see certificates close to expiry and any instance that has unsaved configuration or configuration drift. If you click on the red Config Not Saved error circle you’ll be presented with the offending appliance that currently has some unsaved configuration.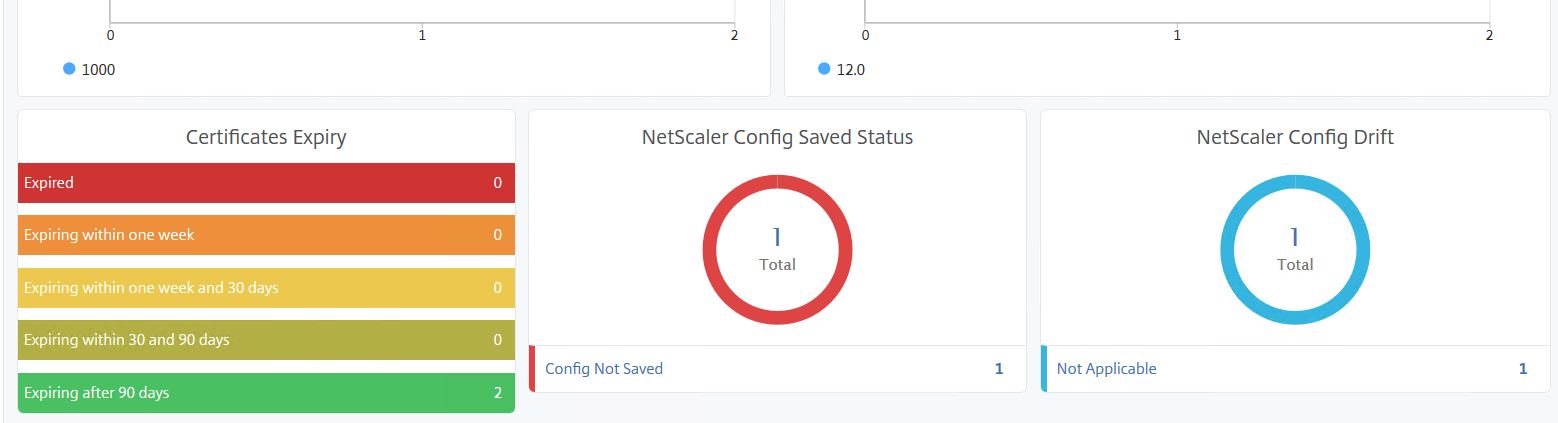
From here, you can save the configuration direct from MAS. Click Save configuration -> Yes. 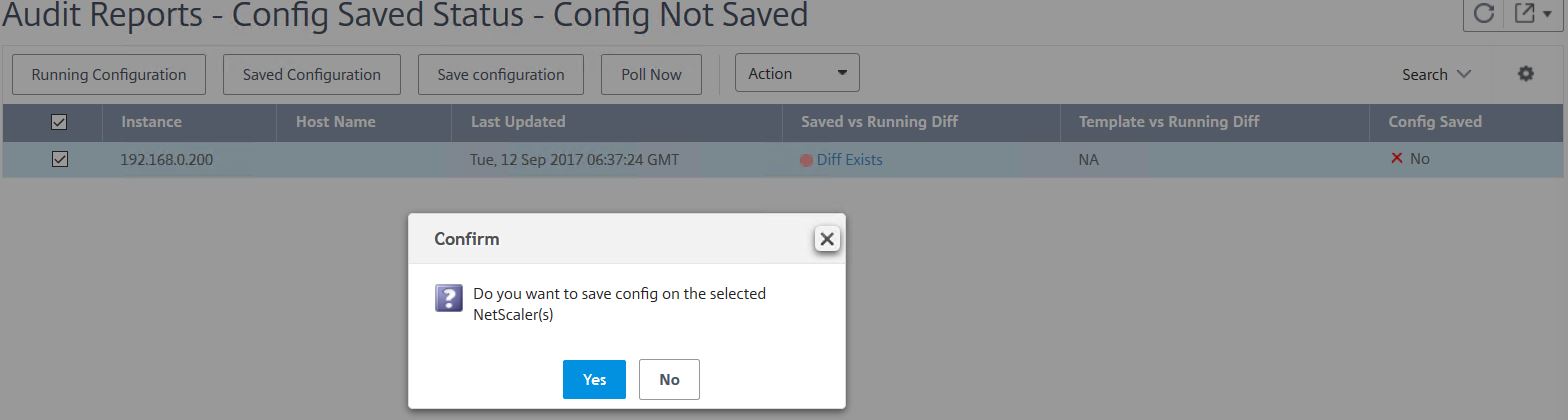
The Diff Exists alert will then clear from MAS. 
Create Site:
Navigate back to Dashboard and click on Sites. 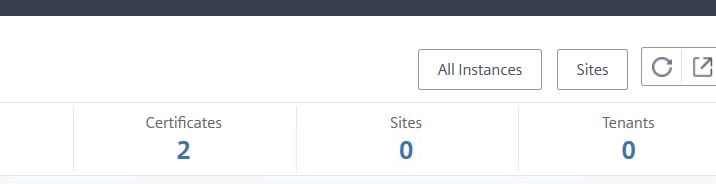
Sites will normally represent a datacentre or possibly a region within your organisation that has NetScaler presence. A default site will be created for you. To create a new site click Add.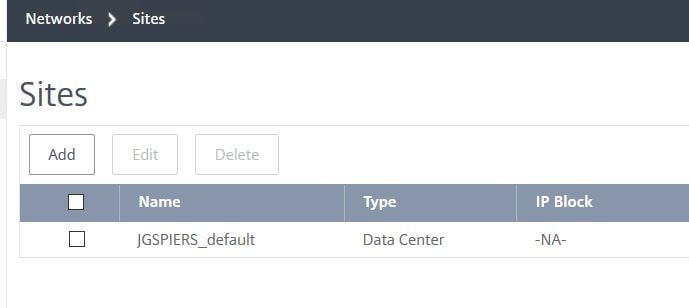
Enter a name to represent the site. Select a Cloud Provider (Private, AWS, Azure or Google Cloud). Enter a location and click Get Longitude and Latitude. If Longitude and Latitude does not return any value, you may have to enter them manually. Finally, create and add an IP Block and click Create. As you will see later, the map populates with resources.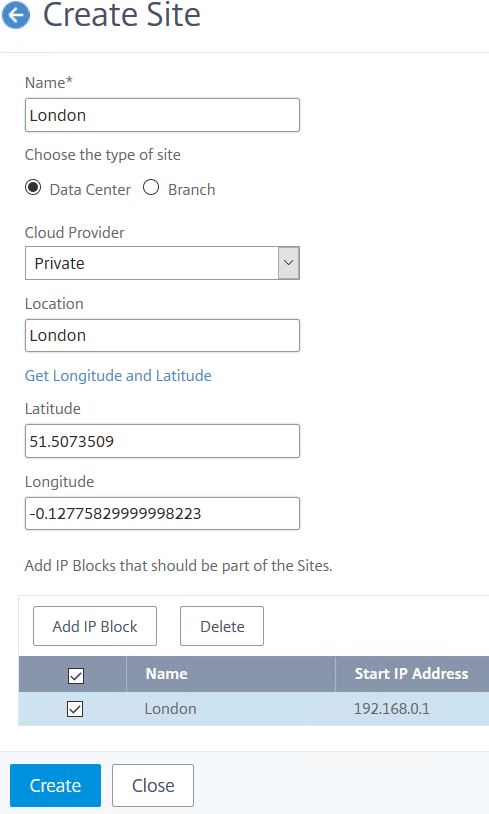
Manage Instances:
Navigate to Instances -> NetScaler VPX. You can also navigate to the MPX, SDX, CPX etc. sections. Here you see a list of appliances being managed by MAS and you can perform numerous actions, add new appliances, delete appliances, associate different profiles with each appliance and so on. If you are adding a new appliance to be managed by MAS, you must assign a MAS Agent to the instance.
Note: You cannot change the host name of an appliance to a custom name for example.
Note: If you change NetScaler instance credentials after the instance is discovered, create and attach an updated profile to the instance and then rediscover the instance by clicking Action -> Rediscover.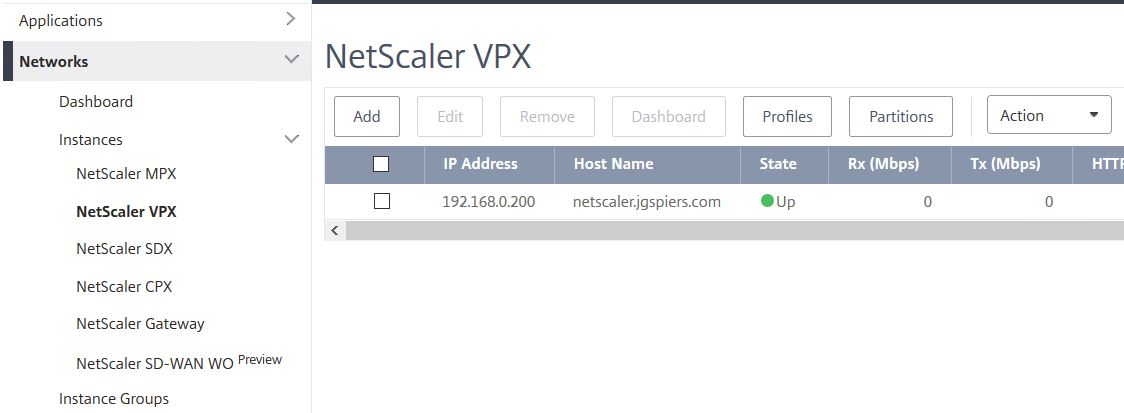
If you click on the Action button, a number of tasks can be performed such as enabling/disabling Insight, rebooting the appliance, configuring Syslog and looking at events 
As mentioned, if you click the Profiles button, you can associate a new profile with the managed appliance. This comes in handy if you were to change credentials on the appliance at a later stage.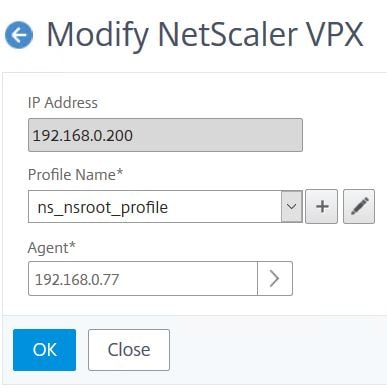
If you select an appliance and click Dashboard, you’ll see a screen filled with information specific to that appliance. You can see CPU, Memory, Disk usage, Load Balanced Virtual Server health, HTTP throughput, any outstanding Events and so on. 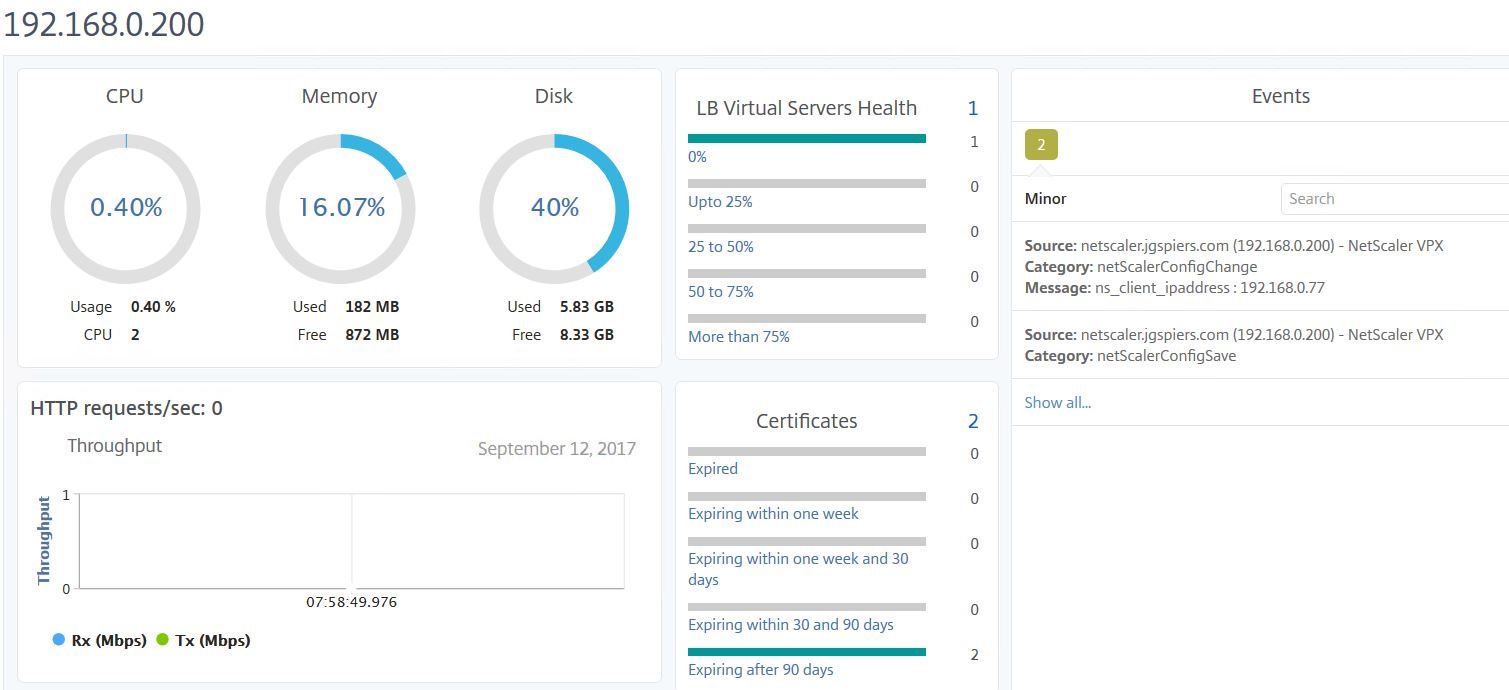
Scrolling down you see the software and network information of the appliance and the state of any attached network interfaces. Citrix have been adding more information pieces in recent releases of the MAS service.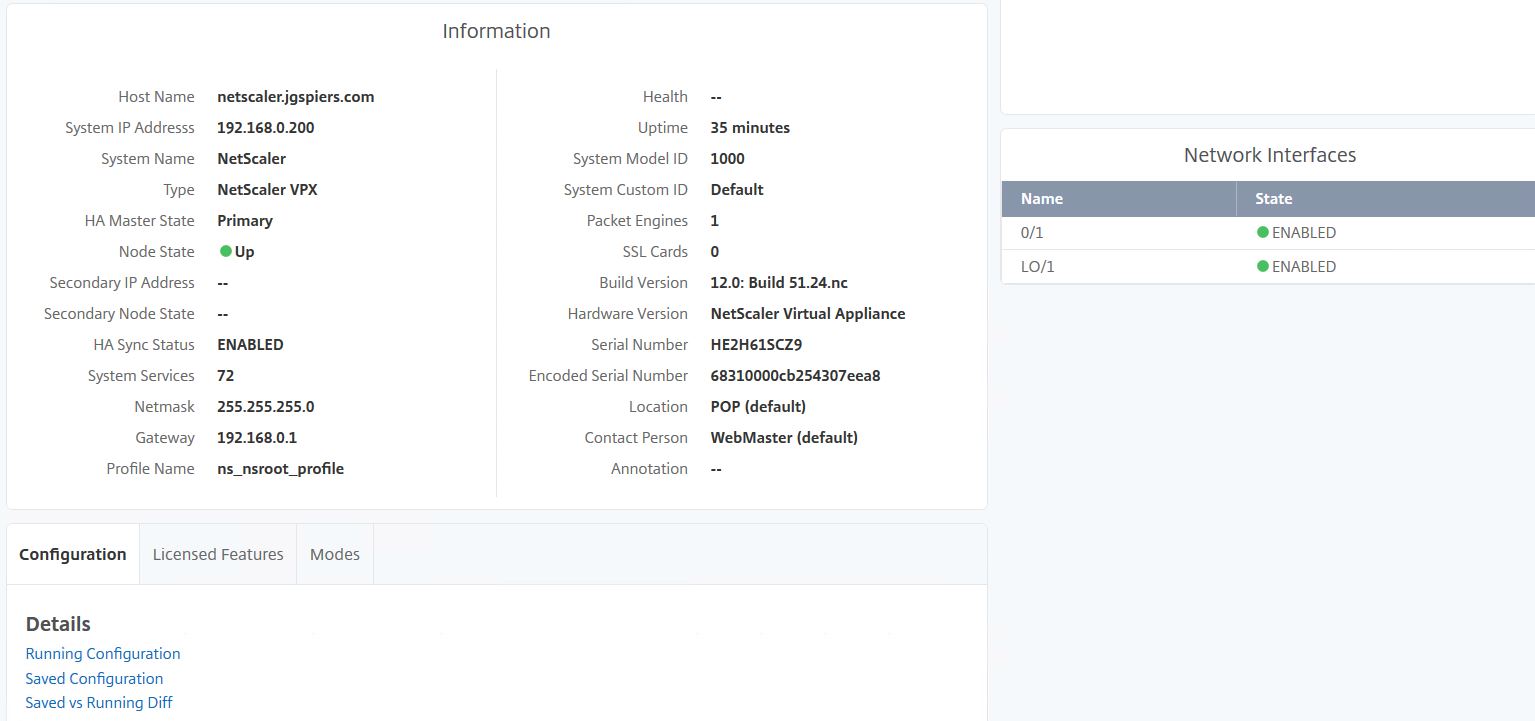
Scrolling down further you can see the Licensed Features, Modes and saved/running configuration. You can also run a comparison between running and saved configuration.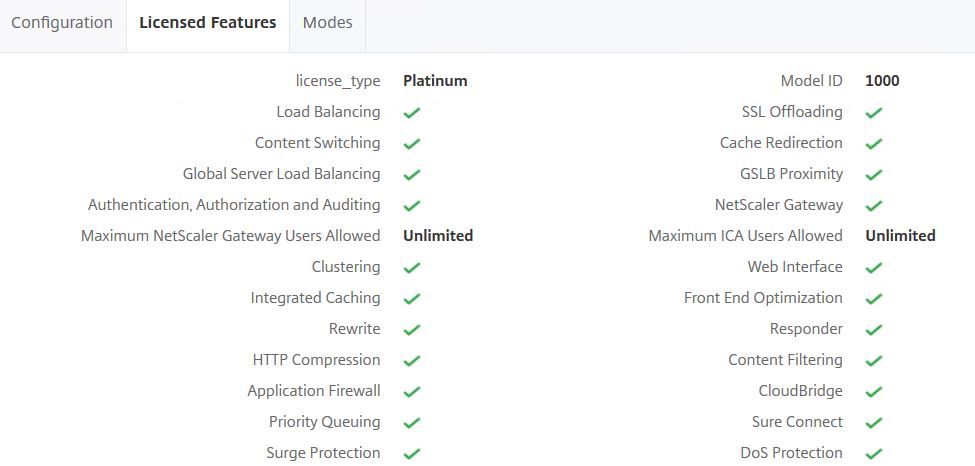
Viewing Events generated from Instances:
Navigating to Networks -> Instances -> NetScaler VPX -> Events shows events specific to the appliance of your choice. By selecting an event, you can get further details, delete the event, clear the event or view a history of events of the same type that have been generated before on the NetScaler instance.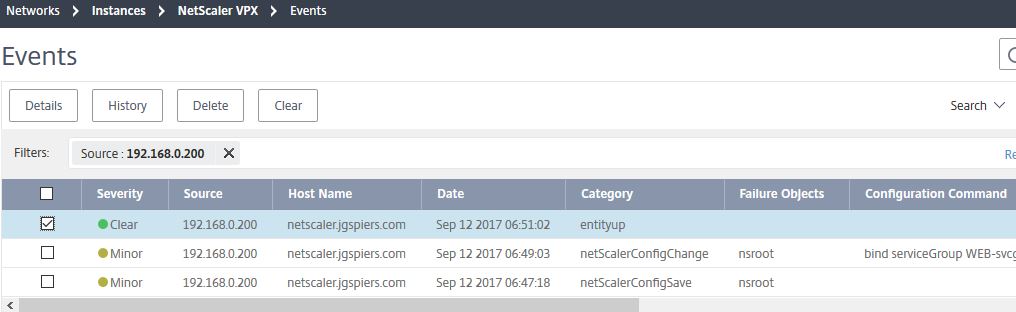
Instance Groups:
Instance Groups allow you to group together two or more NetScaler appliances. This allows you for example to run a Configuration Job against multiple appliances at the same time to further automate deployments and configuration, or update multiple hosts at once rather than running through upgrades individually. 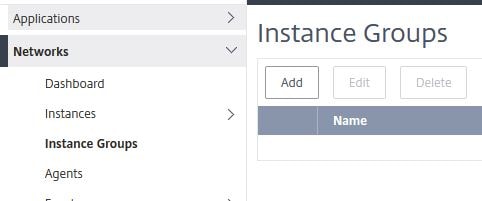
Delete or view details of MAS Agents:
Under Agents, you get a view of existing MAS Agents running within your Resource Location and their State. You can delete agents or view the details of an agent. Agents are automatically updated by Citrix Cloud when a new release is made available.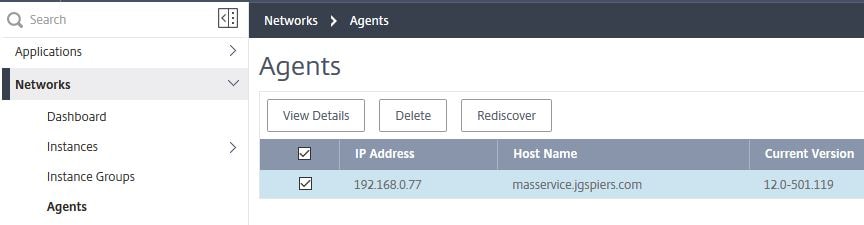
Viewing Reports from all Instances:
Under Events -> Reports show a summary of events by severity across all your managed instances. The top 10 managed instances that have received the most events are displayed under Top 10 Instances. If an instance goes offline for example an event is generated and displayed here. You can sort the historical data from 5 minutes to 1 month.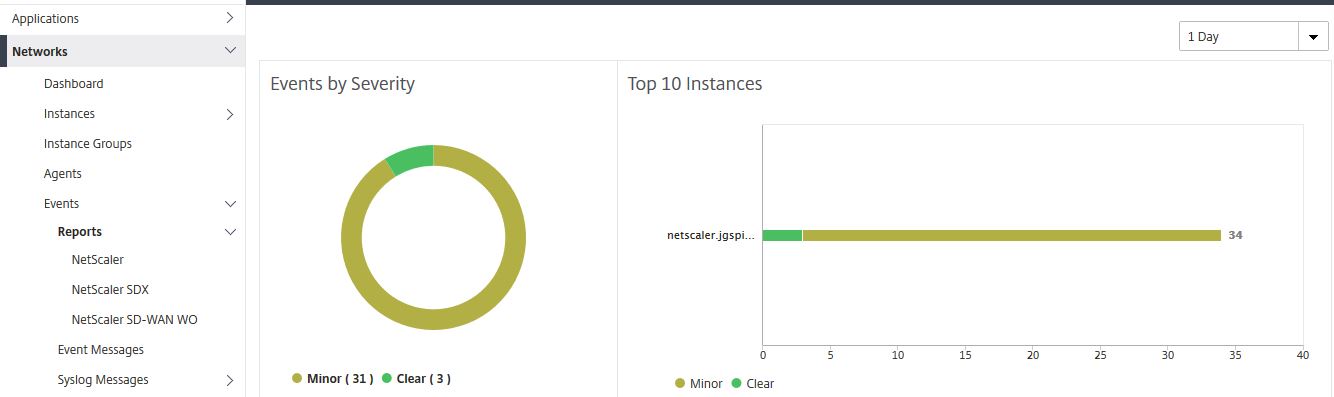
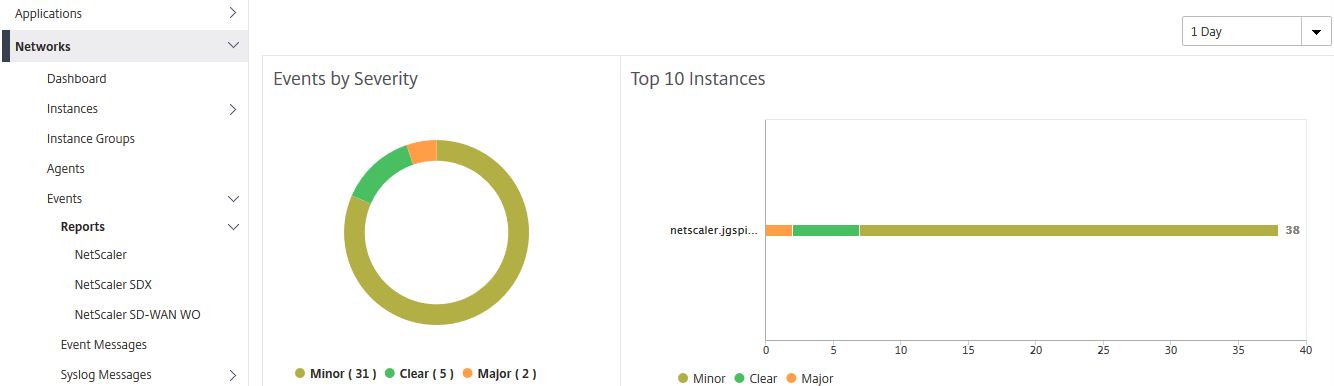
If you click in to one of the event graphs, for example the minor graph, a filtered display listing all the minor events is shown. Again you can change the duration from 5 minutes to 1 month. You can also click into a specific event to see more details.
Here you can see more details of an event after clicking in to it. 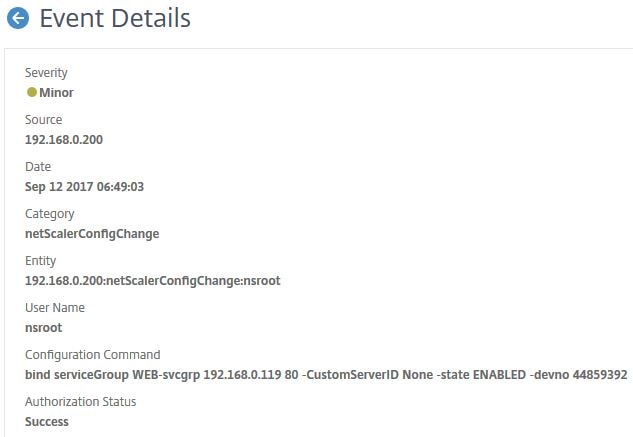
Viewing Event Messages for all Instances:
Event Messages under Events shows a list of events for all managed NetScaler, NetScaler SDX and NetScaler SD-WAN WO appliances.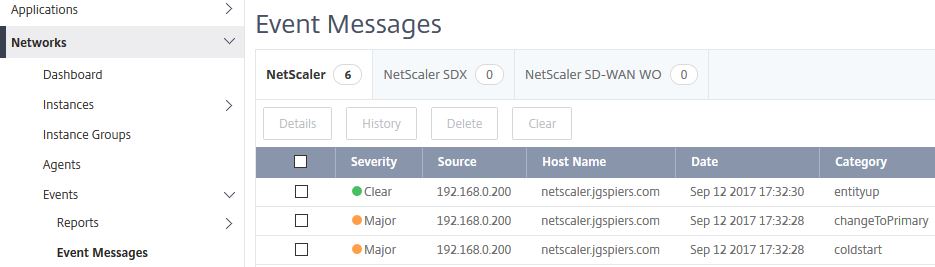
Clicking on an event and then selecting History brings you to the Event History pane. Helpful for identifying reoccuring faults on NetScaler. 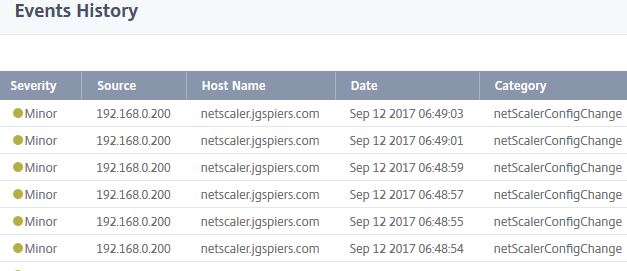
Configure Syslog:
By default, MAS is not configured to collect Syslog messages from any managed appliance. You can however automate the configuration of Syslog so MAS does receive Syslog messages. 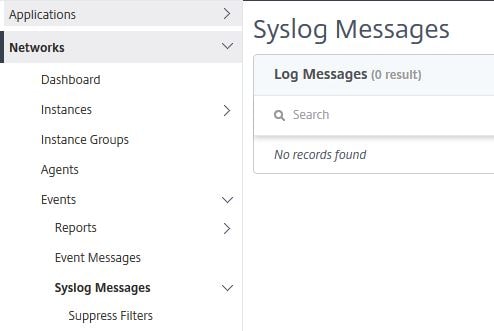
To do so navigate back up to Networks -> Instances and select your instance using the check box. Click Action -> Configure Syslog. 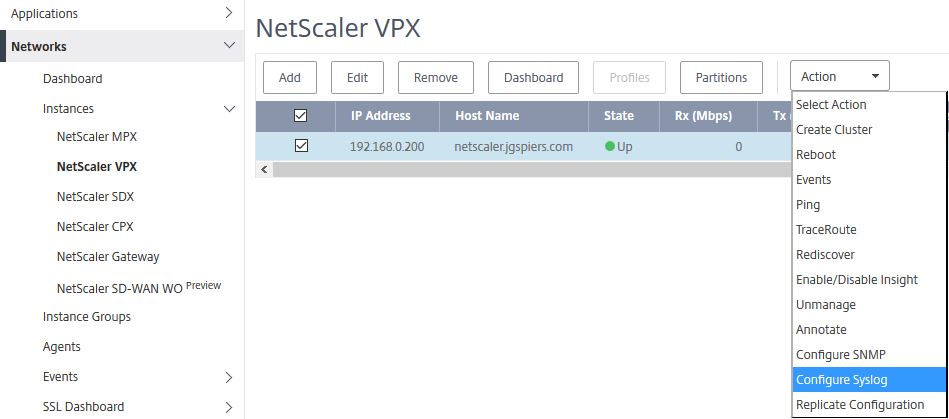
Check Enable. Select your log level and click OK. 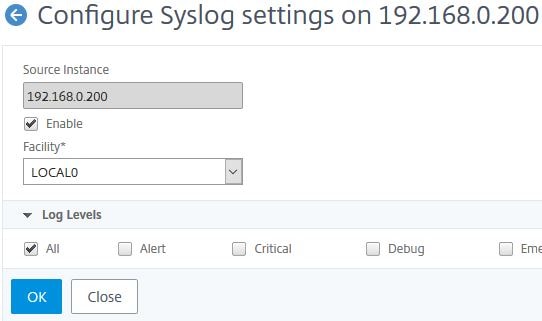
After a few moments, syslog will be configured. If you look on the NetScaler instance itself, under System -> Auditing -> Syslog Auditing -> Servers you can see that the MAS server is now configured as a collector for all syslog events. 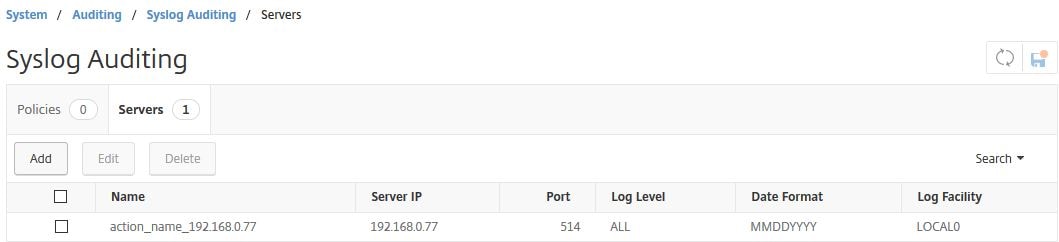
A syslog policy is also created and bound globally to the instance. 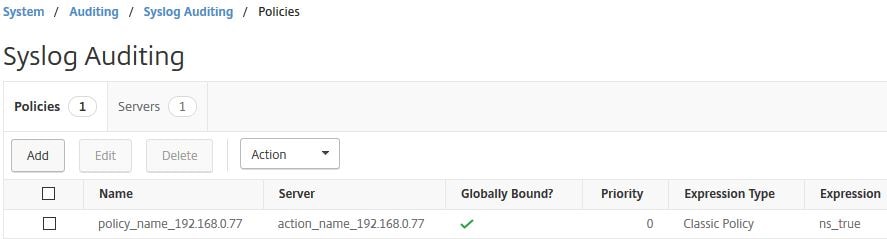
Navigating back to Syslog Messages on MAS you will see syslog messages beginning to populate and show up in the console. You can export syslog messages to PDF, JPEG, PNG or CSV files.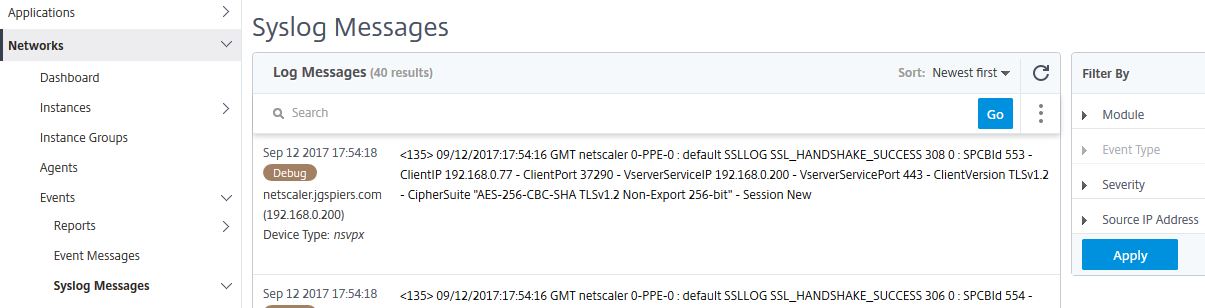
Create Rules:
Rules allow you to create actions based on events that are received by MAS. Click Add. 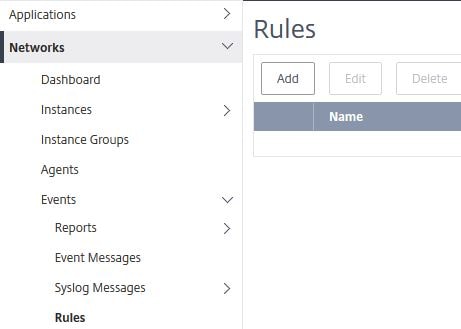
Check Enabled. You can specify an Event Age for example which would flag an alert if the NetScaler CPU levels exceed a defined threshold for more than 30 seconds, or an instance was offline for more than 15 seconds. Select which severity you want the rule to evaluate against. If you do not select any, all are by default selected. Set the Instance Family to NetScaler.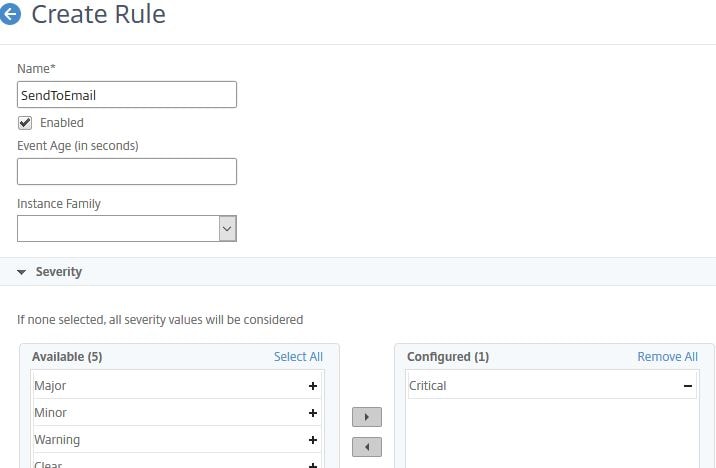
Select the instance(s) this rule will apply against. If you do not select any, all are considered. Click Add Action.
You can send emails, run a command, execute a job etc. To send an email when the rule is triggered, select Send e-mail Action. You can configure MAS to keep sending the alert until the event is cleared. To create a new email distribution list click the + symbol.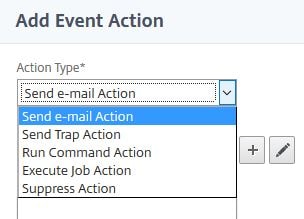
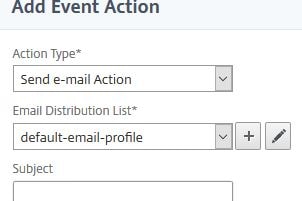
Enter email addresses that should receive the alert and from what email address alerts should be sent from. Click Create.
Finally click OK. You do have the option of altering the email subject and message, or uploading an attachment. 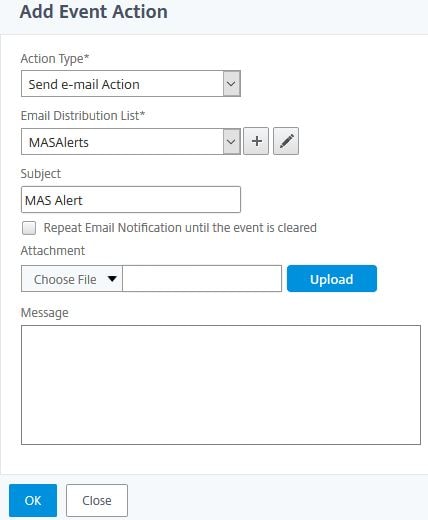
Click Create. You could add additional actions that execute when the Rule is triggered.
The newly created rule shows as below. You can add additional, delete or edit existing rules. You can also specify that the rule is run only during certain times. Click a Rule using the checkbox and click View Schedule and then create a new schedule. You may want to do this if you run resource intensive operations during certain times of the week or month and do not want to be alerted during those times.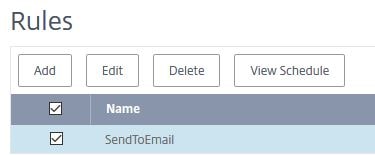
Configure Event Severity:
You can configure Event severity by navigating to Networks -> Events -> Event Settings. For example, if you want to change a Major event to Minor/Warning or vice-versa depending on your needs. Check an Event and click Configure Severity. 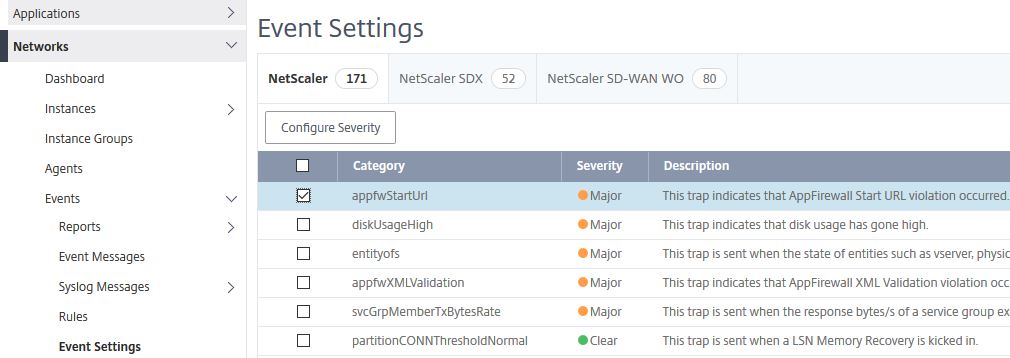
Using the drop-down, select the new desired severity for the selected event and click OK.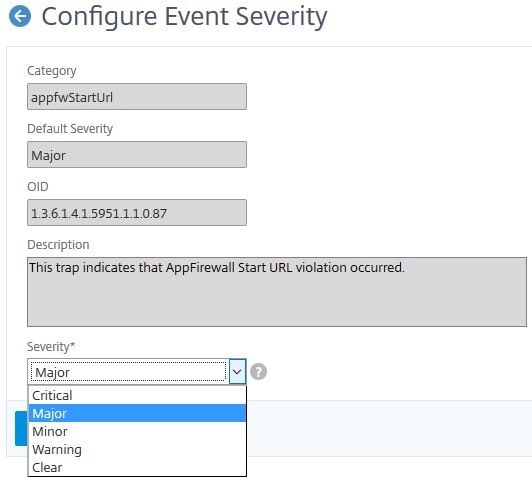
Viewing the SSL Dashboard and installing Certificates:
The SSL Dashboard shows a wealth of information related to SSL certificates, ciphers in use, TLS versions in use and so on. You can see how many certificates that are installed on managed instances are close to expiring, which are self-signed vs CA signed, how many Virtual Servers use SSLv3 and more. A quck glance at this page could help you identity security risks due to vulnerable SSL configurations. You can also install certificates on your managed instances straight from MAS. Click Install.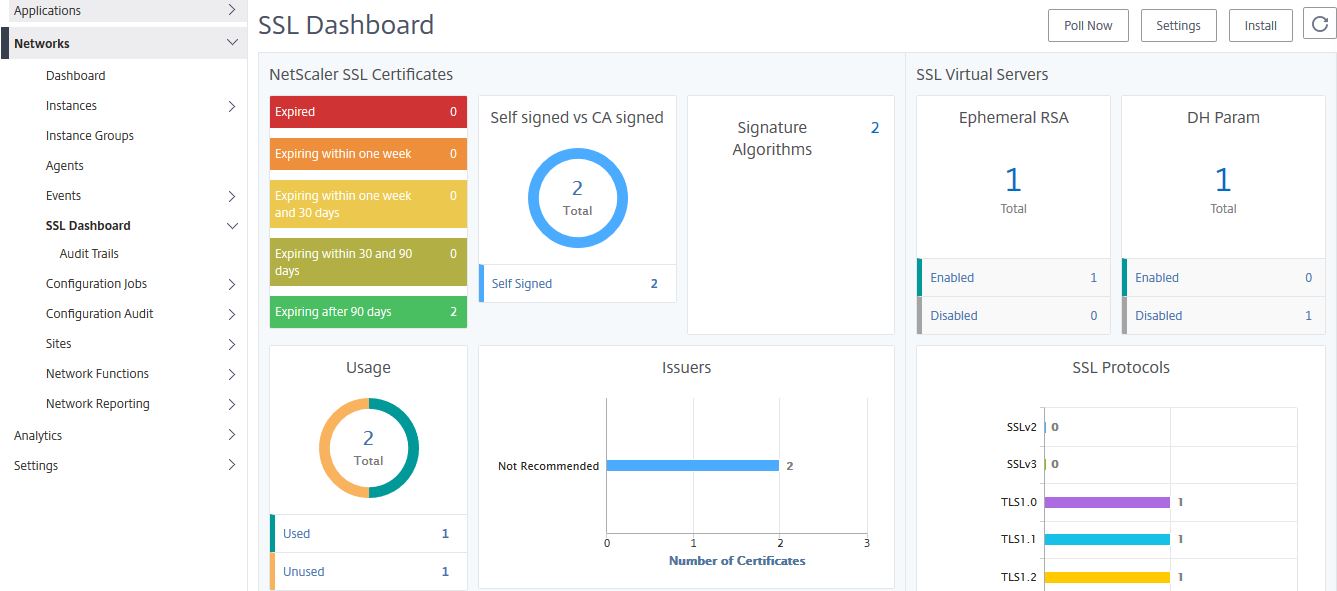
Browse for and upload a certificate of your choice. Check Save Configuration if you wish which saves the running configuration on an instance after the certificate install is complete. Check the instance(s) you wish to install this certificate on to and click OK. 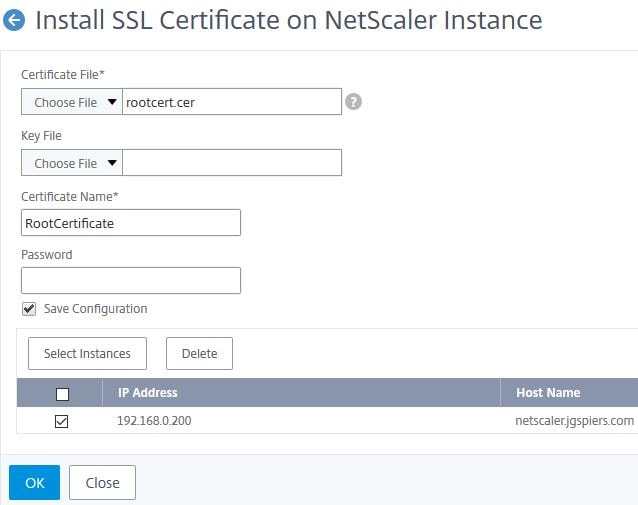
The new certificate will install and show underneath the SSL Dashbboard in my case as self-signed. Click on the Self signed counter to see a list of which certificates are installed on NetScaler that are self-signed.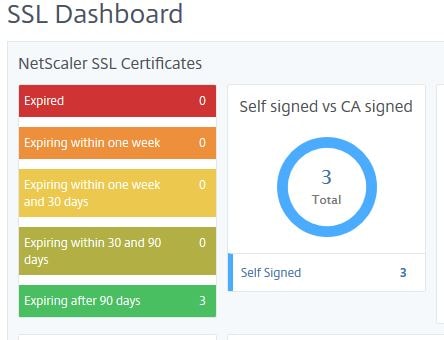
Here you see the list as expected. You can delete certificates or view more specific certificate information.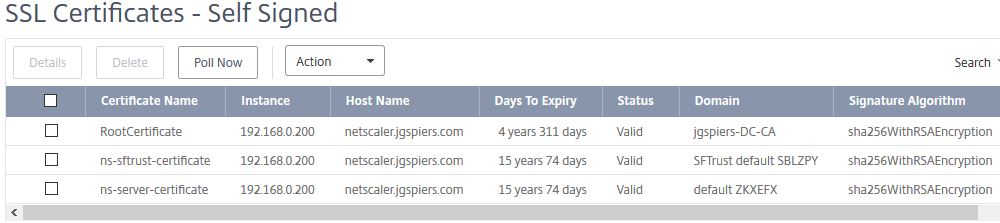
You can also link/unlink certificates straight from the MAS console. 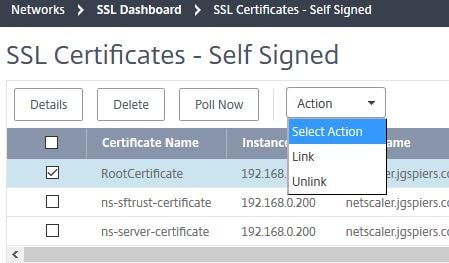
Configure Enterprise Policy Settings:
Navigate to SSL Dashboard -> Settings. This is where you can configure your Enterprise Policy Settings and configure notifications for certificates that are about to expire.
Whilst NetScaler MAS may recommend TLS 1.0 as a protocol, your company may not. The problem here is that Virtual Servers with TLS 1.0 enabled will not be flagged as a risk by MAS until you remove it from the Enterprise Policy Settings section. This is what the section is here for, so you can configure the requirements to that of your organisations to ensure SSL protocols, signatures, key strengths etc. not approved by your organisation are not in use across any of your MAS managed NetScaler instances.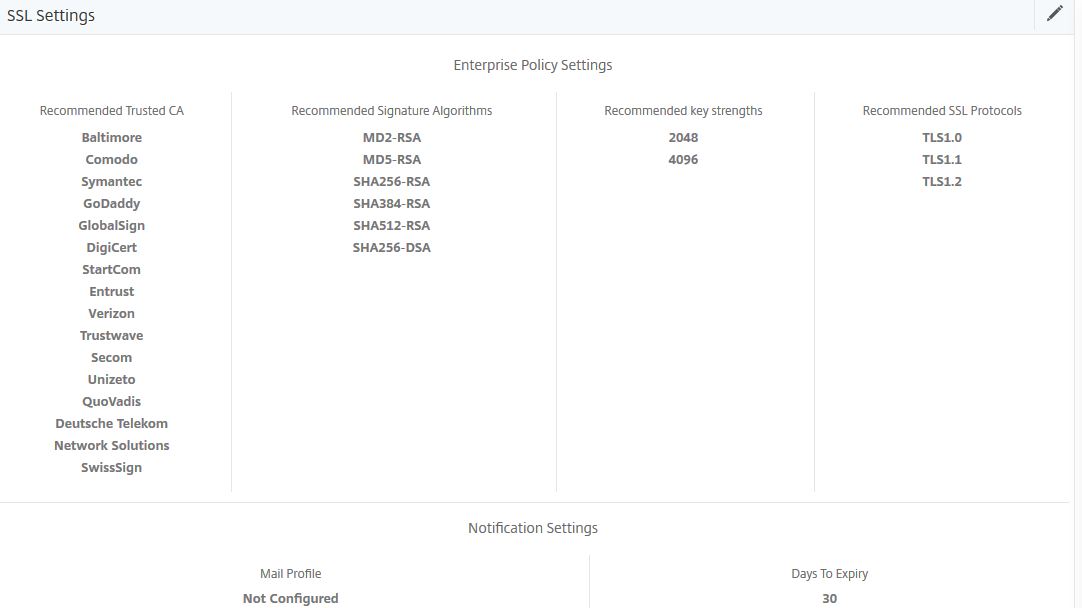
Under SSL Dashboard is Audit Trails which show SSL related events that occurred from each managed NetScaler instance. As you can see, the certificate installation job I executed not long ago shows in the log including the time that action occured. If you install more certificates, remove certificates and so on those actions will be audited and shown under Audit Trails.
Create Configuration Job:
Configuration Jobs allow you to run any type of configuration on NetScaler using CLI commands that have been built in to the job. This can be helpful for automating tasks that you would normally perform manually on NetScaler. The jobs can be scheduled, repeated, run once, run across multiple instances and so on. To create a job click Create Job. In this example I will create a job that adds a VIP address to my single NetScaler managed instance. 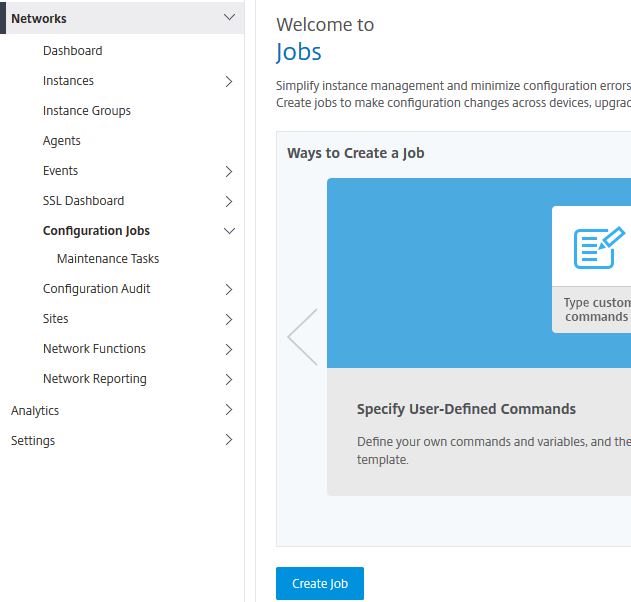
Specify a name and instance type (NetScaler, NetScaler SDX, NetScaler SD-WAN WO). Beside SSH, type commands of your choice which you would like the Configuration Job to execute. You could also extract running and saved configuration from managed instances by setting Configuration Source to Instance and then clicking on Extract for Running Configuration or Saved Configuration. You then drag and drop the commands extracted to the commands field. This could be useful to quickly replicate configuration to multiple instances or for Audit Template purposes.
In my example, I’m adding a VIP of 192.168.0.30 so will just manually type the command as below. You can use variables in commands using a dollar sign if for example you want to add different configurations to different instances within the same Configuration Job. For example, adding two VIPs to instance one but adding only one of the VIPs to instance two.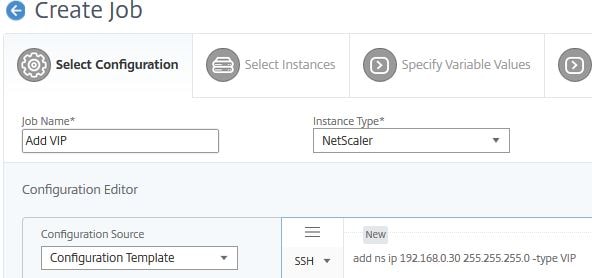
Optionally, you can save this job as a Configuration Template which allows you to re-use this configuration when creating any additional Configuration Jobs in the future. If you have checked Save as Configuration Template then click Save.
Click Next. 
You have to select which Instances or Instance Groups that this Configuration Job will be executed against. Select each Instance or Instance Group of your choice using the Add Instances button and click Next. 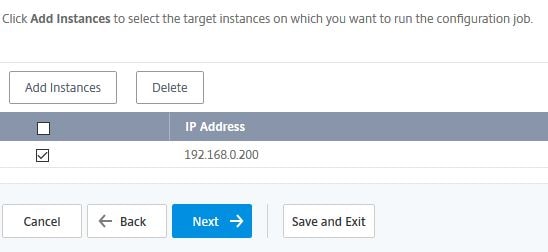
Click Next if you have no need to use variables. Files can be uploaded to reference variables. 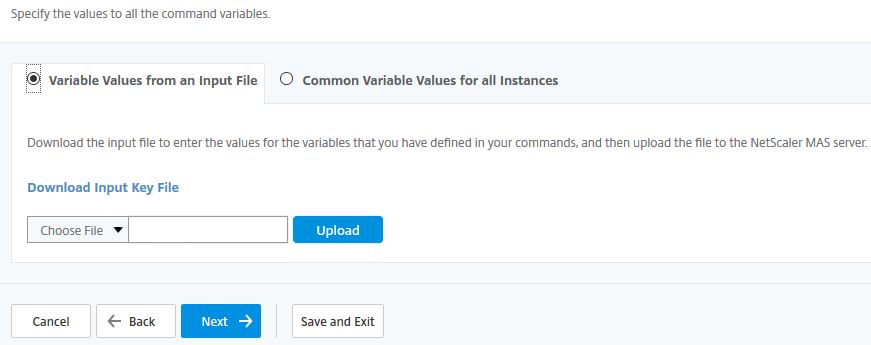
Click Next. 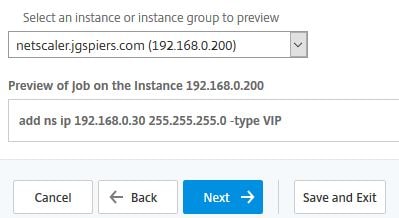
Specify what you want to happen when a command fails. Also set the execution mode (Now or later).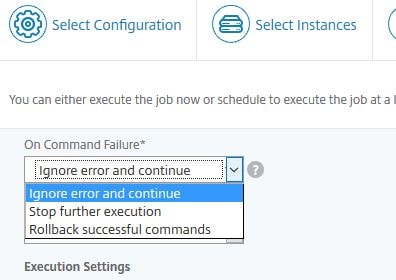
You can specify jobs to execute on instances sequentially or in parallel. If a job fails on one instance it does not continue processing on the remaining instances. You can also tell MAS to send an email report once the job has run, or prompt the administrator running this Configuration Job for instance credentials. Click Finish.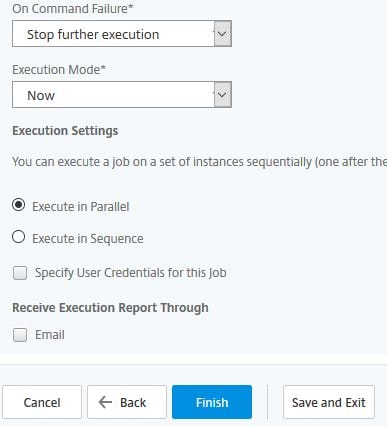
Since I set the job to run now, it executes right away and has completed as shown below. Jobs can be edited and re-run in the future. To view a report of the last executed job result, click on Report. 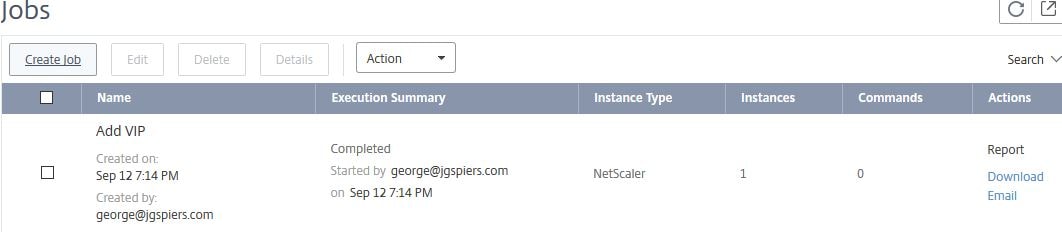
An Execution Summary PDF report opens with details of the job, when it started, ended and the status etc.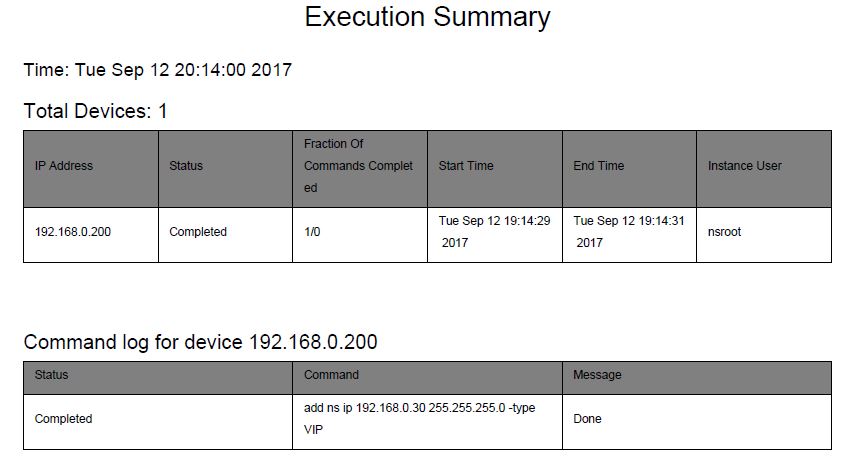
Over on my NetScaler the newly created VIP shows. 
Maintenance Tasks:
Maintenance Tasks contain a number of pre-built tasks that can be executed such as the Upgrade NetScaler task. You can upgrade HA pairs, including the option to upgrade one node now and the second node at another time. You can not specifically create any of your own tasks. To perform a NetScaler VPX upgrade directly from MAS, see https://jgspiers.com/citrix-netscaler-management-analytics-system/#Upgrade-NetScaler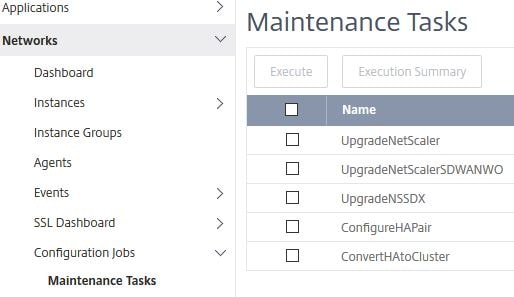
Viewing Configuration Audit:
The Configuration Audit pane shows an overview of all instances that either do not have their running configuration saved or a configuration that drifts from any Audit Templates you create. Audit Templates define what an instance configuration should be and if the true configuration doesn not match the Audit Template, MAS flags the instance under NS Auti Template Violations. Audit Templates are run against chosen instances every 12 hours.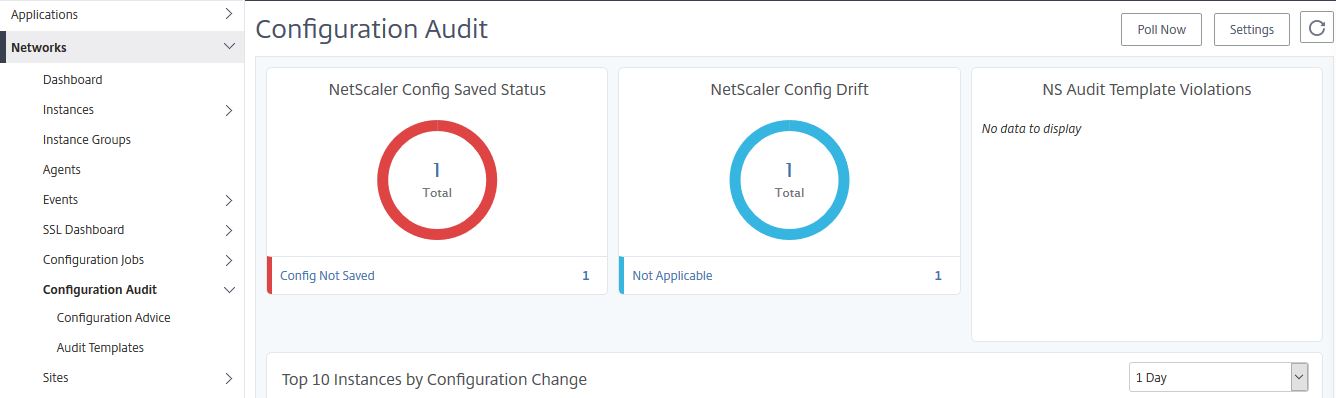
If you click on Settings you can enable email notifications for audit alerts. You need to create a Mail Profile first.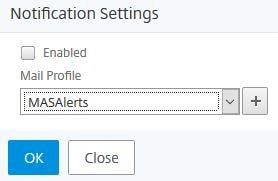
Create Audit Template:
Audit Templates contain configuration you define that should exist in ns.conf on the instances you choose. To create an Audit Template, click Add.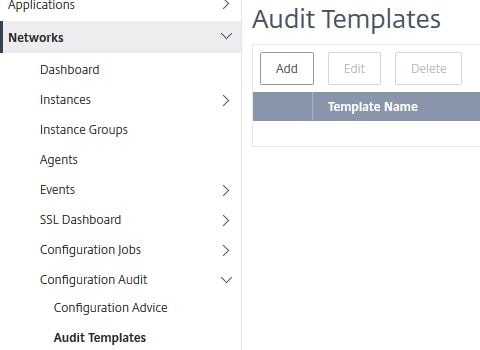
Specify a name and either choose a saved Configuration Template or enter your own commands. The Configuration Template I created earlier called Add VIP will be used.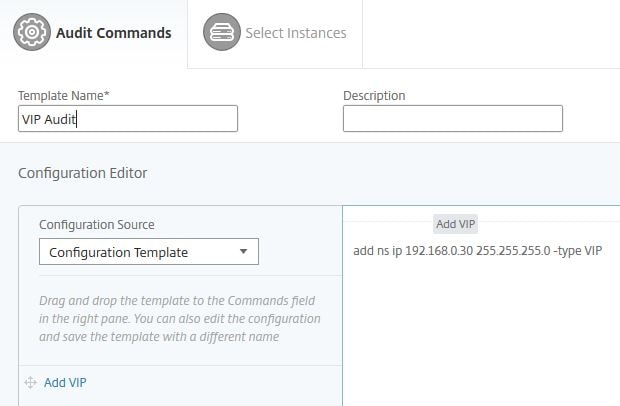
Click Next. 
Choose which instances you want to apply this template too and click Finish. If the instance doesn’t contain a VIP of 192.168.0.30 an alert will flag in MAS under Configuration Audit.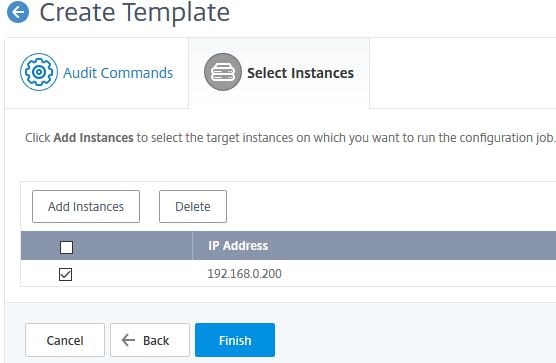
Sites and IP Blocks:
Sites and IP blocks can be created to help localise your managed instances which populates the map under Dashboard with Load Balanced Virtual Servers based on where they reside in the world.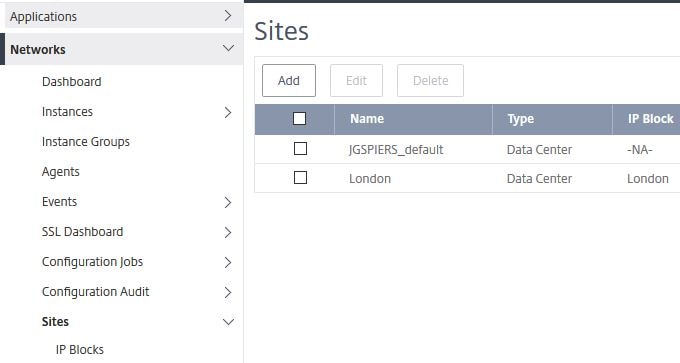
Network Functions:
Navigate to Networks -> Network Functions. Here you see an overview of metrics from all your managed instances. Dashboards exist for Virtual Servers with the highest client connections, lowest throughput and highest throughput etc. 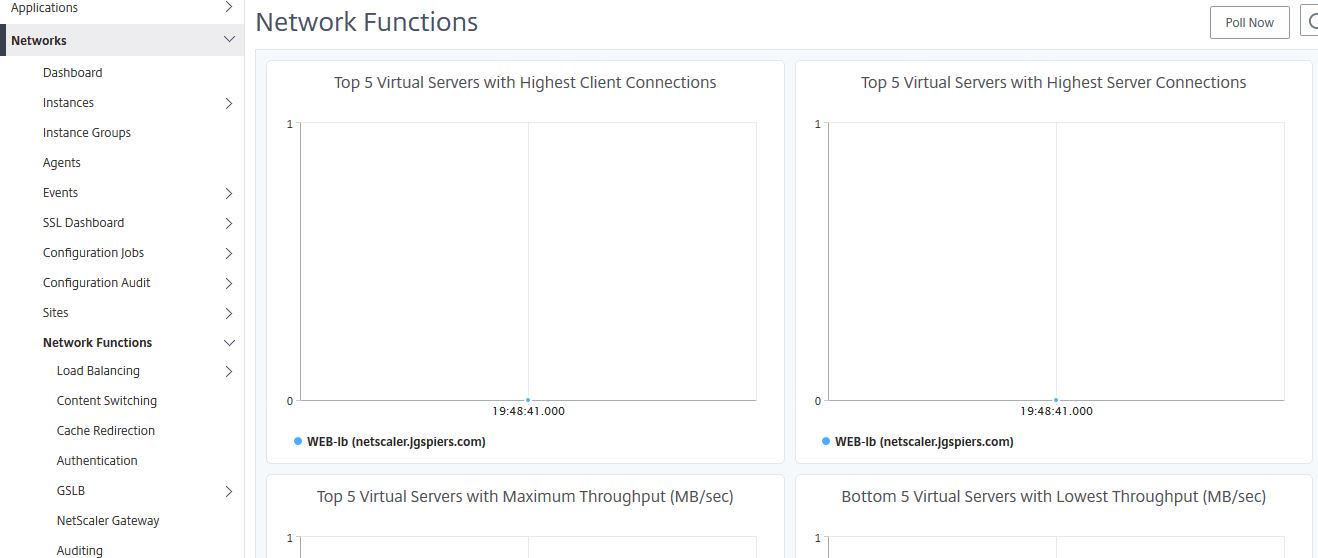
View and Manage Load Balanced Virtual Servers and Services:
Navigate to Networks -> Network Functions -> Load Balancing. Here you get a quick overview of the amount of Servers, Service Groups, Services, and Load Balancing Virtual Servers discovered by MAS on all your managed instances. You can generate a report with the details of each Virtual Server. Click Generate Report.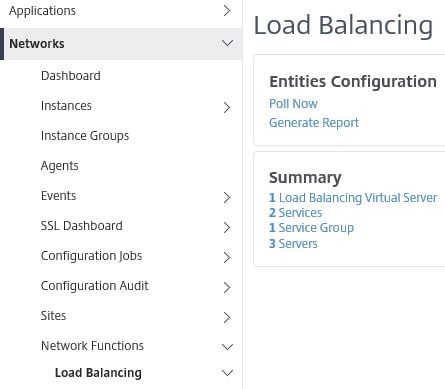
Click OK under Export Now.
Note: You can schedule reports to be generated daily, weekly (across multiple days) or monthly (across multiple days) that are emailed to you.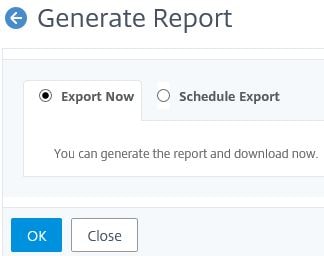
The report will download and open as an Excel document. I only have one Load Balanced Virtual Server but when you have multiple, all the details below display for each entity. If you want to generate a report for all services, navigate to Load Balancing -> Services and click the export button.![]()
Under Load Balancing -> Virtual Servers are all discovered Load Balanced Virtual Servers from each managed instance. Virtual Servers will appear here if you have set MAS to auto-select Virtual Servers to manage. If you have disabled the auto-selection of Virtual Servers, you must then manually select those that you want to manage before they show here. You can get a quick and easy view of the state, the instance each Virtual Servers resides on, protocol used and so on from this screen. You can also edit Virtual Servers straight from MAS by clicking on a Virtual Server using the check-box and selecting Action -> Configure.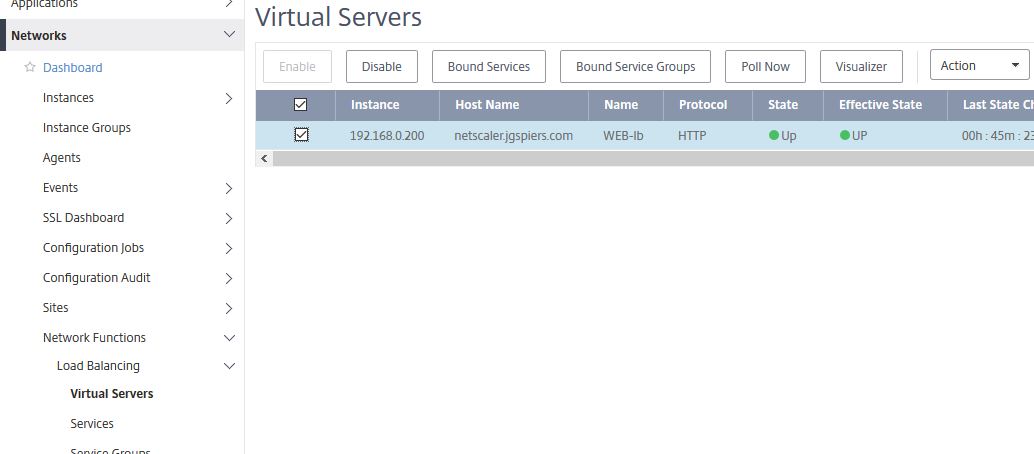
Here, direct from the MAS console, you can bind/unbind Services/Service Groups, change Basic Settings, Persistence methods and all other settings that you would normally configure using the NetScaler GUI. 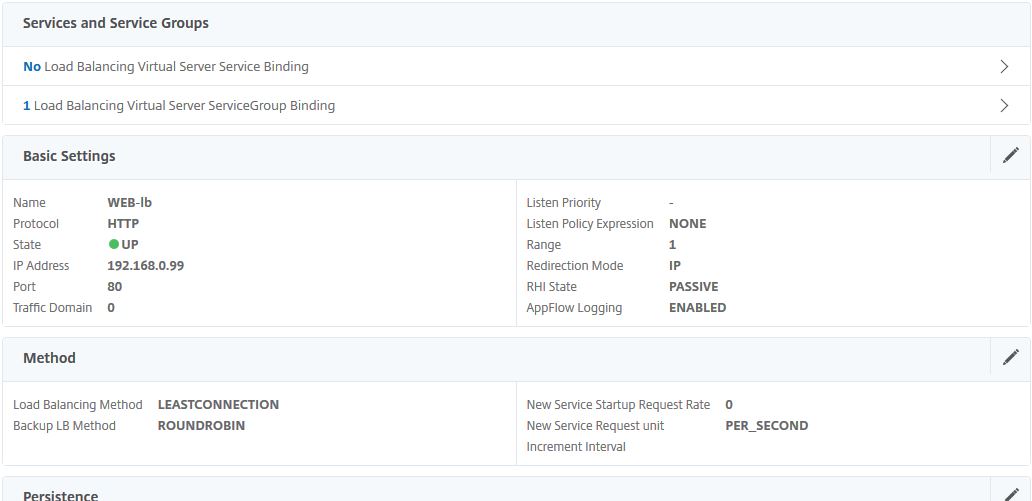
Under Load Balancing -> Services you can disable services, view service statistics and view which Virtual Server services are bound to. If you want to generate a report for all services, click the export button.
Generate Reports:
Under Network Reporting -> NetScaler you can generate a number of reports from your NetScaler appliances. Using the drop-down boxes, select a report, instances to gather statistics from and the duration from when to gather statistics from (hour, day, week, month).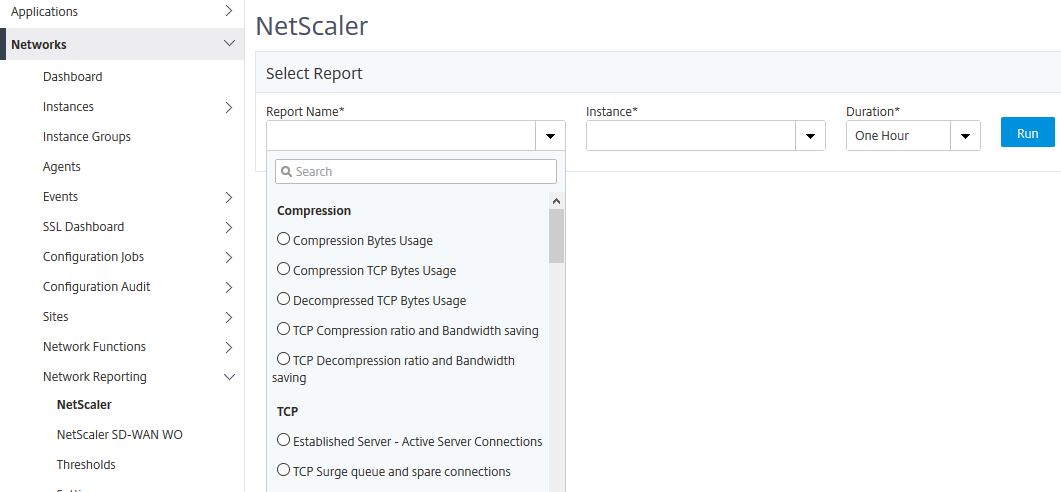
Click Run and the report will display below. You can export reports to PDF, JPEG, PNG or CSV. 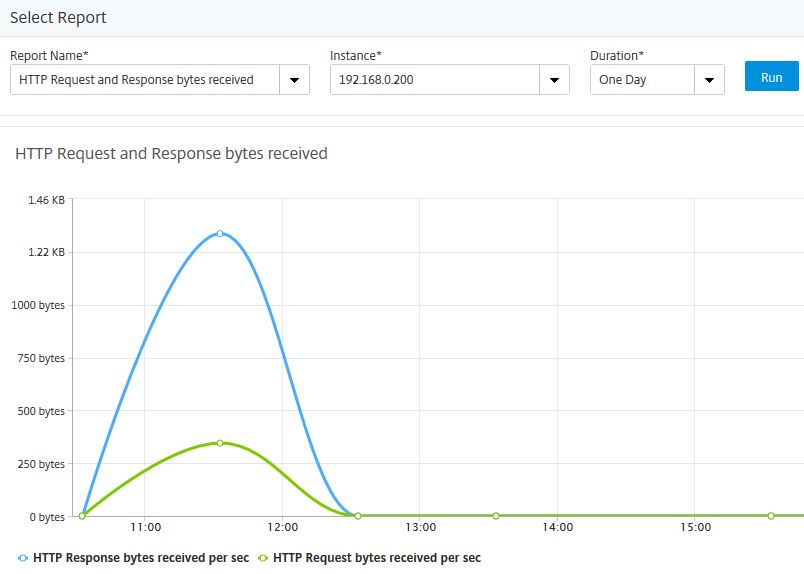
Thresholds:
Thresholds allow you to specify when MAS should generate an Event and optionally send you an email based on things such as high instance CPU usage, SSL request bytes, current client connections and much more. 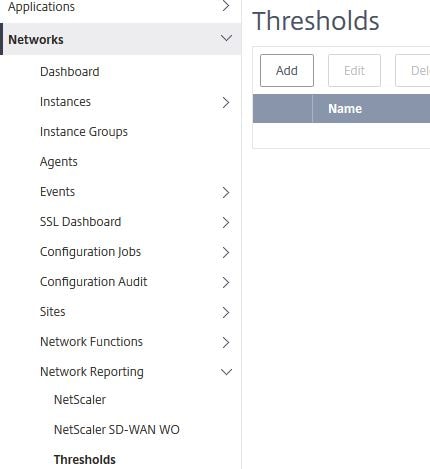
Analytics:
Under Analytics, you have HDX Insight, Gateway Insight and Security Insight that also exist on on-premises deployments of MAS. For more information on Insight, see https://jgspiers.com/citrix-netscaler-management-analytics-system/#HDX-Insight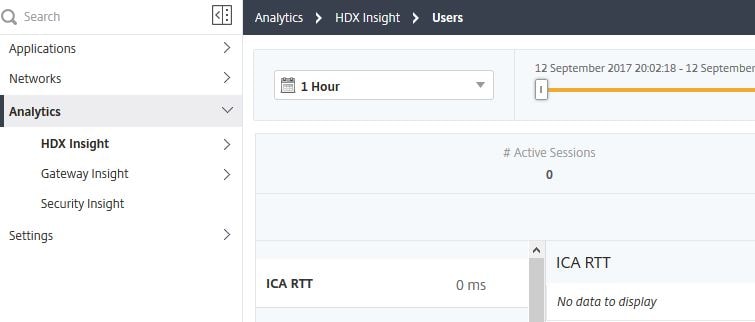
Deploy extra MAS Agents and Prune Events/Syslog messages:
Settings allow you to perform new MAS Agent installs, download the latest Agent build media and configure Event and Syslog prune settings.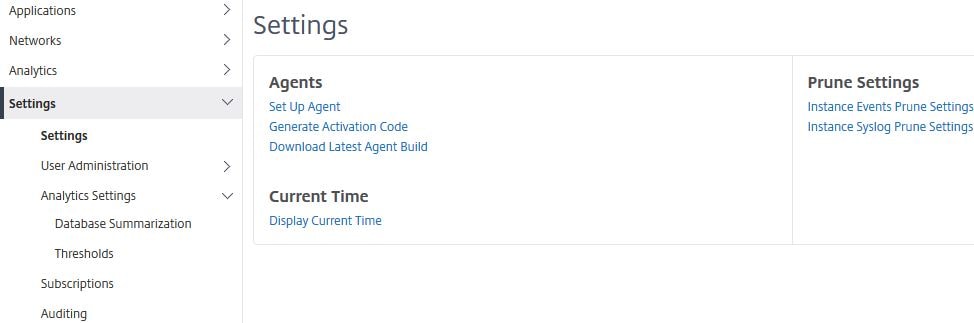
In this example, you can configure how long you want MAS to keep Event messages for until they are pruned. By default MAS keeps Event messages for 40 days.
Syslog prune settings have a few more options to configure. 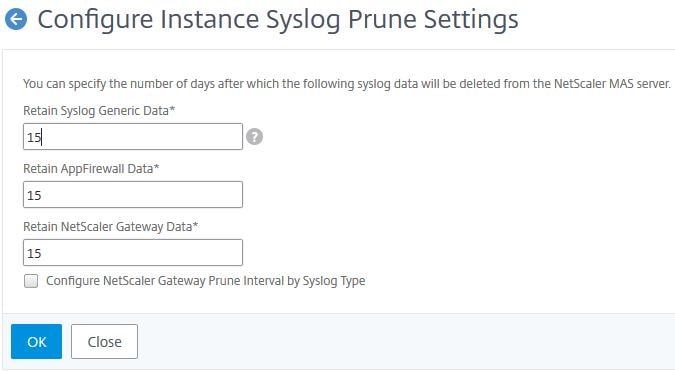
Configure Role Based Access Control:
There are some current limitations with RBAC as of September 2017. These are:
- RBAC is not fully supported for StyleBooks or in the Analytics Modules.
Under Settings -> User Administration -> Users you can view the super admin account. The super admin role is assigned to the account that logs on to MAS Service first with Citrix Cloud credentials but can be manually assigned to additional administrators. Any additional Citrix Cloud user who logs on to MAS will be shown here and assigned all permissions except for being able to access the User Administration section.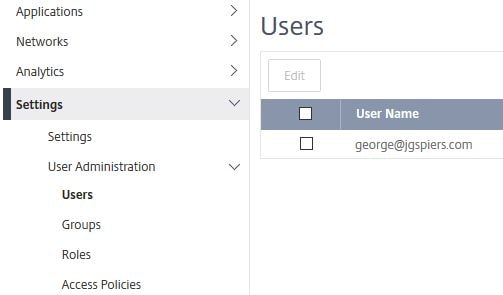
To create a custom role in MAS and assign to specific users, click on Access Policies -> Add.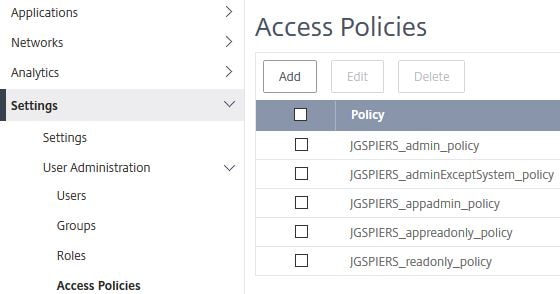
In this example I’m creating a policy which allows editing of Subscriptions and read-only permission for all other areas. You can use the Toggle all “View” selection button which quickly sets view permission for all objects and then you can choose edit for specific objects. Click Create.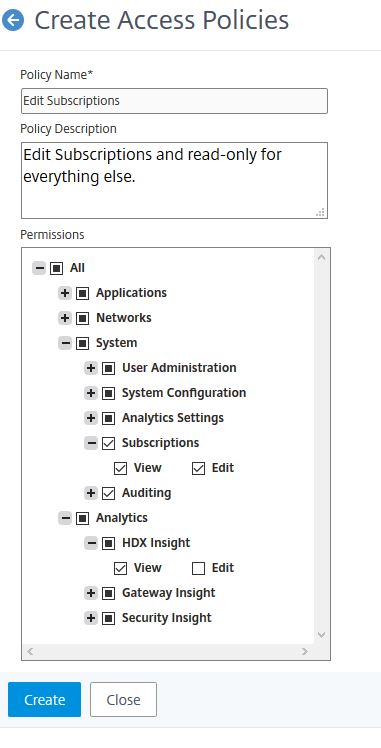
Next click on Roles -> Add.
Specify a name and move the newly created Access Policy to Configured. Click Create.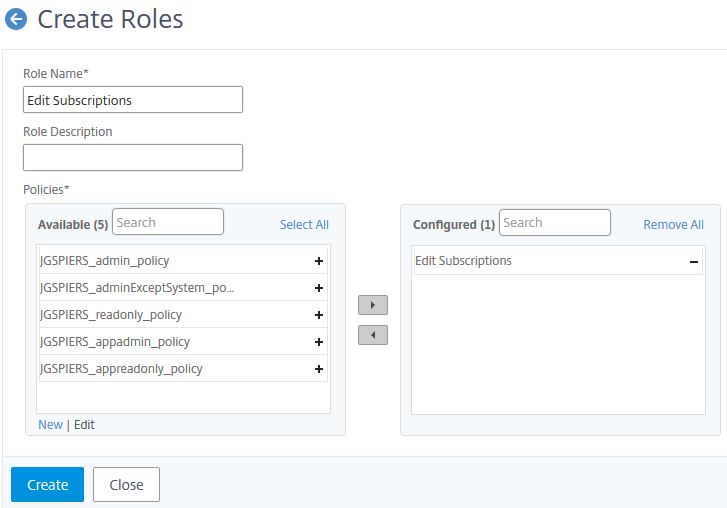
Click on Groups -> Add.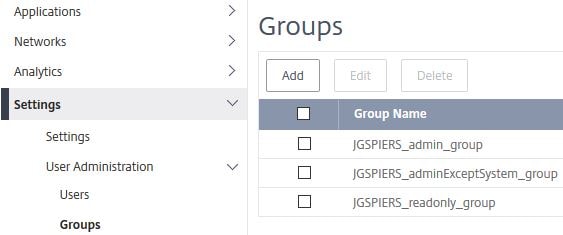
Enter a name and move the newly created role to the right. Click Next.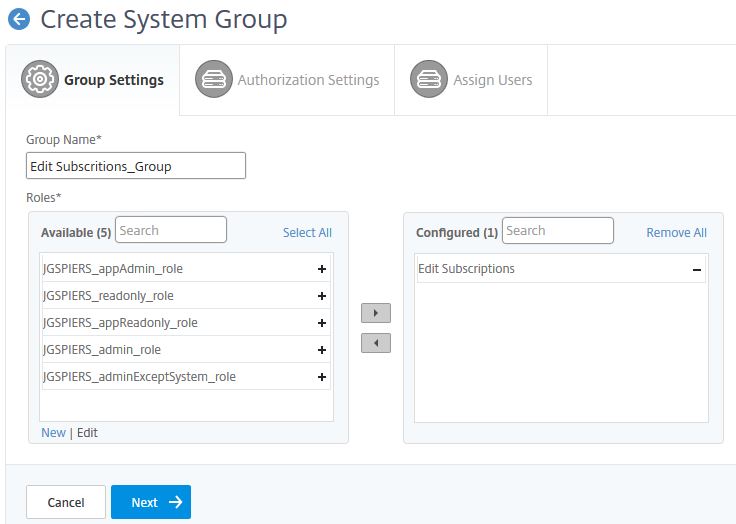
Click Create Group unless you want to limit access to specific instances, applications etc.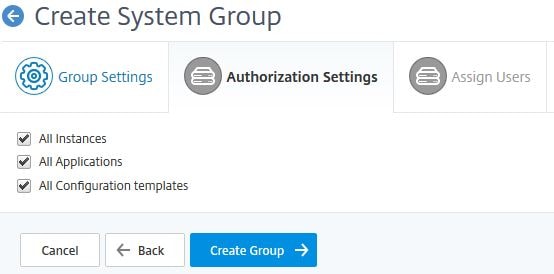
Move the users you want to add to this group to the right and click Finish.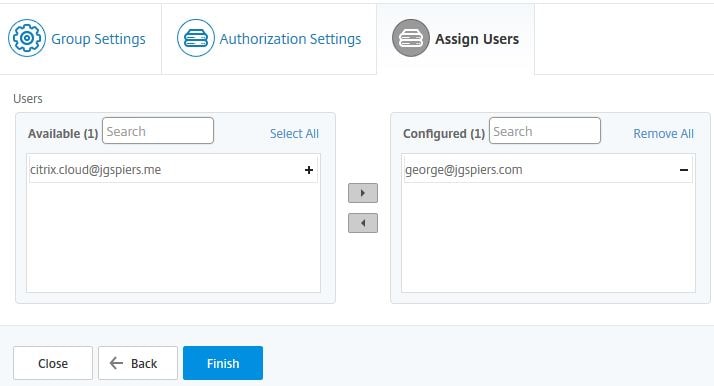
Change Data Record settings:
Under Settings -> Analytics Settings -> Configure Data Record Settings allows you to enable/disable Security and HDX Insight logs. By default these logs are enabled so MAS will collect them from Instances that have been configured with Insight. 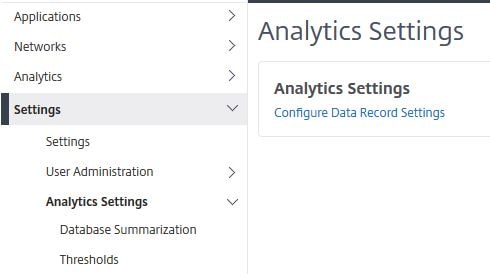
Using the check boxes, you can turn off HDX/Security Insight logs. 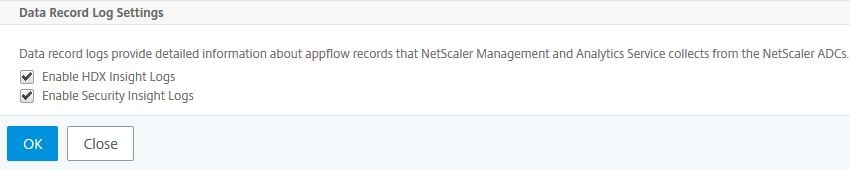
Configure how long data persists:
Under Analytics Settings -> Database Summarization you can change how long minutely, hourly and daily Gateway, HDX and Security Insight data persists on MAS. Click on one of the options.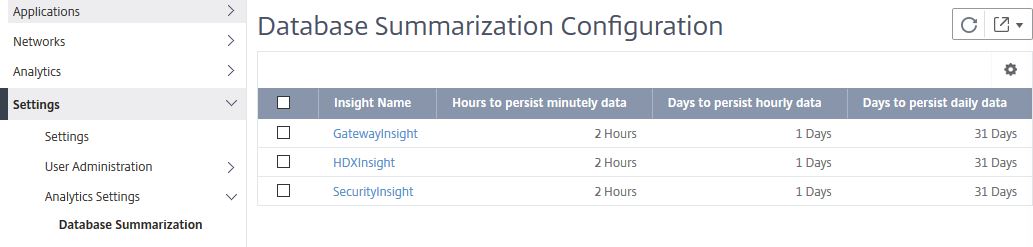
Here you can change how often the data persists. 
Create Threshold:
Thresholds are a handy way to configure MAS to alert you when certain thresholds on the collected analytics from your managed instances are met. To create a Threshold, click Add.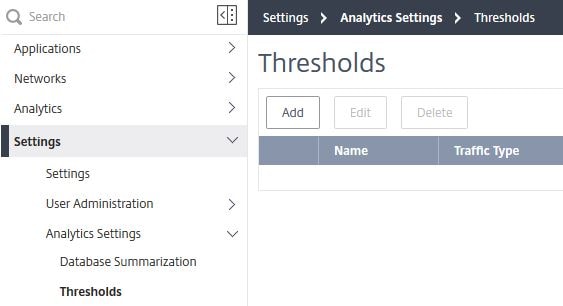
Enter a name, the Traffic Type can be HDX or Security. If selecting HDX you can choose an Entity of Desktops, Applications, Gateways etc. which NetScaler HDX Insight collects data for. Select a duration and specify how you would like to be notified of an alert. Finally click Add Rule to create any number of rules. In the example below, I could configure an alert to be sent via Email or SMS, or have the alert be simply displayed in the GUI when the rule metric ICA RTT for sessions is greater than a value of 100(ms). Once you have your rules defined, click Create. 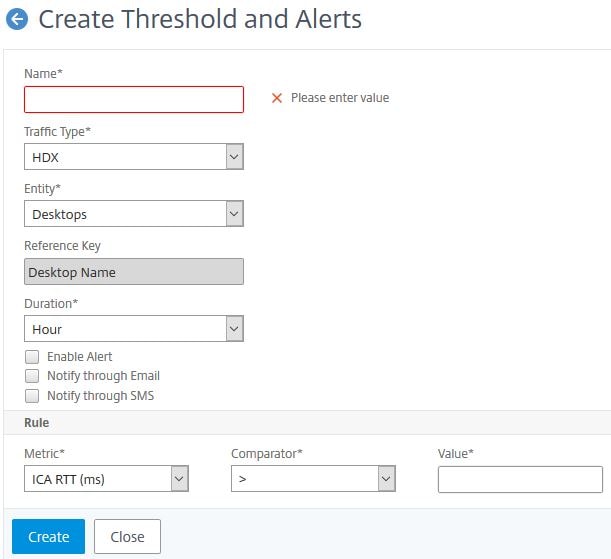
Manage Subscriptions and Auto-selection of managed Virtual Servers:
Subscriptions are where you can turn Auto-select Virtual Servers either on or off. If on (which is the default), MAS selects Virtual Servers randomly to manage. If off, you have to manually choose your own Virtual Servers before they appear in MAS. If you have more Virtual Servers than licenses then either purchase additional licenses or manually tell MAS which ones to manage. The dashboard also allows you to see how many Virtual Servers are managed and how many Virtual Servers of each type (Authentication, Load Balancing etc.) are being managed. If I was to click on 1 underneath Load Balancing for example I’d be able to see which Load Balancing Virtual Servers MAS is managing. Users on a trial period of MAS Service receive a license for 10 Virtual Servers and 5GB storage as shown in the Subscriptions Summary.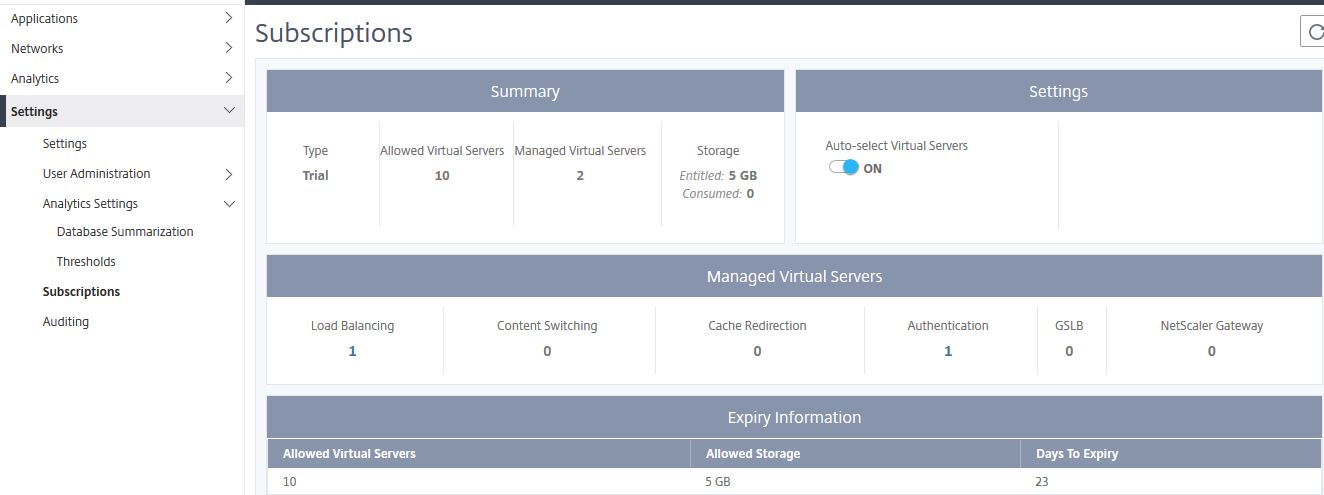
To turn off Auto-select Virtual Servers set the toggle to OFF and then click Select Virtual Servers. 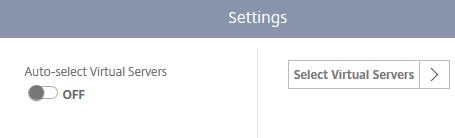
MAS already has a list of discovered Virtual Servers from your managed instances. To choose which Virtual Servers to manage, use the tabs and then click Add Virtual Servers. Use the check box to select a Virtual Server and click Select. Virtual Servers will then appear as below. If you want to unmanage a Virtual Server, check the box next to the Virtual Server and click Mark Unlicensed.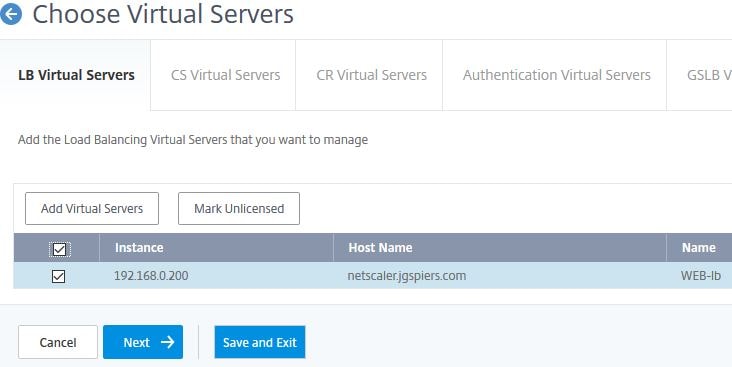
View Audit Log Messages:
Auditing -> Audit Log Messages show a list of Audit Logs related to the NetScaler MAS Service. You can view logins, actions MAS administrators make such as adding a NetScaler instance to be managed, adding/deleting IP blocks, generating reports under Network Reporting and so on.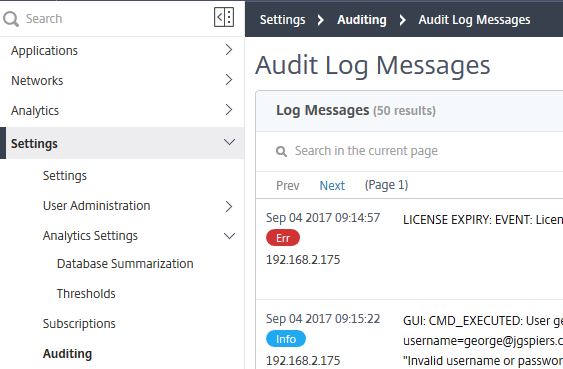
Enable Insight:
To enable Insight on a VPX appliance for example, navigate to Networks -> Instances -> NetScaler VPX -> select the VPX you want to enable Insight for and click Action -> Enable/Disable Insight.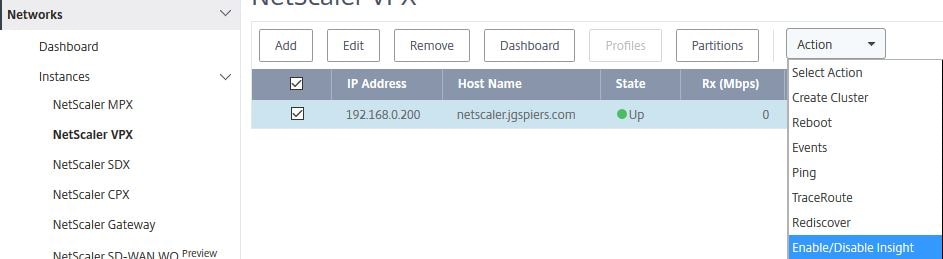
Using the drop-down, select a View (for example VPN), highlight the Virtual Server of your choice and click Enable AppFlow. You cannot enable Insight on Virtual Servers that are down.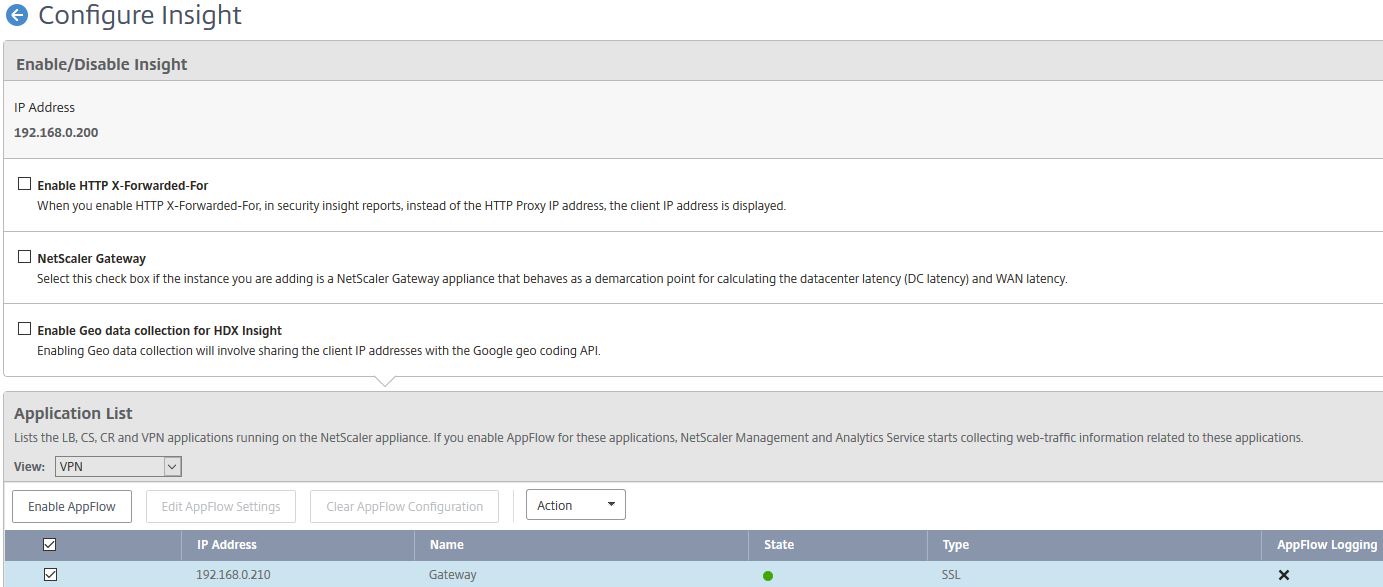
AppFlow can be delivered via traditional IPFIX protocol or the newer LogStream method. Keep in mind that whilst LogStream is a new and efficient way of transporting analytics data from NetScaler instances to NetScaler MAS, it is current in beta. Specify an expression of true, tick Logstream and ICA. Click OK.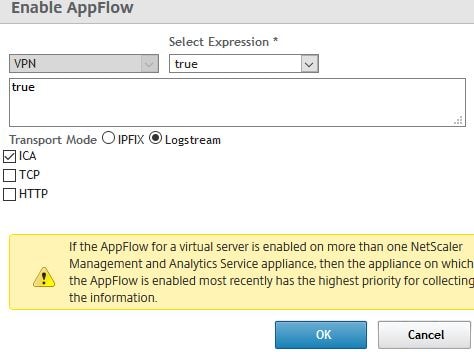
After a few moments you’ll see a green tick under AppFlow Logging and the Transport Mode of Logstream. 
Extract saved configuration from NetScaler and use in an Audit Template:
In this example, the requirement is to ensure that a key part of configuration on NetScaler does not change and if it does, MAS alerts us. For this scenario, I am creating a Configuration Job using part of the extracted NetScaler saved configuration, saving the job as a Configuration Template and then using that Configuration Template to build an Audit Template.
Navigte to Networks -> Configuration Jobs -> Create Job.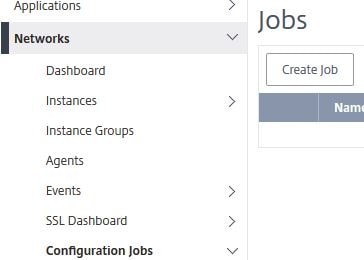
You don’t have to enter a name. Under Configuration Source select Instance. 
Choose an instance and click OK. 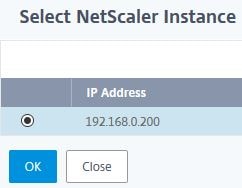
Select Saved Configuration and click Extract. Once extraction is complete drag the commands from obhect to the commands field. What I normally do is select the few commands that I need copy them to notepad, click Clear above the commands field and then paste the specific commands in to the commands field. Check Save as Configuration Template, enter a name and click Save. At this stage exit the Configuration Job creation wizard.
Next we need to create an Audit Template. Navigate to Networks -> Configuration Audit -> Audit Templates -> Add. 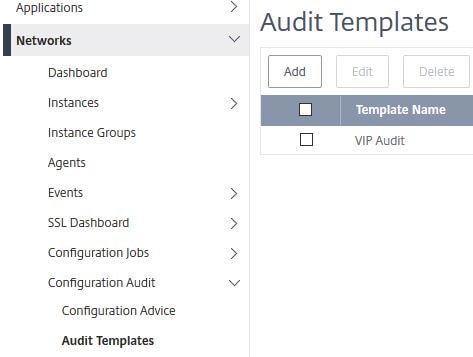 Enter a name and under Configuration Source select Configuration Template. Drag the newly created Configuration Template to the commands field.
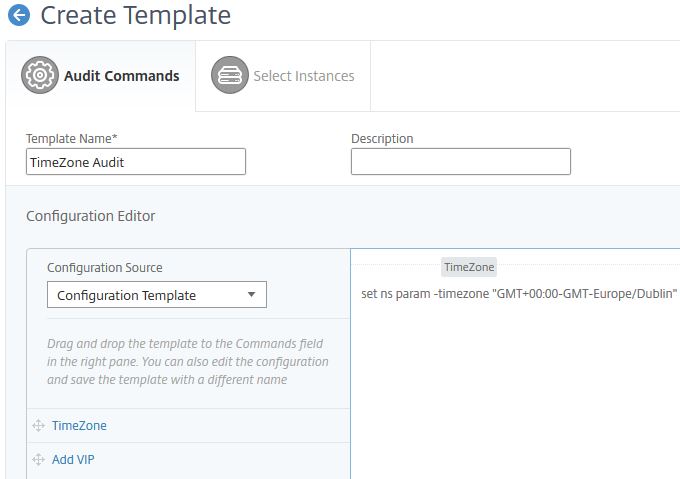
Click Next. 
Using Add Instances, select any amount of instances or Instance Groups and click Finish. The Audit Template will then be run against each instance(s) every 12 hours.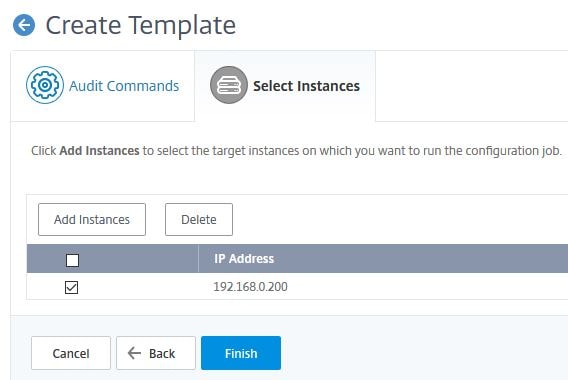
Al Taylor
September 26, 2017Awesome post George, thanks for sharing.
George Spiers
September 26, 2017Thanks!
Pingback: Detailed Change Log – Carl Stalhood
Pingback: NetScaler Management and Analytics System (MAS) 12 – Carl Stalhood
Pingback: Site Updates – September 2017 – Carl Stalhood
Pingback: EUC Weekly Digest – October 7, 2017 – Carl Stalhood
Pingback: NetScaler Management and Analytics System (MAS) 12.1 – Carl Stalhood
Ray
December 8, 2018We route ICA traffic (TCP/UDP 1494 and TCP/UDP 2598) through a NS SNIP, and NS snip
send it to storefront then routes it to the VDAs.
Will this work for collecting hdx data for internal user’s?
George Spiers
December 9, 2018Yes I assume you mean that you are routing internal ICA traffic through a Citrix Gateway, in which case traffic can be captured by HDX Insight.
Pingback: Citrix Application Delivery Management (ADM) 13 – Carl Stalhood
Pingback: Citrix Application Delivery Management (ADM) 13.1 – Carl Stalhood