NetScaler can perform compression on data to reduce the size of the data in transit without any loss to that data. Compression advantages include reduced bandwidth, reduced stress on backend web servers and the quicker serving of content to users.
The compression feature can be enabled via GUI or using CLI command enable ns feature cmp. Compression is available under Enterprise and Platinum licenses.
Compression can be enabled for HTTP and SSL services only.
Data that is compressible:
- HTML, XML, CSS.
- Microsoft Word, Excel, PowerPoint.
- Plain or rich text documents.
Quantum size: The minimum size an object must be to be compressed (default 56 KB). This setting exists to prevent the NetScaler wasting resources compressing content that is already very small to begin with.
Change Quantum size: Navigate to Optimization -> HTTP Compression -> Change compression settings -> Quantum size.
Note: Other settings such as the compression level can be configured by navigating to Optimization -> HTTP Compression -> Change compression settings -> Quantum size:
- Optimal – Corresponds to a GZIP level of 5-7. (default option).
- Best Speed – Corresponds to a GZIP level of 1.
- Best Compression – Corresponds to a GZIP level of 9.
Note: The better the compression, the more CPU that will be consumed on NetScaler. Plan carefully when using compression, especially if you have a lot of services.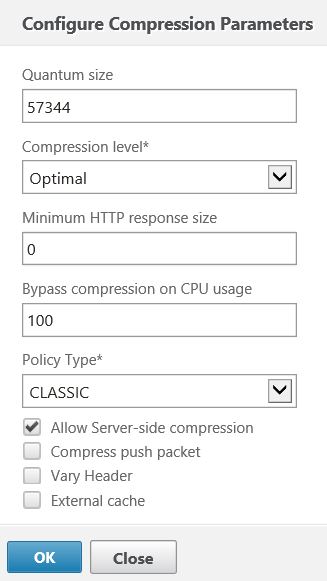
Another setting named Bypass Compression On CPU Usage prevents compression from running if the NetScaler reaches a certain CPU percent level. This by default is set as 100%.
Compression can be enabled at a global level or against individual services.
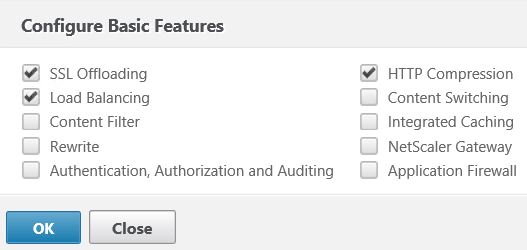
Enable compression globally: Navigate to System -> Settings -> Configure Basic Features -> HTTP Compression. At this stage some default compression policies that have already been created will be used globally to compress data.
Enable compression per service: Enable the compression feature as above then navigate to Traffic Management -> Virtual Servers and Services -> Services -> edit existing service -> tick Compression under Settings.
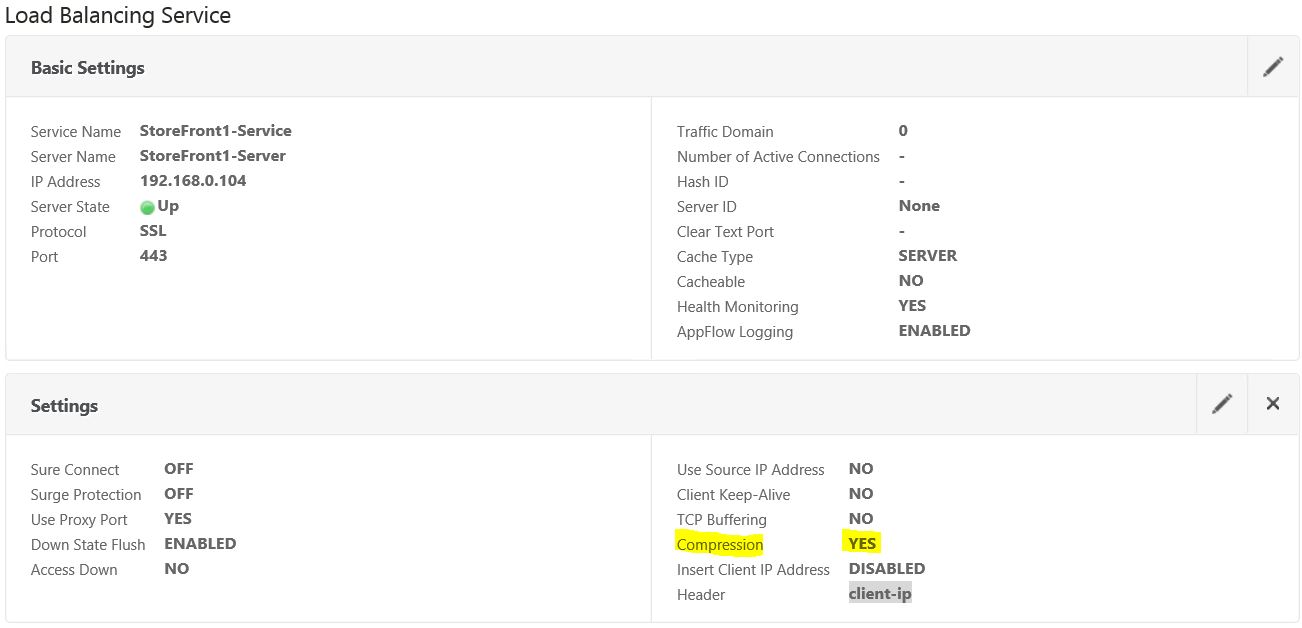
Note: If you have configured services before enabling compression globally then you must enable compression individually on each service. Future created services will have compression enabled by default.
Compression Policies contain actions which dictate if compression applies or not and if so using which compression algorithm. Policies can be applied globally or to a vServer.
Compression Actions:
- COMPRESS – Compresses data using GZIP or DEFLATE algorithm (depending on which algorithm the web browser supports).
- NOCOMPRESS – Does not compress data.
- GZIP – Uses the GZIP algorithm to compress data on browsers that support this algorithm.
- DEFLATE – Uses the DEFLATE algorithm to compress data on browsers that support this algorithm.
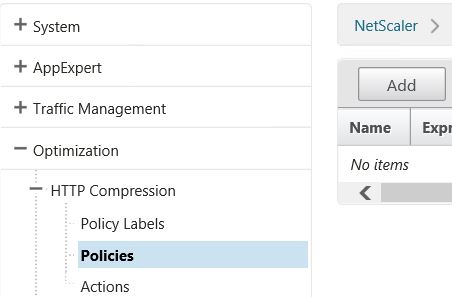
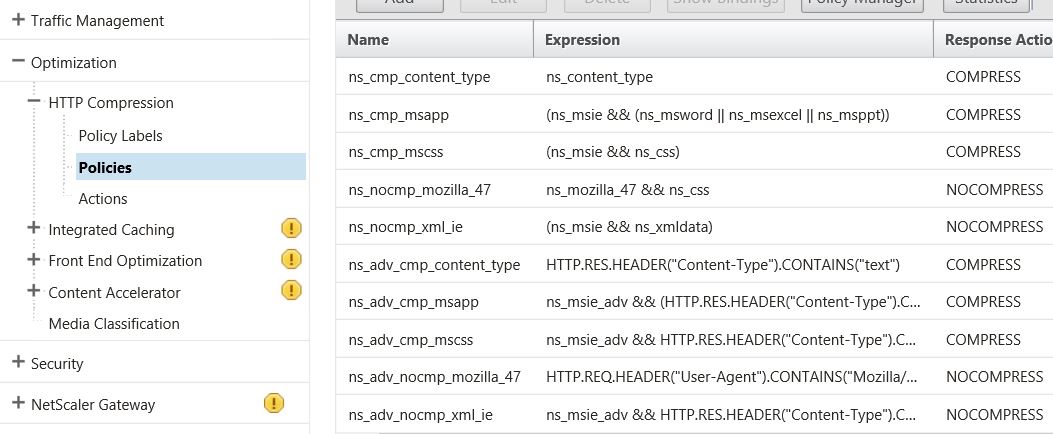
To configure a policy, navigate to Optimization -> HTTP Compression -> Policies -> Add.
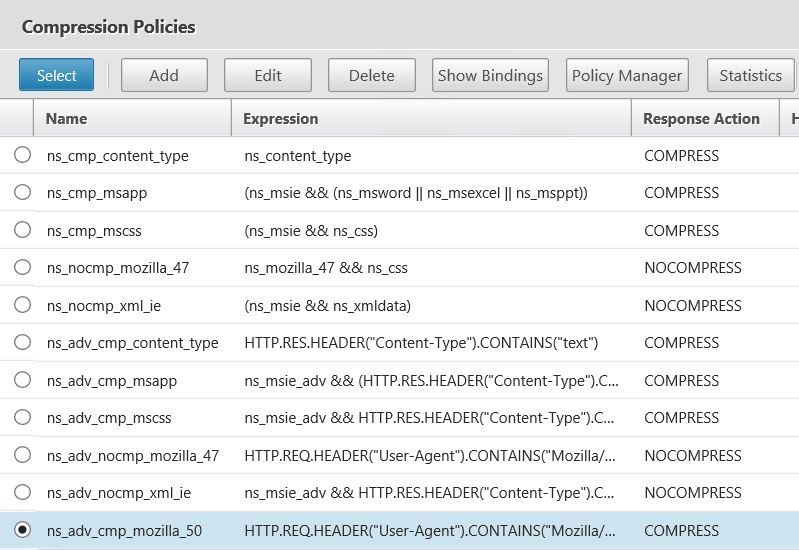
A number of built-in policies already exist which can be viewed by clicking on the Show built-in Compression Policies link. These policies are activated globally when you enable compression.
Some policies include:
- ns_nocmp_xml_ie – Data of type XML and text is not compressed when the browser connecting is IE.
- ns_cmp_msapp – Files of type Microsoft Word, Excel and PowerPoint are compressed.
- ns_cmp_content_type – When the response contains text data, this policy is used to compress.
Now create a policy with the Response Action as COMPRESS and an expression that specifies the User Agent contains Mozilla//5.0 as shown below. Note that to create this policy I am using the default syntax. This is recommended as policies created with a default syntax can perform deeper analysis of the data. If you have a reason to use a Classic Syntax, click Switch to Classic Syntax.
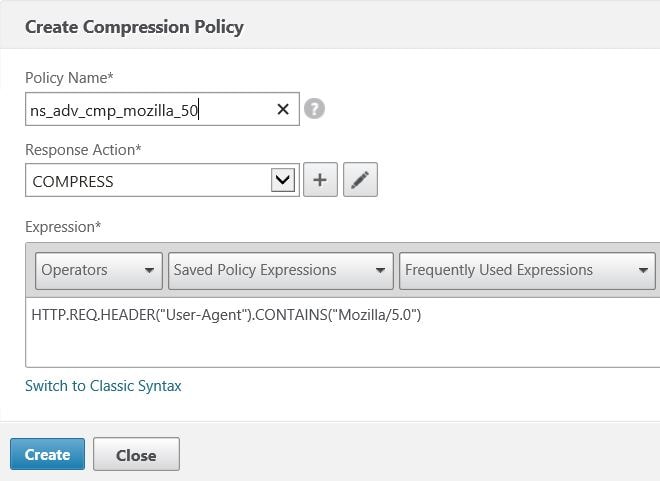
To find out what user agent your browser uses, there are websites out there such as https://msdn.microsoft.com/en-gb/library/ms537503(v=vs.85).aspx.

You can also use the Saved Policy Expressions such as ns_msie for Internet Explorer.
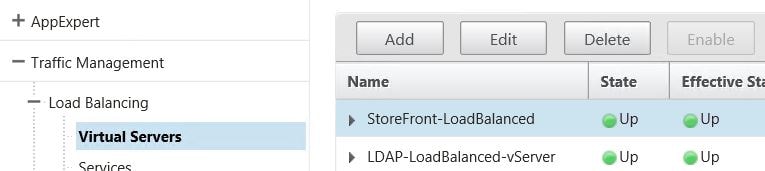
Next bind the policy so a vServer by navigating to Traffic Management -> Virtual Servers. Click on the desired vServer and select Edit.
Under Policies click Add.

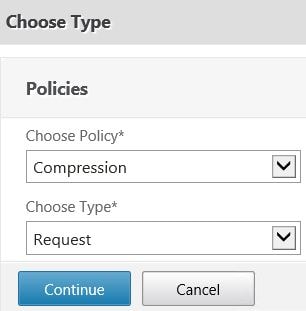
Under Choose Policy select Compression and under Choose Type select Request. Click Continue.
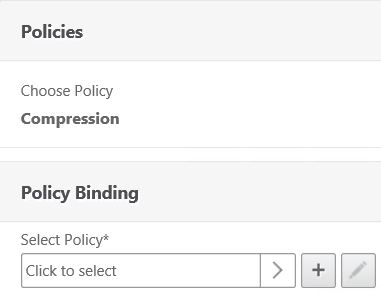
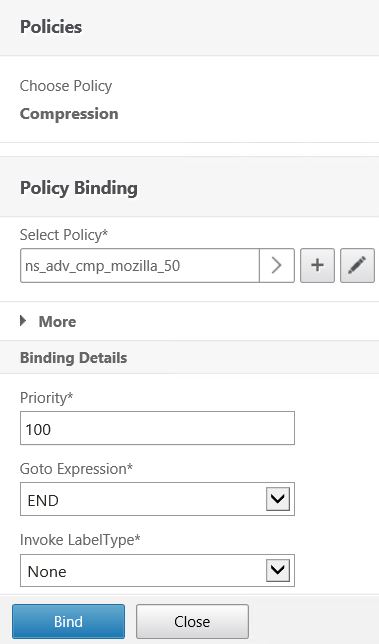
Under Select Policy click Click to select.
Choose the policy we just created and click Select.
Click Bind.
Click Done.

Save the running configuration.
![]()
Now using your web browser visit the web page that is served through the Load Balanced vServer. This vServer will be the one we enabled the compression policy against.
Now on the Dashboard pane on your NetScaler, using the dropdown select Compression Policy. We can see that the ns_adv_cmp_mozilla_50 policy has received hits.
Next switch to Compression. You can see some compression statistics.
Then back over in Optimization -> HTTP Compression -> Policies the created policy also shows compression statistics.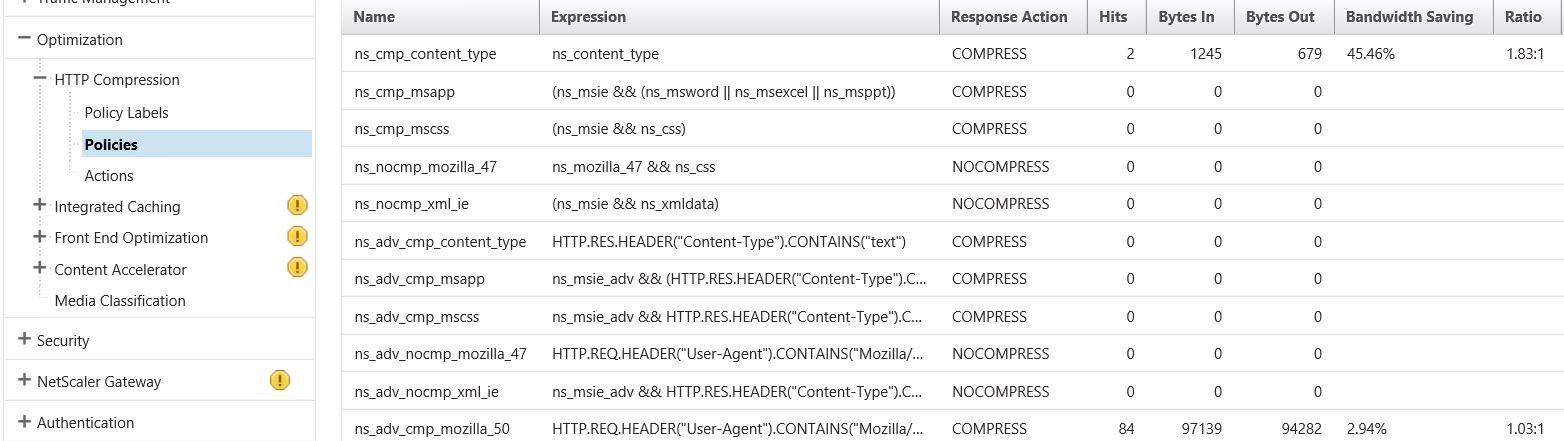
Another example is compression of the Director website using NetScaler. Here I am using HTTP Fox, an add-on that allows me to view the GET requests and responses between my web browser and the Director server. Keep an eye on the received bytes column. Also notice that my browser is sending Accept-Encoding gzip, deflate as supported compression methods. The server is not returning anything compressed as the response headers do not contain any Content-Encoding flags.
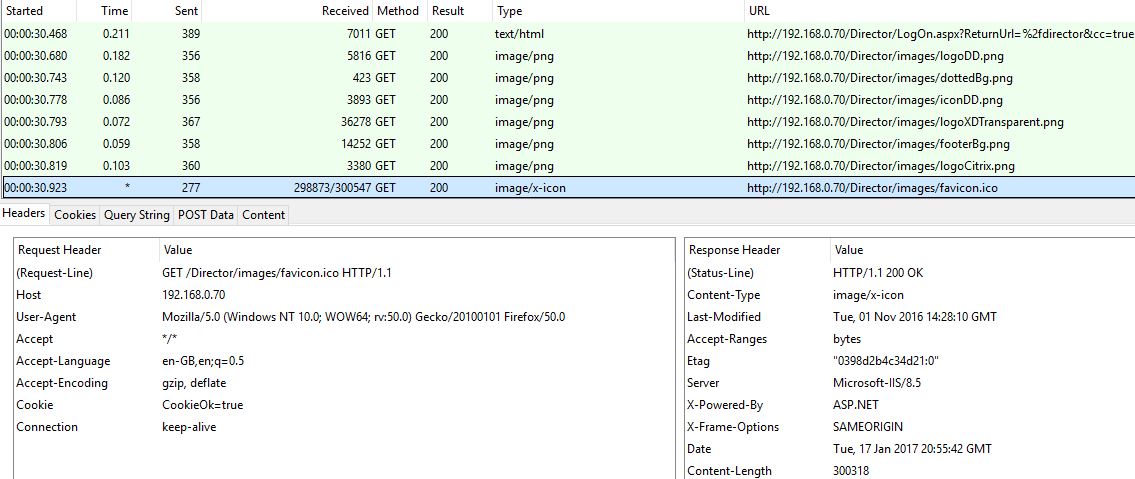 Now with compression enabled on the NetScaler, the received bytes are reduced. Also notice the Content-Encoding gzip field within one of the response headers. This proves the NetScaler is using GZIP to compress the data.
 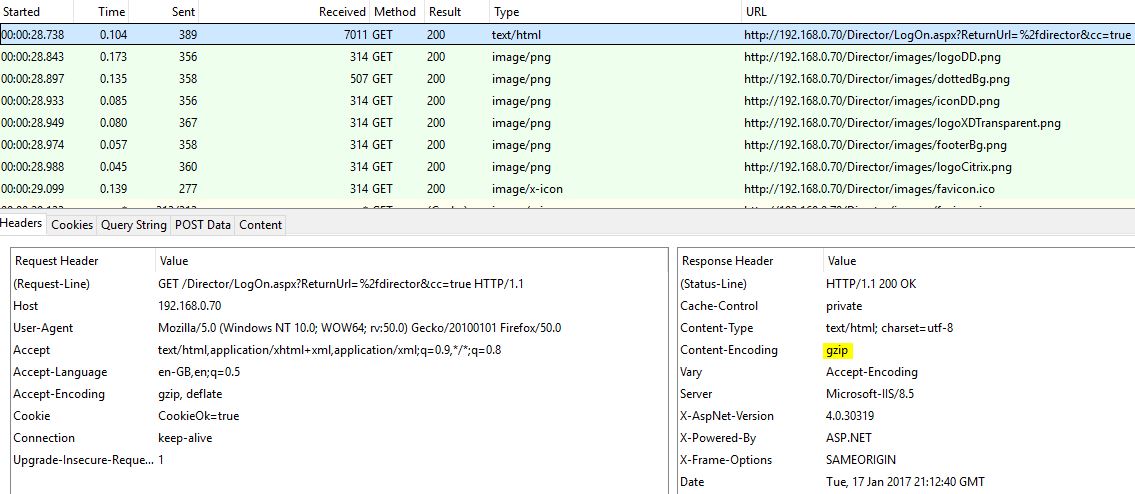 Using CLI and stat cmp shows come compression statistics including a 2.82 HTTP compression ratio.
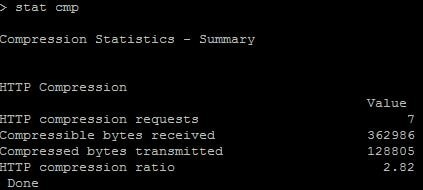
Anonymous
December 13, 2018I have tried to remove the Accept-Encoding Header to be able to rewrite the requests that I’ll send to the backend services (like in here https://support.citrix.com/article/CTX122916). I can see that the RW policy is being hit, but still I can see Content-Encoding header in the responses (with gzip).
My policy and action:
add rewrite action rw_act_remove-acceptencoding delete_http_header Accept-Encoding
add rewrite policy rw_pol_remove-acceptencoding true rw_act_remove-acceptencoding
… and I’ve bound these on request/rewrite on the vServer (behind a CS).
I’m using a similar approach for Atlassian products and they seem to work as expected. I’m on NS 12.0-59.9 (VPX200Ent).
Kari Ruissalo
December 13, 2018I’m trying to remove the Accept-Encoding header to allow rewriting my requests and responses. I have done it like in this article (https://support.citrix.com/article/CTX122916). It seems to work just fine with Atlassian web sites, but not for this new one.
My act/pol looks like:
add rewrite action rw_act_remove-acceptencoding delete_http_header Accept-Encoding
add rewrite policy rw_pol_remove-acceptencoding true rw_act_remove-acceptencoding
… and I have bound it on the LB VS (rw/req).
The environment is running NS-12.0-59.9 (VPX200Ent).
rohit aggarwal
November 9, 2019thanks for the information