Using NetScaler you can set up Load Balancing for LDAP traffic or LDAPS. In this guide, I am using LDAP however the majority of steps for LDAPS will be similar.
NetScaler Gateway direct authentication to StoreFront instead of using LDAP policies – https://jgspiers.com/netscaler-gateway-authentication-direct-storefront/
For LDAPS you need to make a modification to the nsldap.pl monitor and ensure certificates exist on your LDAP servers.
I have two Active Directory servers configured for this guide:
- DC.citrixpro.co.uk (192.168.0.101)
- DC2.citrixpro.co.uk (192.168.0.108)
- LDAP port = TCP 389
- A NetScaler Gateway with LDAP Profile attached which will link to the new load balanced VIP when created
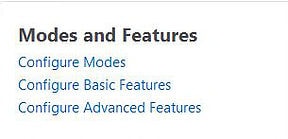
Enable Load Balancing by navigating to System -> Settings -> Configure Basic Features.
Check the box next to Load Balancing and click OK.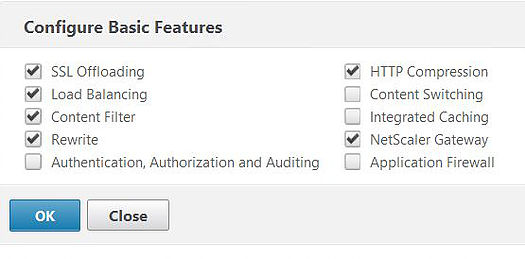
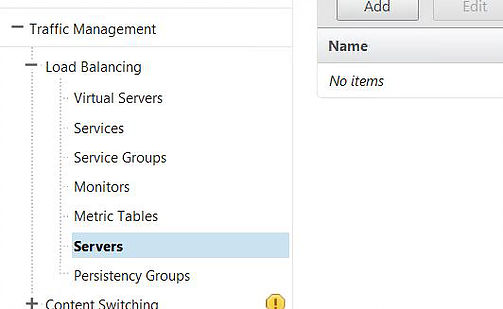
Servers need to be created for each LDAP server partaking in load balancing. Navigate to Traffic Management -> Load Balancing -> Servers -> Add.
Configure the first server with a name, and the IP address of your first LDAP server and click OK.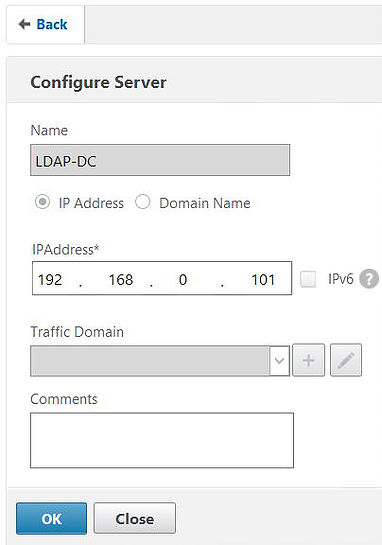
Repeat the process for any remaining LDAP servers.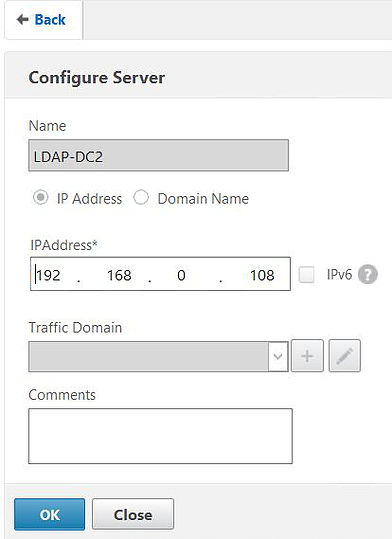
Both LDAP servers have been created and are shown as enabled.
Next, create a Service Group. Navigate to Traffic Management -> Load Balancing -> Service Groups -> Add.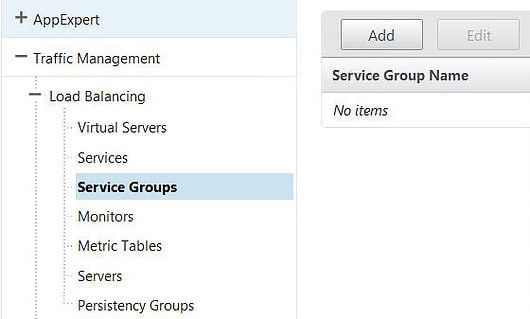
Give the Service Group a name, specify TCP as the protocol and click OK.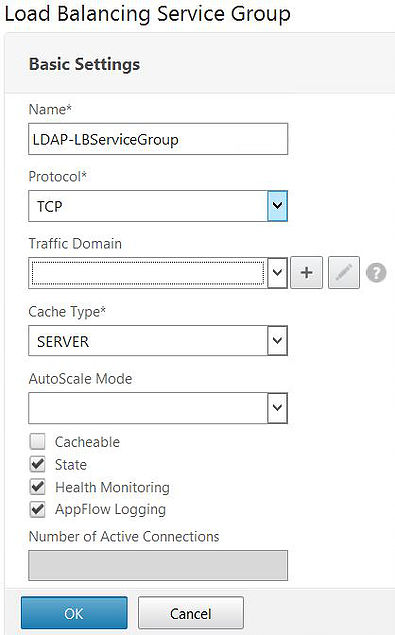
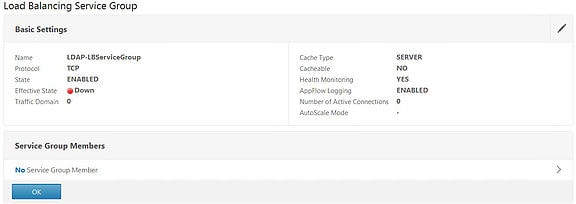
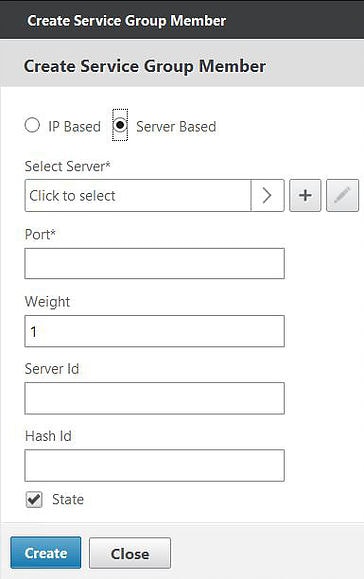
Click on No Service Group Member to add Service Group members.
Check the radio box for Server Based and then click on Click to select.
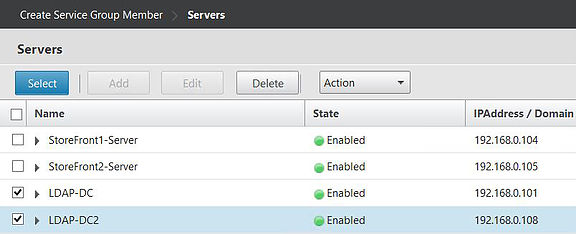
Select the recently created LDAP servers and click on Select.
Specify the port as 389 and click Create.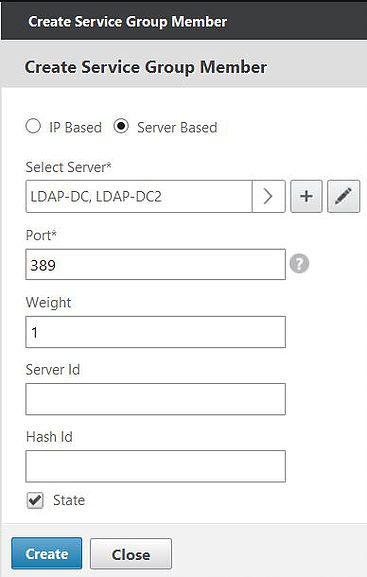
Click on OK.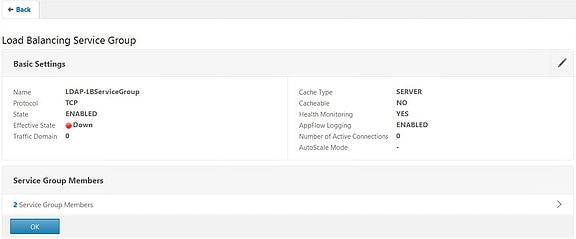
We need to add the LDAP monitor to the Service Group. The LDAP monitor is one built by Citrix and binds to the 389 port to ensure LDAP is functioning. Click on the Monitors box to the right.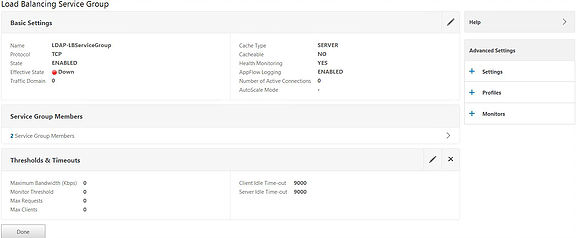
Click on No Service Group to Monitor Binding to add a monitor.![]()
Click on Click to select.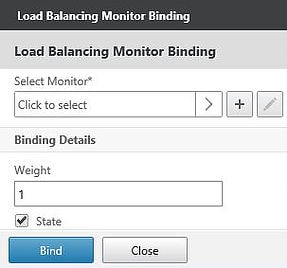
Click on Add.
Specify an appropriate name and under Type select LDAP. Enter a destination port of 389.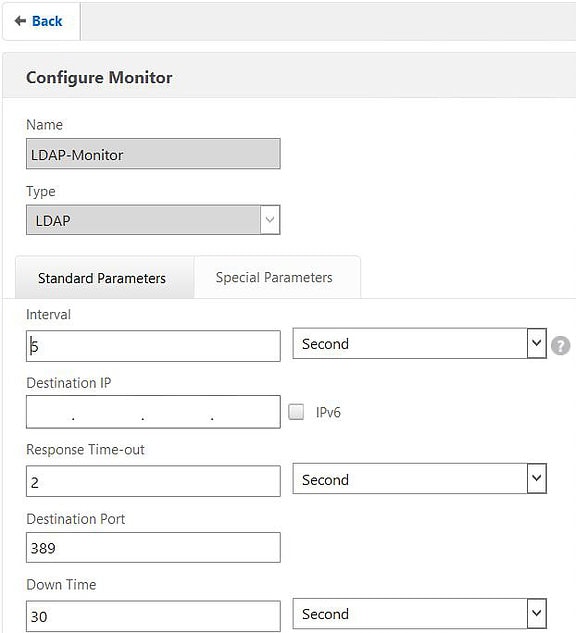
Click on the Special Parameters tab and under Script Name select nsldap.pl. Under Base DN enter your domain name in LDAP format. Under Bind DN and Password enter the details of an account you want the monitor to use when binding to LDAP. This should be a service account with user privileges and the password should not expire. Click OK. The Dispatcher Port and Dispatcher IP fields will automatically be filled in after clicking OK so do not be concerned if these are blank.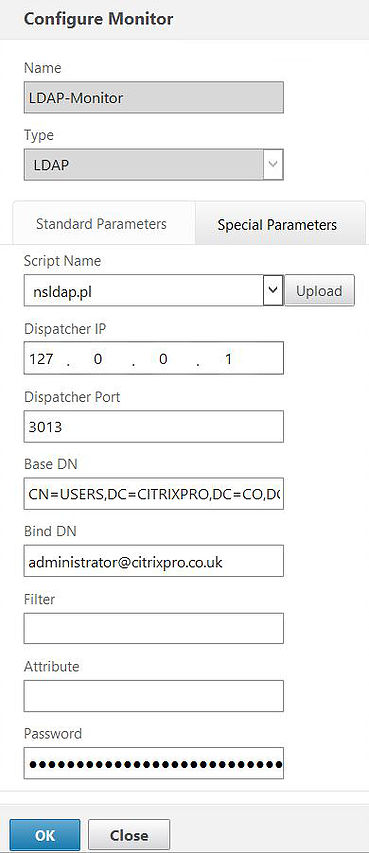
Select the LDAP monitor you created.![]()
Click Select.
![]()
Click Bind.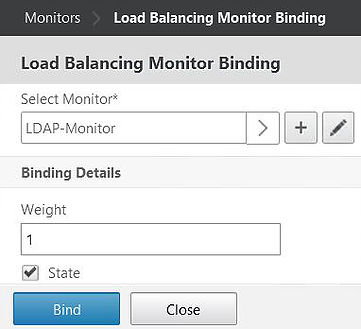
Click Close.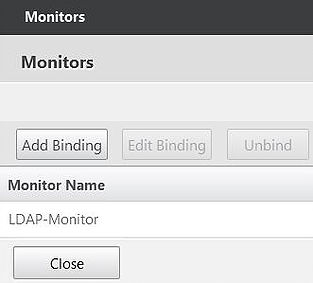
The Service Group now has a monitor attached. Click Done.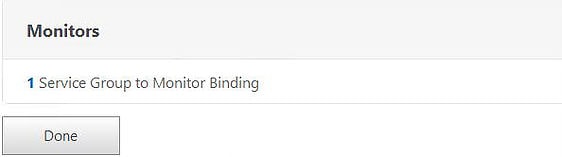
If we go back to Traffic Management -> Load Balancing -> Service Groups and click on the newly created Service Group. Click Actions.
Click Manage Members.![]()
Both LDAP members appear and we can see that the Service Status is Up. The monitor is successfully able to bind to LDAP over TCP 389 at this time.
Navigate to Traffic Management -> Load Balancing -> Virtual Servers -> Add.
Specify a Name, set the Protocol as TCP, specify an IP address (VIP) and then specify the Port as 389. Click OK.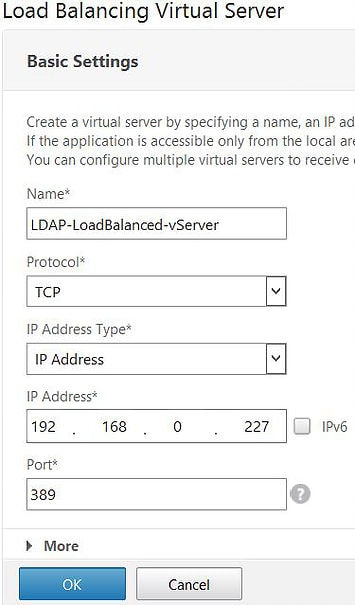
Click No Load Balancing Virtual Server ServiceGroup Binding.![]()
Click Click to select.

Click the Service Group we created earlier and click Select.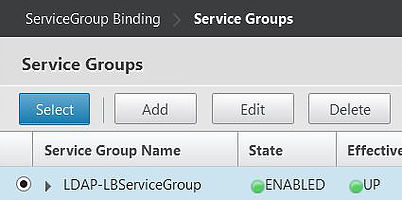
Click Bind.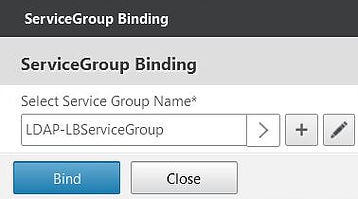
The Service Group has been attached to the vServer. Click Continue.
Click on the Method box to the right of your screen.
Under Load Balancing Method select ROUNDROBIN and click OK.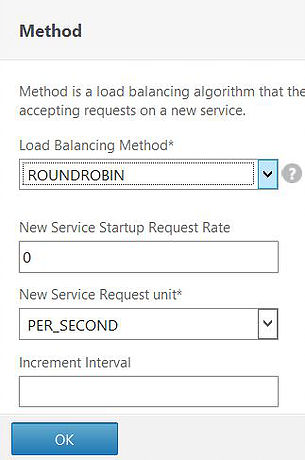
Click Done.![]()
The new Load Balanced Virtual Server is created and in the Up state.![]()
Now that we have a load balanced LDAP vServer for use, we can use it to authenticate users against for example, NetScaler Gateway. I have a NetScaler Gateway vServer created in Basic Mode for ICA Proxy. I also have an LDAP policy attached to the vServer, however the LDAP policy currently only points to a single Domain Controller. What I can now do is point the policy to the new Load Balanced VIP instead.
Navigate to NetScaler Gateway -> Policies -> LDAP.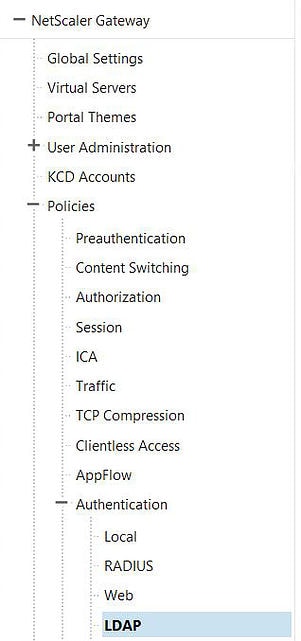
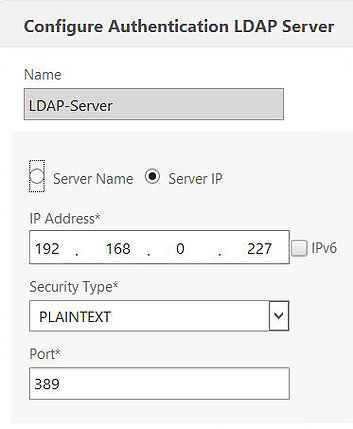
Click on the Servers tab. Click on the available LDAP server and click Edit. Add a new one if you need.
Under IP Address specify the new Load Balanced LDAP vServer VIP. Click OK.
Save your running configuration.![]()
For the first test, using a web browser, I’ve gone to the NetScaler Gateway address of https://netscaler.citrixpro.co.uk. I have logged on using the administrator account.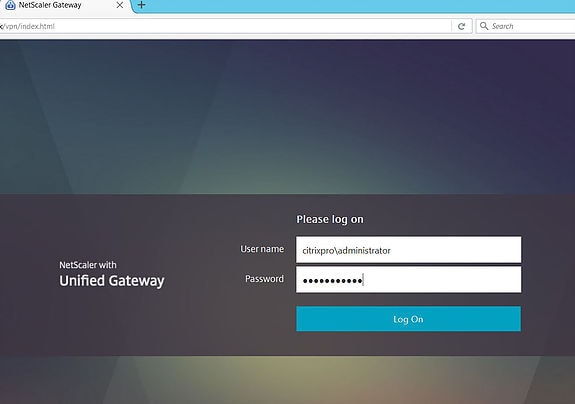
Using WireShark and an nstrace on the NetScaler, during authentication you can see traffic flowing between the LDAP server DC (192.168.0.101), the SNIP (192.168.0.250), the VIP (192.168.0.227) and NetScaler NSIP (192.168.0.211). If you look closely, all communication to LDAP is via the SNIP. If you don’t have LDAP load balanced, the NSIP is used for communicating to a single LDAP server.
For the second test I have authenticated with a different user account.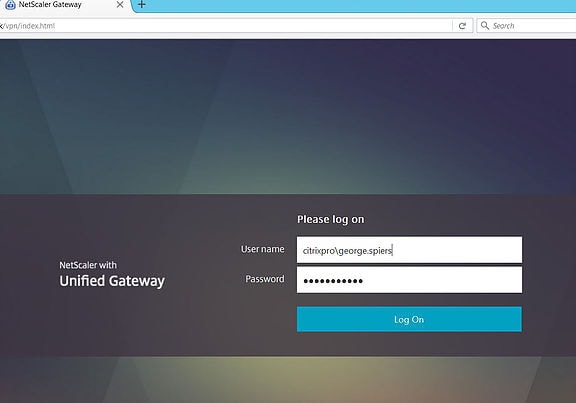
Again WireShark captures authentication traffic for the different account. Notice the 192.168.0.108 address involved in the authentication process. This is the DC2 LDAP server and proves the ROUNDROBIN load balancing method is working.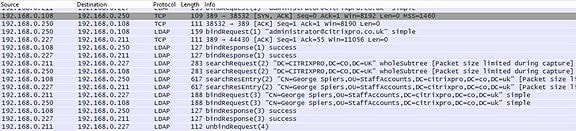
Anonymous
March 22, 2018Excellent topic
Anonymous
March 24, 2018Thanks for posting this. I really appreciate your blog.
Anonymous
March 29, 2018Great. Thanks very much für your time for this excellent work
Anonymous2
August 5, 2018I remember speaking with a NetScaler expert (from Citrix0 a few years back and they said that simply creating a load balanced server for LDAP is a problem since all traffic during the authentication needs to be sent to the same domain controller. I do recall him saying that if you don’t ensure all traffic is sent to the same domain controller, it will fail. I noticed that you didn’t mention anything special about this in the post. Could you please provide suggestions on how to avoid this pitfall? Thanks!
George Spiers
August 5, 2018Without looking at the steering of LDAP authentication packets I can tell you that this setup is used in all sorts of environments and there are no failures.
Mayur
August 15, 2018Hi George,
I am trying to learn how to configure LB of LDAP. I noticed in the steps you have shown the Monitor uses the Special Parameters where you configure the Perl script etc. Is the running of the script in the Monitor section still relevant when configuring on v12 firmware or it can be done in a different way.
Thanks,
Mayur
George Spiers
August 16, 2018It is recommended to use the script. Your LDAP monitor will authenticate with AD and perform a search against the directory. If successful, the service is marked UP.
Mayur
August 16, 2018Thanks for your note. I will configure it in my lab and see how it works.
Han Valk
December 3, 2018You are aware of the fact that Microsoft disapproves load balancing LDAP to DCs?
When doing a simple LDAP bind, which is what the NetScaler does, domain joined Windows clients normally use Kerberos. By Default which authentication protocol does the NetScaler use for an LDAP bind, Kerberos or NTLM?
George Spiers
December 5, 2018Sure but it works for many people. Kerberos cannot be used as Citrix ADC is not part of the domain. Simple authentication is used.
Pingback: NetScaler Authentication with Duo - An nFactor Example - IT Randomness
Pingback: NetScaler nFactor with Duo - Update - IT Randomness
Aditya Pagadala
May 9, 2023Thanks for the detailed article. I have implemented this in VPX ADC 13.0. This article helped me to complete my task.