Citrix Profile Management (now on version 7.16) at the time of this writing comes installed with the Virtual Delivery Agent when installed on your 7.x Worker VMs. Below are some of the frequently used and important policy settings that are configurable with CPM:
- Active write back (CPM v3.0+) – Files and folders (not registry entries) that are modified can be synchronised to the user store in the middle of a session rather than at logoff. This can speed up the logoff process as there will be less to write back. The Citrix user store is the location that stores your CPM profiles, for example on a networked server or storage.
- Always cache (CPM v3.0+) – Optionally, to enhance the user experience, use this setting with the Profile streaming setting. This imposes a lower limit on the size of files that are streamed. Any files this size or larger are cached as soon as possible after logon. Other files smaller can be streamed when needed. To use the cache entire profile feature, set this limit to zero which caches all of the profile contents.
- Always cache size – This setting is used with the above Always cache setting. The above enabled Always cache whilst this setting allows you to set the size of files to cache. A value of 0 caches the entire profile.
- Delay before deleting cached profiles (CPM v5.0+) – Works only if Delete locally cached profiles on logoff is enabled. Sets a delay before deleting the profile from a Worker VMs disk. A value of 0 deletes profiles immediately. Checks take place every minute, so a value of 60 seconds ensures a profile will be deleted between 1 and 2 minutes depending on when the last check took place. Extending the delay is useful if you know or find that a process keeps files or the registry hive open during logoff. With large profiles, this can also speed up logoff.
- Delete locally cached profiles on logoff (CPM v2.0+) – Does what it says. I’d recommend enabling this. If you restart your Worker VMs each night and they are configured to discard changes then this setting may not be as important to you.
- Folders to mirror (CPM v3.1+) – Mirroring is helpful in reducing profile bloat caused by build up of browser cookies and the index.dat file. When users browse the internet from multiple VDAs, it is common for cookies to build up in a profile and become stale with the index.dat file referencing those stale cookies. Normally the session logged off last shoud overwrite any older session cookies however instead cookies from all sessions are merged. Mirroring the cookie folders ensure that last write wins and the index.dat is kept up to date with the most recent cookies. For Interner Explorer 10 and later, add the following folders under Folders to mirror:
- AppData\Local\Microsoft\Windows\INetCookies (Cookies location for Windows 8.1 and Windows 10).
- AppData\Roaming\Microsoft\Windows\Cookies (Cookies location for Windows 7 and Windows 8).
- AppData\Local\Microsoft\Windows\WebCache (Cookies database is maintained at Webcache01.dat).
- Note: Folder mirroring is recursive, so adding AppData\Local\Microsoft would also mirror subfolders.
- Note: When using Internet Explorer 10 and UPM 5.2+ stale cookies are deleted automatically. If you aren’t using these versions, enable the Process Internet cookie files on logoff (this will add extra time to logoffs).
- Directories to synchronize (CPM v1.0+) – This setting allows for the inclusion of directories below excluded folders. For examle, directories that applications use may be included here.
- Note: Folders that applications store outside the user profile require solutions such as Personal vDisk. Profile Management should not be used with such applications. Citrix class these applications as legacy/badly behaved.
- Disable automatic configuration (CPM v5.0+) – Profile management 5.x examines the environment and configures itself accordingly. By default this setting is disabled.
- Enable profile management (CPM v2.0+) – Does just that.
- Excluded groups (CPM v5.0+) – In this setting you can specify computer local groups and domain groups to prevent particular user profiles from being processed by CPM.
- Exclusion list – Directories (CPM v2.0+) – List of directories that are ignored during synchronisation. See the Directories to synchronize setting if you want to get granular. Citrix recommend excluding the AppData\Local and LocalLow folders from synchronisation. Also if you believe a directory is causing a profile to become corrupt, you could exclude it from synchronisation either temporarily until you find a fix or prove your theory, or permanently.
- Note: Excluded folders may still appear in the user profile but will not be synchronised.
- Note: There are some applications that may store settings in AppData\Local. You may be able to change this behaviour to AppData\Roaming instead, or you can use the Directories to synchronize setting to include them.
- Exclusion list – Files (CPM v2.0+) – List of files that are ignored during synchronisation. Wildcards are supported i.e. AppData\*.tmp ignores files with the .tmp extension within the AppData directory and its subfolders. If you believe a file is causing a profile to become corrupt, you could exclude it from synchronisation either temporarily until you find a fix or prove your theory, or permanently.
- Note: Wildcards are supported for files, but not directories.
- Files to synchronize (CPM v1.0+) – This setting allows for the inclusion of files below excluded folders. For example, files that applications use may be included here.
- Grant Administrator access (CPM v5.0+) – By default, users are granted exclusive access to the contents of their own redirected folders. Enabling this setting allows Administrators access to the content aswell. Recommended for support purposes.
- Include the domain name (CPM v5.0+) – Enabling this option will include the %userdomain% environment variable as part of the UNC path. For example, \\servernameredirfolders\joe.loors.domain.local.
- Local profile group handling (CPM v2.0+) – This setting configures what Profile Management does if both a profile in the user store and a local Windows user profile exist on the machine that the user is logging on to. You can choose to use the local profile, delete the local profile and use CPM or rename the local profile and use CPM.
- Log off user if a problem is encountered (CPM v4.1.1+) – If a problem is encountered when a user logs on (for example, if the user store is unavailable) a temporary profile is provided (by default). Enabling this setting displays an error message and logs the user off instead. If disabled, a temporary profile is issued as normal.
- Migration of existing profiles (CPM v2.0+) – Profile management can migrate existing profiles on the fly during logon is the user has no profile in the user store. During logon if an existing Windows profile is found and the user does not yet have a Citrix user profile in the user store, the Windows profile is migrated (copied) to the user store. In future, the Citrix user store profile is used by Profile Management in the current and any other session on machines that use Citrix Profile Management. If this setting is enabled, profile migration can be activated for Roaming and Local profiles, Local only, or Roaming only. This is a neat feature. Remember that when a user has a Citrix user profile, this profile takes precedence over Local and Roaming profiles and will be the selected profile used during a session if it exists.
- Number of retries when accessing locked files (CPM v1.0+) – Sets the number of retries when accessing locked files. The default is five.
- Path to template profile (CPM v2.0+) – By default, new user profiles are created from the Default User profile on the computer where a user first logs on to. Profile Management can alternatively use a centrally stores template when creating new user profiles. Template profiles are identical to normal profiles. Users need read access to the template profile.
- Template profile overrides local profile – If this setting is enabled, Profile Management uses the template instead of the local default profile when creating new user profiles.
- Template profile overrides roaming profile – Same concept as above but for Roaming Profiles.
- Template profile used as a Citrix mandatory profile for all logons – The template profile is used as a Citrix mandatory profile for all logons.
- Path to user store (CPM v1.0+) – The path that will contain user profiles. A central storage share somewhere on the network.
- Process logons of Local Administrators (CPM v1.0+) – Specifies whether logons of members of the local group Administrators are processed by Profile Management.
- Processed groups (CPM v1.0+) – If this setting is configured, Profile Management processes only members of these user groups. Computer local groups and domain groups can be used. For domain groups, specify DOMAINNAME\GROUPNAME. For local groups, specify GROUPNAME. Local Group members must be Domain Users.
- Profile streaming (CPM v3.0+) – With Profile Streaming, user profile parts are synchronised only when they are needed. Registry entries are cached imediately, but files and folders are only cached when accessed by the user. This can allow for faster logons. If a user has large files, you may want to cache these immediately using the Always Cache setting. This will help prevent any delays once the user tries to access a large file.
- Note: Profile Streaming is not supported with XenDesktop personal vDisks.
- Note: Profile Streaming is not supported with Citrix App Layering Elastic Layers.
- Streamed user profile groups (CPM v3.0+) – If this setting is enabled, only profiles of the members included in the groups specified are streamed. If this setting is disabled, all user profiles are streamed.
- Timeout for pending area lock files (days) (CPM v3.0+) – You can set a timeout period that frees up users’ files so they are written back to the User Store from the pending area in the event that the User Store remains locked if a server becomes unresponsive. Use this setting to prevent bloat in the pending area and to ensure the User Store always contains the most up-to-date files.
- Active write back registry (CPM v5.6+) – This setting is used with Active write back and allows modified registry entries to be synchronised back to the user store in the middle of a session.
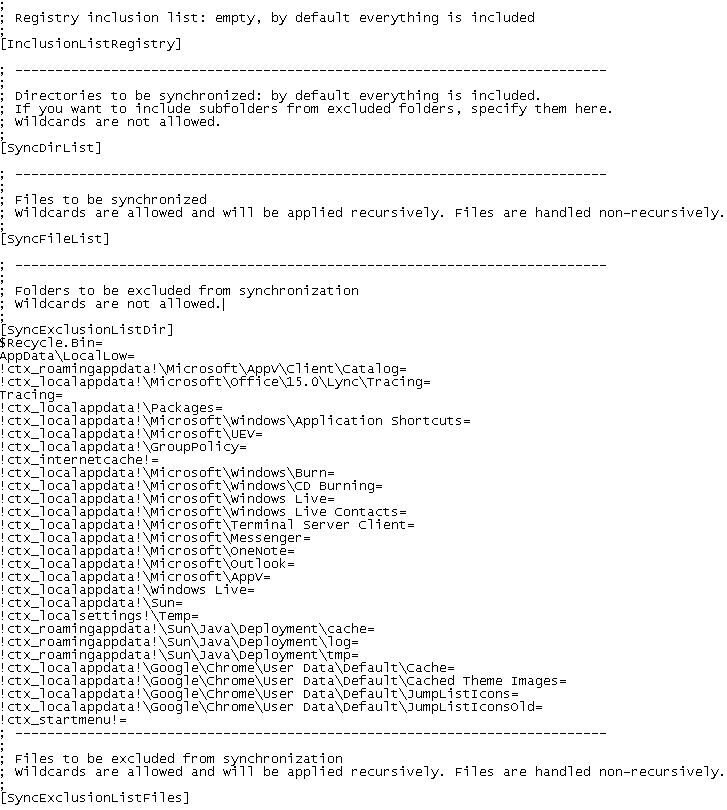
- Enable Default Exclusion List – directories (CPM v5.5+) – A list of directories excluded from synchronising to your users profiles. The list here is the same that is in the UPMPolicyDefaults_all.ini file under [DefaultSyncExclusionListDir] on your VDAs. If you do not configure this setting the local .ini file is used. This setting however allows you to easily hand pick which directories will be excluded when configured using Group Policy instead of copying them from the local .ini file.
- Enable Default Exclusion list (CPM v5.5+) – A list of registry keys in HKCU that are excluded from synchronising to your users profiles. The list here is the same that is in the UPMPolicyDefaults_all.ini file under [DefaultExclusionListRegistry] on your VDAs. If you do not configure this setting the local .ini file is used. This setting however allows you to easily hand pick which keys will be excluded when configured using Group Policy instead of copying them from the local .ini file.
- NTUSER.dat backup (CPM v5.5+) – Citrix have identified that the common cause to profile corruption stems from damage to the NTUSER.dat file. As a result, CPM can now keep two copies of the NTUSER.dat file. One is written after a successful logoff and the other is most recent version. If a corruption is detected, CPM overwrites the bad file with the good NTUSER.dat file.
- Profile Streaming Exclusion List – directories (CPM v5.8+) – The directories in this list are ignored by Profile Streaming and are instead fetched immediately from the User Profile Store on user logon. By default in previous versions of CPM, only the registry was fectched at logon and then any file size at or above the size defined in the Always Cache setting was cached as soon as possible after logon.
- Large File Handling – Files to be created as symbolic links (CPM v7.16+) – Allows you to redirect large files rather than synchronise them on logon/logoff. This will help combat logon slowness due to the synchronisation of large files, especially when you do not use Profile Streaming. It will also reduce IOPs.
♣ What’s new in CPM 5.5
♣ What’s new in CPM 5.6
♣ What’s new in CPM 5.7
♣ What’s new in CPM 5.8
♣ What’s new in CPM 7.16
♣ What’s new in CPM 7.17
♣ What’s new in CPM 7.18
♣ System Requirements
♣ Profile Support
♣ Create Profile Store Share and Permissions
♣ Tips on managing the CPM Profile Store
♣ CPM Root Profile Structure and Location
♣ CPM Profiles across multiple platforms and domains
♣ CPM Profiles shared simultaneously across different VDA machines
♣ High Availability and Load Balancing
♣ Migration of existing profiles to CPM
♣ Citrix Profile Management configured via Citrix Policies
♣ Splitting out profiles per department or location (example)
♣ Upgrade Citrix Profile Management
♣ CPM Logging and the Log Parsing Utility
♣ Events logged by CPM
♣ Template Profiles for new users
♣ Microsoft App-V and Profile Management
♣ Microsoft UE-V and Profile Management
♣ Citrix ShareFile and Profile Management
♣ Google Chrome and Profile Management
♣ Mozilla Firefox and Profile Management
♣Logon Exclusion Check (new in CPM 5.7+)
♣ Large File Handling (new in CPM 7.16+)
♣ XenApp Optimization (new in CPM 7.16+)
♣ Outlook search and OST roaming (new in CPM 7.18+)
♣ Tips
What’s new in CPM 5.5
- NTUSER.DAT backup capability to reduce the chances of profile corruption. Citrix have identified that NTUSER.DAT was a culprit of the majority of profile corruptions.
- The new 5.5 ADMX template includes the recommended items (file/registry) for inclusion and exclusion in a profile – typically found in the local .ini file.
What’s new in CPM 5.6
- CEIP integration.
- Ability to actively write-back registry entries during the middle of active session.
What’s new in CPM 5.7
- Support for roaming default programs on Windows 10 and Windows Server 2016.
- Ability to exclude items from synchronising to the local profile from a UPM store when a user logs on. This setting is disabled by default and must be enabled via the local .ini file on each VDA.
What’s new in CPM 5.8
- Support for Windows 10 Redstone 2.
- Optimised support for Windows 10 and WS2016.
- Profile management can omit or delete excluded items in the user store when a user logs on.
- Enhanced support for processing cookies when using IE10 and IE11 using policy Process Internet cookies on logoff.
- Optimised folder mirroring for mid-session synchronisation.
- Profile streaming exclusions using the Profile Streaming Exclusion list – directories policy allows you to specify folders which are not streamed and instead locally cached when a user logs on by copying them immediately from the user store.
What’s new in CPM 7.16
- Logon and logoff performance enhancement with large file handling.
- Cross-platform enhancement.
- Application Profiler. Citrix provides new application based profile processing.
What’s new in CPM 7.17
- Security attributes can be synchronised when Profile Management copies files and folders in a user profile between the system on which the profile is instaled and the user store.
What’s new in CPM 7.18
- Outlook search and OST roaming along with the user profile. The OST and Outlook search data is captured in a container.
System Requirements
- CPM must be used with Windows 7, 8, 8.1 and Windows 10 or Server 2008, 2008R2, 2012, 2012R2 and Server 2016 across XenApp and XenDesktop platforms.
- Note: Windows Store applications (Metro Apps/UWP) are supported on dedicated XenDesktop desktops and desktops that have a PvD, but not other desktops. This is because these types of applications are not designed to work on roaming profiles.
- Profiles can be held on a shared network folder centrally or if preferred within the user’s home drive. By default user stores reside in the WINDOWS folder in a user’s home drive if configured however you should specify a different location.
- Policies can be controlled by Citrix Studio or Group Policy with the use of an ADMX template file.
- Settings in the local .ini file (UPMPolicyDefault_all.ini) on each VDA will apply if not explicitly configured in Studio or Group Policy. Settings in the .ini file should only be changed for testing purposes. You should configure all settings from Studio or GP.
- CPM supports an NTFS share for storing profiles, which can be accessed using SMB or CIFS.
Profile support
The following versions of CPM and XenApp/XenDesktop are supported together:
- CPM 5.1+ with XenApp/XenDesktop 7.5.
- CPM 5.2+ with XenApp/XenDesktop 7.6.
- CPM 5.3+ with XenApp/XenDesktop 7.6 LTSR.
- CPM 5.4+ with XenApp/XenDesktop 7.7.
- CPM 5.5+ with XenApp/XenDesktop 7.11.
- CPM 5.6+ with XenApp/XenDesktop 7.12.
- CPM 5.7+ with XenApp/XenDesktop 7.13.
Create Profile Store Share and Permissions
- When creating the share, hide it with the $ symbol at the end of the share name. This prevents users from seeing the share.
- When creating the share, untick Enable continuous availability if present.
- Select Enable access-based enumeration but deselect Encrypt data access when creating the share.
- Disable inheritance so the share has explicit permissions.
- Set Share permissions as follows:
- Domain Users – READ/WRITE.
- Set NTFS permissions as follows:
- SYSTEM = FULL CONTROL – This folder, subfolders and files.
- CREATOR OWNER = FULL CONTROL – Subfolders and files only.
- UPMUsers = LIST FOLDER/READ DATA/CREATE FOLDERS/APPEND DATA – This folder only.
- Note: UPMUsers could be Authenticated Users/Domain Users and UPMAdmins could be Domain Admins.
- UPMAdmins = FULL CONTROL – This folder, subfolders and files.
Tips on managing the CPM Profile Store
- Do not change the structure of the store or place files or folders inside of the store.
- Do not redirect folders to the store. Keep redirected folders in a separate location from Citrix user profiles.
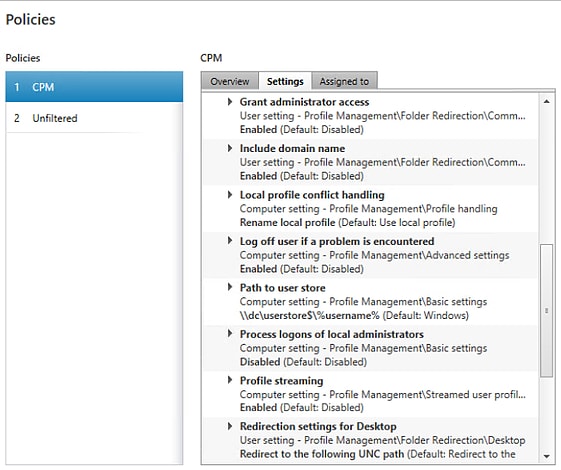
I’ve gone ahead and configured my CPM policies and you can see the settings I have configured in the pictures that follow. You can also see pictures of the profiles being processed by Citrix Profile Management on first log on and how they apply to a Shared Desktop but not against shared applications. I’ve included Folder Redirection for the most part so the majority of the profile is redirected rather than cached or streamed to my XenApp machines.
CPM Root Profile Structure and Location
By default on machines that do not use a Personal vDisk, profiles can typically be found in C:\Users on each VDA. When Personal vDisks are used in a XenDesktop environment, profiles are stored on the PvD, typically P:\.
The following directories and file can be found within a user’s Citrix profile:
- UPM_Profile – This directory contains files and user folders from the profile. Folders such as Desktop, AppData and so on if they are not redirected. NTUSER.dat also resides here.
- UPM_Drive_C – This folder will only be present if you upgraded from CPM 4.x or earlier. The folder would have contained items from outside the profile such as folders or files on C:\. This is not supported in CPM 5.x.
- Pending – This folder will contain any pending files (when Active Write Back or Profile Streaming is used), the stamp file and the lock file.
- UserProfileOrigin.ini – This configuration file simply contains information about when the profile was created, what template was uses (such as C:\Users\Default) what machine it was created from including processor architecture and machine OS type.
- UPMSettings.ini – This confguration file contains all the configured UPM settings such as the path to user store, log levels, exclusion lists and so on.
- PmCompatibility.ini – This configuration file contains information about when the profile was last updated and from what machine it last updated from/used on. It also contains information around what Citrix Profile Management versions the profile was last used on. Looking at this file, you can tell the last VDA which processed this user profile.
CPM Profiles across multiple platforms and domains
When multiple platforms are involved such as Windows 10 and Windows 8, or when using Published Applications on Windows Server 2016 and Windows Server 2012 R2, you need to plan carefully to ensure profiles can be used across all Operating Systems. A profile created on Windows 10 will not work on a Windows 8 desktop. This is because profile structures between Windows Operating Systems have changed. For example Windows 10 Anniversary Update uses a v6 profile and Windows 8 uses v3. This is nothing new and people implementing Microsoft Roaming Profiles have always had this challenge for years.
To separate profiles for each platform, use variables such as %USERNAME%\!CTX_OSNAME! when specifying the path to the User Profile Store. If you use these variables, a Windows Server 2016 profile will be named Win2016.
If you want to include the OS arechitecture (x86/x64) use variables of %USERNAME%\!CTX_OSNAME!!CTX_OSBITNESS! when specifying the path to the User Profile Store. Profiles for Windows Server 2016 will be named Win2016x64.
Note: You could use specify the path as !CTX_OSNAME!\%USERNAME% and all user profiles would then be separated by OS type.
You could also choose %USERNAME%\!CTX_OSNAME!!CTX_PROFILEVER!. In this case profiles will be named Win2016v6.
If you use Home Directories, you can place user profiles there. If you don’t want the profile actually going in to the Home Directory (Documents) folder, you can place it beside. Use a path such as
There is a CPM policy setting Enable cross-platform settings which allows a small amount of application settings to perist between two Operating Systems such as Windows 7 and Server 2008. The application settings are held in a central cross-platform settings store. The majority of new OS and Office/Internet Explorer versions are now unsupported by this feature. I believe Citrix did not want to go down the route of capturing application settings to a central store for cross-platform sharing.
Profiles cannot traverse forests, however can traverse domains within a forest. Variables in the user store path should contain %USERNAME% and %USERDOMAIN%. Active Directory Forest and Domain Functional Levels of Windows Server 2008 and above are supported.
CPM Profiles shared simultaneously across different VDA machines
Users connecting to multiple VDA machines at once, whether that be desktops or published applications, can share the same profile between each VDA. Keep in mind that last write wins, so the VDA a user logs off last will overwrite any changes that was made in previous sessions. For example, user creates a desktop shortcut on Server2016VDA1 then logs off. The user then logs off Server2016VDA2 where the desktop shortcut isn’t present. The change from the last session wins and the shortcut is lost.
Alternatively to prevent such a problem, you could consolidate desktops and applications on to the same VDA machines where possible. Another alternative is to have separate profiles for each “silo”, desktop, application suite however this brings extra management overhead that must be evaluated and taken into consideration.
High Availability and Load Balancing
You can distribute profiles to different DFS Namespace member servers. The Path to user store will be set to the DFS Namespace name including a matching attribute such as Department or Location. The Namespace contains multiple directories matching the attribute names. Those directories simply point to folder targets which are hosted on member file servers across your regions.
In an environment where profiles are globally spread or even confined to one datacentre, redundancy must be localised to each file server. Clustering technologies are supported to ensure high availability of profile hosting file servers.
Active-Active DFS Replication is not supported with Citrix Profile Management.
Active-Passive replication may be implemented so long as the passive file server is only used during an outage. You can implement a DFS Namespace along with multiple folder targets. Only one target is enabled at any given time. DFS Replication keeps the passive targets in sync. When you need to failover, the active target folders are disabled and the passive targets in your disaster recovery site are enabled.
For load balancing, you can effectively distribute user profiles among multiple file servers based on the users Active Directory attributes. Fo example, based on the Office attribute, you can send users to file servers of your choice. This achieves load distribution. For an example, see www.jgspiers.com/citrix-profile-management/#Distribute-Profiles
Migration of existing profiles to CPM
If present, CPM can migrate on the fly the following profile types:
- Microsoft Roaming Profiles.
- Windows local profiles on Windows XP – Windows 10 or Windows Server 2003 – Windows Server 2016.
- Citrix user profiles created with CPM 2.0.
Citrix Profile Management configured via Citrix Policies
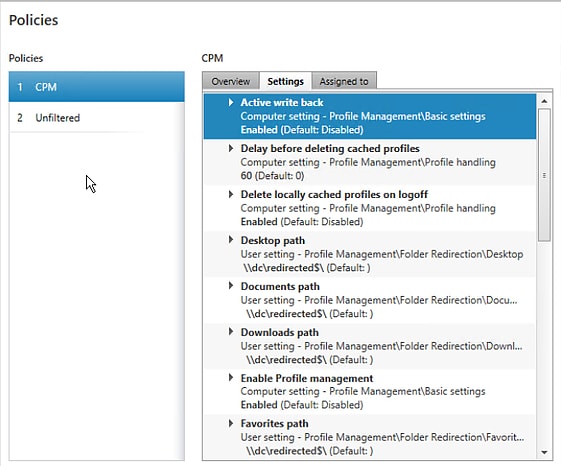

Citrix Profile Management policy applied only to the Corporate Desktop.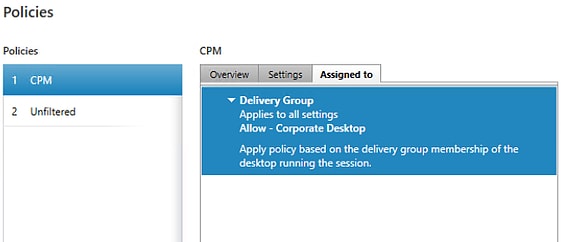
Logging on to the Corporate Desktop processes the first user profile to the Citrix User Store.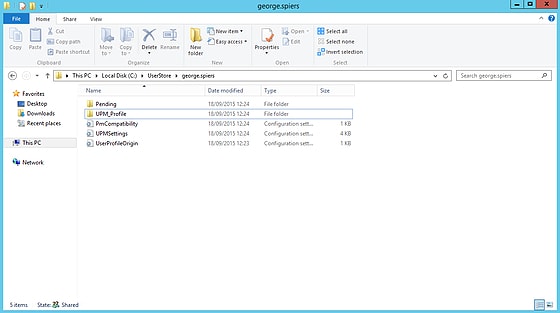
All folders set to redirect are redirected to the correct server location. This includes Desktop, Documents, Downloads and Favorites.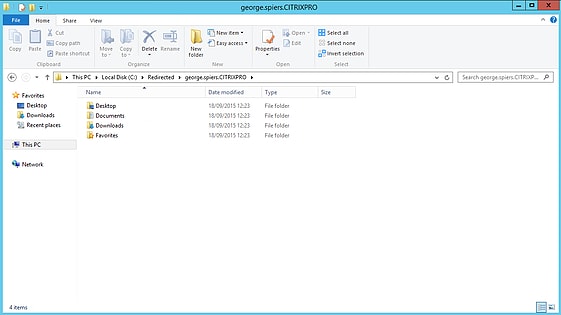
Citrix Director displays the profile information when viewing the users session when logged on to Corporate Desktop.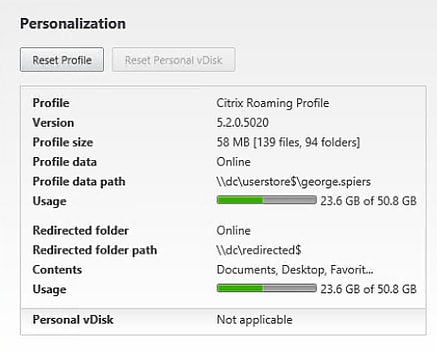

When the same user runs a published application no profile information is displayed because the CPM policy does not apply.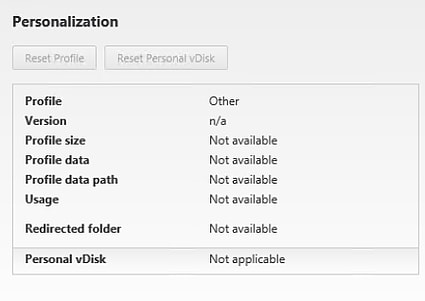
Back on the Corporate Desktop machine, the profile displays within C:\Users.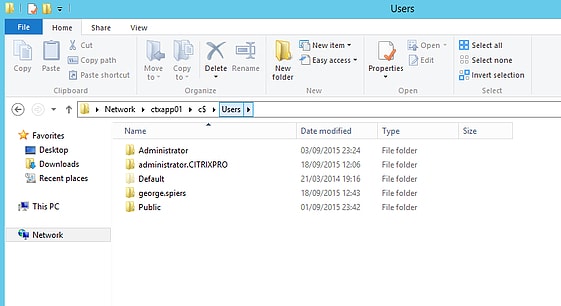
After the user logs off the Corporate Desktop, Citrix Profile Management deletes the locally stored profile.
Splitting out profiles per department or location (example)
The Path to user store location you specify via policy can include AD Schema variables and this ability allows you to separate profiles on to different file servers based on user department or location for example. Take the scenario where you want the Finance team profiles stored on File1 and HR profiles stored on File2.
You would simply fill in the Department attribute within each users AD user account as below.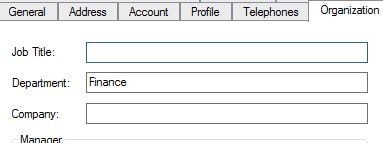
In the Citrix policy, set the Path to user store location to \\#department#.domain.com\storename\%username%. 
Create CNAME records for HR and Finance (the CNAMEs match the attribute values) and point them towards your desired file servers that will host the profiles. ![]()
Now as users log on, Finance staff profiles will be stored on \\finance.jgspiers.com\profile store\%username% (File1) and HR will be \\hr.jgspiers.com\profile store\%username% (File2).
You can see how this would be advantageous when your Citrix farm is distributed across datacentres around the world. Making use of AD Schema attributes will allow you to place London users on a London file server local to them, and New York users are placed on their closest file server.
Upgrade Citrix Profile Management
As always, Citrix recommend that you use the same versions of Profile Management across all VDAs and that the Group Policy ADMX versions match the Citrix Profile Management version running on VDA.
Note: Do not upgrade to CPM 5.x from versions lower than 3.x.
The upgrade procedure is as follows:
- Replace ADMX/ADML files with the latest CPM version. This can easily be achieved by replacing the existing files within SYSVOL (PolicyDefinitions) on your Domain Controller. ADMX templates for newer versions are backwards compatible. Do not enable any new features at this stage.
- Upgrade VDA Citrix Profile Management MSI to desired version (or upgrade VDA).
- The MSI file can be downloaded separately from Citrix or is included in the XenApp & XenDesktop media under x64/x86\ProfileManagement.
- Upgrade .ini file (if you have modified it). If you previously modified the .ini file, the MSI installer detects so and does not overwrite it. To upgrade the .ini file you can either
- Manually add the settings of the newer .ini file to your customised .ini file.
- Save a copy of the existing edited .ini file and use the OVERWRITEINIFILES=yes command during the MSI upgrade install.
- If using Citrix Studio to configure CPM policy settings, upgrade your Delivery Controllers to the latest version.
You should not activate new Citrix Profile Management settings until the VDA side has been upgraded. Settings for each version is stated at the top of this post or found in Citrix docuemntation.
CPM Logging and the Log Parsing Utility
You can enable logging via Group Policy or Citrix policies when you want to troubleshoot. By default only errors are logged to Event Viewer however when logging is enabled you will get verbose levels of information in log files. Remember to turn off logging when you have finished troubleshooting.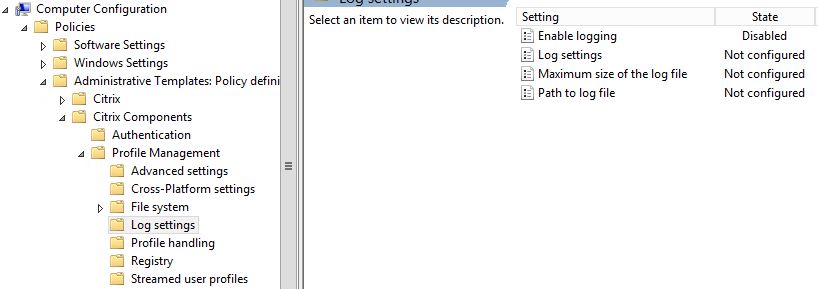
- Enable logging – Enables debug mode logging with logs being stored in C:\Windows\System32\LogFiles\UserProfileManager\.
- Log settings – Allows you to specify events that are logged in detail. For example, logon/logoff events.
- Maximum size of log file – By default the log file can reach 1MB in size, however you can adjust the size using this setting.
- Path to log file – If you want to change the log location from the default location, use this setting. You can specify a local or UNC path. If using UNC, make sure the system account for each VDA has write permissions to the share.
When you enable logging, two log files are stores in C:\Windows\System32\LogFiles\UserProfileManager:
- domainname#VDAname_pm.txt – Informational, warning and error messages are recorded here.
- domainname##VDAname_pm_config.txt – Logs .ini file or GPO settings related to CPM.
The UPM Log Parsing utility makes it easier to read CPM log files.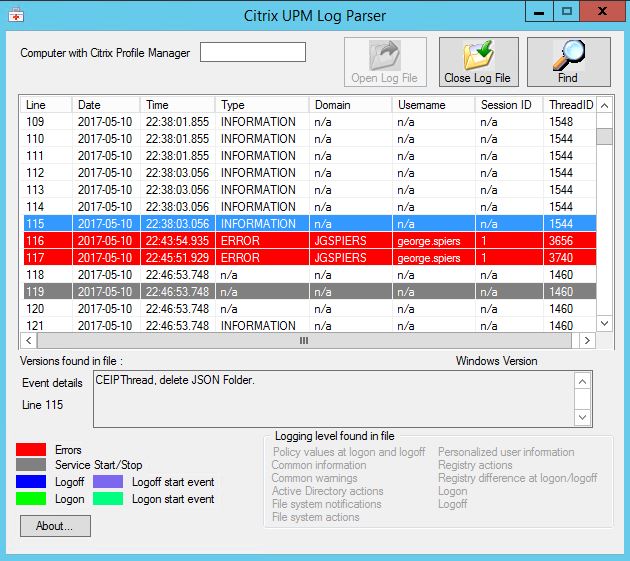 What you want to look out for are warnings, errors and any event that seems to take too long as judged by the time stamps.
Taking an example look at the *pm.txt log file it logs which settings are active. In this example PSEnabled (Profile Streaming) is not enabled along with the Always Cache and WriteBack features being switched off.
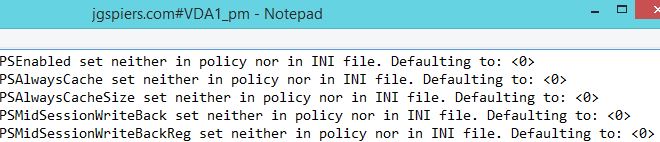
When Profile Streaming is enabled, the log file will log PSEnabled=<1>. ![]()
You can also view logon events. Here the log shows how the user logging on is determined, including the store path. The log also shows an existing profile is not found on the VDA so it is created and profile streaming is found to be enabled. The user hive is loaded along with other files and directories streamed using Profile Streaming.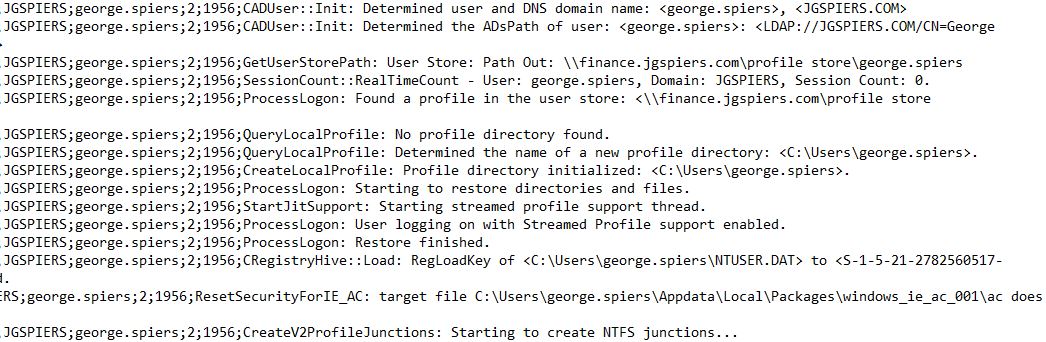
Citrix Profile Management counters can be used to gather performance data using Performance Monitor. Some of these counters are explained below:
- Logoff duration – The total time in milliseconds it took to logoff.
- Logon duration – The total time in milliseconds it took to logon.
- Logon bytes – The amount of data in bytes transferred during the logon process.
- Delete Local Profile Duration – The amount of time it took to delete a local profile. When using Citrix Profile Management you get the option to delete user profiles after that user has logged off their session. This is a good practice to reduce HDD bloat, especially when machines are shared between users in XenApp.
Events logged by CPM
The following events can be logged within Event Viewer by CPM:
- Event ID 6 – Citrix Profile Management Service has started.
- Event ID 7 – Citrix Profile Management Service has stopped.
- Event ID 8 – Profile for user has been modified by a later version of Citrix Profile management and can no longer be used by this version. Ensure versions between VDAs are all equal.
- Event ID 9 – The logon hook detection encountered a problem. You may have to enable 8.3 filename support on the volume where CPM is installed.
- Event ID 10 – A valid CPM profile has been found for the user logging on.
- Event ID 12 – The CPM service was unable to monitor the profile for changes. Ensure that change journal processing is configured and operational. Ensure the VDA has adequate system resources.
- Event ID 13 – The CPM service was unable to stop monitoring the profile for changes. File and registry changes will not be synchronised for this user. Ensure that change journal processing is configured and operational. Ensure the VDA has adequate system resources.
- Event ID 14 – The CPM service was unable to monitor the profile for changes. A problem was detected while attempting to create or resize the NTFS change journal on a volume, preventing th eservice from monitoring changes. Ensure that change journal processing is configured and operational. Ensure the VDA has adequate system resources.
- Event ID 15 – The CPM service was unable to monitor the profile for changes. A problem was detected while querying the NTFS change journal on a volume, preventing the service from monitoring changes. Ensure that change journal processing is configured and operational. Ensure that the VDA has adequate system resources.
- Event ID 16 – The CPM service was unable to monitor the profile for changes. A problem was detected while performing an initial scan of the NTFS change journal on a volume, preventing the service from monitoring changes. Ensure that change journal processing is configured and operational. Ensure that the VDA has adequate system resources.
- Event ID 17 – The CPM service was unable to monitor the profile for changes. A problem was detected while performing an update scan of the NTFS change journal on a volume, preventing the service from monitoring changes. Ensure that change journal processing is configured and operational. Ensure that the VDA has adequate system resources.
- Event ID 18 – The CPM service was unable to monitor the profile for changes. A problem was detected while performing an update scan of the NTFS change journal on a volume, preventing the service from monitoring changes. Ensure that change journal processing is configured and operational. Ensure that the VDA has adequate system resources.
- Event ID 19 – The CPM service was unable to monitor the profile for changes. A problem was detected while preparing the initial scan of the NTFS change journal on a volume, preventing the service from monitoring changes. Ensure that change journal processing is configured and operational. Ensure that the VDA has adequate system resources.
- Event ID 20 – A problem occured while querying Active Directory for information about the logged-on user. Make sure the VDA can contact any Domain Controller in the domain. Make sure the VDA has adequate resources.
- Event ID 21 – Determining the DNS domain and ADsPath failed. This can be caused by a limit on memory allocation.
- Event ID 22 – User tried to access a file but CPM detected a delay. This could be due to interference with an Anti-Virus product. After discussing with your security team, consider adding the UserProfileManager.exe and upmjit.sys files to Anti-Virus exclusion lists.
- Event ID 23 – File access may be denied when user tries to access a file but CPM detects a significant delay. The user will receive an error message.
- Event ID 24 – RevertToSelf failed with error code and Profile management was shut down. Some logon and logoff processing is performed using impersonation. The RevertToSelf function is normally invoked when impersonation is complete but may not be called prompting this error.
- Event ID 25 – The CPM user store could not be reached. Check the network connection between VDA and CPM store and that the store is available.
- Event ID 26 – The default profile location is invalid. Make sure default profiles reside on a mounted, lettered drive such as C:\.
- Event ID 27 – The profile folder for the user logging on is not present under the default profile location. Make sure the users profile is located in the same defautl folder location.
- Event ID 28 – Prmission issues with the registry in the default or template profile used to create this Citrix user profile. Reset the security permissions on the users registry hive in the CPM user store if appropriate.
- Event ID 29 – A template profile path is configured but no profile was found. Check that you have configured a valid profile path and that the path contains the NTUSER.dat file and that this is a valid file with correct permissions.
- Event ID 33 – A profile was created in the user store from a local profile.
- Event ID 34 – A profile was created in the user store from a roaming profile.
- Event ID 35 – A profile was created in the user store from a template profile.
- Event ID 36 – The existing profile for user could not be prepared for this users new Citrix madatory profile. The user will be given a temporary profile if possible. Delete any existing profile folder manually. Ensure the template profile exists and the user has permissions to read its contents.
- Event ID 37 – The user store path could not be reached for the logging on user. A temporary profile will be created for the user. Make sure the VDA has network connectivity to the user store and that the store is available.
- Event ID 38 – The profile for the user logging on is managed by CPM but the user store could not be found. A temporary profile will be created for the user. The users profile could not be found in the user profile store. Make sure the VDA can reach the user profile store and that the store is available. Check to see if the profile does exist in the profile store. If the issue exists delete the profile on the local machine and retry. If that does not work rename the profile hosted on the store.
Template Profiles for new users
When a new user logs on for the first time without a Citrix user profile, the default behaviour is to create a profile based on the Default profile located on the VDA. This is commonly C:\Users\Default. You can create and specify a template profile to be used instead. The template profile sits on a share accessible by each user logging on.
I prefer to make use of the Default profile. You can load NTUSER.dat and add HKU keys to the hive and place shortcuts on the Desktop for example. Any new user logging on will pick up that default, modified profile. Provisioning systems and gold images ensure the default profile is consistent across the estate. Furthermore you can use WEM to place shortcuts in the Start Menu.
Microsoft App-V and Profile Management
App-V 5+ and CPM 5.x can be used together. You must exclude the follownig folder from synchronisation using policy Exclusion List – Directories:
- AppData\Local\Microsoft\AppV
- AppData\Roaming\Microsoft\AppV\Client\Catalog
You must exclude the following registry keys from synchronisation using policy Exclusion List:
- HKCU\SOFTWARE\Microsoft\AppV\Client\Integration.
- HKCU\SOFTWARE\Microsoft\AppV\Client\Publishing
If the Profile Streaming CPM feature is enabled, you cannot use the UserLogonRefresh App-V policy as well. If you must use Publishing Refresh On Logon, disable Profile Streaming.
Microsoft UE-V and Profile Management
UE-V and Profile Management can exist together, however if using UE-V then make sure to disable the Cross-platform settings feature. UE-V (User Experience Virtualization) captures user personalisation settings for various application types allowing those settings to roam from desktop to desktop in a virtual environment. There are two requirements from Citrix when using UE-V alongside Profile Management:
- Exclude AppData\Local\Microsoft\UEV from synchronisation using policy Exclusion List – Directories.
- Do not share profils controlled by UE-V with CPM. Data loss can occur since both profile solutions use a last write win feature which could overwrite data.
Citrix ShareFile and Profile Management
The requirements to run ShareFile with CPM are as follows:
- Use CPM 4.1.2 and later.
- Deploy ShareFile in On-Demand mode.
- Exclude %UserProfile%\ShareFile from synchronisation using policy Exclusion List – Directories.
ShareFile stores configuration data within the AppData\Roaming\ShareFile folder. Since CPM captures the Roaming folder, no further configuration is required on CPM and the folder will follow users as normal.
If you use Personal vDisks in your environment, the CPM profile will be stored here (typically P:\) and therefore you must point SharePoint to the location of the user profiles on your PvD. You can use the ShareFile policy LocalSyncFolder.
Google Chrome and Profile Management
Exclude the following folders from synchronisation using policy Exclusion List – Directories.
-
- Appdata\Local\Google\Chrome\User Data\Default\JumpListIcons
-
- Appdata\Local\Google\Chrome\User Data\Default\JumpListIconsOld
-
- Appdata\Local\Google\Chrome\User Data\Default\Cache=
- Appdata\Local\Google\Chrome\User Data\Default\Cached Theme Images=
Note: These folders are part of the Enable Default Exclusion List – directories policy setting on CPM 5.5+.
Mozilla Firefox and Profile Management
Exclude the following file from synchronisation using policy Exclusion list – files.
- AppData\Roaming\Mozilla\Firefox\Profiles\*\SessionStore.bak
Logon Exclusion Check (new in CPM 5.7+)
In the past you may have found that files and folders captured in a users Citrix profile were taking up a lot of space or were simply unneeded. Unwanted files and folders do not have to exist in the profile as they will simply add to the time taken for a profile to cache locally to a VDA when logging on. You can exclude the unwanted folders and files from being captured in a profile but if the profile(s) have already been created CPM did not offer a way to remove them without your own manual intervention. The problem you faced would have been around removing unwanted files/folders after users profiles were created. This was a manual task or you had to script it. Now starting CPM 5.7+ you have what is called a Logon Exclusion Check which tells Citrix Profile Manager either to not synchronise a folder/file from the CPM store down to the VDA on logon (but keep copies of the folder/file in the CPM store) or else delete that folder/file completely from the CPM store.
Keep in mind that CPM 5.7 only has the ability to exclude files/folders from synchronisation. CPM 5.8 can do this aswell as completely delete the object from the CPM store. The objects are deleted from the CPM store as users log on to the VDA.
To configure this for CPM 5.7/5.8 you need to edit the UPMPolicyDefaults_all.ini file typically within C:\Program Files\Citrix\User Profile Manager\.
Underneath the section [General Settings] enter either:
- EnableLogonExclusionCheck=0 – Do not do anything.
- EnableLogonExclusionCheck=1 – Keep a copy in the Profile Management store within the users profile but don’t cache the file on logon.
EnableLogonExclusionCheck=2 – Delete the folder/file completely from the users profile within the Profile Management store.![]()
Remember that only values 0 and 1 can be used with CPM 5.7 whereas all three values can be used with CPM 5.8.
To configure the same setting on Citrix Profile Management 7.15 and onwards, use the policy setting either from Citrix Studio or from the Profile Management ADMX Group Policy file called Logon Exclusion Check which is found under Computer Configuration -> Profile Management -> File System.
Large File Handling (new in CPM 7.16+)
Rather than streaming or caching large files, you now have the option to simply keep them on the Citrix Profile store using redirection. Keep in mind that not all files are suitable for redirection, especially ones that cannot be accessed by multiple applications such as the Outlook OST file.
To enable Large File Handling, you edit Citrix policy Large File Handling – Files to be created as symbolic links and specify the files you want to include such as !ctx_localappdata!\Microsoft\Outlook\*.ost.
XenApp Optimization (new in CPM 7.16+)
XenApp Optimization was another feature released in CPM 7.16. Using this feature, only the file, folder or registry items specified in an XML file are syncronised to the VDA on logon when a user launches a published application or desktop. This feature reduces logon time because only the required items that an application needs are synchronised.
There are many pre-created XML files on Microsoft TechNet, you can find them here: Microsoft UE-V Templates
Alternatively, you can easily create your own template application XML files by downloading the Microsoft UE-V Template Generator which is part of the Windows 10 ADK.
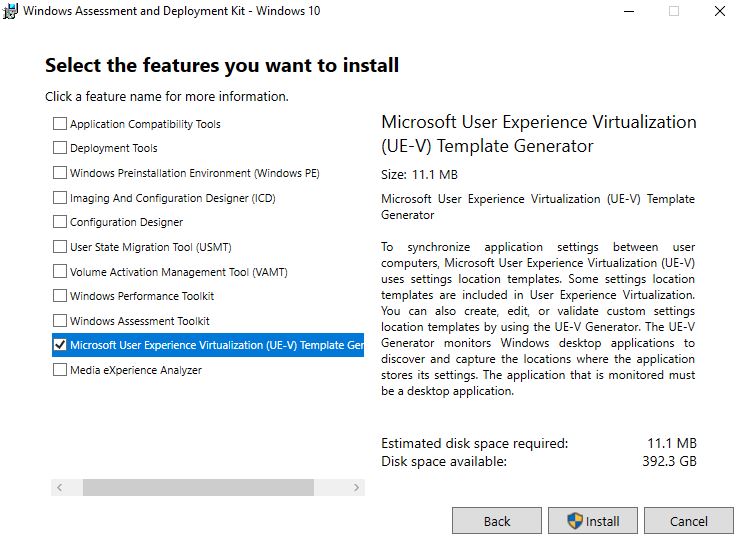
Once downloaded and installed, launch the UE-V Generator and click Create a settings location template. 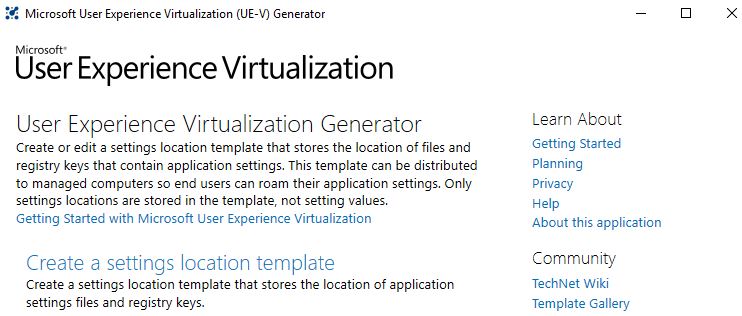
Browse to the application executable file that you want to create a template XML file for. In my case, I want to create a definition file for Adobe Reader. Click Next.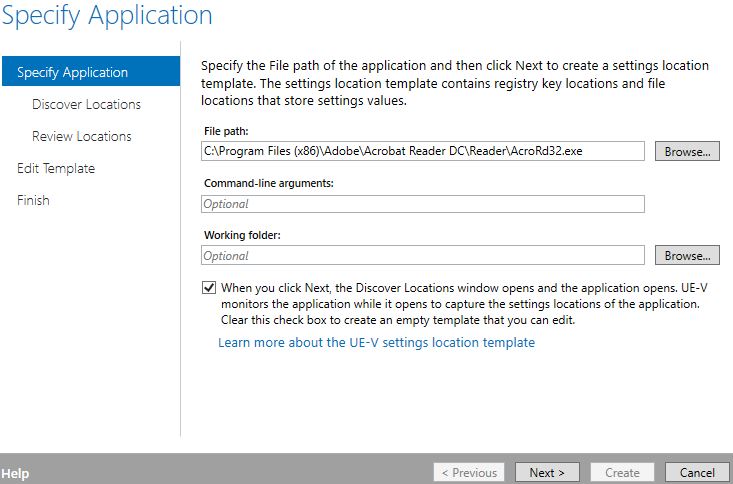
After clicking Next Adobe Reader opens, at the same time the UE-V Template Wizard gets to work on discovering the directories it should capture for possible synchronisation.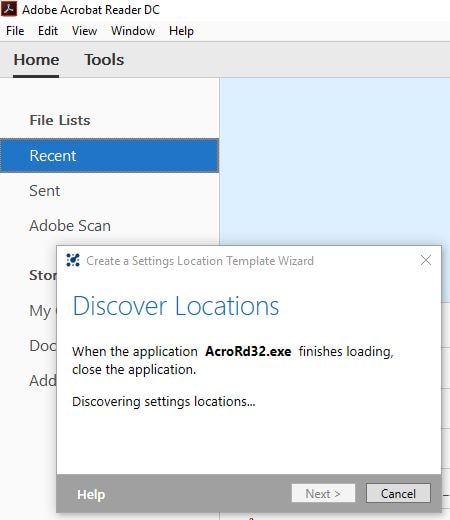
Once the Discover Locations job is complete, click Next. 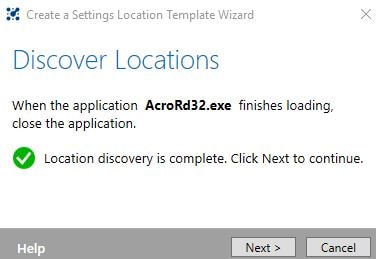
A list of locations will be displayed to you for consideration. Anything you check here will be specified in the XML file, and then that file is used to tell Citrix Profile Management what to synchronise. If you know exactly what should sync then check/uncheck as appropriate. In this example I’ll select just the Software\Adobe\Acrobat Reader location as I know that is all that is required for Adobe Reader. You should do some research if you are unsure of what to select. You don’t want to synchronise things that are not needed, and likewise don’t want to miss out anything that could affect the application and user experience. Click Next.
Specify properties as desired and then click Create. You will be asked at this stage to save the file somewhere.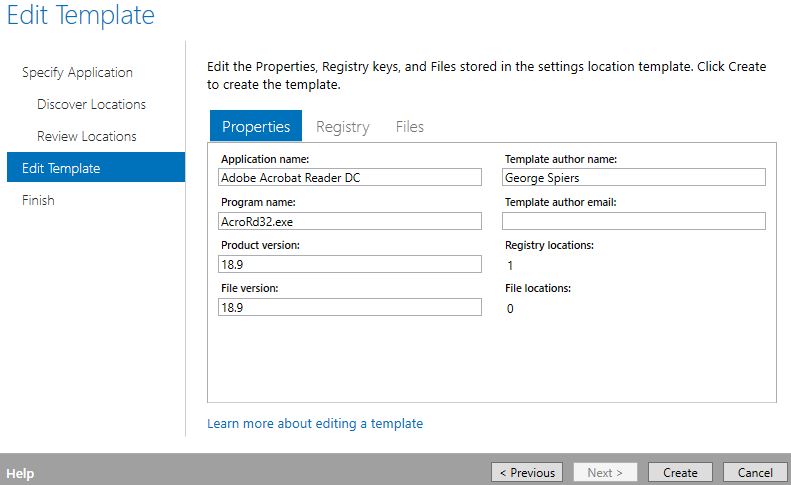
Click Close. 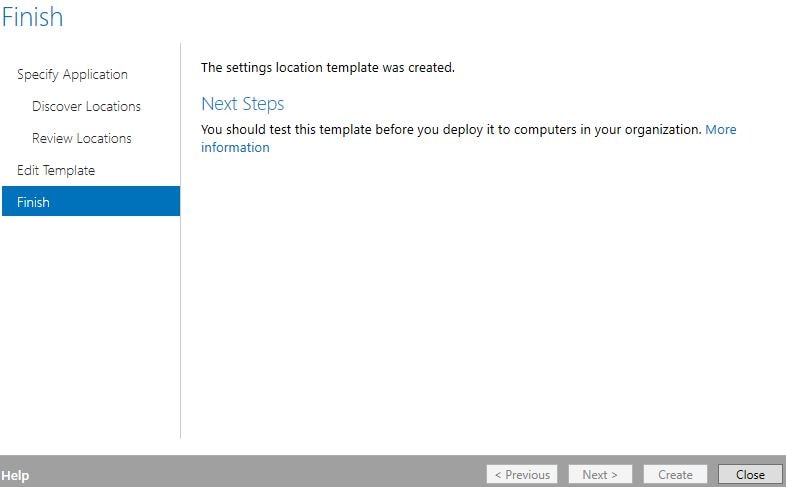
Now that we have our XML file for Adobe Acrobat, we need to convert it in to a definiton file that Profile Management can read. First of all open the XML file to take a look.
As shown under <Registry> the location that I specified earlier shows. 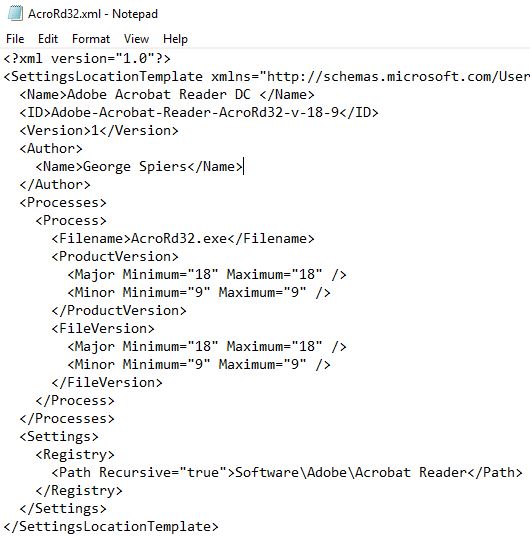
You will now have to download a converter tool from Citrix to convert this file to a definition file. You can download the tool from https://support.citrix.com/article/CTX230786
Once downloaded place the file under the same directory that your previously created UEV template resides in.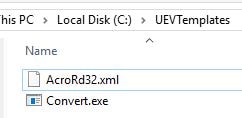
Open Command Prompt as an administrator and run convert show appname.xml. The output should return your application name(s). Note that you can have multiple applications defined within the one template file. ![]()
Next to convert the template file to a definition file, run command convert appname.xml newappname.xml [/V]. The /V switch stands for verbose. The new definition file will be created alongside the template file.![]()
Open the definition file to make sure everything looks OK.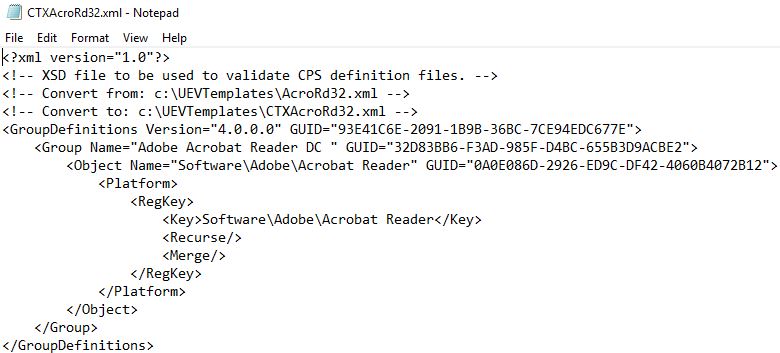
Next we actually have to enable XenApp Optimization and tell Profile Management where definition files exist. You should place definition files on a share that Domain Computers have read access to. This could be an Active/Active DFS Namespace share. To define the location of the definition files, set Path to XenApp optimization definitions to Enabled and then specify the path.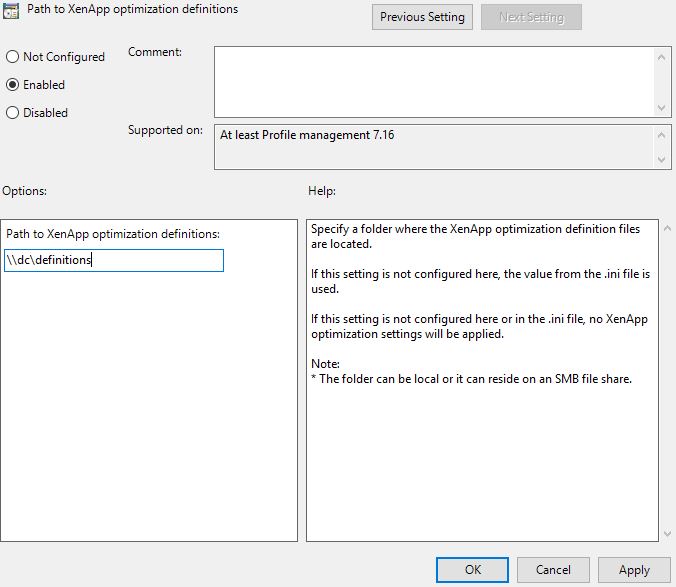
Also set Enable XenApp Optimization to Enabled. 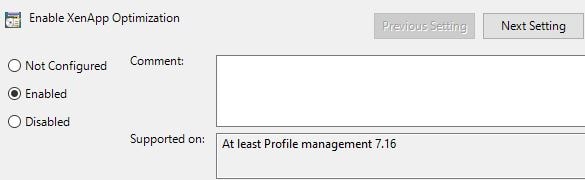
I’ve published Acrobat Reader out, launched it and will now disable Create links from URLs under Preferences -> General. This will write a value to my HKCU registry hive for demonstration.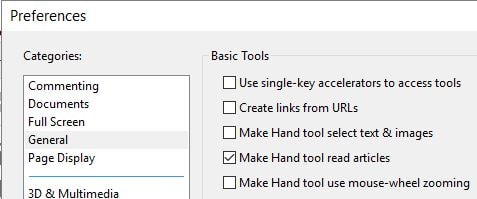
To help with the demonstration I’ve broken out of Adobe Reader and created a regedit shortcut on my desktop (which is on the VDA). 
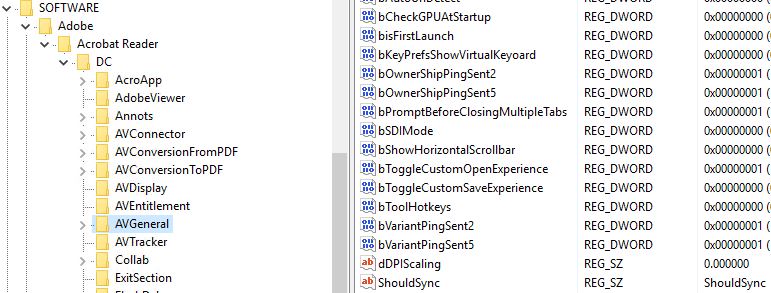
Launching RegEdit we can see that bAutoUriDetect now has a value of 0 as a result of my earlier change of disabling Create links from URLs. Since this REG_DWORD exists under SOFTWARE\Adobe\Acrobat Reader it should be synchronised back to the Profile Management store. Remember that the definition file should only synchronise objects from this registry key.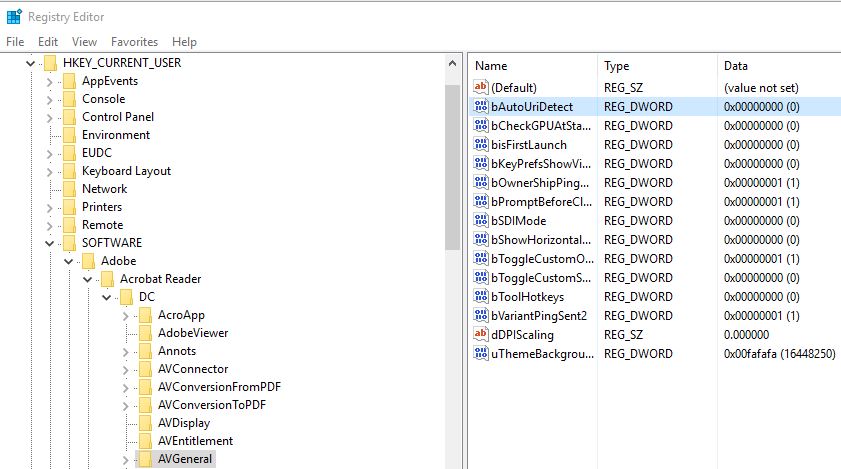
To further prove it I have created a ShouldSync string under SOFTWARE\Adobe\Acrobat Reader\DC\AVGeneral.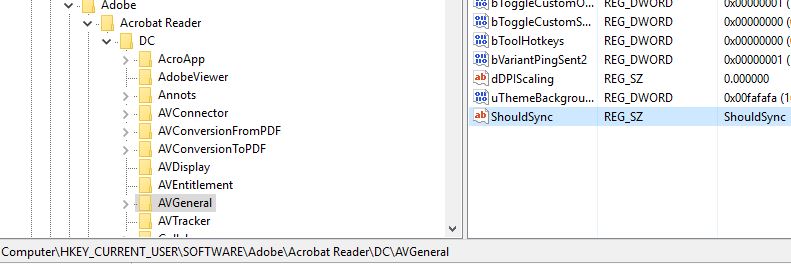
I’ve also created a second string under SOFTWARE\Citrix. This string should not synchronise to further sessions.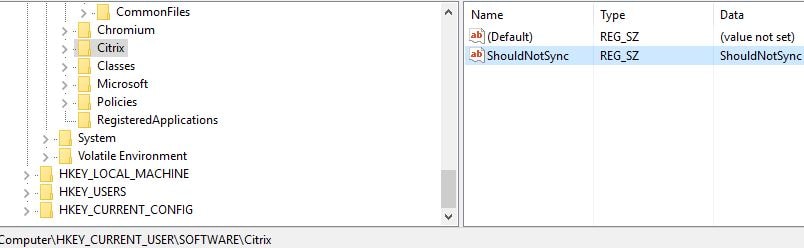
After logging off the VDA the ntuser.dat file will synchronise back to the Profile Management store. We can mount the file from a different machine by opening RegEdit then clicking File -> Load Hive.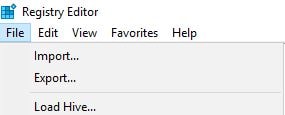
Browse to the CPM store and locate/open the NTUSER.DAT file. 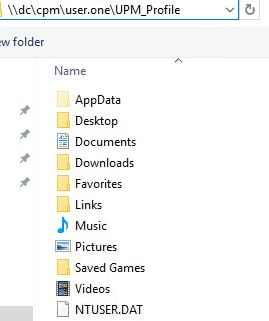
Enter a name then click OK.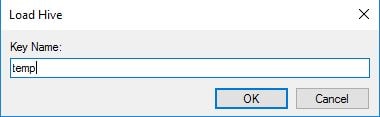
As expected the ShouldSync string is there, but there was no SOFTWARE\Citrix key which means that XenApp Optimization has successfully worked and only synchronised the contents of SOFTWARE\Adobe\Acrobat Reader.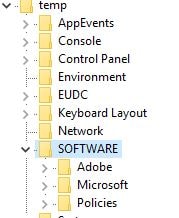
Also as another test, when I launch Acrobat Reader again and break out of the application, notice regedit does not exist on my desktop, even though I did create it in the previous session. 
If when launching a published application and the required template cannot load, you will see the below message.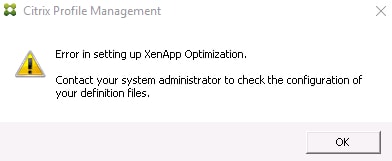
Log on to the VDA recording the error and look at the Citrix Profile Management logs. You should see the reason why XenApp Optimization isn’t working. In my case, it was due to permissions and the inability to read the template file.![]()
When the template file can be read, Profile Management will record details as below. The template file is loaded and XenApp Optimization begins during logon.
Rather than loading the entire user profile, only the files, folders and registry keys that the application needs is cached to the VDA. The remaining parts of the profile are created using junctions. 
Outlook search and OST roaming (new in CPM 7.18+)
The ability to capture the OST file and Outlook search data for roaming purposes has been long sought in Citrix environments especially since organisations have started to consume Office 365 services. Citrix released the capability to roam these parts of the profile by capturing them in a VHDX disk.
By enabling the Enable search index roaming for Outlook policy, Outlook search and the OST is captured in a VHDX container and stored alongside the user profile on the Profile Management store. The redirected OST and search roams with users between desktops for a more consistent, better user experience.
What is supported:
- Office 2016 (32-bit).
- Windows 10 1709 (64-bit) and Windows Server 2016.
- The following Windows Search (SearchIndexer.exe) versions:
- 7.0.1393.2125.
- 7.0.1393.1884.
- 7.0.1393.1770.
- 7.0.9600.18722.
- 7.0.14393.1884.
- 7.0.10240.17443.
- 7.0.15063.413.
- 7.0.16299.15.
- 7.0.16299.248.
What is not supported:
- Concurrent sessions across multiple machines.
To enable OST and Search roaming, firstly make sure that the Windows Search service is started with a Startup type of Automatic.

Next via Group Policy or Citrix policy, enable Enable search index roaming for Outlook. 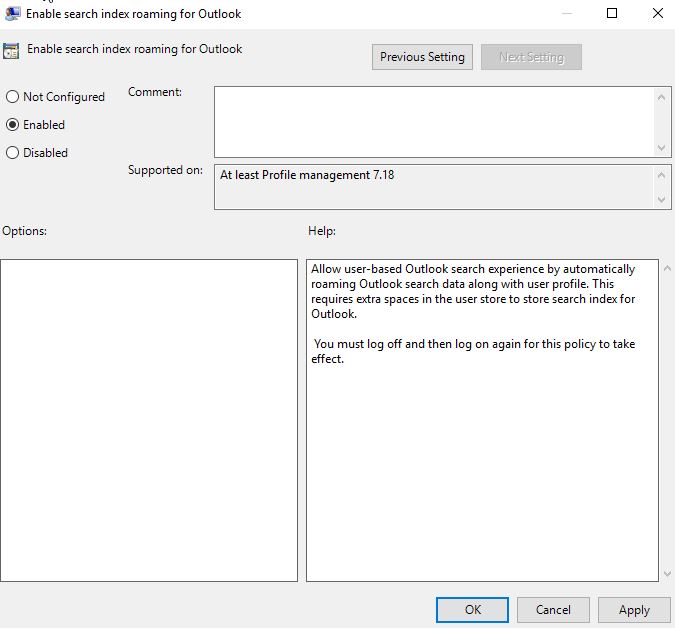
Once your VDAs pick up the policy change, upon logging on to a VDA two VHDX files will be created in the profile store under your profile directory.
- OutlookOST – Contains the OST file (essentially the AppData\Local\Microsoft\Outlook folder). This disk begins with a size of roughly 84MB.
- OutlookSearchIndex – Contains Outlook search index related files. This disk begins with a size of roughly 114MB.

On the VDA, browsing to AppData\Local\Microsoft shows the Outlook folder redirected to a mounted volume (the VHDX). The Outlook folder size may look large when viewed from Explorer. This is the total amount the VHDX can potentially grow to. In UPM 7.18 the capability was 100GB and in UPM 1811 the capability was reduced to 50GB.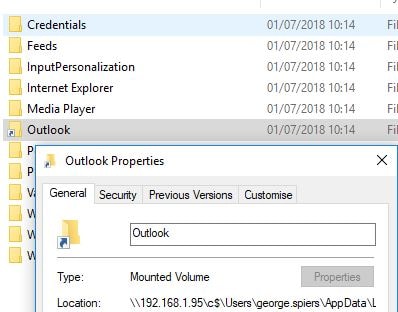
The OutlookSearchIndex disk contains Outlook search related files and folders.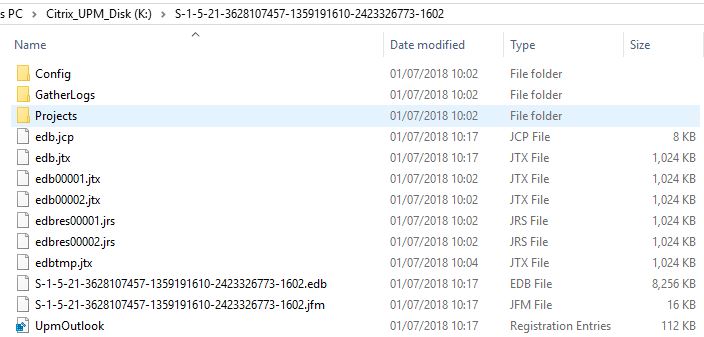
As you create Outlook accounts which operate in Cached Exchange Mode or cache data locally, the OutlookOST disk grows to a size it requires.
Tips
- If using Windows 10, use UPM 5.7. It can handle things such as Start Menu stability better and file association roaming.
- UPMConfigCheck is a PowerShell script which can examine a live profile management system to determine if it is optimally configured or not. The script checks that exclusions are in place per best practice, reports on profile size, policies and so on – https://support.citrix.com/article/CTX132805
- The Citrix UPM Log Parser helps you analyze CPM produced log files – https://support.citrix.com/article/CTX123005
- Exclude directories and files from synchronising if you do not need them for example, Saved Games, Searches, Videos, Java temp folders, log folders found in AppData. If you believe a directory or file is causing a profile to become corrupt, you could exclude it from synchronisation either temporarily until you find a fix or prove your theory, or permanently.
- Citrix recommend considering the exclusion of directory AppData\Roaming\Sun\Java from CPM user profiles. Java applications can leave many small files in the profile which adds to profile bloat and logon times.
- Redirect as many folders as possible. An optimum setup would only roam the AppData folder in my recommendation.
- By default, a number of files and folders are excluded from synchronisation which can be found in the UPMPolicyDefault_all.ini file located on your VDA. If you are excluding specific files and folders from synchronising using the Exclusion list – Directories or Exclusion list – Files policy objects make sure you copy the default Citrix specified entries from UPMPolicyDefault_all.ini in to your Group Policy or Citrix Policy then add any extra specific entries to the list. If you are not using Group or Citrix Policies, you can add exclusions directly to the UPMPolicyDefault_all.ini file on your VDA. In CPM v5.5+ you can use the policy setting Enable Default Exclusion List – directories to quickly configure directory exclusions without having to copy them from UPMPolicyDefault_all.ini.
- Note: If you are copying exclusions from .ini to Citrix or Group Policy, remove the trailing = sign.
- Note: If you are copying exclusions from .ini to Citrix or Group Policy, remove the trailing = sign.
Michael McAlpine
May 26, 2017Great post. Thank you!
Pingback: Detailed Change Log – Carl Stalhood
Pingback: Citrix Profile Management 7.16 – Carl Stalhood
Josef Malmborg
February 6, 2018Great article, was looking for some answers about cross platform UPM.. you just told me not to use it…
rupesh bhattarai
June 4, 2018I need documentation in implementing citrix mandatory profile management for 7.15 vda. Help will be highly appreciated.
George Spiers
June 4, 2018This mentions App Layering but can be used without: https://support.citrix.com/article/CTX225373
Also: https://docs.citrix.com/en-us/profile-management/current-release/configure/template.html
MIke
June 11, 2018Hi George,
Firstly, like to thank you for your efforts on sharing your world experience.
I have a single XA/XD Site running 7.6 CU1 LTSR (it has been very reliable but lacks the must have LHC). So instead of upgrading it, I am looking build a 7.15 CU2 site from scratch and migrate some of the XenApp VDA’s over and build new 2016 servers.
All the 7.6 User/Machine GPOs and Citrix Polices are managed in AD. In taking this approach, How do I go about importing the newer 7.15 related policy templates into AD. Will they break the existing settings for things like UPM and other Citrix Policies? Not quite sure how to go about it. Are you able to shed any light and any gotchas?
Thanks!
George Spiers
June 11, 2018Hey – you will not lose any settings after updating ADMX files. I’ve done that before in the past between versions without issue.
Ray
September 22, 2018George I am confused on UPM mirroring? I understand how folder Sync works, which sync the data back to the UPM. But mirroring I am lost on.
The Docs say This policy can help solve issues involving any transactional folders
So does this write the data back to the UPM profile after they log off?
George Spiers
September 24, 2018Yes that is right, the data is written back to CPM profile on logoff in a last write wins manner.
Ray
January 27, 2019Thanks for the clarification. For those who get confused on this. This link helps as well.
https://virtualfeller.com/2019/01/15/synchronize-vs-mirror/#comment-17553
Owe
September 26, 2018Awesome article!
However, the download link to the UE-V-to-CitrixUPMdefinition tool does not work. “Invalid link”
George Spiers
September 26, 2018I’ve updated the link.
Owe
September 27, 2018Thank you 🙂 Keep up the good work!
Pingback: EUC Weekly Digest – January 6, 2018 – Carl Stalhood
Pingback: Site Updates – January 2018 – Carl Stalhood
François GOTTI
January 25, 2019Hi Carl,
Is it possible with WEM to configure UPM for different Silo. Actually I use mandatory profiles.
Is it possible also if the file server (where profiles are located) doesn’t reply that user has the possibility to connect and use his application. I have checked but I don’t have found replies about that.
Regards,
George Spiers
January 26, 2019Yes WEM can apply different UPM configurations if you create multiple Configuration Sets. If the file server where the profile is stored fails, the user can connect but should be logged on with a temporary profile. You can use hardware storage replication technologies or file server technologies such as DFS-R to make profile stores more highly available.
Ray
January 27, 2019hey George,
I am having a brain fart on always cache “Cache file this size or larger”
Are they saying, if I put lets say 1024 in the GPO. It will cache up to 1024mb of the profile only?
Not sure why its say “or larger” does this mean it can go bigger that 1024 if specified?
George Spiers
January 29, 2019Hi Ray, it basically means that if a file in your Citrix profile matches or exceeds the size set within the “Cache file this size or larger” policy setting, it will cache the file down to the VDA. This can be helpful when you have Profile Streaming enabled, but have large files that need to be more quickly available.
Ray
February 9, 2019Hey George,
We enabled Citrix vhdx outlook feature. It appears that when logging on it now stars loading Citrix user profile manangent. Before it used to just zoom by. Seems like it slowed down logins
Curious if anybody else sees this
George Spiers
February 9, 2019Just to confirm, you use Profile Management before enabling the Outlook feature, but now it is much slower to log on?
Ray
February 9, 2019Correct sir. What is strange director doesn’t show the time on the profile section. Meaning the times say 28seconds to login. But the times on each section don’t add up. The UPM side says 0.17 sec. But thats way wrong.
Ray
February 9, 2019Just some background. All ssd drives. Vda is 1811. Workspace is 1812. Streaming is PVS not upgraded yet still on 7.15 PVS target. Use Wem but not for UPM side. Use GPO for UPM. I have all the UPM setting from your site, James Kindom and Carl. Followed your reduce login times and James Rankiln pages on login times. Profile is about 28 -30 seconds where it was 16-20 seconds. We change the always cage and do the delete local profile to help. Always cache is set to 768mb or higher. Might log a case with Citrix. Just figured I would try here first.
George Spiers
February 11, 2019I have noticed Director doesn’t accurately report when the Outlook feature is enabled. That may be another bug. Was going to ask had you tried Profile Management 1811 but you are already running VDA 1811. I’ve noticed a slow down when using this feature on an image with App-V 4.6. It could be that you have a filter driver that is clashing with UPM. Best to log a call about this issue with Citrix.
Ray
February 26, 2019Couple things Citrix stated. I needed to install this feature on the 2016 server.
https://docs.citrix.com/en-us/profile-management/current-release/configure/enable-native-outlook-search-experience.html
Which is
7.On the Features page, select Windows Search Service and then click Next to intall.
Then they are saying in appdata\local\Microsoft
Its supposed to be a VHDX file not a folder with a arrow on it.
https://support.citrix.com/article/CTX235347
Feature troubleshooting •Ensure that the Enable Search index roaming for Outlook Profile Management policy has been enabled. This policy enables both the Outlook search index feature and the Outlook cache (.OST file) feature.
•Check that the Outlook cache VHDX file and the Outlook search Index VHDX file have been mounted and appear in Windows Explorer as VHDX mount icons. If they show as regular folder icons, the VHDX mount failed.
So I am going back and following these 2 articles.
Jennifer Ruetten
September 9, 2019This is a great summary of UPM. I am having a problem with the Pending folder not clearing out at logoff. I went through all my GPO settings and ran the config checker and reviewed the logs, but nothing is helping with the Pending folder. Any suggestions?
George Spiers
September 29, 2019Does it happen for all users? Try turning off Profile Streaming, and Active Write Back if you have them enabled. Also consider upgrading to a later version of UPM.
Ilyas Ahmed
April 29, 2020Hi George,
I am planning to implement CPM using Citrix Studio Policy. Can I apply this policy on the AD group instead Delivery Group?
George Spiers
September 9, 2020CPM policies are computer based so unfortunately not.
CEM
May 17, 2020Hi George,
Great article !
You know why th service Citrix Profile Management is down after reboot VDA server ?
Many thanks.
hasan
July 2, 2020Hi Sir,
This may be dumb questions, but I am not sure on these. Appreciate if you could clarify me as I am very new to this technology.
What is the recommended way of setting up roaming profiles and folder redirection? MS provided Windows default using GPO, Using Citrix GPO or with CItrix Profile Management with Citrix Policy?
Is it necessary to install Citrix Profile Management ADMX files in-order to use Citrix Profile Management using Citrix Policy?
If we use MS default roaming profiles GPO settings, I need to type in profile path in Windows user account settings in their account Properties. Is is necessary to type in these for other methods also? (Citrix GPO and CItrix Policy Profile Management)
Can We have only folder redirection without roaming profile and vise versa? What would be the end user experiencing in these case?
thank you
Hassan
Siva
January 1, 2022Hi George,
Do XenApp/Virtual Apps Optimization definition file work for Virtual Destkops? the Policy help sections say it applies to Desktop OS’s as well but unable to see it work.
I see the “XenApp Optimization, enabled: 1, definition path: \\xxxxxxxxx\CitrixUPM-ApplicationProfiles” in the upm log but nothing after, not even errors. – 1912 LTSR CU4
Do we need to place both UE-V and converted files in the share or just the converted xml file?