Workspace Environment Manager (previously Norskale as many people may be familiar with) is a recent acquisition by Citrix that will fill the gap when it comes to Citrix offering a UEM solution. WEM is available for all Enterprise and Platinum XA/XD customers with active Software Maintenance (Customer Success Services) and is available for download today. WEM 4.0 was the initial release.
Citrix quote using WEM in a Citrix environment could boost server scalability by 70% and reduce logon times by up to 80% so it would be rude not to have a look at this product and see what it is all about!
♣ Hardware and Software Requirements
♣ What’s new
♣ WEM Firewall Ports
♣ What has changed in WEM 4.3
♣ Install WEM Infrastructure Services
♣ Create WEM Database
♣ Broker Service Configuration
♣ Install WEM Administration Console
♣ Configure Licensing
♣ Import Setting Templates
♣ Install WEM Agent
♣ Point Agent to WEM Broker Server
♣ Connect to WEM Administration Console
♣ Add an Application (example)
♣ Add a Registry key (example)
♣ Import Registry keys (example)
♣ Import Printers (example)
♣ Create Directory (example)
♣ Apply settings to users using Rules and Conditions
♣ Modeling Wizard
♣ Resultant Actions Viewer
♣ System Optimization – Fast Logoff
♣ System Optimization – CPU Management
♣ System Optimization – Memory Management
♣ System Optimization – I/O Management
♣ Configuring Environment Settings
♣ Configuring Microsoft USV Settings
♣ Configuring Citrix UPM Settings
♣ Advanced Settings – Configuration – Main Configuration
♣ Configuring Agent Options
♣ Configuring Service Options
♣ Configuring UI Agent Personalization
♣ Configuring Helpdesk Options
♣ Power Saving Management – WEM Agent VMs
♣ Configure WEM Administrators
♣ Viewing WEM Connected Users
♣ Viewing WEM Connected Agents
♣ Administration Log
♣ Monitoring
♣ WEM Logging
♣ Creating additional WEM Sites
♣ WEM Transformer
♣ Upgrading WEM
♣ Migrating WEM database
♣ Documenting WEM Configurations
♣ VUEMAppCmd
♣ Troubleshooting
Hardware and Software Requirements
Citrix WEM consists of a Management Console, an Agent Host, a Broker and depends on Active Directory and SQL. For the sake of more detail:
- Citrix WEM Administration Console – This can be installed on a Windows client or Server OS. This console will be used to manage the WEM installation such as creating and managing policies, assigning and creating resources and so on. The WEM Administration Console connects to the broker.
- Software Prerequisites: .NET 4 (full package or client profile), Microsoft Sync Framework 2.1.
- OS Prerequisites: Windows XP SP3 32/64bit, Windows Vista SP1 32/64bit, Windows 7, 8 & 10 32/64bit, Windows Server 2003 32/64bit, Windows Server 2003 R2 32/64bit, Windows Server 2008, Windows Server 2008 R2, Windows Server 2012, Windows Server 2012 R2, Windows Server 2016 (WEM 4.1).
- Hardware Prerequisites: Dual core processor at minimum with 2GB RAM. Disk space usage is also low at 40MB minimum and 100MB during install required.
- Note: Installing the WEM Administration Console on the following OS will not be supported in an upcoming Current Release of XenApp and XenDesktop (the next CR after the next LTSR):
- Windows XP SP3 32bit and 64bit.
- Windows Vista SP1 32bit and 64bit.
- Windows 8.x 32bit and 64bit.
- Windows Server 2003 32bit and 64bit.
- Windows Server 2003 R2 32bit and 64bit.
- Windows Server 2008 and 2008 R2.
- Note: Installing the WEM Administration Console on the following OS will not be supported in an upcoming Current Release of XenApp and XenDesktop (the next CR after the next LTSR):
- Citrix WEM Agent Host – The Agent Host connects to the broker or Infrastructure Services and enforces the settings configured through the WEM Administration Console. This can be installed on Windows Desktop OS VDAs to manage those VDAs or Server OS VDAs. This component cannot be installed on the Infrastructure Services server.
- Software Prerequisites: .NET 4 (full package or client profile), Microsoft Sync Framework 2.1.
- OS Prerequisites: Windows XP SP3 32/64bit, Windows Vista SP1 32/64bit, Windows 7, 8 & 10 32/64bit, Windows Server 2003 32/64bit, Windows Server 2003 R2 32/64bit, Windows Server 2008, Windows Server 2008 R2, Windows Server 2012, Windows Server 2012 R2, Windows Server 2016 (WEM 4.1).
- Hardware Prerequisites: Average RAM consumption for the agent is 10MB. Disk space usage is also low at 40MB minimum and 100MB during install required.
- Citrix WEM Infrastructure Services – WEM Broker or Citrix WEM Infrastructure Services is installed on a Windows server acting as the connector between the Agent Host/Administration Console and SQL/Active Directory. This component cannot be installed on an Active Directory server.
- Software Prerequisites: .NET 4.5.2, SQL Server Compact Edition 3.5 SP3 (installed during setup), Microsoft Sync Framework 2.1 (installed during setup).
- OS Prerequisites: Windows Server 2008 R2, Windows Server 2012 R2, Windows Server 2016 (WEM 4.1).
- Hardware Prerequisites: 4vCPUs, 8GB and a minimum of 80MB disk space for up to 3000 users.
- SQL Server – WEM stores all settings within a SQL database. The SQL database must be a minimum of 50Mb in size. WEM requires sysadmin access to the SQL server instance during creation of the database and read/write access going forward for usage. SQL Server 2008 R2 or later is supported.
- Active Directory – To push settings to your users AD is required. WEM required read access to AD to push configured settings out to users.
- Citrix License Server – WEM requires Citrix License Server 11.14 or later for the current WEM 4.0/4.1 release.
- XenApp/XenDesktop – Any currently supported version of XenApp and XenDesktop will work with WEM 4.0/4.1.
Note: WEM will not be supported on .NET Framework 4.0, 4.5 and 4.5.1 once the next Current Release is released after the next LTSR.
Antivirus requirements – The entire installation directory for the WEM Agent Host and WEM Infrastructure Services must be excluded from on access scanning. If not possible, the following services must be excluded from on access scanning.
- Infrastructure Services – NorksaleBrokerService.exe, NorksaleBrokerServiceConfigurationUtility.exe, NortksaleDatabaseManagementUtility.exe.
- Agent Host – Norksale Agent Host Service.exe, VUEMUIAgent.exe, Agent Log Parser.exe, AgentCacheUtility.exe, AppsMgmtUtil.exe, PrnsMgmtUtil.exe, VUEMAppCmd.exe, VUEMAppCmdDbg.exe, VUEMAppHide.exe, VUEMCmdAgent.exe, VUEMMaintMsg.exe, VUEMRSAV.exe.
What’s new
What’s new in WEM 4.1:
- Transformer module re-enabled
- Agent Host communication improvement (communication now occurs from WEM Broker Service to Agent Host Service)
What’s new in WEM 4.2:
- Support for Profile Management up to v5.6 including new options in the Administration Console to manage Profile Management.
What’s new in WEM 4.3:
- User interface improvements by renaming labels, and messages in the installation wizards for example.
- The session agent user interface is not localised in the following languages: German, Spanish, French, Italian, Japanese, Korean, Dutch, Russian, Traditional and Simplified Chinese.
- Sites are now assigned to machines, or Security Groups, or Organisational Units.
What’s new in WEM 4.4:
- A new Security tab has been introduced to the WEM Management Console which contains settings controlling end-user activity.
- The Process Management controls have been moved to the above new Security tab.
- The Database Maintenance tab has a new setting called Agent registrations retention period which allows agent registration logs to be deleted after a defined period of time. This reduces the size of the database and reduces lag when populating the Registrations tab.
- Support for Profile Management 7.15.
- Infrastructure Services by default sends anonymous data to Google Analytics. You can opt out of this from within the WEM Management Console.
What’s new in WEM 4.5:
- Application Security. Similar to AppLocker but provides some additional functionality. This Application Security feature allows you to control the applications users are permitted to run by defining rules in WEM.
- SDX PowerShell Modules and the ability to run some administrative tasks via PowerShell.
- Support for SQL Always On availability groups.
- Intelligent Optimisation is now user-centric. If a process infringes a rule for a particular user, the process is optimised only for that user rather than for all users as was the case with previous versions.
- Intelligent Optimisation history is now moved to the local database (LocalAgentDatabase).
What’s new in WEM 4.6:
- You can publish Citrix StoreFront resources as appplication shortcuts in WEM, allowing you to configure Start Menu shortcuts on VDAs that have the WEM Agent installed.
- Transformer is now integrated with the Receiver for Windows SDK.
- Active Directory performance improvements have been made, and are noticeable especially when adding AD objects to WEM.
- The administrative templates provided to configure the WEM Agent have been renamed to make the filenames versionless.
- The administration console UI has been tweaked:
- There is a new StoreFront tab under Advanced Settings -> Configuration.
- There is a new Advanced pane in Active Directory Objects and a new option called Active Directory search timeout on the AD Settings tab.
What’s new in WEM 4.7:
- PowerShell modules in the WEM SDK are updated at this release.
WEM Firewall Ports
| Source | Destination | Port | Reason |
| Infrastructure Services | Agent Host | TCP 49752 | Agent Host listens for instructions from Infrastructure Services on this port. |
| Administration Console | Infrastructure Services | TCP 8284 | For Administration Console connectivity to Infrastructure Services. |
| Broker Agent | Infrastructure Services | TCP 8286 | Agent connects to Infrastructure Services on this port. |
| Broker Agent Cache Synchronization Process | Infrastructure Services | TCP 8285 | Agent synchronizes the agent cache with Infrastructure Services on this port. |
| Infrastructure Services | Citrix License Server | TCP 27000 | Infrastructure Services connects to the License Server on this port. |
| Monitoring Service | Infrastructure Services | TCP 8287 | Used by the Monitoring Service on Infrastructure Services servers. Not yet in use. |
What’s changed in WEM 4.3
Some things have changed in WEM 4.3 mainly within the Administration Console that you should be aware off.
Sites have now been renamed to Configuration Sets. Other than that, everything else is the same including the method to create additional Configuration Sets. 
Agents who are pointed to the Infrastructure Servers without any extra configuration now display under Administration -> Agents -> Registrations. This agent is currently not bound to any Configuration Set.
The Agent itself will not be able to sync due to not being able to identify a Configuration Set. 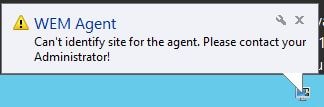
To associate a machine with the Configuration Set, you have to navigate to Active Directory Objects (previously named Users) and then click on Machines. Here you add machines to your Configuration Set. You can add Organizational Units which will add every member of that OU to the Configuration Set, you can also add individual machine accounts or groups of computers. In this example, I’ll add an OU. Click Add OU.
Select the desired OU and click OK. 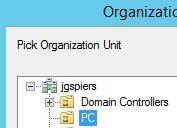
The OU will appear as below. 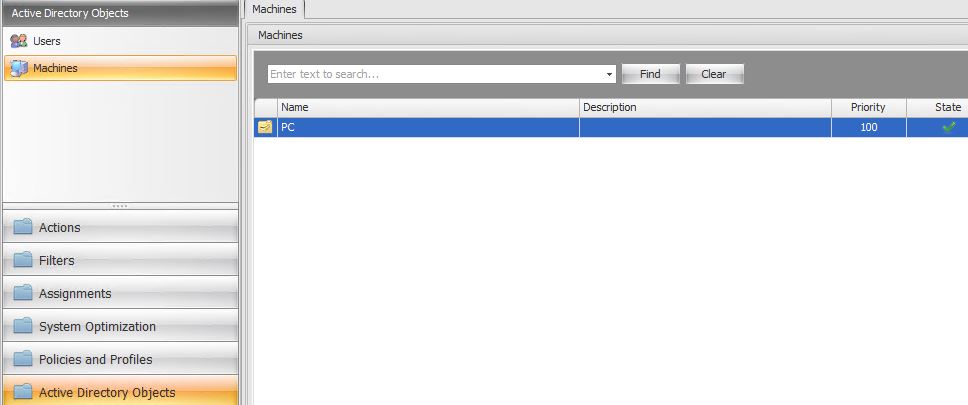
Now refresh the cache on the Agent host machine. The VDA will now report with a green tick to indicate that it is bound to the Default Site Configuration Set. If machines are bound to multiple Configuration Sets for example you’ll get an error here, this allows you to easily identify such machines and perform correction.
Install WEM Infrastructure Services
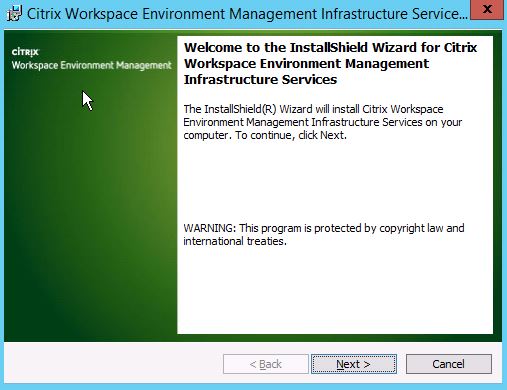
Launch the Citrix Workspace Environment Management Infrastructure Services v4.00.00.00 Setup.exe installer. Click Install. Some of the prerequisites are installed for you.
 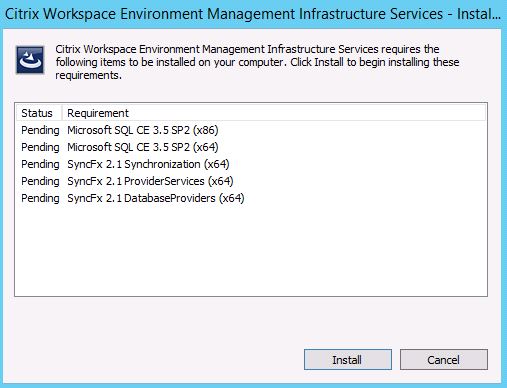 Click Next.
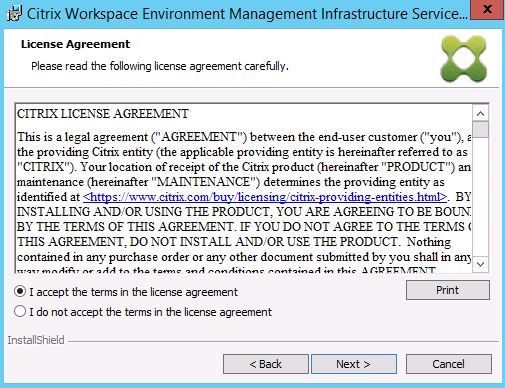
  Accept the License Agreement, click Next.
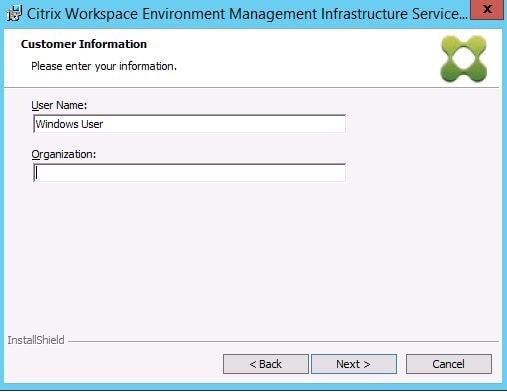
  Click Next.
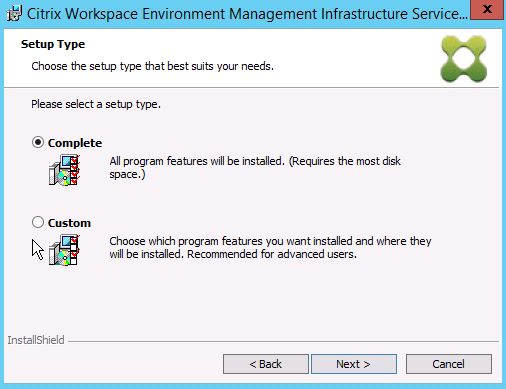
  Click Next. If you want to change the install directory choose Custom.
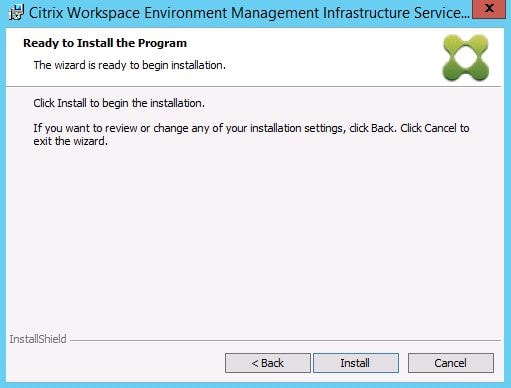
  Click Install.
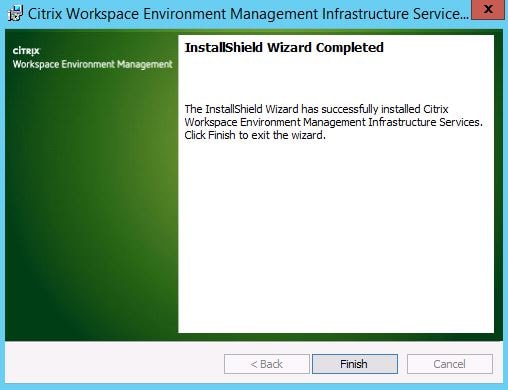
  Now click Finish.
  If you want to specify the Agent Port, Admin Port or AgentSyncPort during install you can do so using the command line. The following switches are available to be used:
- AgentPort – Default agent port is 8286 however using this switch you can specify a different port. This port will be opened locally on the firewall of the Windows Server during install.
- AdminPort – Default admin port is 8284 however using this switch you can specify a different port. This port will be opened locally on the firewall of the Windows Server during install.
- AgentSyncPort – Default agent sync port is 8285 however using this switch you can specify a different port. This port will be opened locally on the firewall of the Windows Sever during install.
Example command line install: “Citrix Workspace Environment Manager Infrastructure Services v4.00.00.00 Setup.exe” /v”AgentPort=\”8288\””
If you are going to use Windows Authentication and load balance Infrastructure Services, you must create an SPN using the following command:
setspn -U -S Norskale/BrokerService [accountname]
If you are just going to use Windows Authentication or do not plan on using Windows Authentication you must create an SPN with the following command:
setspn -C -S Norskale/BrokerService [hostname]
Note: You must use Windows Authentication when load balancing Infrastructure Services. Each server must be configured to use the same account name.
Create WEM Database
Now on the Start Menu locate and launch Database Management. 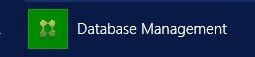 Click Create Database.
 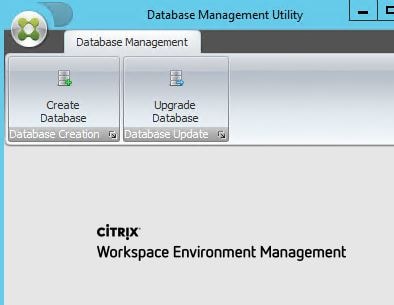 Click Next.
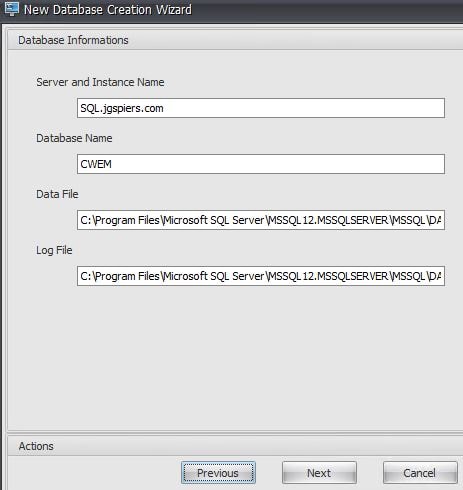
 Enter your SQL server name and choose the database name for WEM. Analyse the Log File and Data File location. The wizard best estimates the location of the SQL server data folder however this may be incorrect. Make sure these paths are correct and match your SQL server to avoid database creation failure. If the directories shown below do not exist, database creation will fail. Click Next.
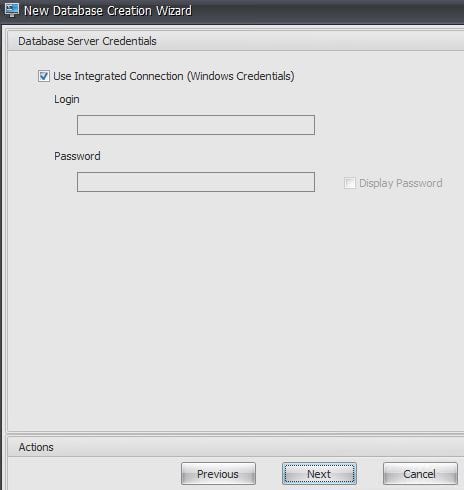
  The Database Creation Wizard requires an account with sysadmin rights on the SQL instance to create the database. By default, the account you use to run the Database Creation Wizard will be used however you do have the option to specify a SQL account that has sysadmin rights.
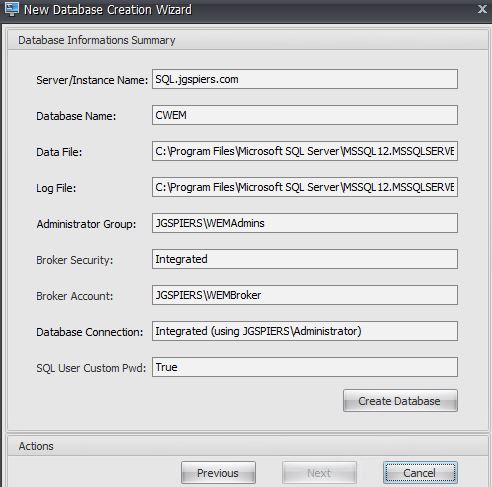
 Specify the VUEM Administrators Group for users who are Full WEM Administrators and can use the WEM Administration Console. Use a service account for the Broker Service Account which will be used to run the Norskale Infrastructure Service service. Make sure you are not running this wizard from the Broker Service Account. If your SQL Users require strict complex passwords, you can set a specific password for vuemUser and then click Next. The default password set is 8 characters in length consisting of lower and uppercase characters including digits and punctuation. If you specify a password, then you will need to configure the same password for the vuemUser account when running through the Broker Configuration later so keep this in mind. If you are using AlwaysOn SQL availability, then you must specify a password here as it will be required when adding the database to an availability group.
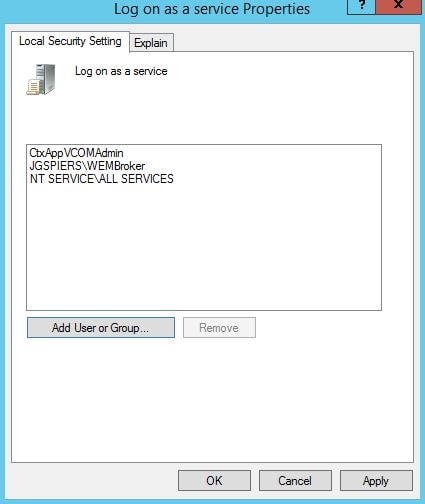
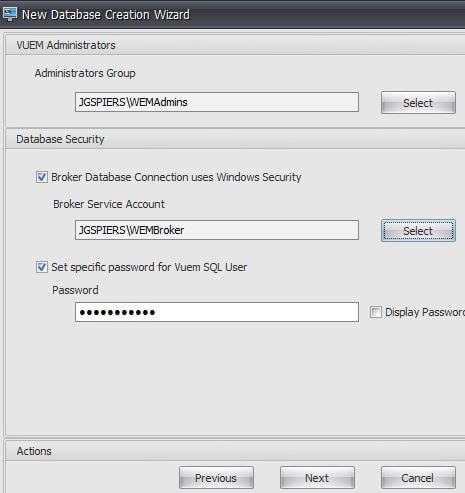 Make sure the broker service account has Log on as a service rights on the WEM Infrastructure Services server.
 Review all settings and then click Create Database.
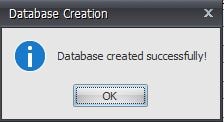
  The database creation occurs.
If you get a database creation failure, review the log file under C:\Program Files (x86)\Norskale\Norskale Infrastructure Services\Citrix WEM Database Management Utility Debug Log.txt Click OK.
  Click Finish.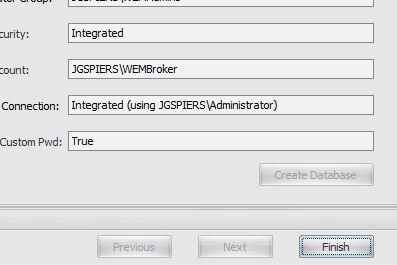
Broker Service Configuration
Next you have to configure the Infrastructure Services using the Broker Service Configuration utility found on the Start Menu of your Infrastructure Services server. 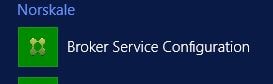 Enter the Database Server and Name as below on the Database Settings tab including failover database if you are using DB mirroring.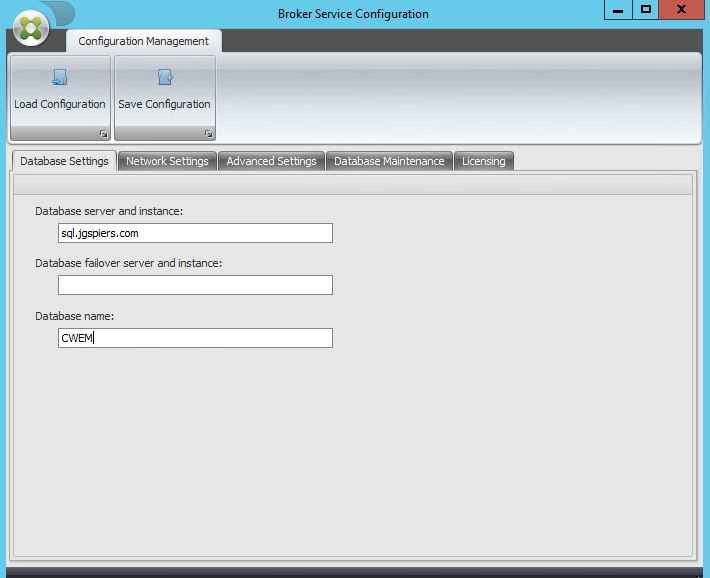
On the Network Settings tab if you changed any of the ports during the Infrastructure Services install such as the Admin Broker port then enter the same port numbers here. 
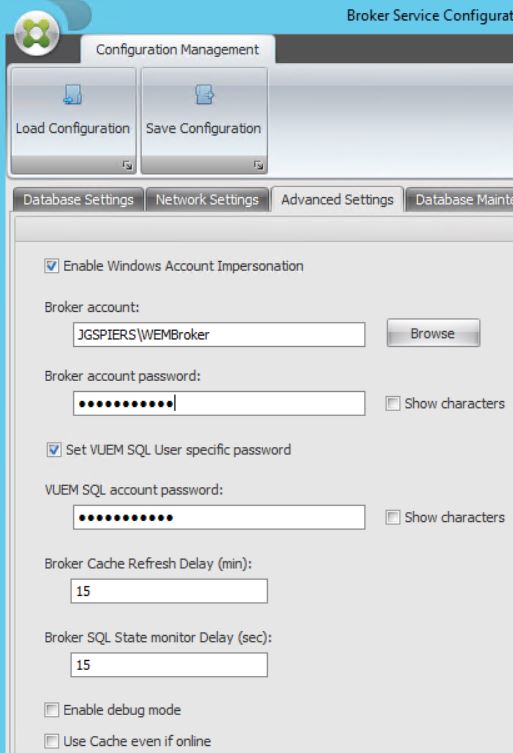
On the Advanced Settings tab tick to enable Windows Account Impersonation and use the Broker account if you are not using SQL Mixed Mode Authentication. If you are using MMA you can leave this option unticked and the vuemUser SQL account created during database creation will be used for connections to the database. Specify the SQL user password if you manually specified one during database creation. If you did not, then leave this unticked. You can also change:
- Broker Cache Refresh Delay (15 minutes by default) and the cache is used if SQL is offline/unavailable or WEM Infrastructure Services is unavailable.
- Broker SQL State monitor (15 seconds by default) which is how often the broker attempts to poll the SQL server.
- Enable debug mode to enable verbose logging on WEM Infrastructure Services.
- Use Cache Even if Online meaning WEM Infrastructure Services reads site settings from its cache even when SQL is available.
Over on the Database Maintenance tab you can specify to enable scheduled database maintenance cleaning up any old statistic records from the database every number of days. The default retention for statistical data is 365 days. The system monitoring retention period is 90 days and the maintenance occurs at 2AM.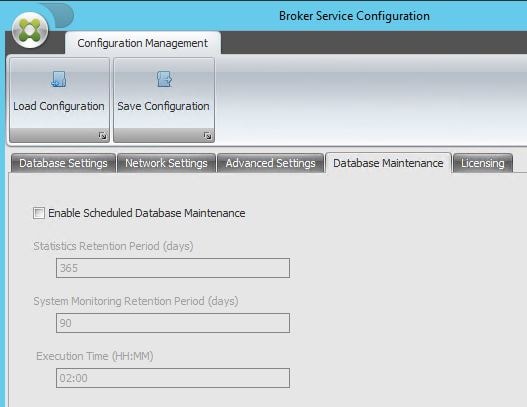
Using the global license override setting to specify a Citrix license server which overrides what is set within the WEM Administration Console. Once you have specified all your required settings across all tabs click the Save Configuration button. 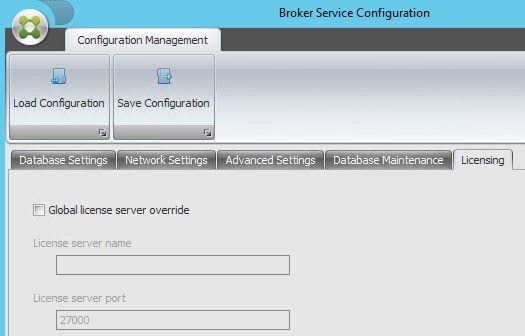
The broker service will restart, and we are now ready to install the Management Console.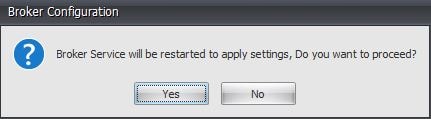
Install WEM Administration Console
Launch Citrix Workspace Environment Management Console v4.00.00.00 Setup.exe.
Click Next. 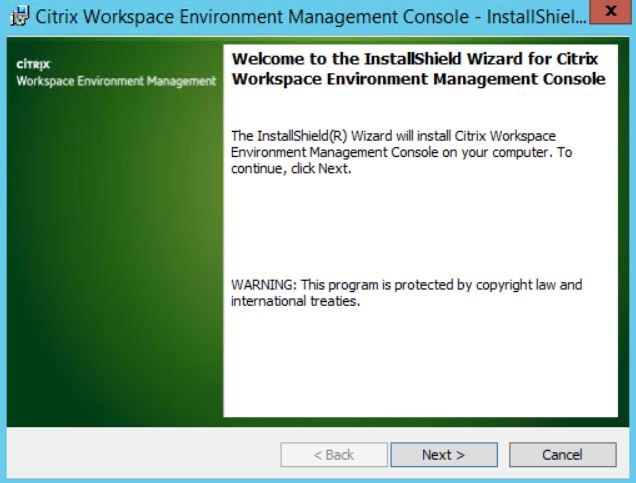
Accept the License Agreement. Click Next. 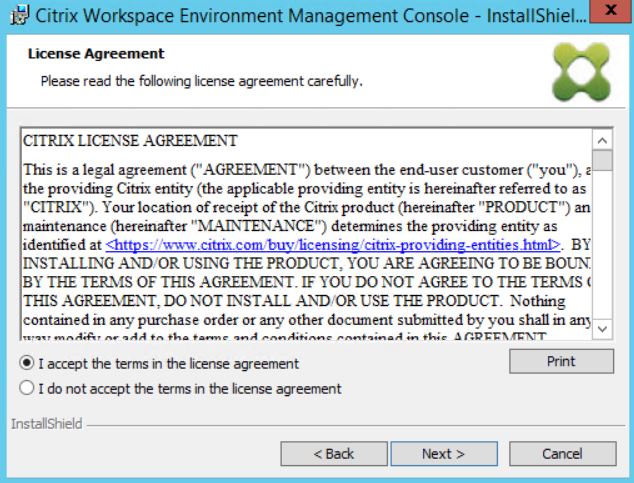
Click Next. 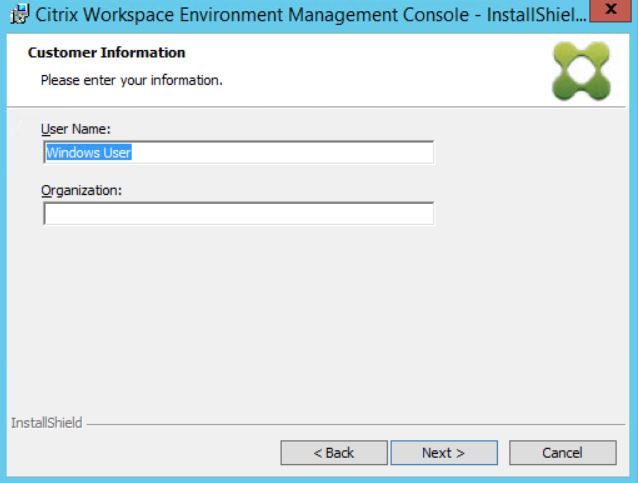
Select Next. Choose Custom if you wish to specify an install location manually. 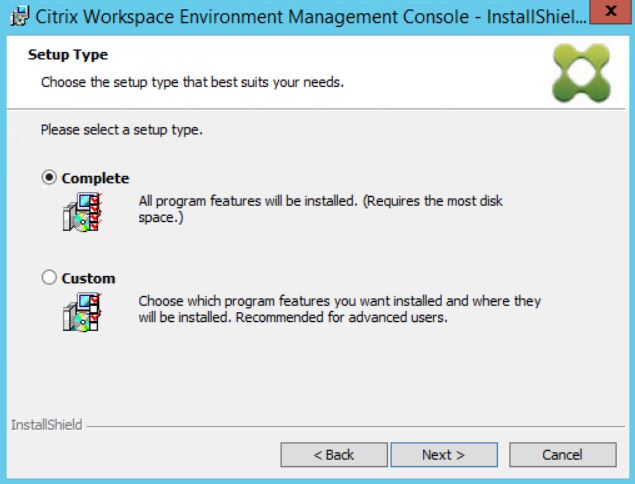
Click Install. 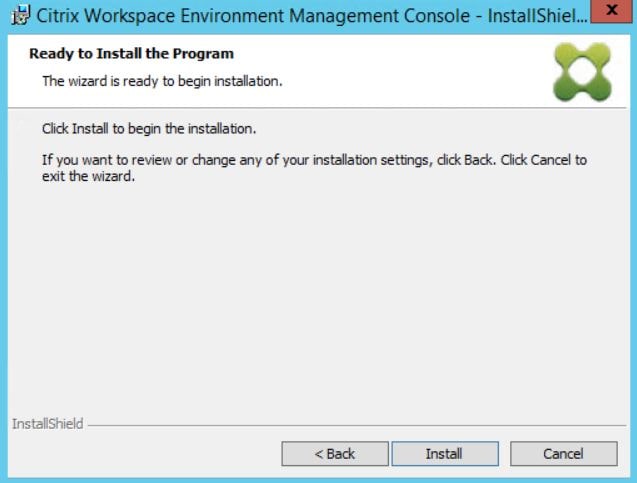
Click on Finish. 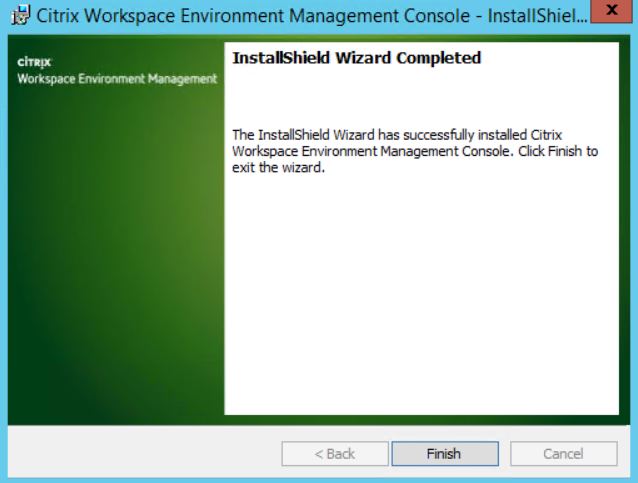
Now launch the management console. Click Connect. 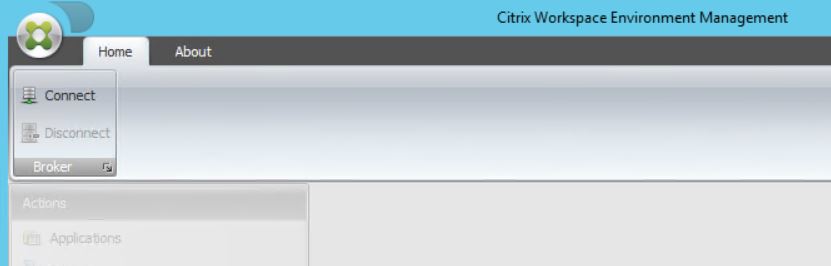
Enter the broker server name and port. Click Connect. 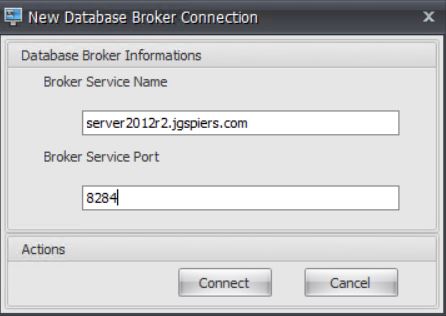
Click OK on the below warning. We can configure the license server shortly using the Administration Console. 
Configure Licensing
Click on Configure license server. 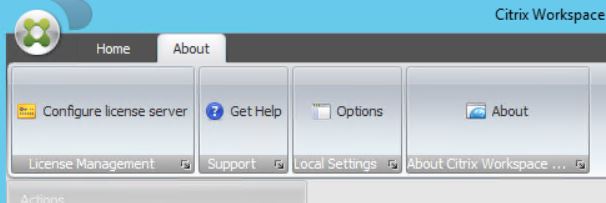
Enter the Citrix license server name and port. Click OK. 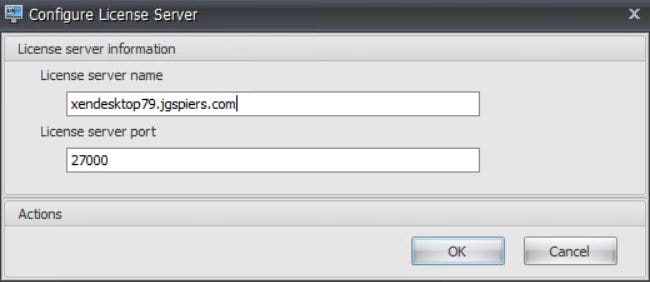 Note: If your license expires, you’ll not be able to use the WEM Console, but agents will continue to operate.
Import Setting Templates
Next, we can import quickstart settings from templates that will configure WEM with default recommended settings giving us a good baseline to get started. There is also a template for environmental lockdown settings based on best practice recommendations. Click Import Settings. 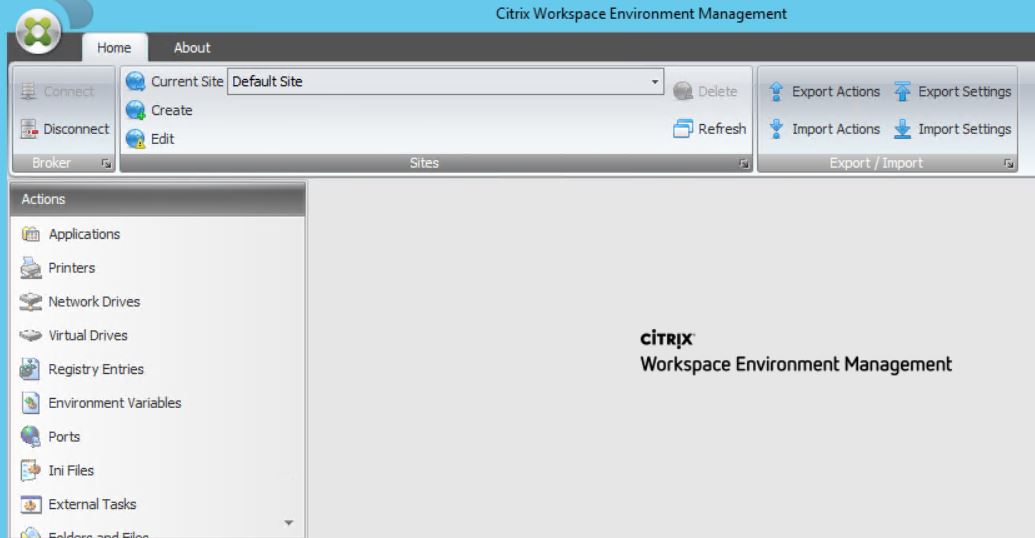
Click Next.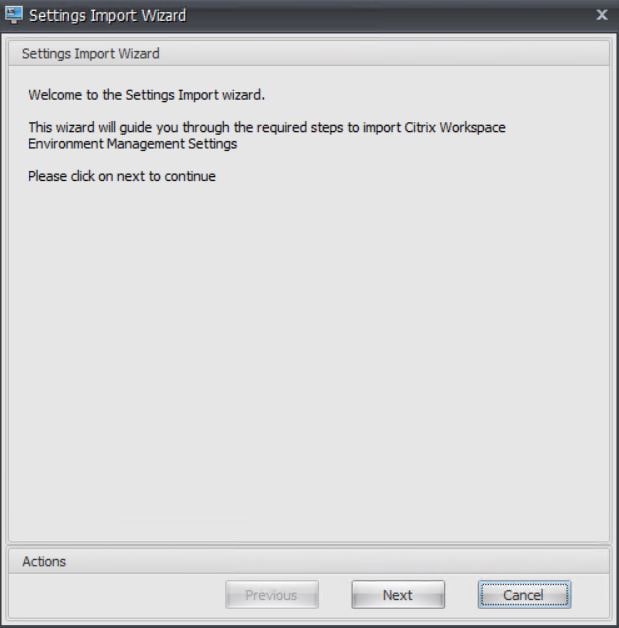
Browse to the Configuration Templates folder located within the installation media. There are three templates that you can import:
- Default Recommended Settings – This template imports recommended System Optimization, Agent Configuration and System Monitoring settings for CPU and memory management, agent offline mode, asynchronous printers processing etc.
- Environment Lockdown Example – This template imports Environmental Settings specifying lockdown actions based on best practice such as hiding administrative tools, control panel and the recycle bin.
- Sample Applications – This template imports sample application shortcuts however don’t seem to be working at this time.
Check the boxes next to each settings type you want to import and click Next.
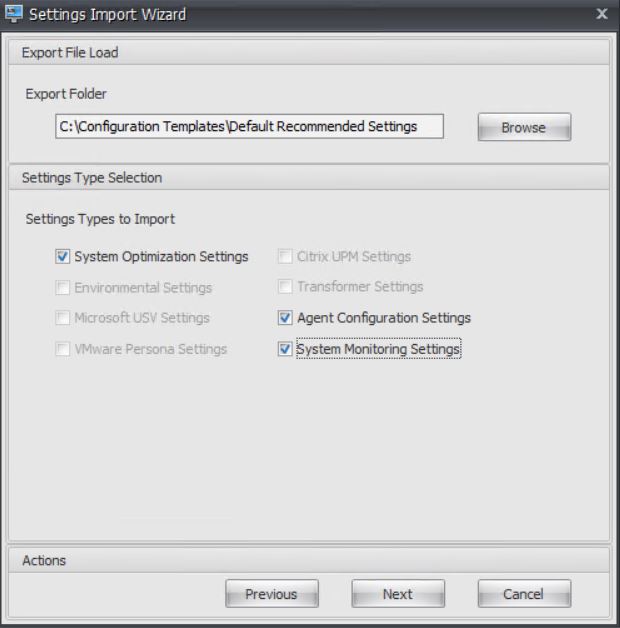
Click Import Settings. 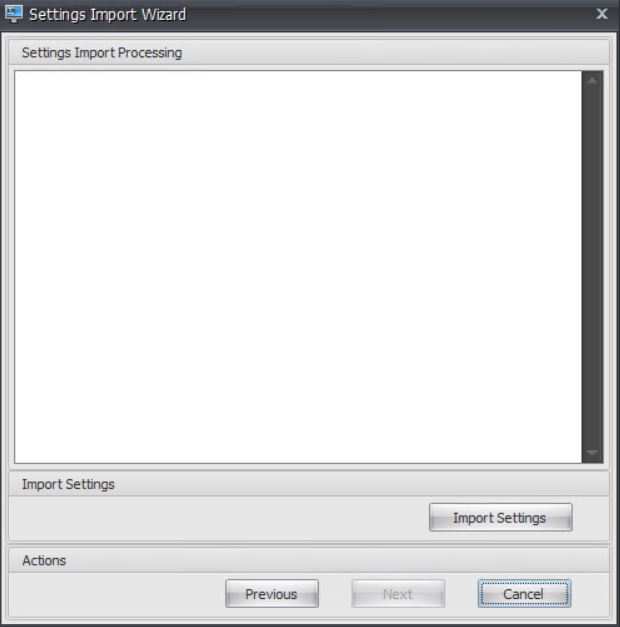
Click Yes. 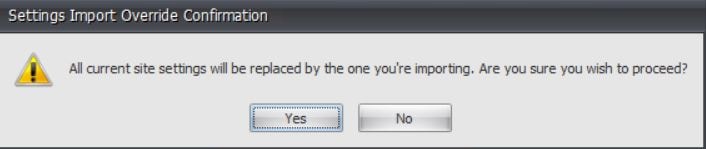
Click Finish. 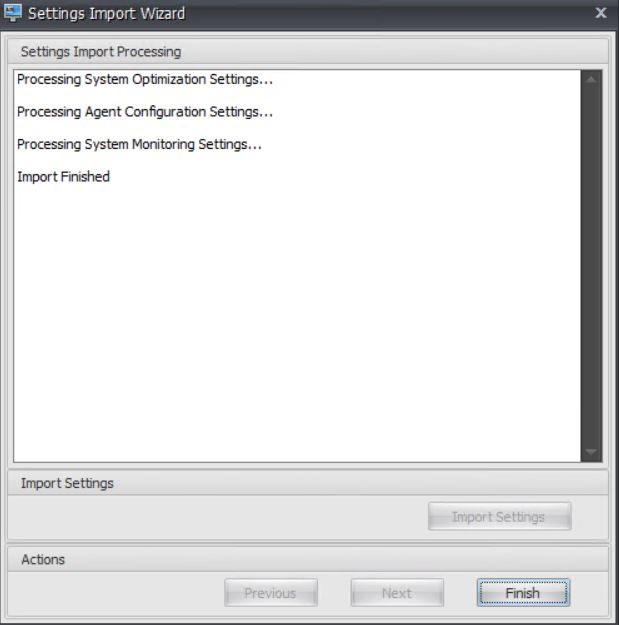
Finally install the WEM Agent Host component.
Install WEM Agent
This piece of software will be installed on the VDA making sure any environmental setting configured within WEM is enforced on the client.
Launch Citrix Workspace Environment Management Agent v4.00.00.00 Setup.exe.

Click Install. Some prerequisites are installed for you. 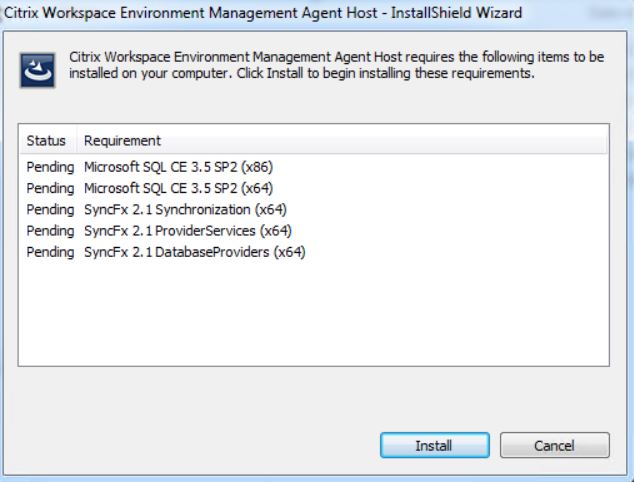
Click Next. 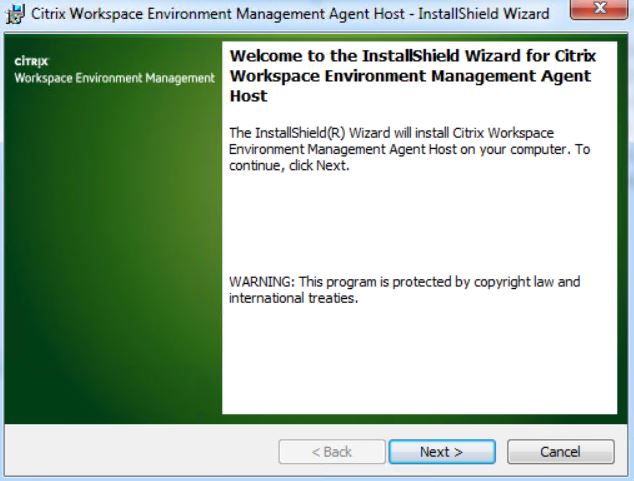
Accept the License Agreement. Click Next. 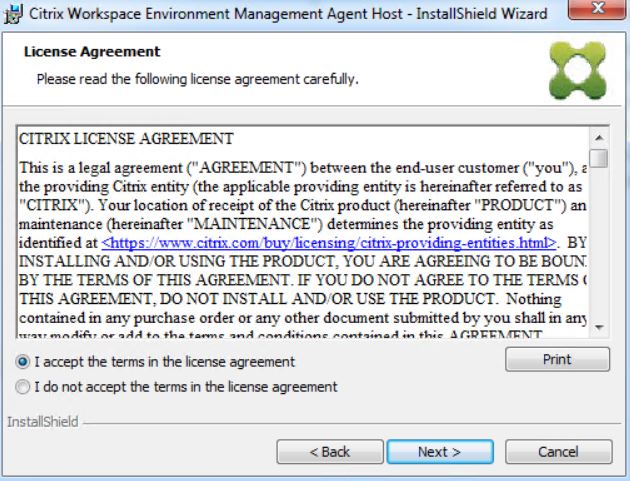
Click Next. 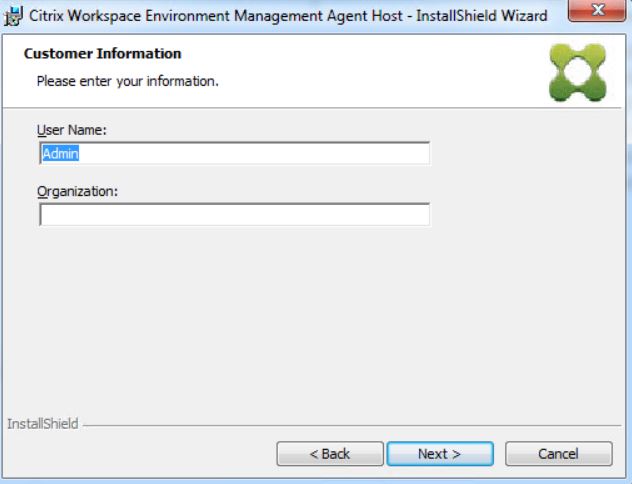
Click Next. Choose Custom if you want to specify an installation directory yourself. 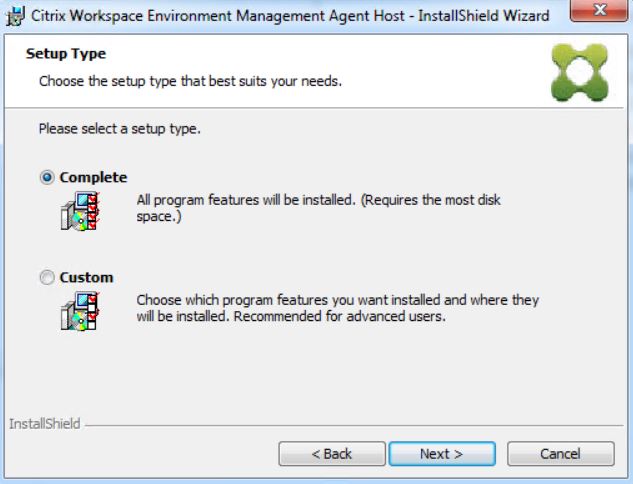
Click Install.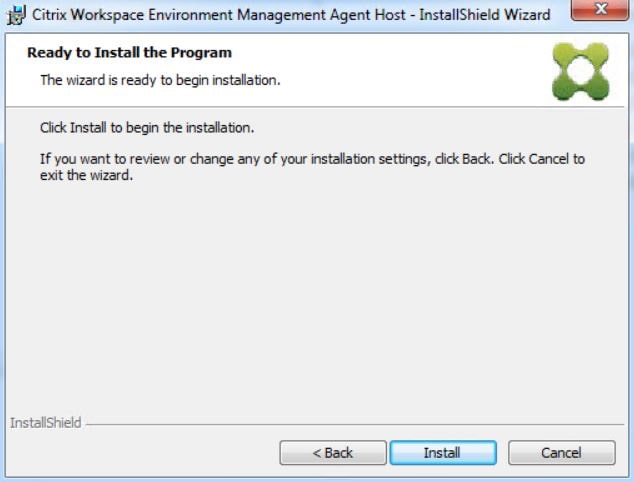
Click Finish. 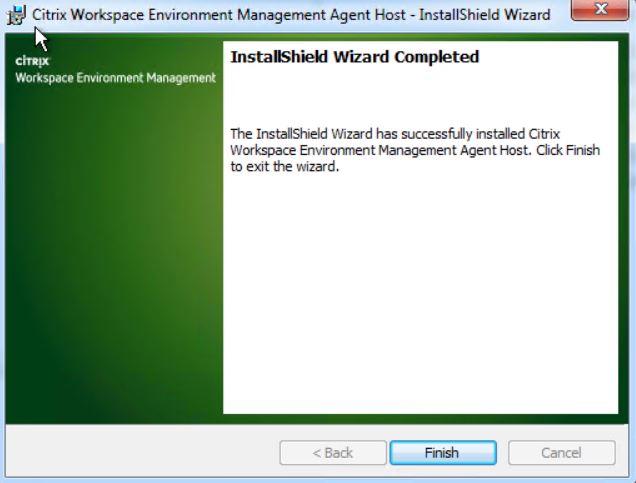
Several line arguments are available to be used when installing the Agent Host. Some example arguments:
- WaitForNework – Accepted values are 0 or 1, 0 meaning inactive and 1 meaning active. By default, this key is not created.
- SyncForegroundPolicy – Accepted values are 0 or 1, 0 meaning inactive and 1 meaning active. By default, this key is not created.
- GpNetworkStartTimeoutPolicyValue – By default the value is 30 (seconds). You can specify a different number during install using this argument.
All three keys above are designed to make sure the VDAs receive the broker address GPO before logon. All keys are created under HKLM\Software\Microsoft\Windows NT\CurrentVersion\Winlogon during installation.
- APPSYSTEMCOMPONENT – Presents the Agent Host as a System component and removes the Agent Host listing from Add/Remove Programs.
- AgentCacheAlternateLocation – The cache file will be saved to the specified location rather than the Agent install directory. Useful for non-persistent machines.
- AgentServiceUseNonPersistentCompliantHistory – The agent service’s process optimisation history will be saved externally to an XML file in the same location as the Agent cache file rather than in the machine’s registry. Accepted value is 1. Useful for non-persistent machines.
- NOTE: Do not use this on Agents from v4.5+ onwards as persistent information is now stored in the agent local database.
Example command: “Citrix Workspace Environment Management Agent Setup.exe” /v”AgentCacheAlternateLocation=\”E:\AgentCache\”” /v”AgentServiceUseNonPersistentCompliantHistory=\”1\””
Changes to the registry values are made based on specified arguments. 
The cache now resides on E:\AgentCache.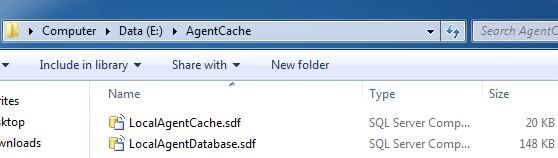
The Netlogon service is made dependant on the Norskale Agent Host service to ensure that the host service is always running before logons can be made.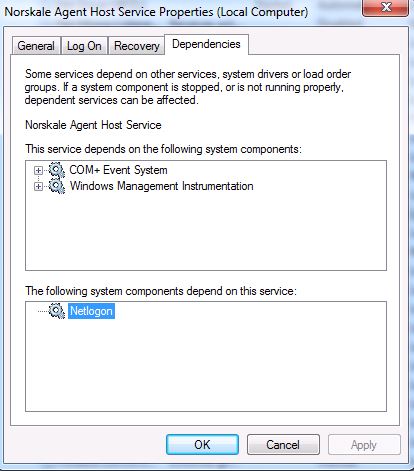
Note: As mentioned the Netlogon service is made dependent on the Norskale Agent Host Service to ensure it does not start before the Norskale Agent Host Service is running. This is particularly important when using Citrix App Layering and PVS because the PVS Target Device Software (which you should be installing in the Platform Layer) also makes a change to the Netlogon service making it dependent on the BNDevice (Citrix PVS Device) service. So, when both PVS and WEM are used together, we end up with two services that must be running BEFORE Netlogon can run. Why is this a problem when PVS and WEM are used with App Layering? The DependOnService multi-string registry value is actually where dependencies are stored for each service running within Windows. So, this multi-string value is where both the Workspace Environment Management Agent (installed in Application Layer) and the PVS Target Device software (installed in Platform Layer) set their dependencies. They both edit the same DependOnService multi-string value. When you publish an image with these two layers combined, the WEM Agent Application Layer’s edit of DependOnService is overwritten by the Platform Layer edit. Since the Platform layer has the highest priority of all layers, it is simply overwriting the change made by WEM rather than merging. This means we end up with VDAs that have no Netlogon dependency set to Norskale Agent Host Service. To fix this, open a new Platform Layer version, navigate to RegEdit -> HKLM\SYSTEM\CurrentControlSet\Services\Netlogon and type without quotes “Norskale Agent Host Service” inside the DependOnService multi-String value. Now when you publish the image, the dependencies will be correct for both WEM and PVS.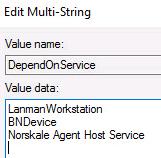
I reached out to Citrix (the ex-Unidesk guys) on this one and they confirmed their code does not contain what is required to merge multiple values together for anything set within DependOnService under the Netlogon key. In a future release of Citrix App Layering, values created under Netlogon from multiple layers including the Platform Layer will be merged. For now, use the workaround above.
Point Agent to WEM Broker Server
Clients (VDAs) need to know where to find the broker server. For this you can use Group Policy however I recommend using the registry on each VDA that has a WEM Agent installed. Create a BrokerSvcName REG_SZ with a value of the WEM Infrastructure Services Load Balanced address under HKLM\SOFTWARE\Policies\Norskale\Agent Host\. If using GPOs, Grab the ADMX configuration files from the WEM install media. 
Copy them in to the PolicyDefinitions Group Policy central store folder within SYSVOL on your Domain. Remove the ADM file as it is not needed. Also import the language file. 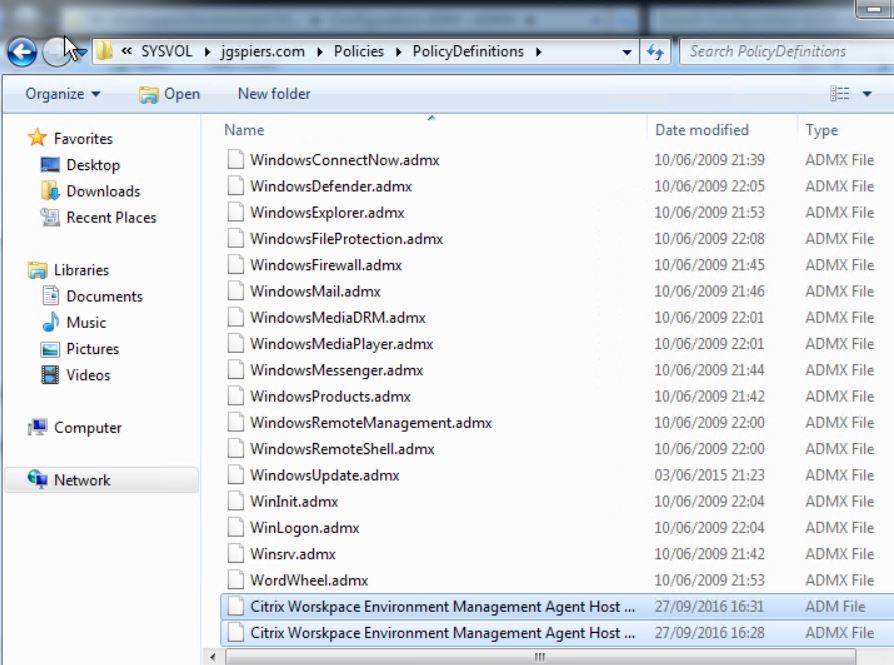
Now navigate to Computer Configuration -> Administrative Templates -> Citrix -> Workspace Environment Manager -> Agent Host Configuration -> Connection Broker Name. 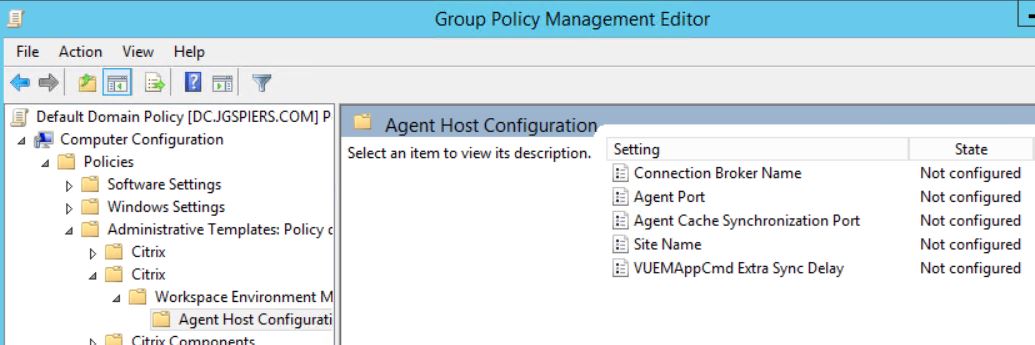
Change the Connection Broker Name to Enabled and specify the broker server. The other settings such as Agent Port can be used to specify port numbers other than the default. For now I do not need to use these so will leave all others settings unconfigured.
Note: Assigning WEM 4.3+ agents to sites via GPO is not supported. In WEM 4.3+, you assign machines to Sites (now called Configuration Sets) using the WEM Administration Console.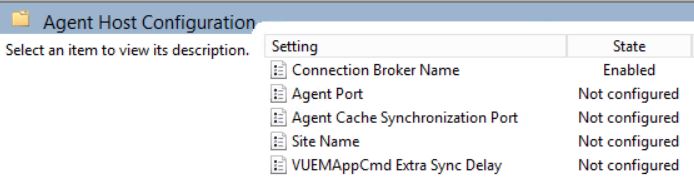
If you want to manually force a cache update/rebuild on a VDA or create the cache before the Agent runs for the first time after an install, you can use the following command:
AgentCacheUtility.exe -RefreshCache -BrokerName servername. The Agent Cache Utility is found within the WEM Agent Host install directory. An optional switch -brokerport:port should be used if you have changed the default Infrastructure Services port of 8285. 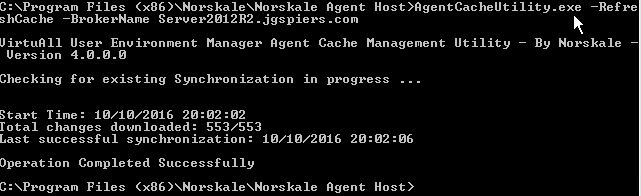
Connect to WEM Administration Console
Firstly, launch he Citrix WEM Administration Console. Click Connect, enter your Infrastructure Services server name and specify the broker service port (default 8284).
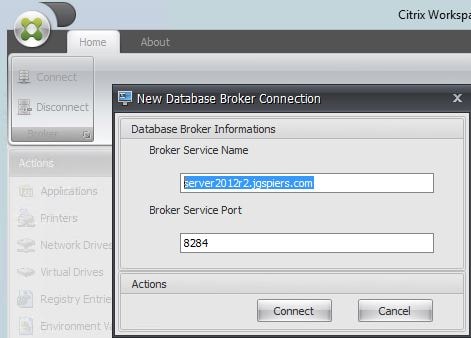 Once connected click the About tab.
  Click Configure license server.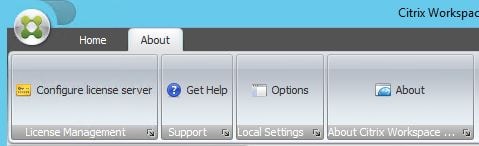
Enter the Citrix license server and port. Click OK. 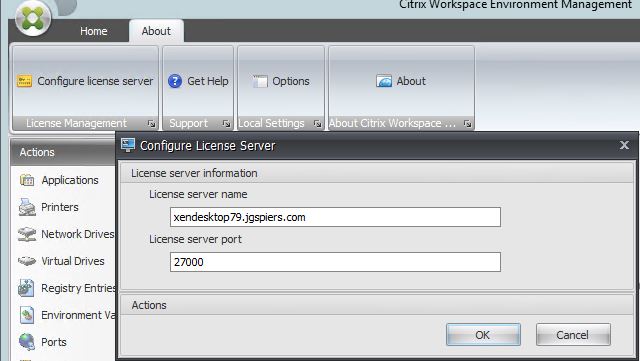
Clicking Options on the About tab allows you to configure items such as:
- Auto Admin Logon – Console automatically connects to last broker it was connected to.
- Enable Debug Mode – Enables verbose logging for the administration console. Logs are created in the root of the currently logged on user’s profile.
- Console Skin – Change the skin (graphical look) of the administration console.
- Port Number – Allows you to change the port number used for administration console connection to broker service. Remember to update the port configured on the broker (Infrastructure Services) server.
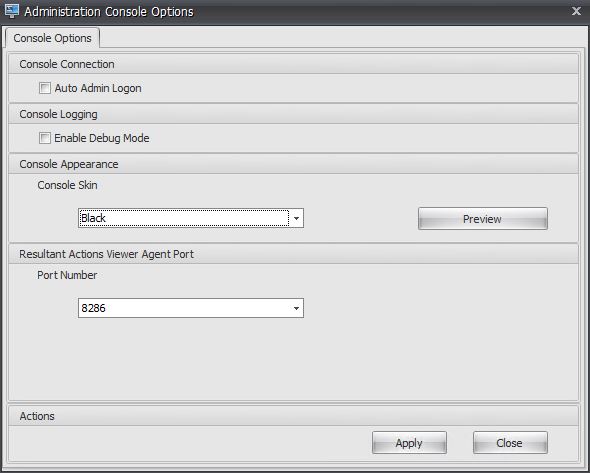
Click on the Home tab. Here you will perform all of your WEM configurations. You have several directories listed such as:
Actions – Configure registry entries, virtual drives, printers etc. on agent host machines.
- Note that virtual drives let you map to a local location.
Filters – Filter actions based on rules and conditions such as if user if part of group then apply these rules.
Assignments – Assign created actions to configured users.
System Optimization – Configure CPU management, memory management, fast logoff for agent hosts etc.
Policies and Profiles – Configure UPM (Universal Profile Management), client lockdown settings i.e. hide administrative tools.
Configured Users – Import users from Active Directory to be used with WEM.
Advanced Settings – Agent logging options, printer processing, network drive clean-up options etc.
Administration – Configure WEM administrators, manage agents etc.
Monitoring – Login reports, boot reports, user and device reports.
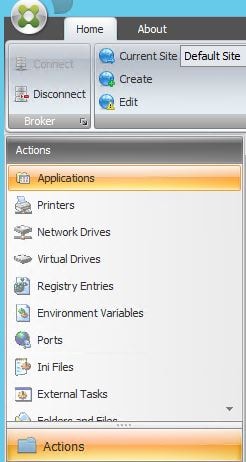
Add an Application (example)
Click on Applications, click Add.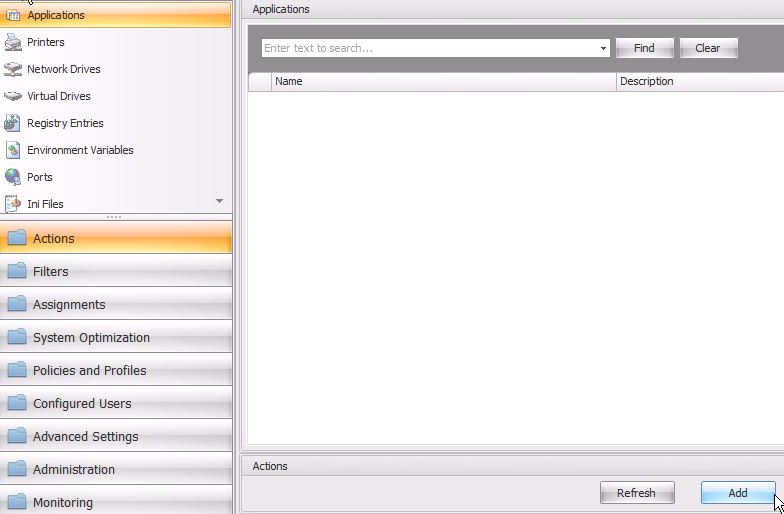
Enter the application name, location and where the application will exist on the users Start Menu etc. I am just creating a basic notepad application. 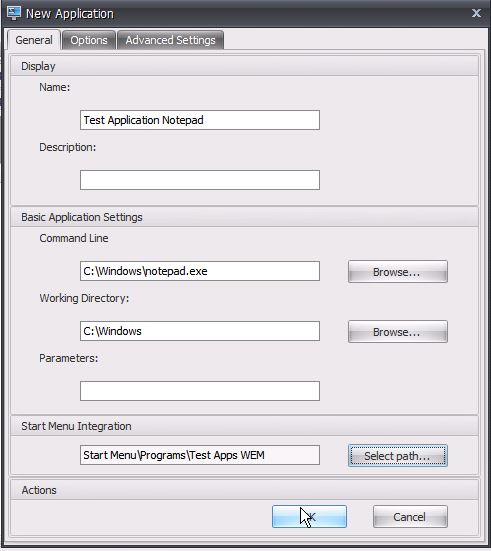
Clicking on the Options tab allows you to change the icon, application state (enabled/disabled), maintenance mode presents the icon as normal to the user but with a warning icon beside it and a warning message if the user tries to launch it. Hotkeys allow users to launch the application using keyboard shortcuts. 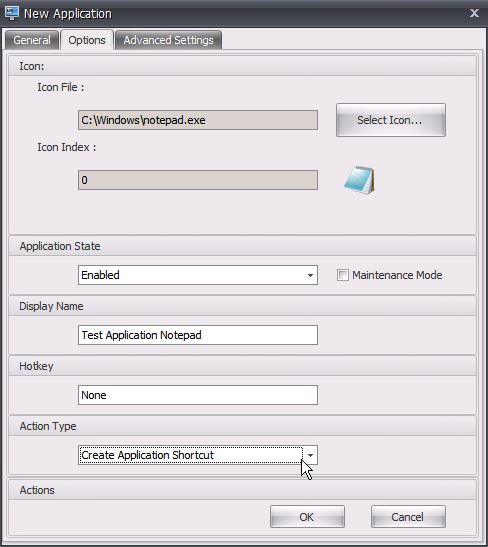
Advanced Settings controls how the application will appear when launched such as maximized. By default, applications appear within the WEM self-service window of the agent however you can disable this using the Do Not Show in Self Services checkbox. Enable Automatic Self-Healing will recreate application shortcuts if they have been deleted or moved by the user. Click OK. 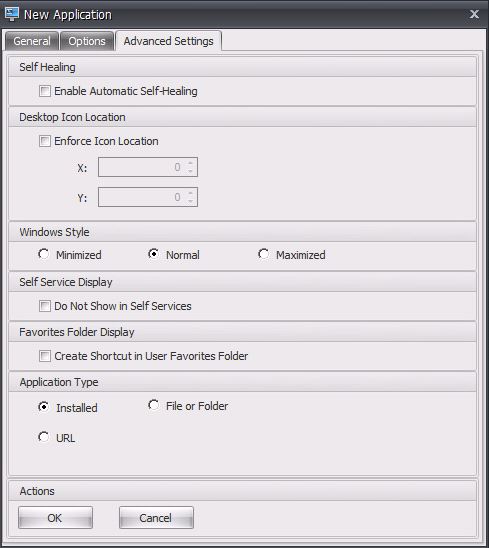 The application now appears within the Application List view.
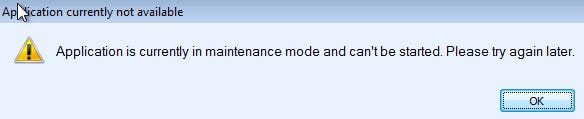
 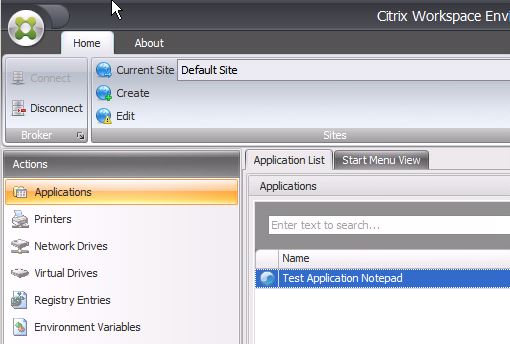 Just to show you the maintenance mode feature. When an application is in maintenance mode it will display as below to the user.
 When application is launched the following error is displayed.
  The application also receives a warning icon within the WEM Administration Console.
Add a Registry key (example)
Click on Registry Entries under Actions and click Add. 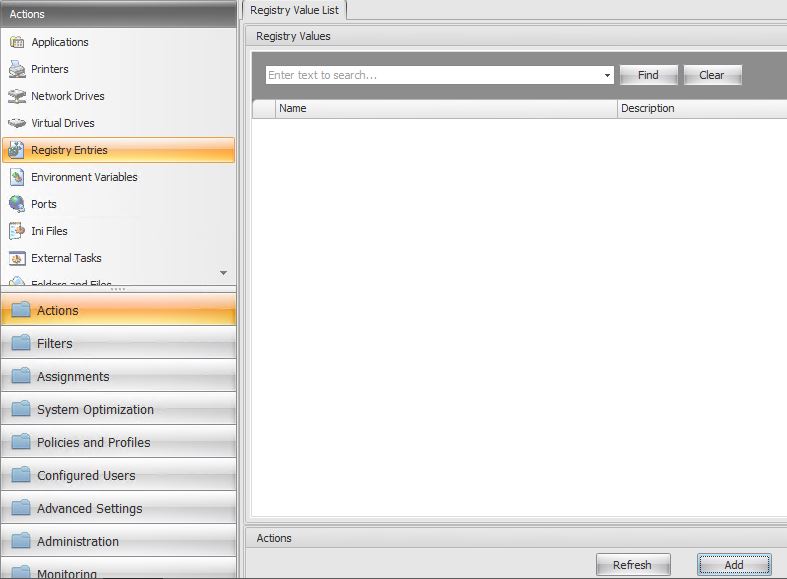
Registry entries can only be created under HKEY_CURRENT_USER. So, let’s create an entry to suppress the Citrix Receiver client add account popup on restart. Note that Target Path does not require HKEY_CURRENT_USERS to be entered in the path as this is handled automatically by WEM. Run Once as the name suggests runs this action once which may be desirable if you have lots of Registry entries as you would not want this key being recreated during every Agent refresh. This also allows users to change the key values if they prefer an application to behave differently to what the registry key specifies.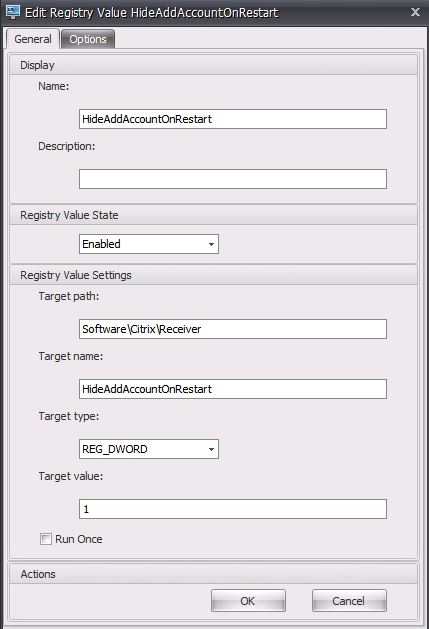
The Options tab allows you to specify if you are deleting, creating or setting an existing key. Click OK.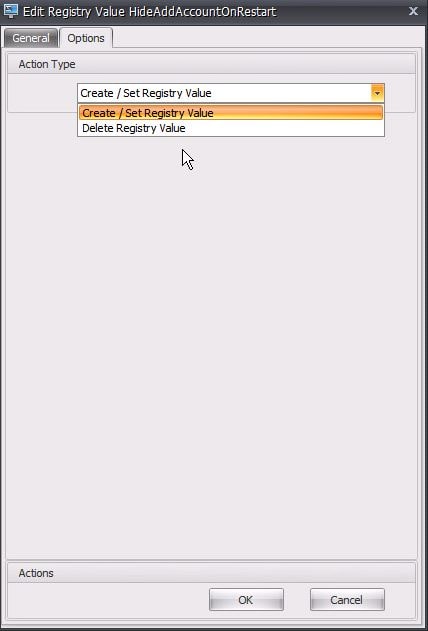
Import Registry keys (example)
You also have the option to import registry keys from a reg file. WEM reads the .reg file and gives you the option to import values of your choice. REG_BINARY values won’t be scanned because WEM does not support creating REG_BINARY keys. Use the Import Registry File action to import values.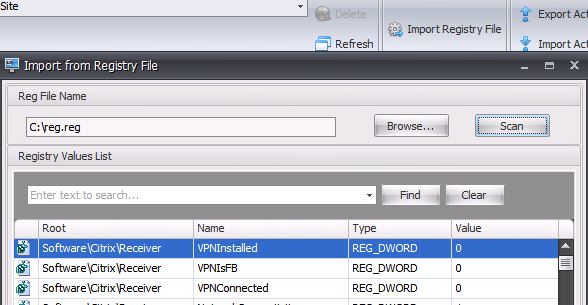
Import Printers (example)
To import printers, you can either do so manually or simply connect to a Print Server using the Import Network Print Server button.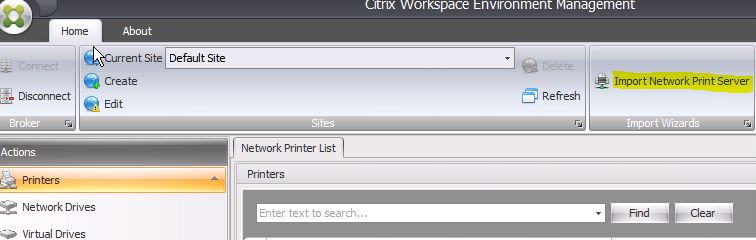
Enter the print server name and specify alternate credentials if the ones you are currently using for the WEM Administration Console do not have the appropriate permissions. Click Connect.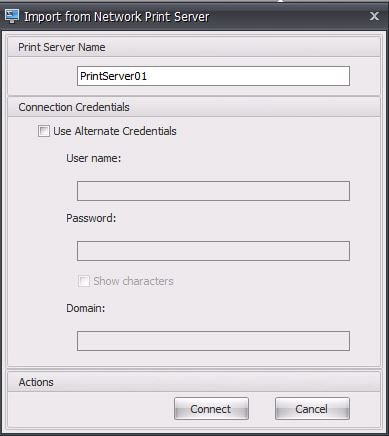 Select one or multiple printers and click Import Selected.
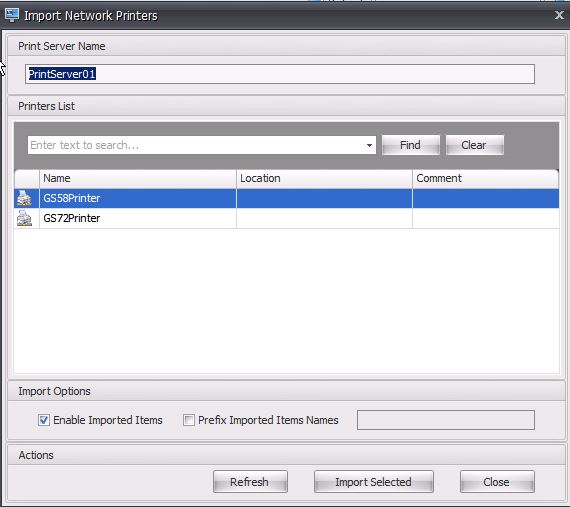 You can then edit imported printers changing the name, printer state (enabled/disabled) and if the printer will recreate if deleted using self-healing etc.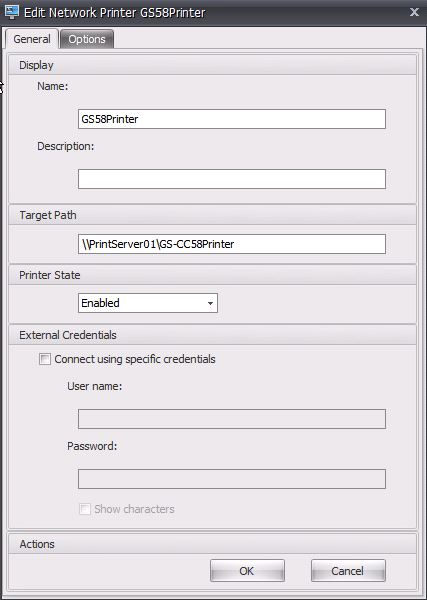
Create Directory (example)
Click on Folders and Files followed by Add. Here we can copy folders and files to the user’s environment and create directories etc. I’ll be creating a folder, so the Target Path is blank.
Note that you can use variables such as C:\Users\##Username##\ which will expand to the username WEM is running under. This can help when creating/copying files/folders to the user’s profile.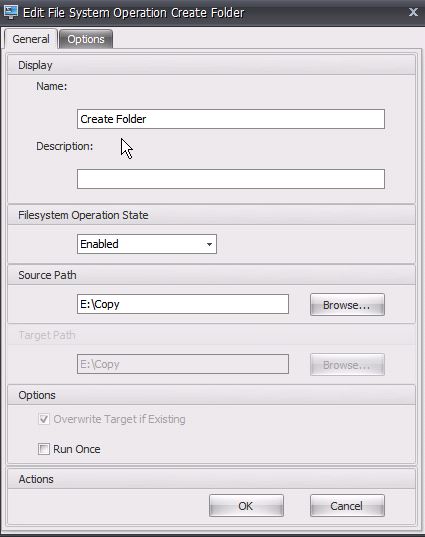 On the Options tab you have several action types. Select Create Directory.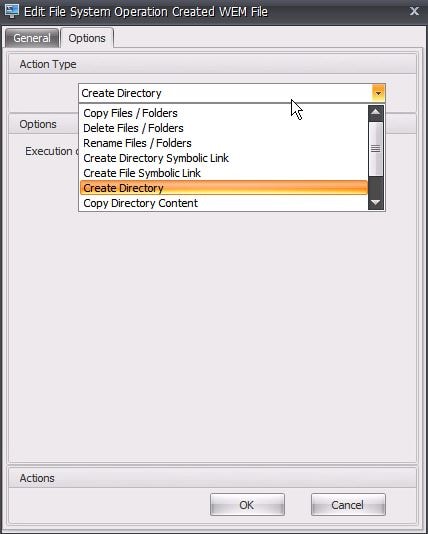
Apply settings to users using Rules and Conditions
To apply these settings to the user environment we need to first configure a set of users or group of users who will receive the actions and create some rules and assignments. Navigate to Configured Users -> Add. Enter a user name, multiple user names or preferably a group as I have done.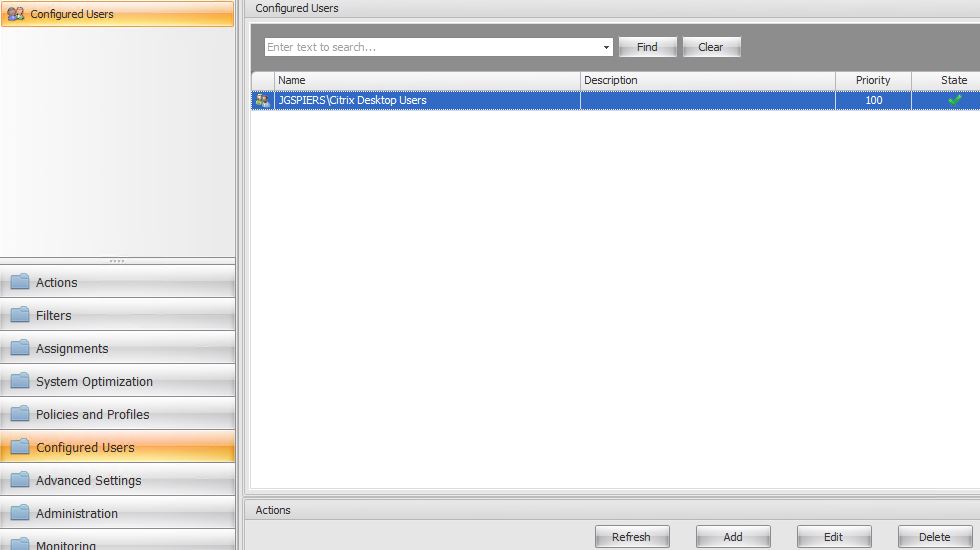 Next click on Filters -> Conditions. By default, an Always True Condition and Rule is created however not in use. Click Add.
 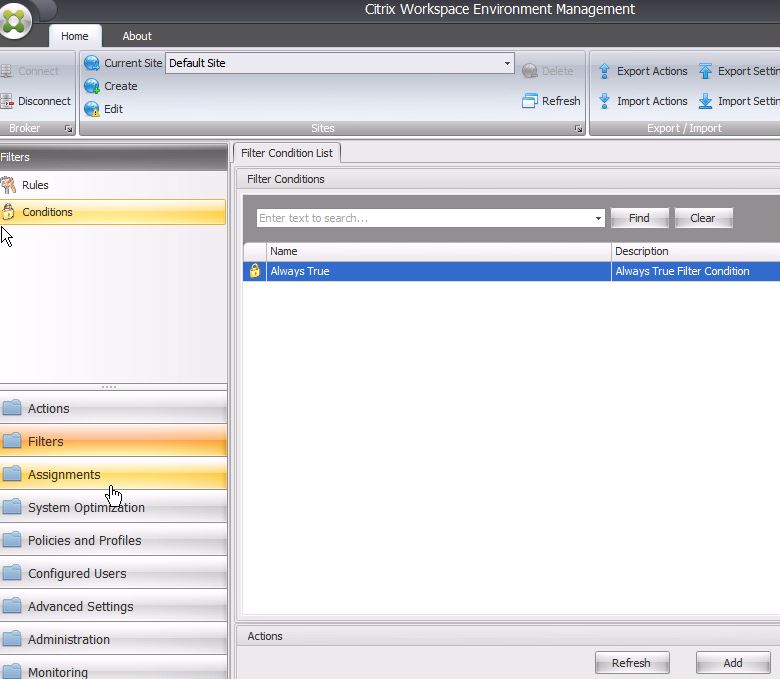 Enter a name and select a condition type. Single or multiple conditions make up a rule. Conditions can be based on things such as the IP address of the VDA machine, the client OS version etc. Here I will choose Client IP Address Match so that VDA’s within the range specified will match this condition.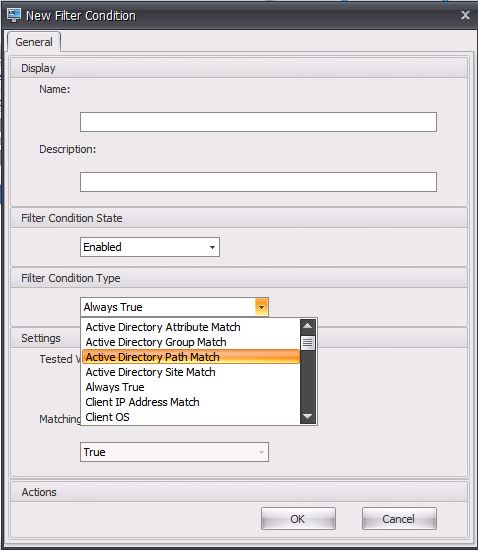
Enter the IP address range of your VDA machines and click OK. You can enter multiple single/ranges of IPs together.
Note: What you cannot do is combine multiple different IP Address Match filters under a single Rule expecting WEM to apply the rule based on IP one or else IP two. It does not work this way.
Below is an example of entering multiple IPs under the same filter:
192.168.1.100-192.168.1.200;192.168.2.100-192.168.2.200;192.168.3.40
Note: Make sure no space exists at the end of the IP address(s) in the Matching Result box.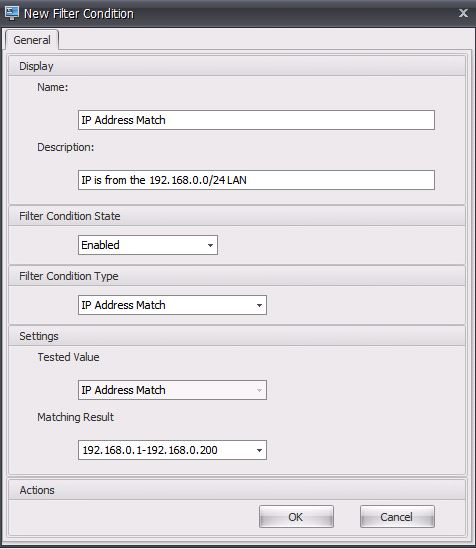
Note: If you are matching on Computer Names/VDA names, you can use wildcards such as Desktop* or you can simply use the star * symbol to match all computers.
I created another condition which matches for users who are in the Citrix Desktop Users security group. Now we can use these conditions against a rule. 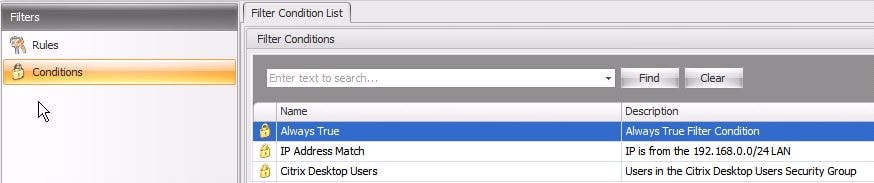 Click on Rules and click on Add.
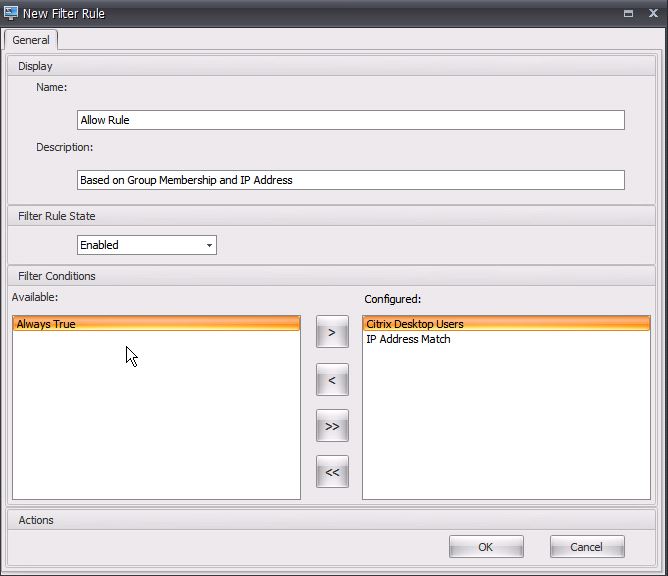
 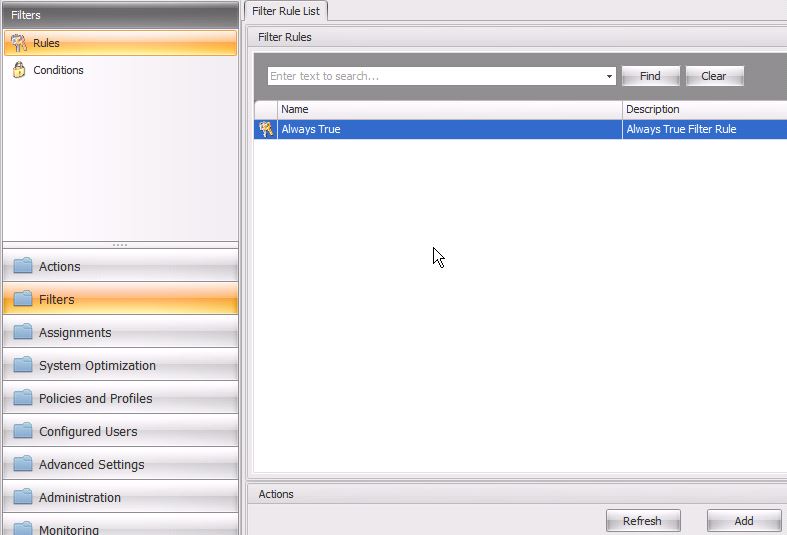 Enter a rule name and toggle the two created conditions to the right. Click OK. If these two conditions match, then the rule is activated and allowed.
  Now click on Assignments. You will see any configured user/group here. Double click the entry and the list of available actions appear. Highlight an action and click the right-arrow to move it across to the Assigned section.
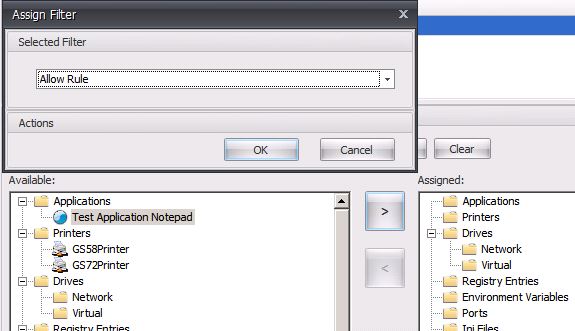
 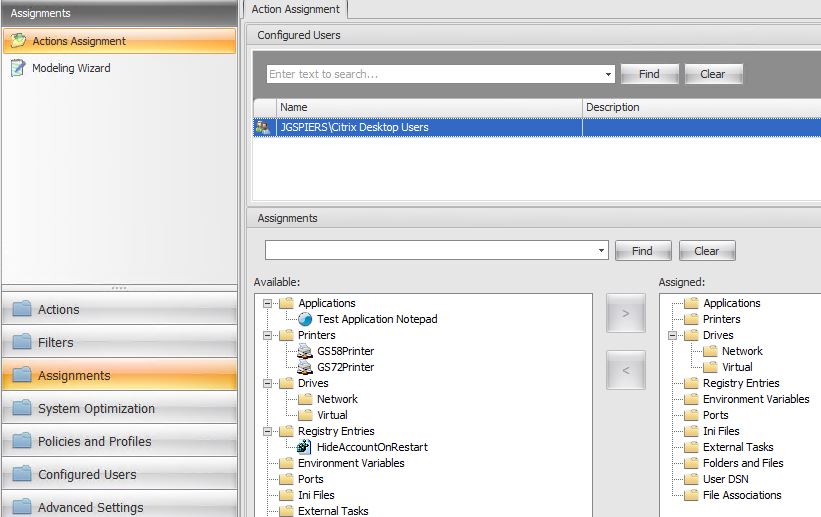 Assign the Allow Rule filter that we just created to the action. This means that the action will apply if the Allow Rule is matched.
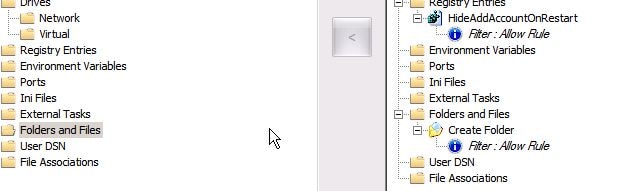
  All actions I have created are now assigned to the Citrix Desktop Users group. Any user who is a member of that group and logs on to a VDA within the 192.168.0.0/24 range should receive the actions.
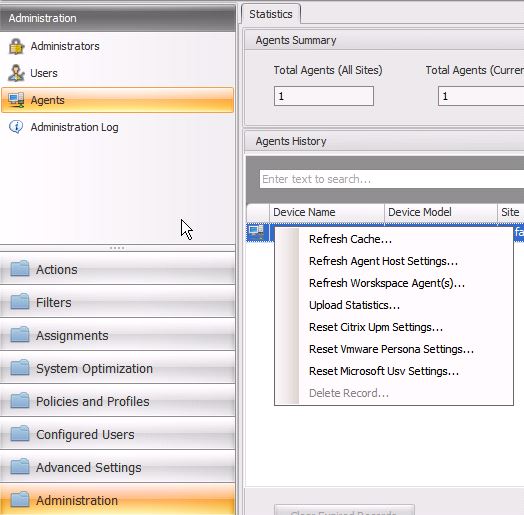
  Navigate to Administration -> Agents, right-click your VDA and click Refresh Cache… to force a refresh of the cache. The VDA now has the latest copy of the cache.
Other options that can be used alongside the above option include:
- Refresh Agent Host Settings – This option will force the VDA to refresh machine based settings such as environmental settings.
- Refresh Workspace Agent(s) – This option will force the VDA to refresh user based settings such as actions.
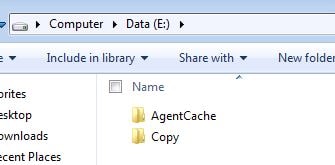
 Next log on to the VDA, the conditions and rules should match and WEM will apply any assigned actions. The Copy folder appears within E:\.
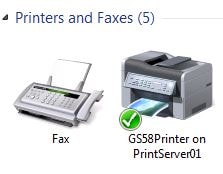
  The printer appears.
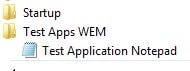
  The test application appears within the Start Menu.
  The registry entry appears.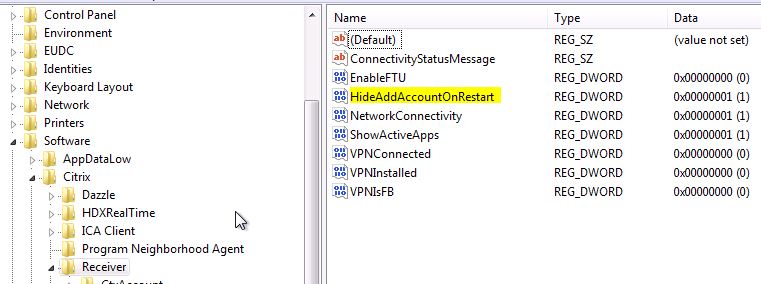
Modeling Wizard
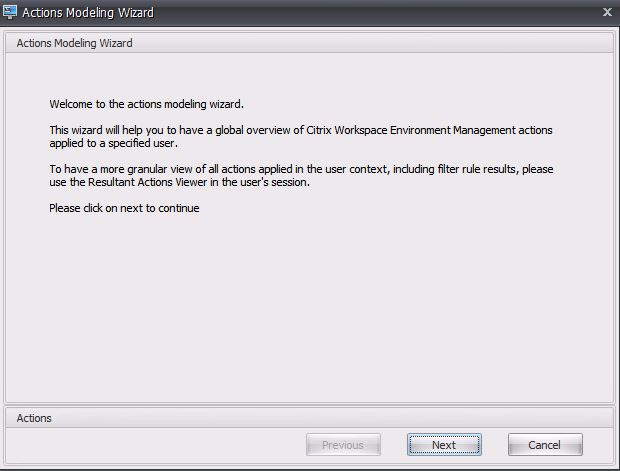
You can also use the modeling wizard to check what actions will apply to a user (groups not allowed). Click Assignments -> Modeling Wizard. 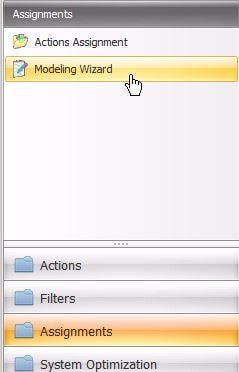 Click Next.
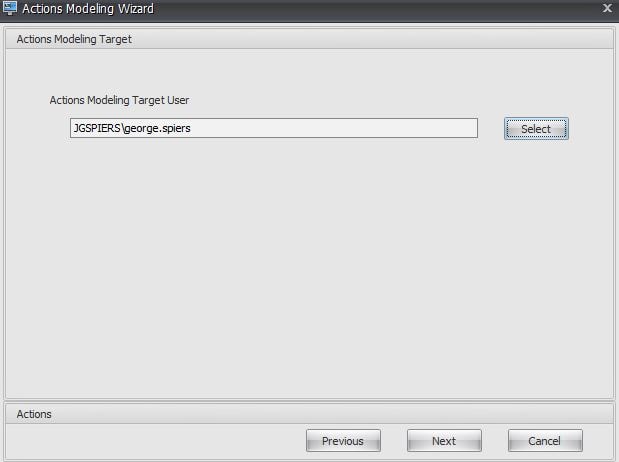
  Enter a user and click Next.
  The list of actions that will apply show.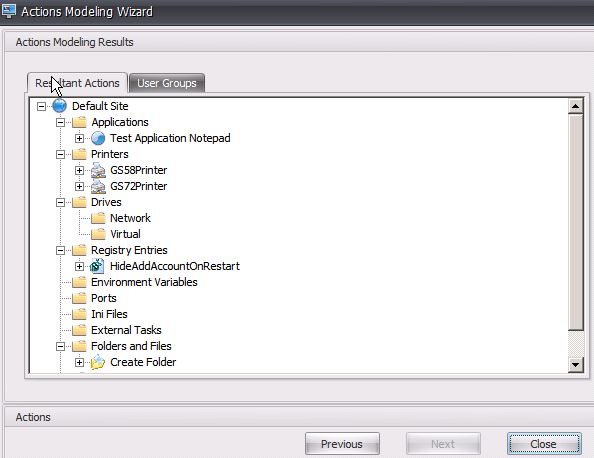
Resultant Actions Viewer
The Resultant Actions Viewer is a client-side tool (installed on VDAs where the WEM Agent is installed) and is quite like server-side Modelling Wizard although this tool rather than telling you what should apply tells you what did apply to a user logged on.
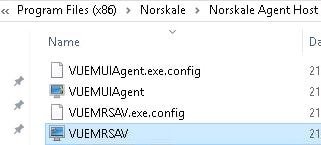
When you log on to a VDA as a user, browse to C:\Program Files (x86)\Norskale\Norskale Agent Host and launch VUEMRSAV.exe.
Several tabs will be on display. The Resultant Actions Viewer displays what actions have been applied to your session, what actions have been excluded, what environmental settings have been applied. You can also view configured Agent Settings and Group Membership for the user.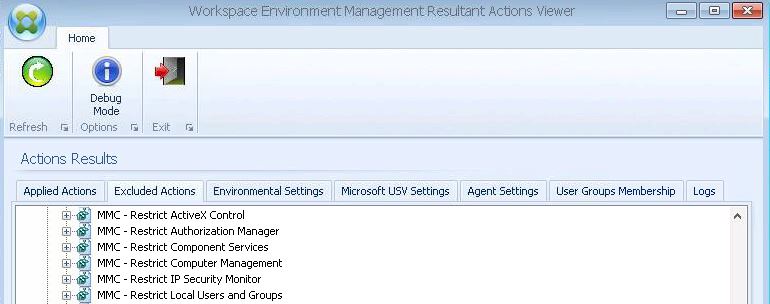
What Environmental Settings have applied shows as below. 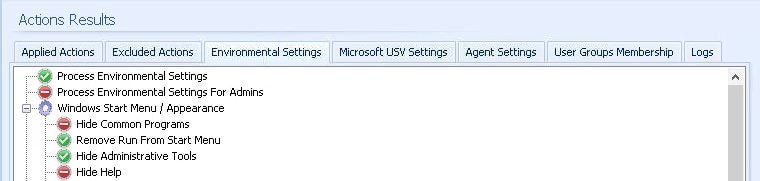
The Logs tab shows a copy of the Citrix WEM Agent.log found under %UserProfile%.
System Optimization – Fast Logoff
Navigate to System Optimization. Here you have a number of options. Firstly, on the Fast Logoff tab you can enable fast logoff. Fast Logoff logs a user off instantly and performs any additional logoff tasks in the background. This basically means the user is instantly disconnected and the logoff happens as normal behind the scenes. You can enable this and exclude specific groups from processing. 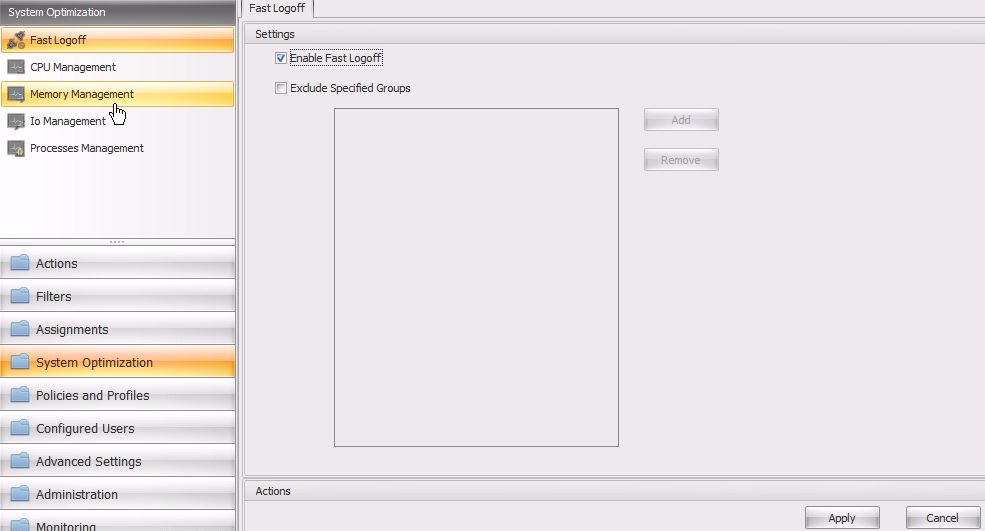
System Optimization – CPU Management
On the CPU Management tab, you have options such as:
Enable CPU Spikes Protection – Configured by the Default Recommended Settings template if imported. This option limits all processes from using more than the specified processor value. Limit Sample Time decides for how long a process can exceed the CPU Usage Limit before it’s priority is lowered, which a less aggressive approach compared to CPU clamping. The CPU Usage Limit (%) field defines how much percentage of CPU a process can use before it is pegged back. The Limit Sample Time (s) value defines how long in seconds a process can exceed the value set by CPU Usage Limit (%) before that process is set to Low Priority. If you have multiple CPUs, divide them up where 99% in the CPU Usage Limit field would be for one CPU but 49% is for two and 33% is for three CPUs.
The CPU Usage Limit percentage accounts for the CPU percentage of that total machine. For example, if you have a 4-core machine and you have set the CPU Usage Limit to 25%, that means a process will need to consume 25% total processing across all 4 cores before CPU Spikes Protection is enforced. If a process is single-threaded, it would need to consume 100% of a single core before CPU Spikes Protection is triggered, as 100% of a single CPU accounts for 25% of the total CPU consumption across all cores (4 cores / 100% = 25%).
For example, if you did not want a single-threaded process to consume 100% CPU on a quad-core machine for any more than 30 seconds, set Limit Sample Time (s) to 30 seconds and CPU Usage Limit (%) to 24%. We set 24% because it is better to avoid allowing a process to take full 100% of the single core, potentially crashing the system before Spikes Protection can have an impact.
Another example is when you do not want a single-threaded process to consume 80% of CPU for more than 45 seconds on a quad-core machine. In this case you set Limit Sample Time (s) to 45 seconds and CPU Usage Limit (%) to 20%.
If however you have no single-threaded applications and want to restrict multi-threaded applications from consuming 80% total CPU, you would set CPU Usage Limit (%) to 80%.
Idle Priority Time (s) defines the amount of time a processes priority will be degraded for before it returns to its previous priority. For example maybe you want a process priority to be degraded for 120 seconds before allowing it to return to a higher priority.
If you need different Spike Protection configurations for multiple applications, or you have different CPU assignments across multiple VDAs, you will need to deploy additional Configuration Sets.
The Limit CPU / Core usage setting allows you to limit the process to a certain amount of cores once it triggers CPU Spikes Protection by violating the CPU Usage Limit (%) value.
Enable Intelligent CPU Optimization – This setting makes processes a user launches in their session reactive by setting the process initially with a CPU Priority of High. It also keeps a history of processes that a user runs, and the amount of times the processes have triggered spikes protection. The more a process triggers a spike protection the lower priority the process will be assigned at next launch by the same user. For example, the first time I launch Internet Explorer WEM will give the process a priority of High to make the application responsive. If Internet Explorer repeatedly triggers spikes protection, WEM will make the process run at the next lowest CPU Priority the next time it is launched, for example Above Normal. If the process continues to trigger spikes protection, it will launch at the next lowest priority until it eventually is launching at the lowest (Low) priority. Note that priorities for processes set under the CPU Priority tab override the Intelligent CPU Optimization feature.
Enable Intelligent IO Optimization – This works the same way as CPU Optimization but instead for I/O.
Exclude specified processes – Allows you to exclude specific processes from spikes protection. By default, CPU Management excludes most of the common Citrix and Windows core service processes. You could set antivirus processes to be excluded but give those processes an IO priority of Low to prevent them consuming too much disk IO. You enter a process name as it is found in Task Manager but without the extension for example explorer rather than explorer.exe.
Note: If a process is clamped by spikes protection, an Event Log entry is generated under Application and Service Logs -> Norskale Agent Service indicating the process that was affected.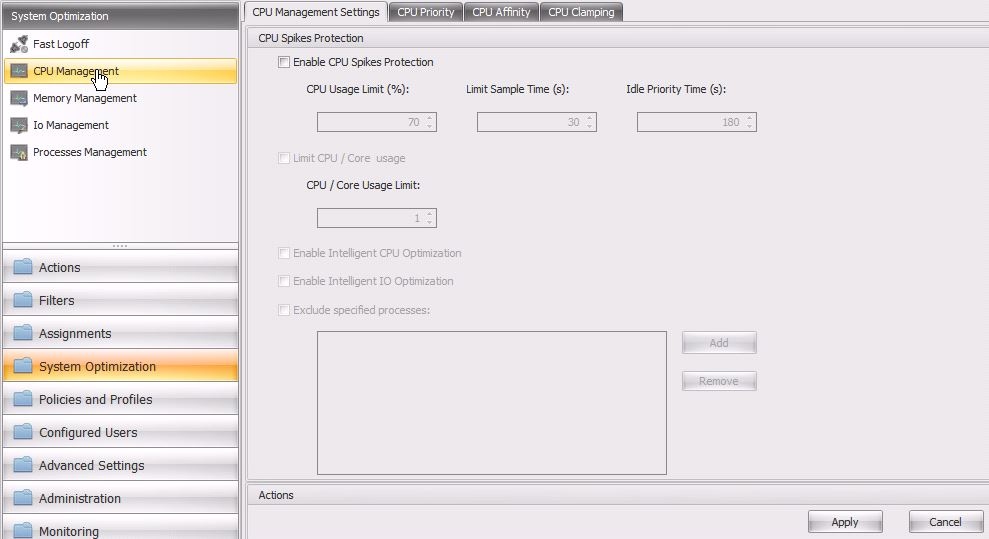
Over on the CPU Priority tab, you can specify processes (by name) such as iexplore.exe and assign a priority, which gives the process more CPU time.
Note: Giving a process Realtime priority is not recommended.
If you set a process such as iexplore.exe with a priority of Normal, the process will begin with this priority set and it will never drop to a lower priority, however it can run at a higher priority.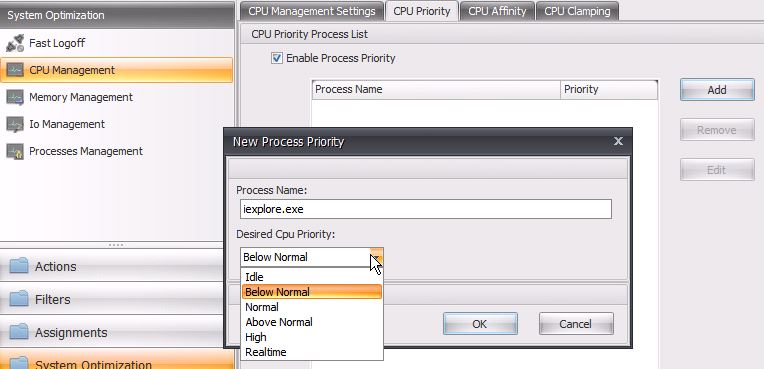
On the CPU Affinity tab you can set process affinity against processes. This determines how many CPU logical cores a process will use. For example, configuring notepad to use 2 cores, or configuring iexplore to use a single CPU core.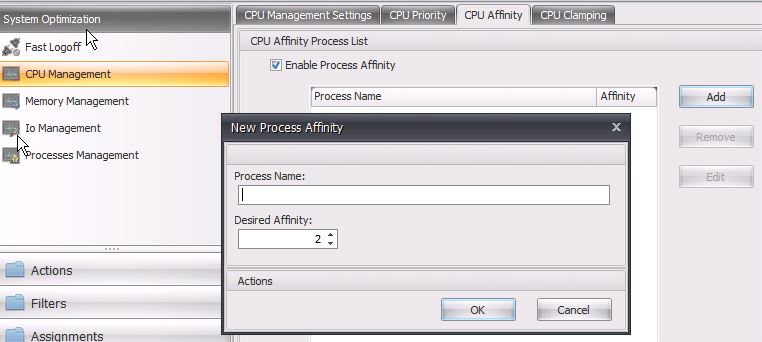
The CPU Clamping tab allows you to clamp a process to a certain amount of CPU i.e. only 10% CPU can be used by this process. The percentage is across all cores, so 10% on a 4-core machine would not be 10% of one core. Citrix recommend using CPU spikes protection, CPU priorities, CPU affinities and CPU usage limits to control troublesome processes rather than using CPU Clamping.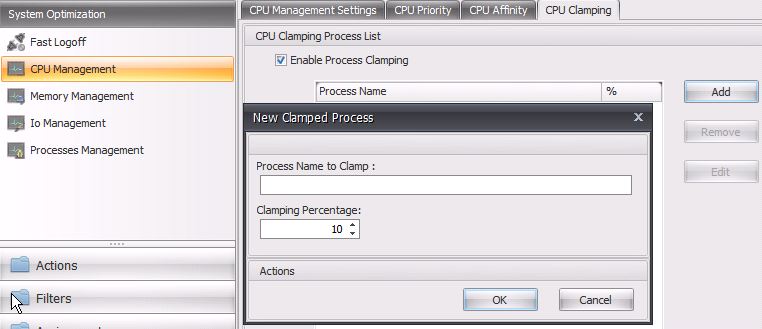
System Optimization – Memory Management
Click Memory Management. Here you can enable Working Set Optimization which withdraws excess memory from idle applications if they have not been used for a certain amount of time. You can exclude processes from being impacted by WSO. A default time of 120 minutes is set against Idle Sample Time (min) which enables WSO to calculate a process’s RAM usage and the least amount of RAM a process requires without losing stability.
An example of WSO in action is when a user opens Internet Explorer and browses a couple of websites. During this time, WSO calculates the amount of RAM used plus the least amount of RAM required. When the user is finished with Internet Explorer and when the Internet Explorer process percentage CPU drops to the value set for Idle State Limit (percent), WEM forces the process to release the excess RAM previously calculated. The RAM is released by writing it to the pagefile.
It is important that you do not set the Idle State Limit (percent) value too high as you don’t want WEM to force the process to release RAM if the process is active. The default value is 1% meaning that in the previous example once Internet Explorer drops to 1%, it’s excess RAM will be released. Citrix do not advise setting the value any higher than 5%.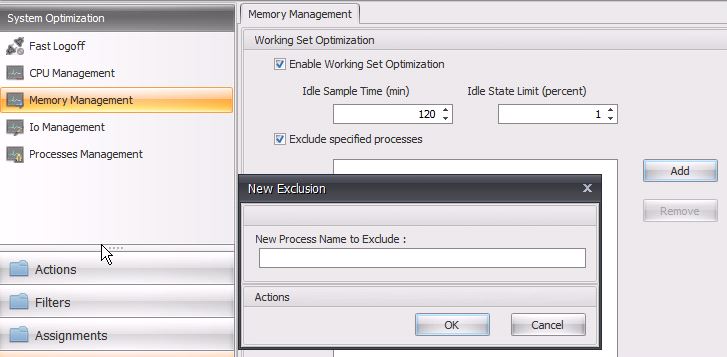
System Optimization – I/O Management
On the Io Management module, you can set an I/O priority for processes. This could be useful if you want to throttle a disk heavy application. This feature works just like the CPU Priority feature, but for network and disk I/O.
You add a Process Name without an extension for example explorer instead of explorer.exe. You then set an IO priority. The next time you restart that process, I/O priority will apply.
For example, you may set an antivirus process with an I/O priority of low to prevent it consuming too much disk I/O during a session. The same could apply to any I/O intensive processes.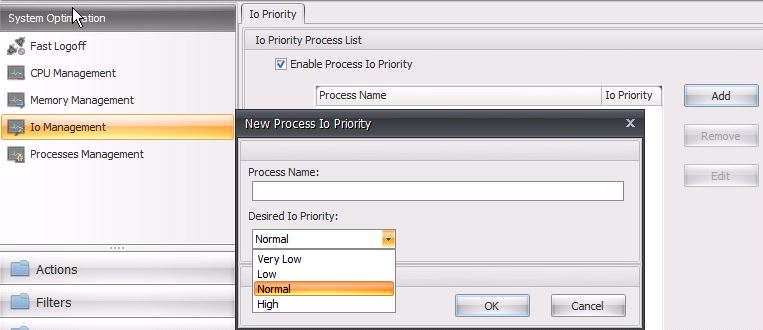
System Optimization – Processes Management
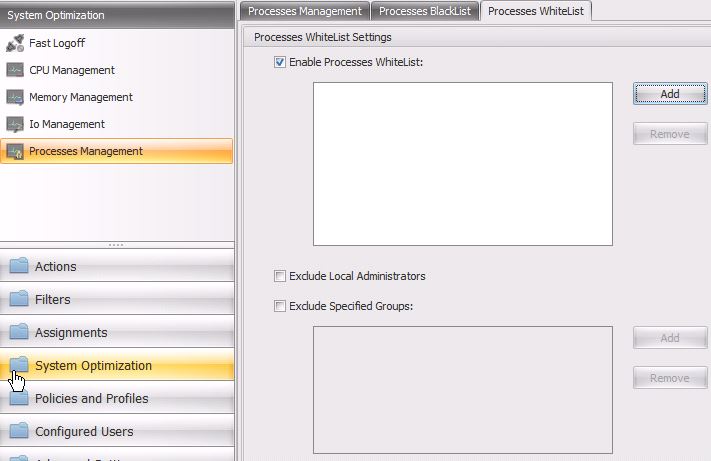
Click Processes Management. If you enable processes management, you can whitelist or blacklist certain processes. 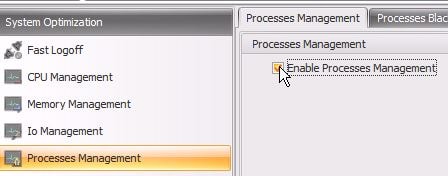 If you enable blacklisting, you can add certain processes to the blacklist meaning they won’t be run.
 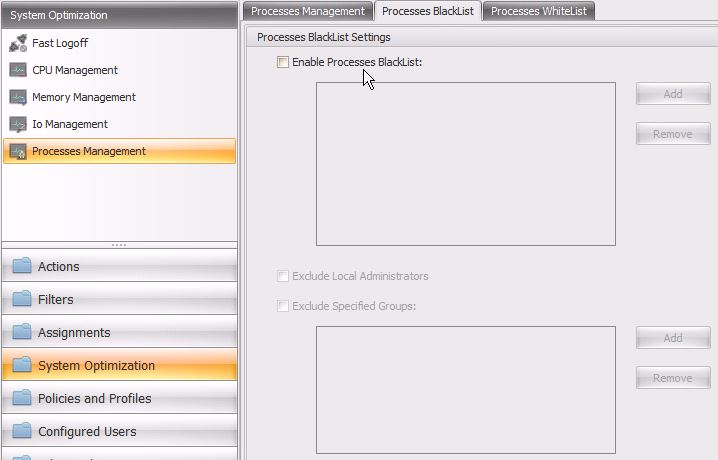 If you enable process whitelisting any process not in the whitelist is automatically blacklisted so be careful. You can exclude local administrators and/or specific groups from both white and blacklists
  With a process blacklisted if you try and run the process manually you’ll get the below message.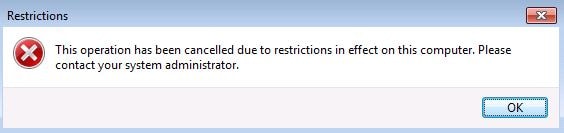
Configuring Environment Settings
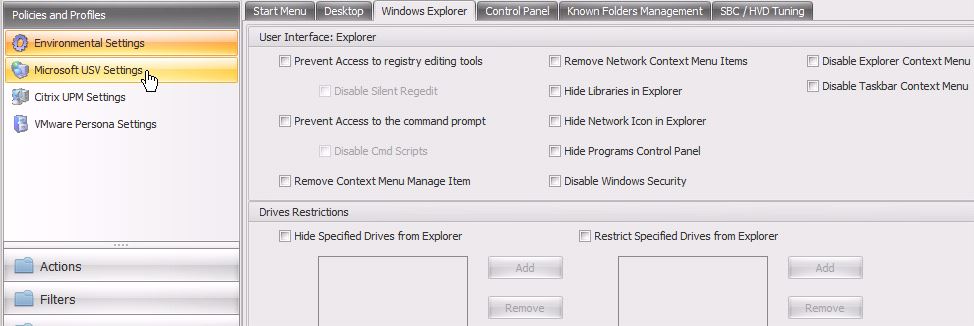
Click Policies and Profiles -> Environmental Settings. A lot of these settings are configured if you import the Environment Lockdown Sample template. For example, the taskbar can be locked and the run button can be removed from the Start Menu. You can exclude administrations from receiving environmental settings by ticking the Exclude Administrators check box. 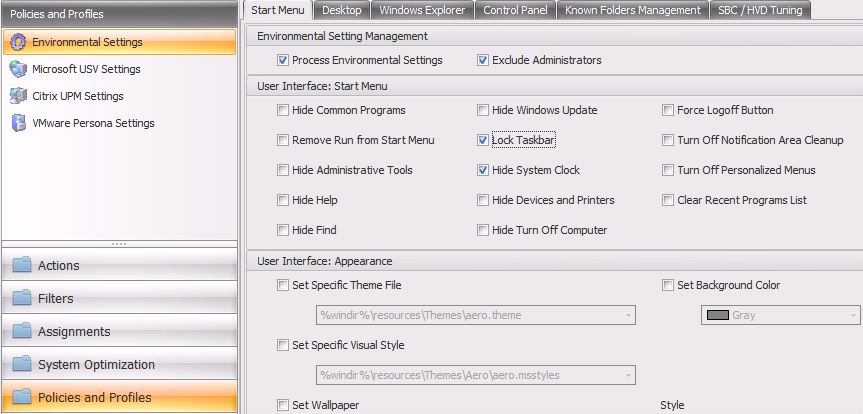 This picture shows the system clock having been removed.
  The Desktop portion allows you to hide the My Computer icon, hide the Recycle Bin and more.
 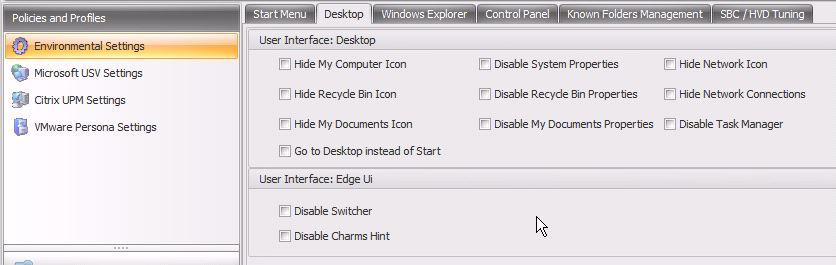 Windows Explorer allows you to hide the Control Panel and prevent access to CMD etc.
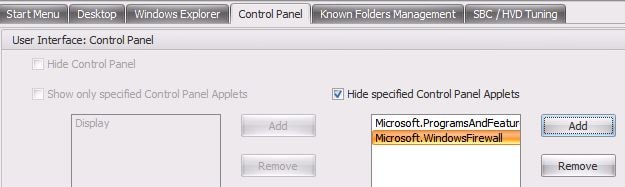
  Control Panel allows you to hide the Control Panel all together, only show specific Control Panel applets or hide specific applets.
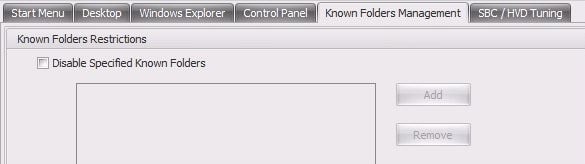
  Known Folders Management gives you the ability to disable known folders within the users profile.
  SBC/HVD Tuning allows you to optimise performance when using Session Hosts such as XenApp Shared Desktops. Some of the options are designed to increase performance however may slightly degrade the user experience as a result.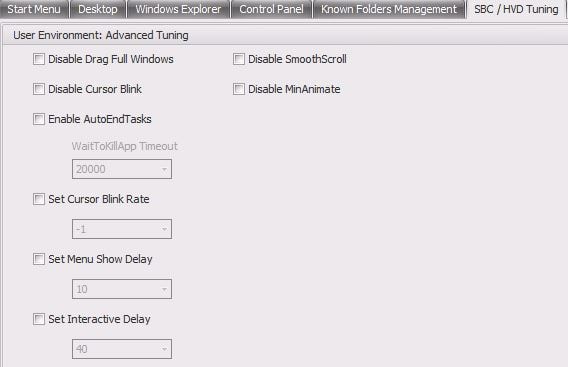
Configuring Microsoft USV Settings
Microsoft USV Settings allow you to integrate WEM with Microsoft Roaming Profiles, configuring Roaming Profiles from the WEM Administration Console. 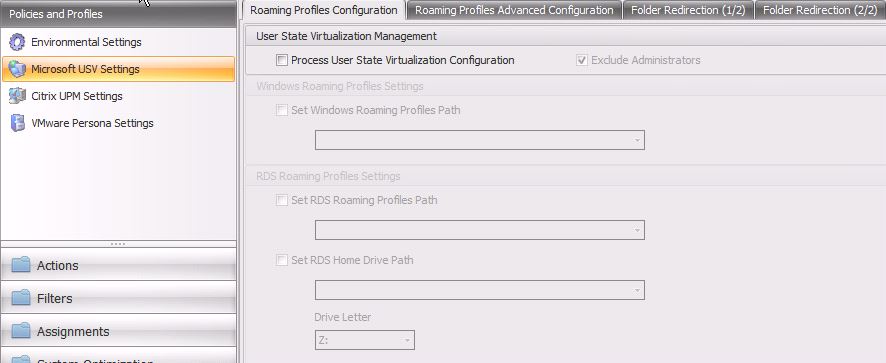
Configuring Citrix UPM Settings
Citrix UPM Settings allows you to integrate WEM with Universal Profile Management, configuring UPM from the WEM Administration Console. Note that some options only work with specific versions of UPM based on new or retired options.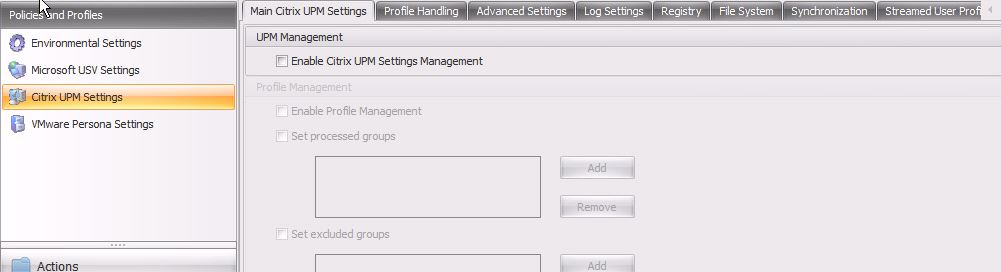 Most familiar options will be present. To see a guide on configuring UPM read https://jgspiers.com/citrix-profile-management-overview/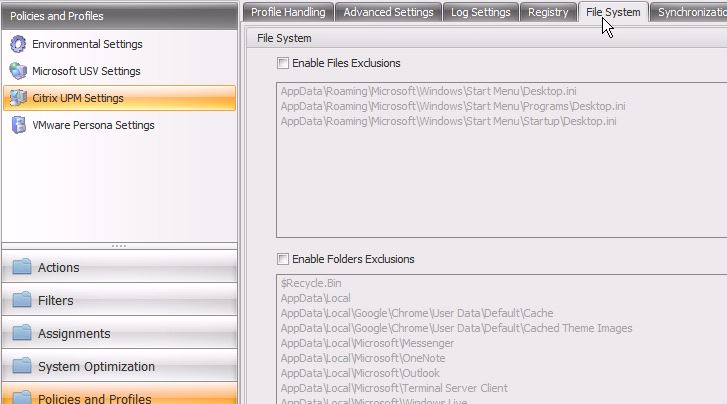
Advanced Settings – Configuration – Main Configuration
Click on Advanced Settings -> Configuration -> Main Configuration. Here you can check or uncheck the processing of actions. If you don’t have any port actions for example, then disabling the processing will reduce unneeded overhead and boost overall agent processing time. Other options include:
- Launch Agent at Logon – A default, launches the agent at logon.
- Launch Agent at Reconnect – Launches the agent if a user reconnects to a published Desktop.
- Launch Agent for Admins – Launches the agent even for administrators.
- Agent Type – UI (GUI) or CMD (no GUI).
- Enable (Virtual) Desktop Compatibility – Leave this enabled when using physical desktops or VDI.
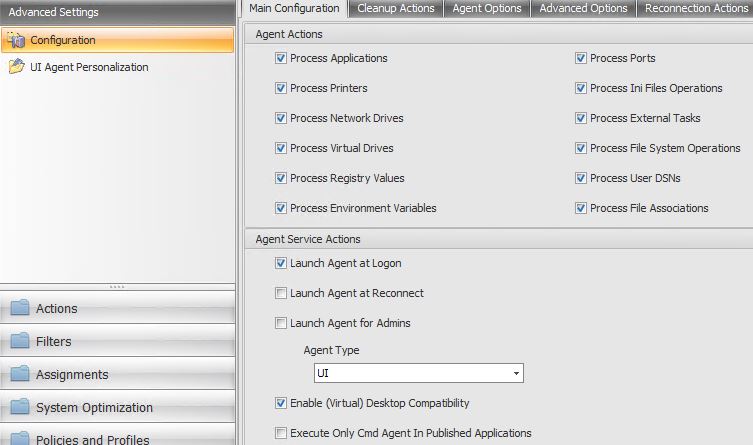 On the Cleanup Actions tab, you can specify to delete printers, network drives, Start Menu shortcuts etc. whenever the WEM agent refreshes.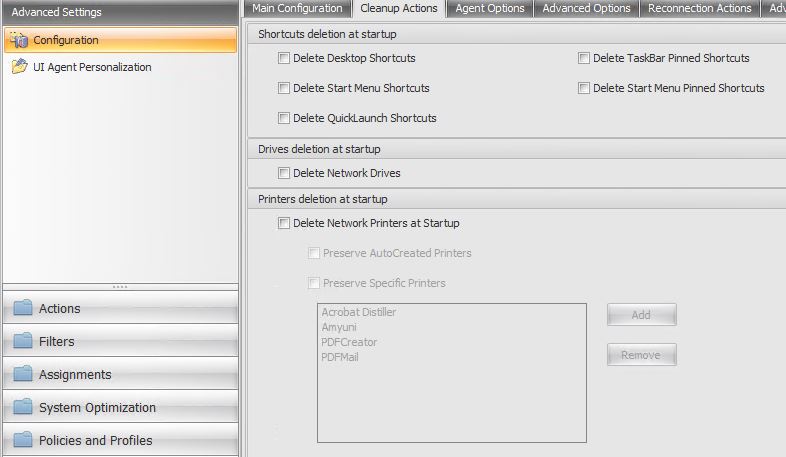
Configuring Agent Options
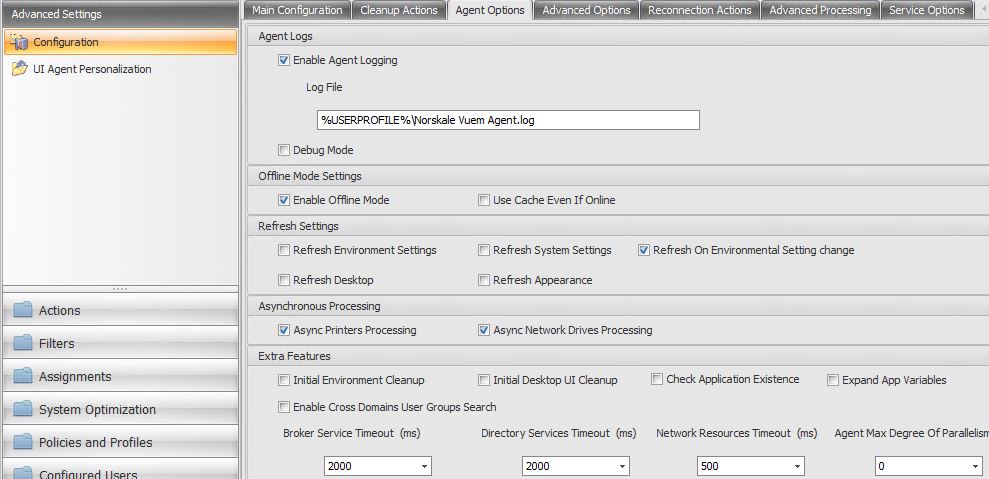
On the Agent Options tab, you can specify where agent logging will reside. Other options include:
- Enable Offline Mode – You can also enable offline mode which allows the agent to use the local cache in the event access to the WEM Infrastructure Services server is lost. This is on by default.
- Use Cache Even If Online – As the name suggests, the local cache will be used even when the WEM agent is online.
- Refresh On Environmental Setting Change – When an environmental setting is changed the Agent will trigger a Windows refresh.
- Async Prnters Processing – Asynchronously process printers.
- Async Network Drives Processing – Same as above only for network drives.
- Broker Service Timeout (ms) – The local cache will be used if the broker service cannot connect within the specified time.
- Directory Service Timeout (ms) – The local cache of user group associations will be used if the directory service times cannot connect within the specified time.
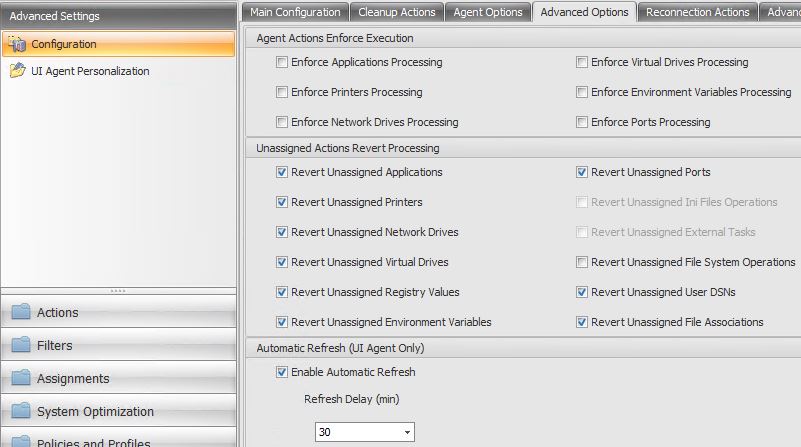
 On the Advanced Options tab you can enforce actions even changes have not been made for example to any of the printer actions. You can also configure to revert any printer, virtual drive, application actions etc. once they have been unassigned the next time the agent refreshes. At the bottom you can specify how often the agent refreshes which is 30 minutes by default (UI only).
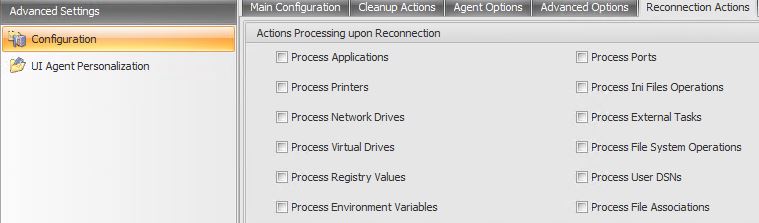
  On the Reconnection Actions tab similar to the processing options on the Main Configuration tab you can allow or disallow processing of certain or all actions when a user reconnects.
 On the Advanced Processing tab you can enable or disable processing of action filters when the agent refreshes.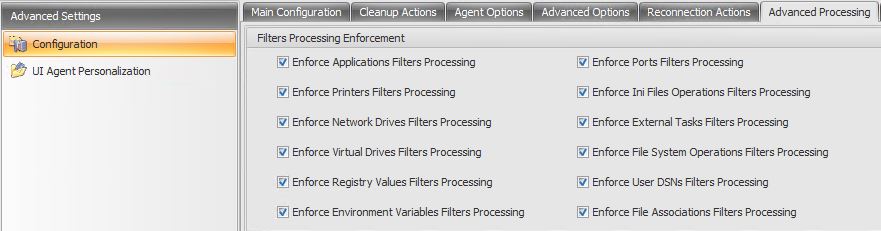
Configuring Service Options
The Service Options tab allows you to specify how often the agent will refresh the cache (15 min default), how often the agent will refresh its SQL connection and other options such as enabling debug mode for the agent and setting a delay on the agent executable launch on a desktop. You can also exclude the agent from running for specific groups of users.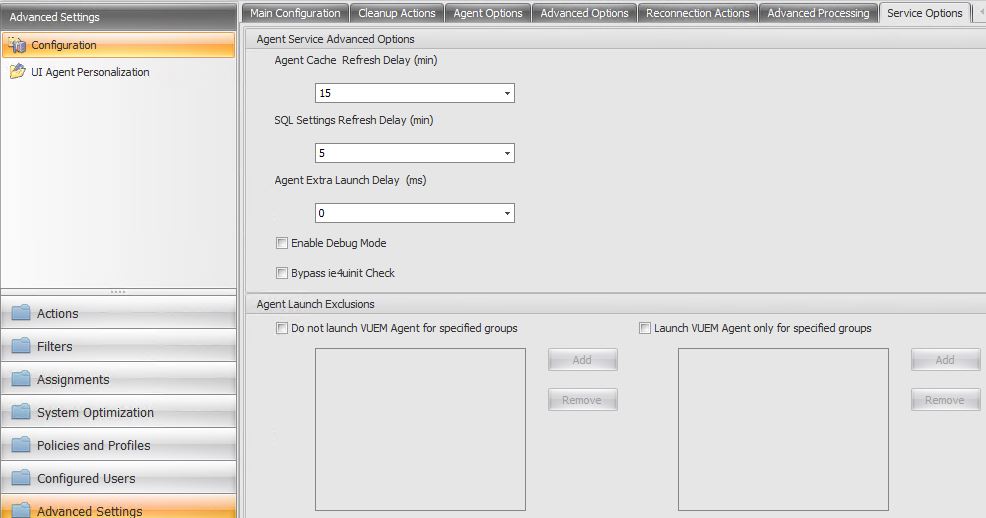 The Console Settings tab allows you to exclude drive letters when creating drive assignments which may help prevent a WEM administrator using a drive letter that is used globally for something else for example.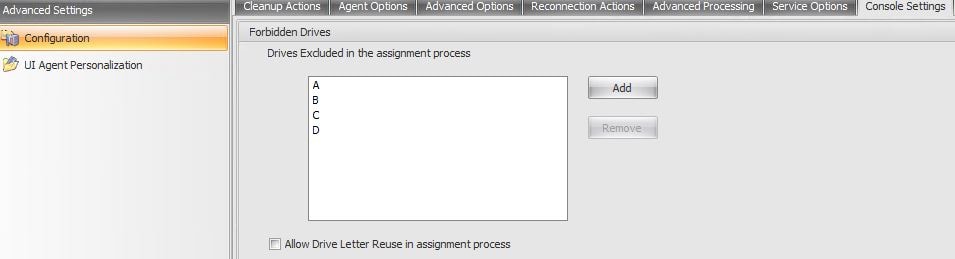
Configuring UI Agent Personalization
The UI Agent Personlization tab simply allows you to adjust the look and feel of the agent, helpdesk and self-service tools running on VDA. You can prevent users from managing printers and applications etc. through the agent.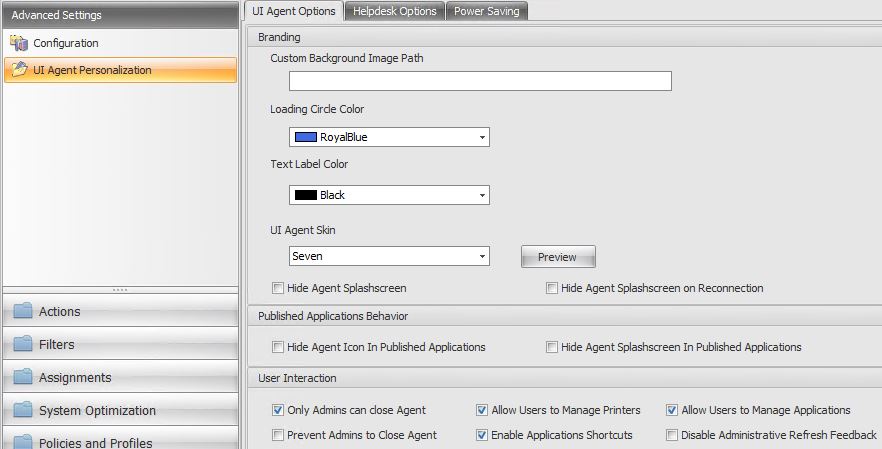 When printer and application management is disabled the options appear greyed out.
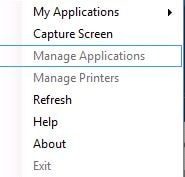 Here is a look at the agent using the Glass Oceans skin.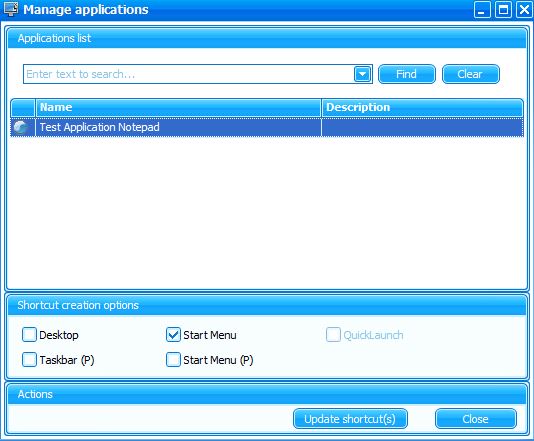
Configuring Helpdesk Options
You can set help links and allow users to take a screen capture including the option to send the screen capture via email to support. 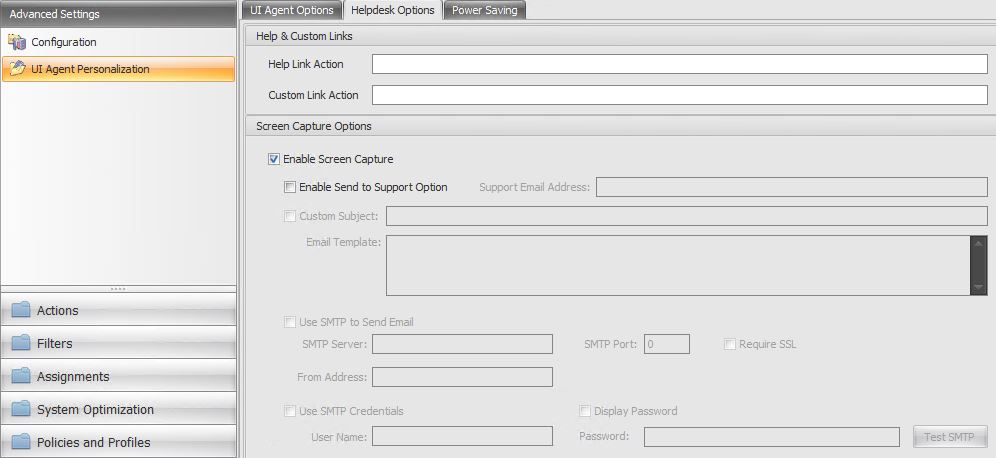
Power Saving Management – WEM Agent VMs
Power Saving can allow the agent to shut down the device it is running on after a specified time or when the machine is idle for so many seconds. 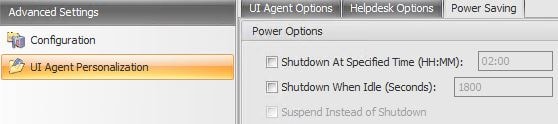
Configure WEM Administrators
Click on Administration. The Configured Administrator List section shows WEM Administrators and allows you to add more using the Add button or edit exsting users or groups. 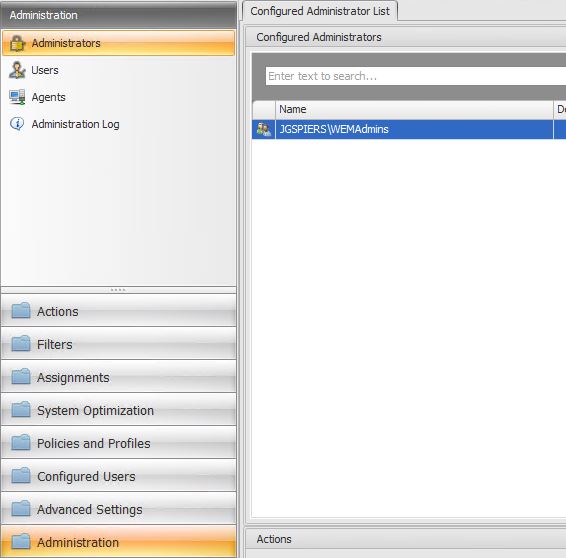 Editing a group or user you can set permissions such as read only access to the WEM Administration Console.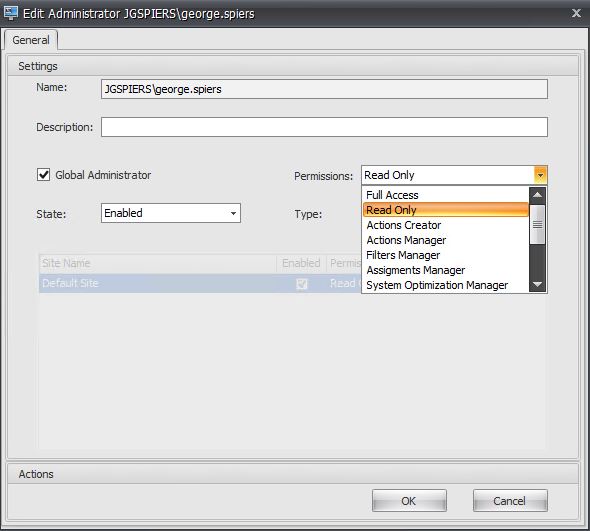
Viewing WEM Connected Users
The Users portion shows a list of users who have connected and reserved a WEM license within the past 24 hours and 1 month.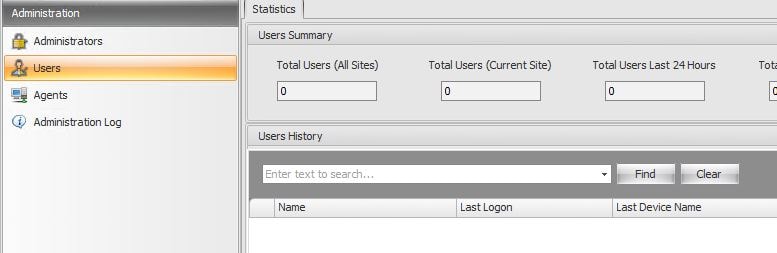
Viewing WEM Connected Agents
Agents shows a list of the machines that have the Agent Host component installed including some machine information such as Device Name and IP Address. 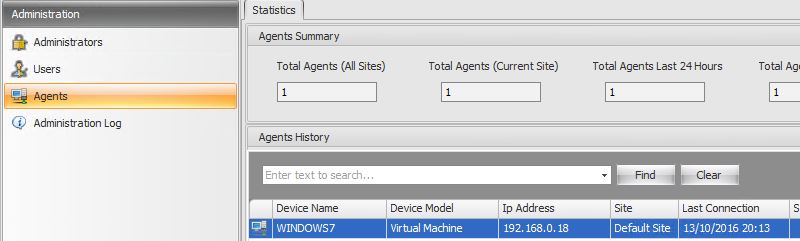 Right-clicking on an agent provides you with several options such as manually forcing a cache refresh or uploading statistics to the WEM database.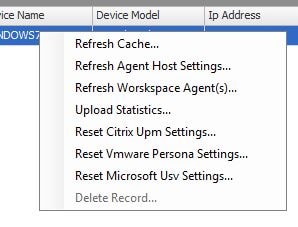
Administration Log
The Administration Log presents a history of changes made by a WEM administrator. As you can see actions such as assigning tasks and refreshing an agent cache are recorded. 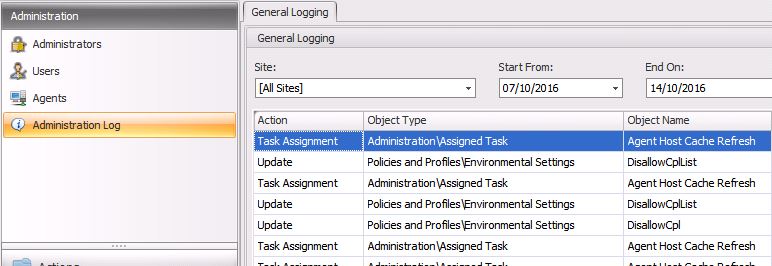
Monitoring
Click on Monitoring -> Daily Reports. This shows an overview of the login times over the past 24 hours. If you double-click one of the bar graphs you are presented with a list of individual logons and their logon times. This is extremely useful for baselining activities and comparing boot times between multiple minor or major changes/customisations both within WEM and outside of WEM i.e. Group Policy. 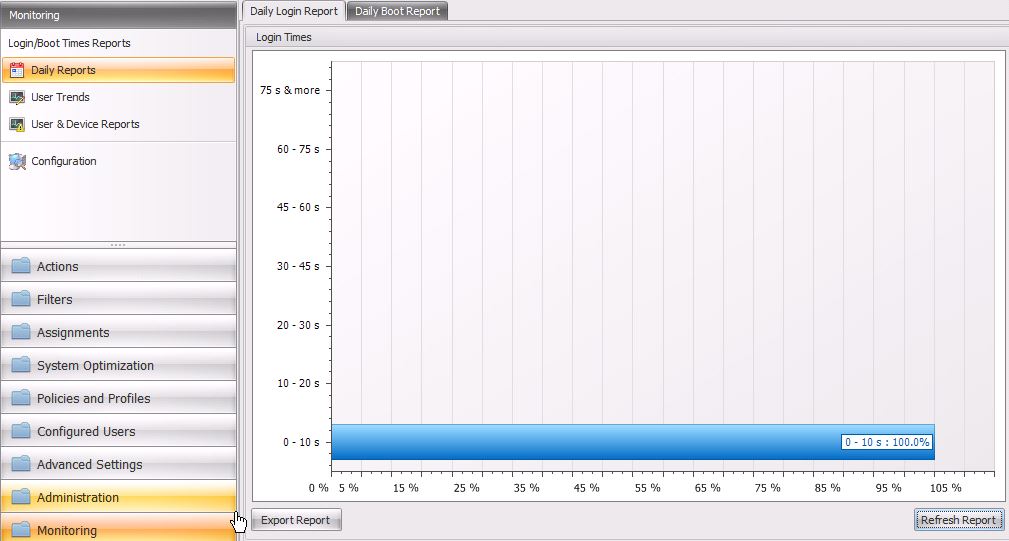
Click on User Trends. The Login Trends Report shows an overview of login times across all users connected to this site for the specified dates. If you double-click the graph bar you are presented with a more detailed view of login times including user logging on and their individual login times. 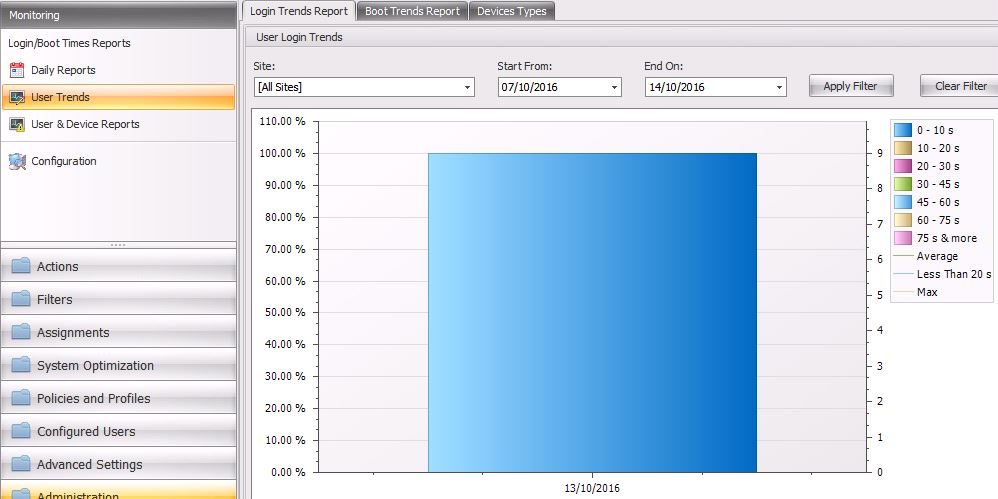
Device Types present a list of the different devices connecting to this WEM site over the specified time period. Double-clicking any of the graph bars show more detail such as the device name and OS version. 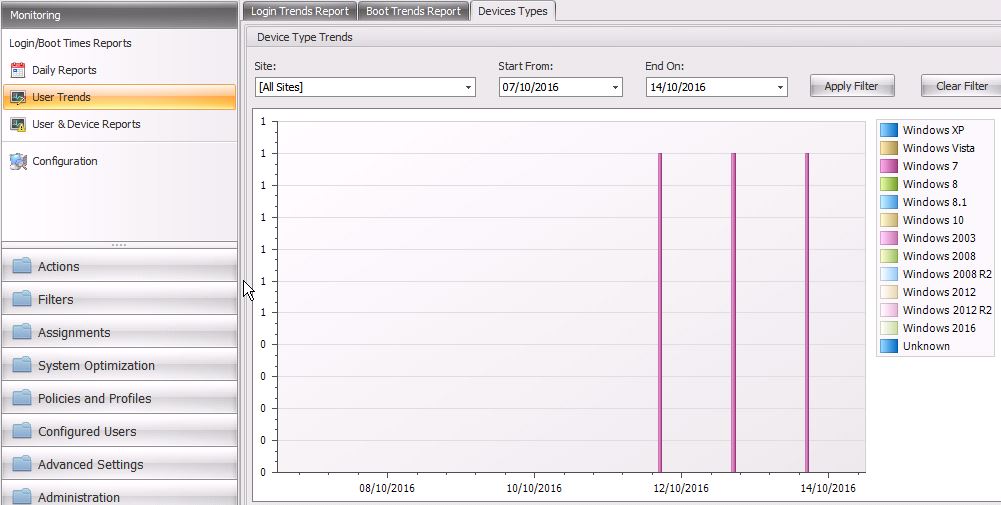
Click on User and Device Reports. On the User Report tab, you can use the User drop-down box to select a WEM configured user and view the login times for that user over a certain time period. Note that all these different reporting features are exportable to Excel, PDF, HTML etc. 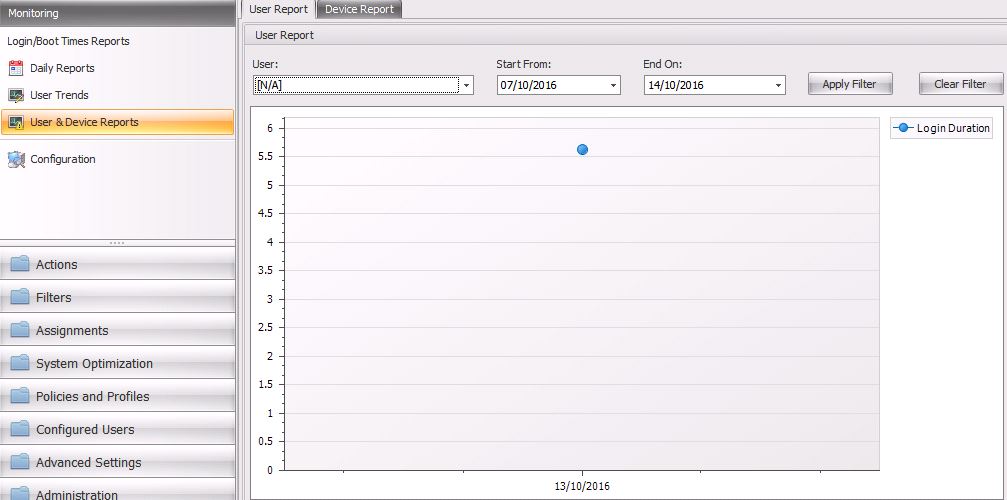
Click on Configuration. You can specify the work days so that reporting focuses only on the days your business is in operation. 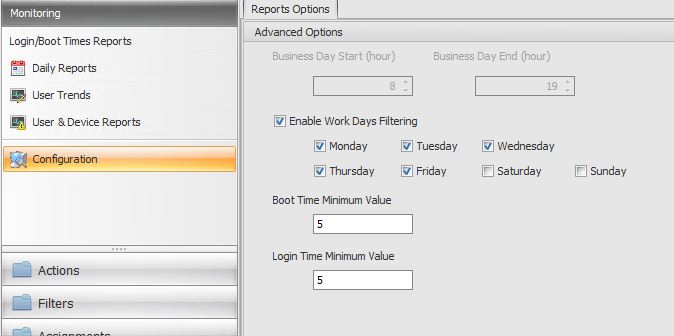
WEM Logging
Several logs are generated by default with advanced debug logs being optional. WEM related Event Logs also exist on both the VDA and Infrastructure Services servers.
By default, Agent Logging is enabled, and this can be toggled on or off within the WEM Administration Console. With Agent Logging enabled, two log files are created on the VDA in location %UserProfile%. Again, this location can be modified using the WEM Admin Console:
- Citrix WEM Agent Init – Agent initialisation information is recorded here. Any issue with the WEM Agent not starting or contacting the WEM Broker will be logged here as an exception.
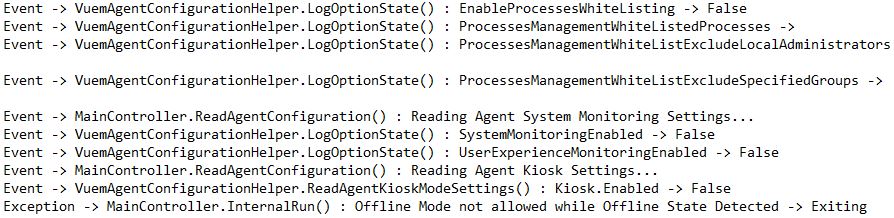
- Citrix WEM Agent – When the WEM Agent processes settings, such information is logged in this file. You’ll be able to see which settings have been processed and if any exceptions or errors occur.
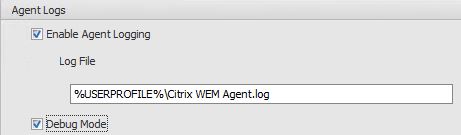
You can turn on Debug Mode through the WEM Administration Console which generates a debugging Citrix WEM Agent Init and Citrix WEM Agent log files within %UserProfile%. These log files provide deeper output on the initialisation and processing stages.
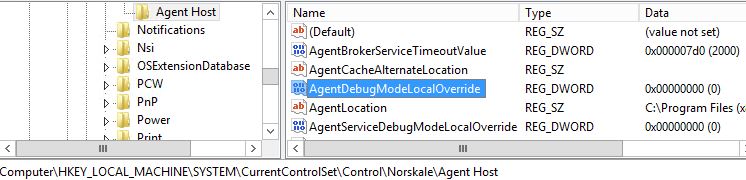
If the WEM Agent cannot contact Infrastructure Services, change the AgentDebugModeLocalOverride REG_DWORD to 0x1 on the VDA you are troubleshooting.
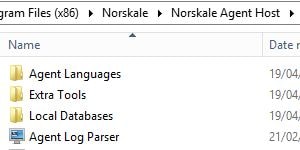
An Agent Log Parser exists in the Agent Host install location that you can use to load either the Citrix WEM Agent or Citrix WEM Agent Init logs into for parsing and easier reading.
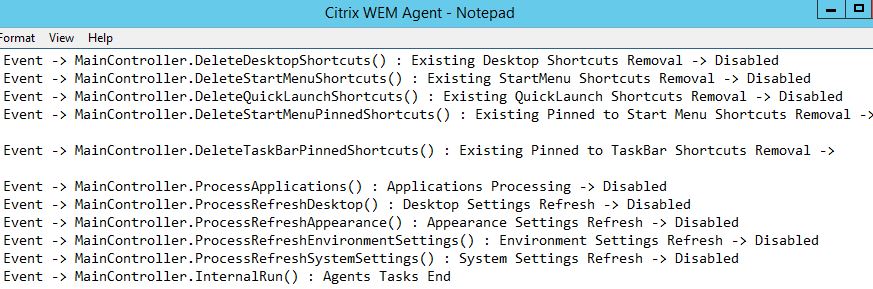
Once you load your desired log file, it will display as shown below.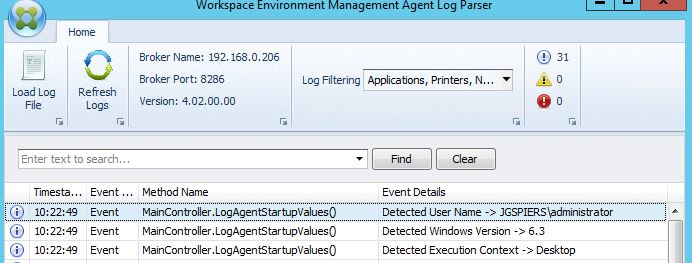
If you browse to Service Options within Advanced Settings, you can turn Agent Host service logging on. These logs related to the Norskale Agent service running on your VDA.
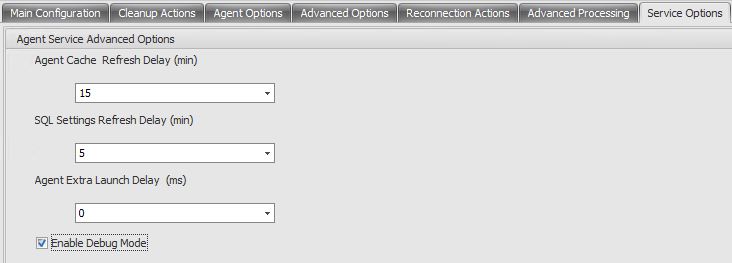
A log file named Citrix WEM Agent Host Service Debug will be created under the Norskale Agent Host install location. This is typically C:\Program Files (x86)\Norskale\Norskale Agent Host\. 
If the Agent Host cannot contact Infrastructure Services, change the AgentServiceDebugModeLocalOverride REG_DWORD to 0x1 on your VDA. 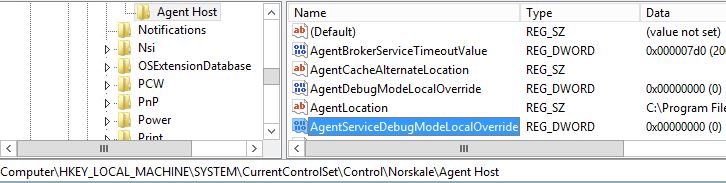
On each VDA with the Agent Host installed, a Norskale Boker Service log directory is present in Event Viewer containing information related to the Norskale Agent Service. If the Agent is offline, or there are connectivity issues, it will be logged here. Informational events such as settings that have been synchronised from the WEM Broker Server to local cache are also logged.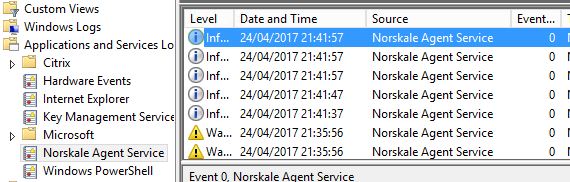
On the Infrastructure Services servers, a Norskale Broker Service log is available in Event Viewer logging non-debug events such as connectivity to SQL, database connection checks and when Agent Hosts connect to the WEM Broker Service.
You can enable Administration Console debugging by navigating to About -> Options and checking Enable Debug Mode -> OK.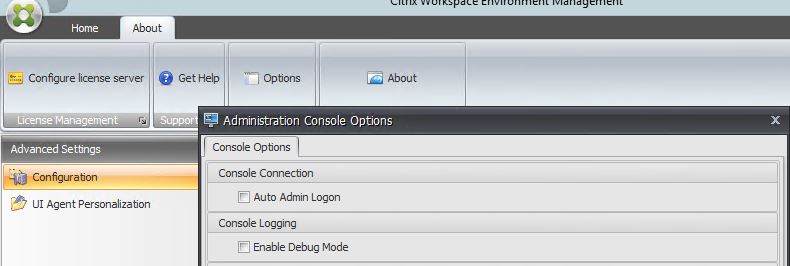
A Citrix WEM Console Trace log file will be placed in %UserProfile% containing information related to the console start-up and connection to Infrastructure Services. If connections are timing out, then this log file will help.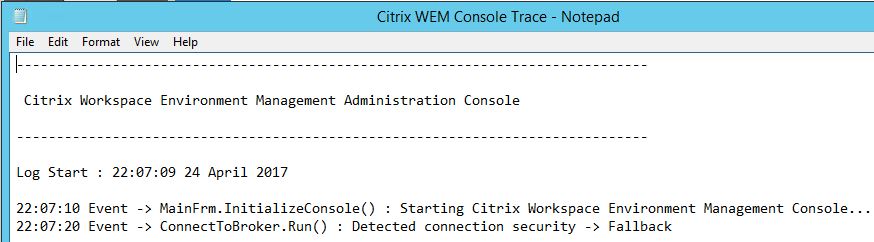
During the creation or upgrade of a WEM database, a log file is created by the Database Management Utility and stored on the Infrastructure Services install folder. Generally C:\Program Files (x86)\Norskale\Norskale Infrastructure Services\. 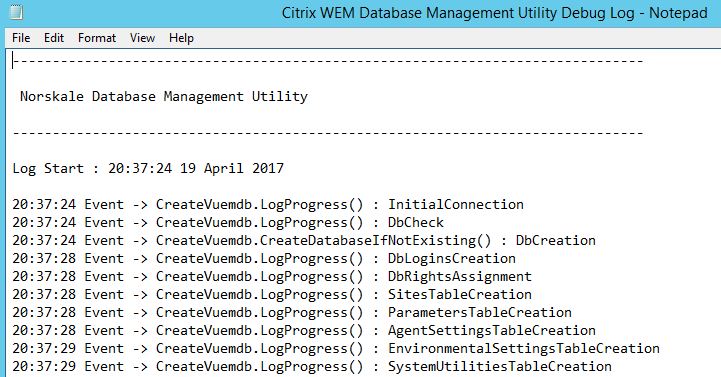
You can also on the Infrastructure Services server enable Broker Service debug logs by changing the BrokerServiceDebugMode REG_DWORD to a value of 0x1. Now restart the Infrastructure Services service.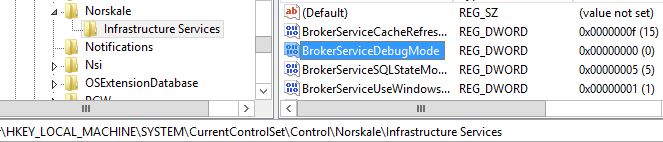
A Citrix WEM Infrastructure Service Debug log will appear within the Infrastructure Services install directory. This log file contains data such as information related to VDAs contacting the Infrastructure Services servers and database connectivity checks. 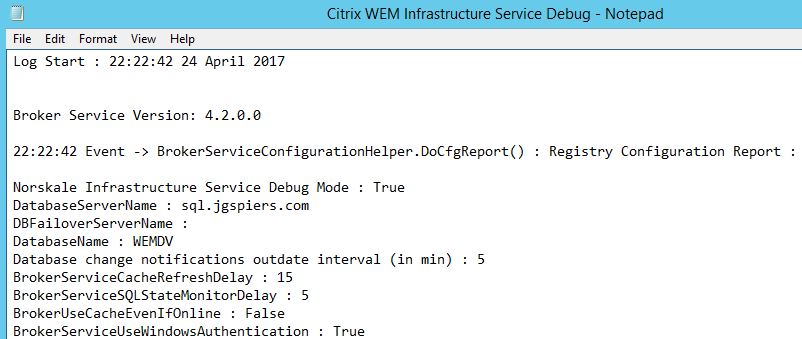
Creating additional WEM Sites
Obviously. a lot of the settings within WEM are site wide settings and can apply to all agents connected to the site. If you need a separate site for settings containment click on Create.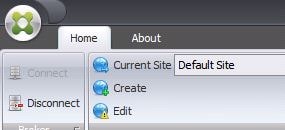 Enter a site name and click Ok. You can then move Agents to a separate site either by Group Policy or by creating a REG_SZ object with a name of SiteName and value of the sites actual name. This REG_SZ value resides in HKLM\SOFTWARE\Policies\Norskale\Agent Host\.
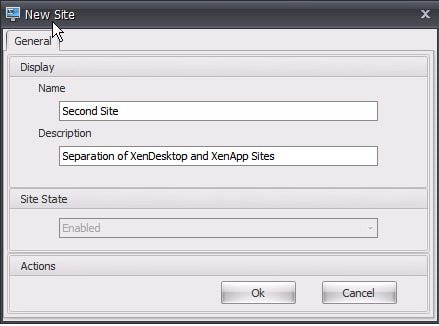 Now you can toggle between each site providing you are a Global Administrator.
 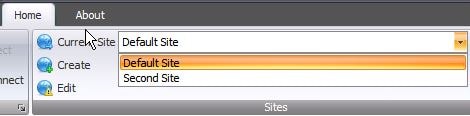 When assigning permissions to WEM Administrators untick Global Administrator. This allows you to assign an administrator to a certain site containing their permissions within that one site.
 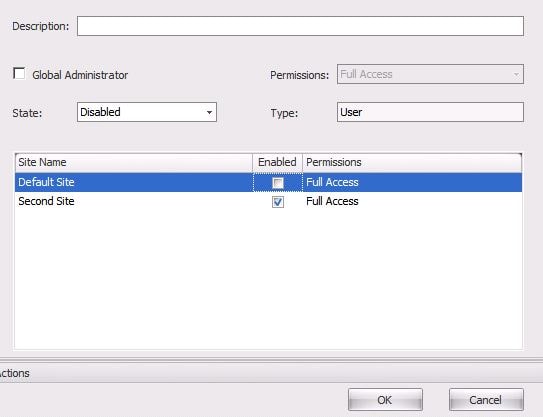 A non-Global Administrator can only manage the site they have assigned permissions for.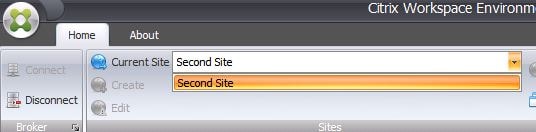
WEM Transformer
Transformer is a feature that turns any Windows PC-type machine in to a thin-client acting device by enabling thin-client mode. Transformer was part of Norskale but not available in Citrix’s first version of WEM 4.0. It is now available in 4.1. To configure Transformer, open the WEM Administration Console and click Transformer.
Note: Citrix do not support running Transformer on Windows Server OS.
On the General Settings tab you should click Enable Transformer then configure your Web Interface/StoreFront address that machines will automatically browse to upon logon to Windows. You can also configure the appearance of Transformer allowing you to add a system clock, language selection, enable windowed mode etc.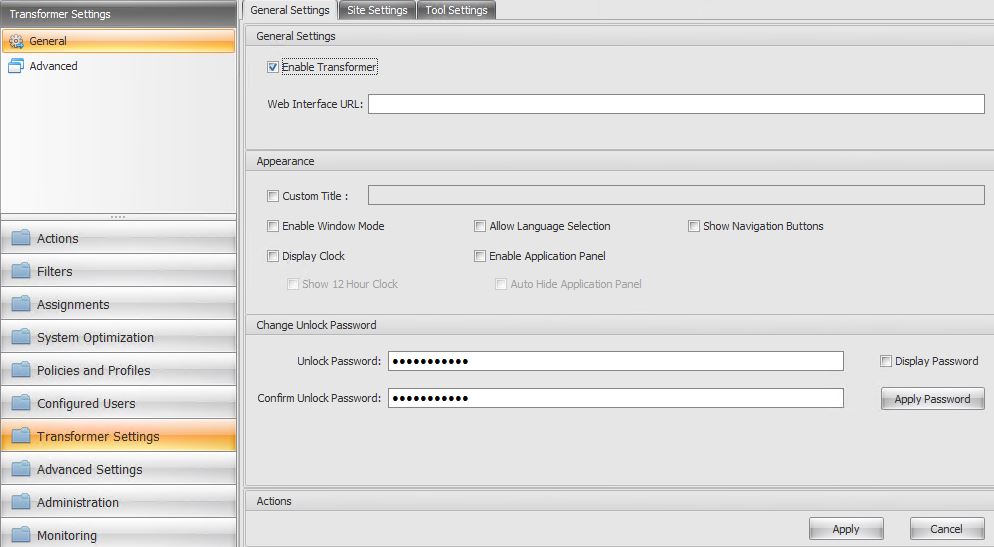
When a user logs on to a WEM managed machine the PC automatically goes in to kiosk mode and displays StoreFront.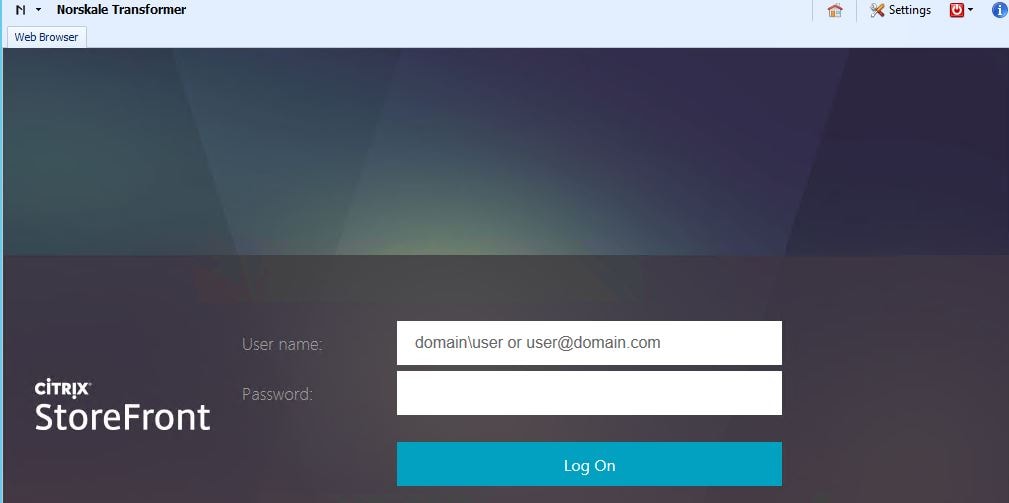
Here you can see the clock, custom title and language options.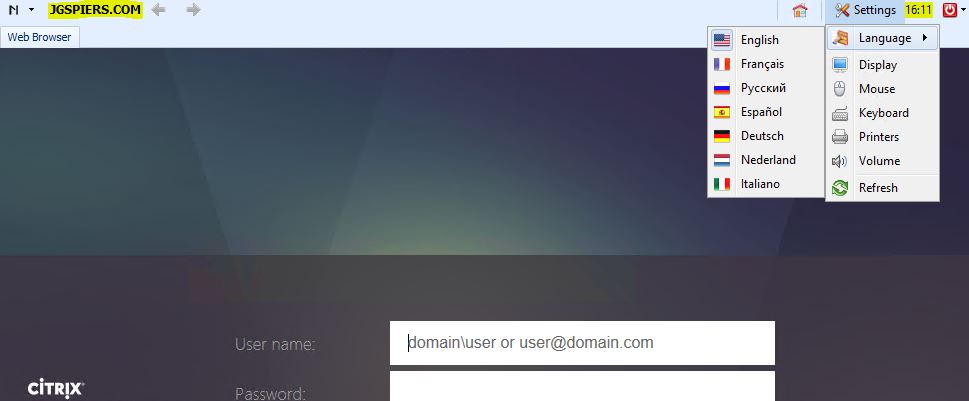
On the Site Settings tab you can add a bunch of websites that allows any user to launch that website through Transformer.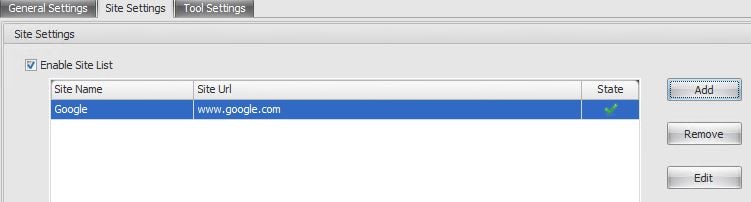
The list of added websites appears as below. You can use the navigation buttons to go back and forth between visited sites. Again, navigation buttons must be enabled as they are disabled by default. 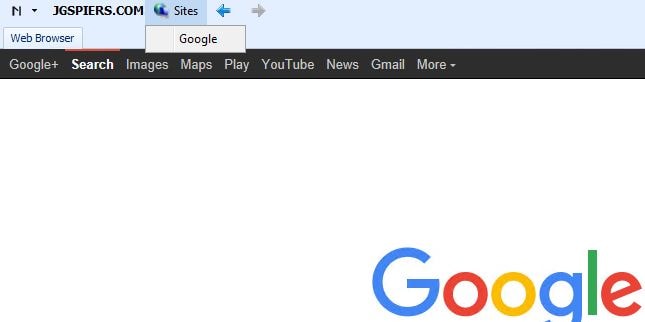 On the Tool Settings tab you can add different tools/programs that appear and are launchable within the Transformer window. To add a tool, click Add.
  Enter a name and the path to the program. You can configure it to autolaunch and maximize. Click OK.
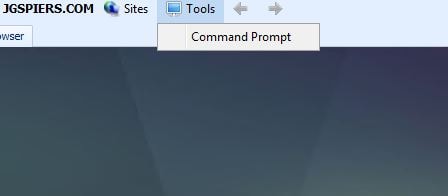
 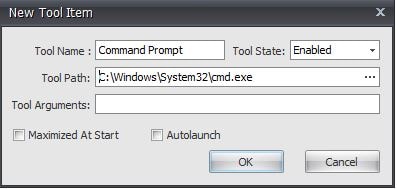 Now in Transformer you’ll have a tools icon, and once clicked you see Command Prompt.
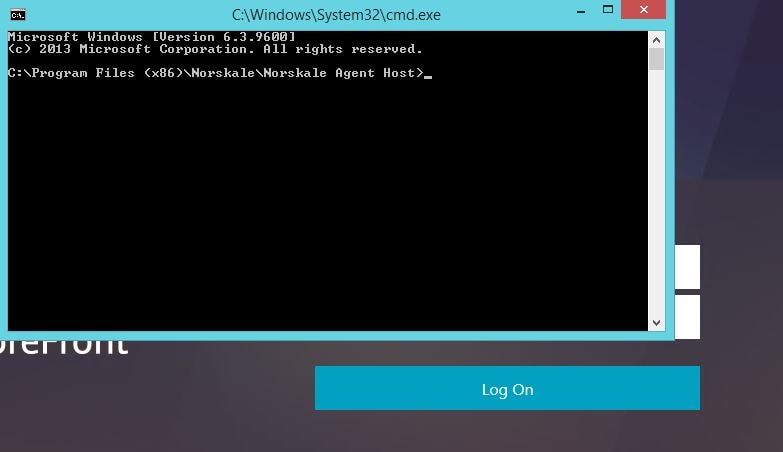
  The Command Prompt window appears.
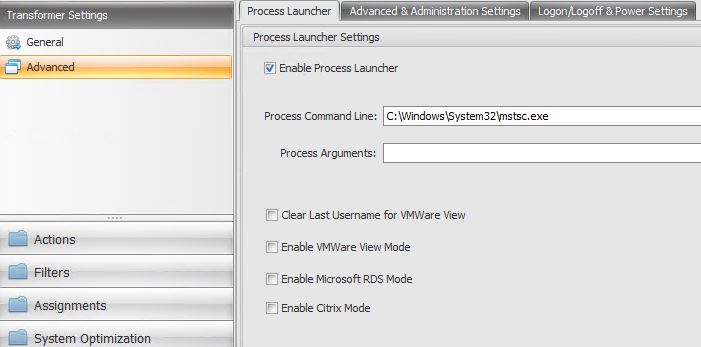
  On the Advanced node the Process Launcher tab allows you to enable Process Launcher. Doing this disables Transformer mode and launches a specified process of your choice. In this example I have specified that MSTSC launches when a user logs on to their desktop.
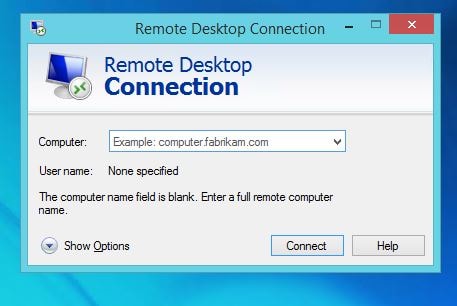
  MSTSC launches. If a user closes the application or kills the process off the process re-launches.
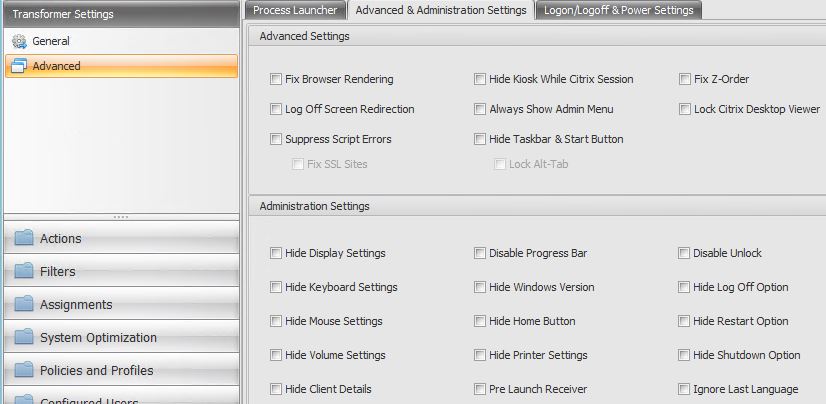
  The Advanced & Administration Settings tab under Transformer Settings -> Advanced allows you to further personalise the Transformer program. Here you can hide buttons such as restart options and the home button. You can also disable unlock ability so that CRL+ALT+U does not unlock the PC/kiosk restrictive view.
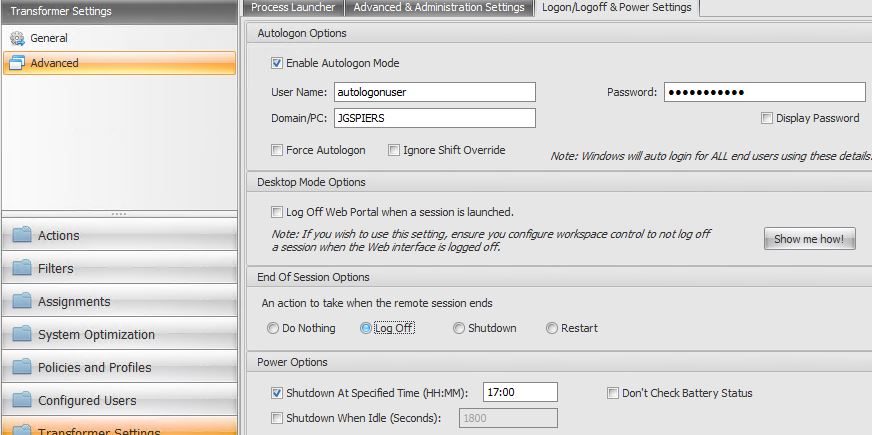
 The Logon/Logoff & Power Settings tab under Transformer Settings -> Advanced allows you to configure Windows auto-logon so that when your PC powers on it is automatically logged on, then the kiosk window opens. You can also configure actions to occur when your remote session ends and power actions to shut down a PC at a specific time etc.
  Shut down action being applied.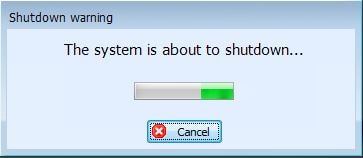
Upgrading WEM
WEM must be upgraded in the following order:
- Infrastructure Services
- Database
- Note: If your WEM database is part of a SQL AlwaysOn availability group, you must first remove the database from the Availability Group before upgrading the database.
- Administration Console
- Agent Host
You can upgrade from any 4.x version using the in-place method.
Infrastructure Services
Run the installer of the Infrastructure Services version you want to upgrade to. You should manually stop the Norskale Infrastructure Services service before upgrading to ensure the upgrade is successful. Once the new version of Infrastructure Services is complete, run the Database Management utility and click Upgrade Database.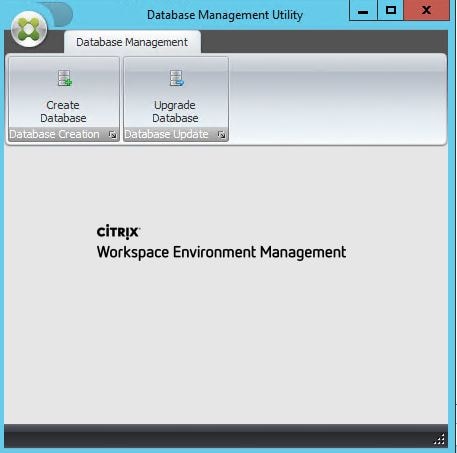
Enter the required information and click Upgrade.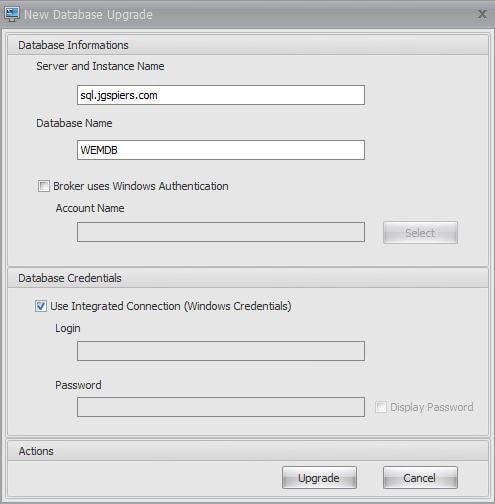
Click Yes. 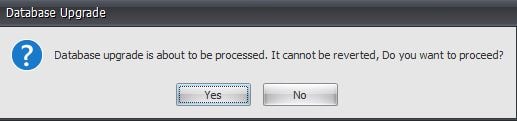
Click OK. The database has now been upgraded. 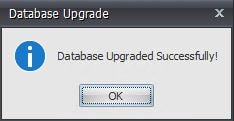
Now you will need to reconfigure the Norskale Broker Service using the Broker Service Configuration utility.
Administration Console
Run the latest WEM Administration Console installer over the top of the existing installation.
Agent Host
Run the latest Agent Host upgrade installer or patch installation over the top of the existing installation on machines which have no users logged on and then perform the following steps:
- C:\Windows\Microsoft.NET\Framework64\v4.0.30319\ngen.exe update

- C:\Windows\Microsoft.NET\Framework64\v4.0.30319\ngen.exe eqi 3

If your using a 32bit OS use the same path above only with 64 removed.
This ensures the Agent Host .dll files are correctly. Agents are backward compatible within the same major release i.e. v3.0 or v3.5 agents work with a v4.0 broker. Some functionality will however be lost until all components are on the same major and minor version.
If you have specified a specific Agent Host Cache location for example when using PVS and set AgentServiceUseNonPersistentCompliantHistory to 1, double check these values still exist.
You may have to specify them again after an Agent upgrade.
Migrating WEM database
It is quite simple to migrate a WEM database. Firstly, before doing the migration you should make sure that agents are configured to access their cache offline.
Take a backup of the existing WEM database by right-clicking the database and selecting Tasks -> Back Up.
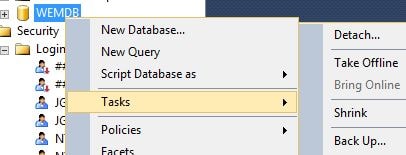
Specify a full backup to disk and click OK. 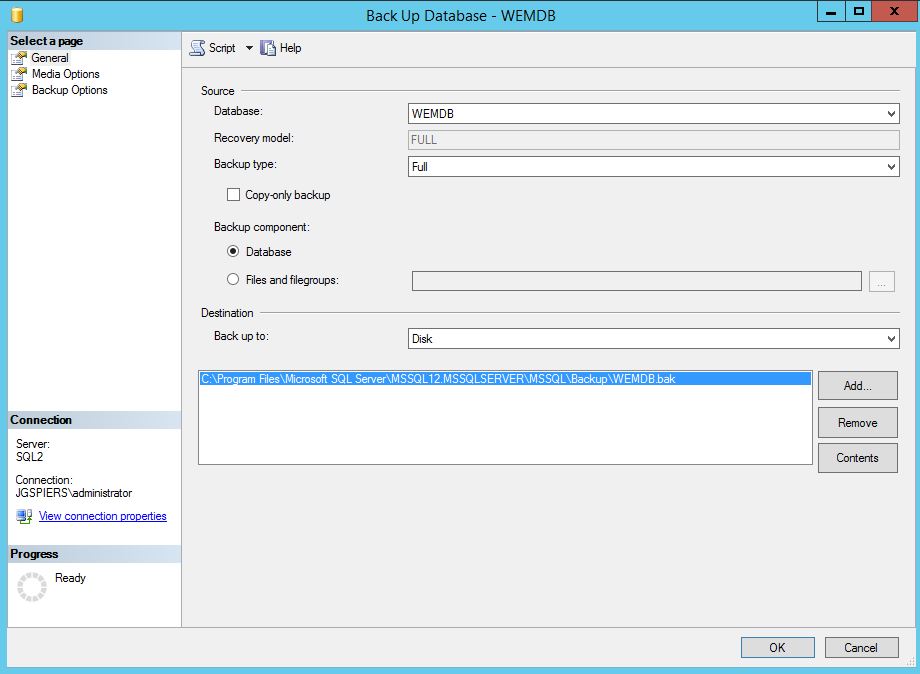
Click OK and then transfer the backup to your new SQL server.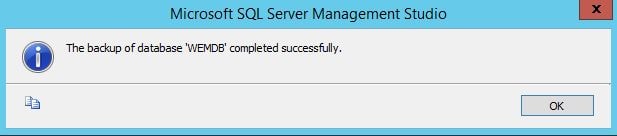
One of the important steps to complete before restoring the database is to in SQL Studio either manually create the Infrastructure Service windows account if using a service account or create the vuemUser account. If you are using a SQL AlwaysOn configuration then it is likely you will need to create both the vuemUser SQL account and service account if you use one. There is no requirement to map permissions or any roles to these accounts as the database restore will take care of that.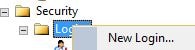
Now proceed with the database restore by right-clicking on Databases and selecting Restore Database. Once the restore is complete, run through the Infrastructure Service Configuration wizard and point the configuration at your new database server.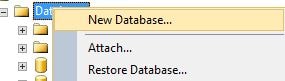
Documenting WEM Configurations
Whilst there is no easy way to output all the different configured settings, policies, objects etc. created in WEM, there is a script available which pulls all configurations in to an easy to read HTML file. See https://jgspiers.com/citrix-workspace-environment-management-documentation-script/
VUEMAppCmd
A nice trick from WEM Client Side Tools by James Kindon. If you have applications that require actions such as drive mapping or printer mapping to be completed first before the application launches, using Citrix Studio edit the properties of your desired application, define VUEMAppCmd.exe under the Location tab along with the actual published application name as a switch.
Doing this prevents the published application from launching until WEM has finished processing.
Troubleshooting
Launch Agent at Logon
If the agent does not launch on logon, make sure that within the WEM Administration Console you have checked Enable (Virtual) Desktop Compatibility.
Agent delay in detecting online mode
I’ve encountered 4.1 and 4.2 agents staying in “offline mode” for around 90-120 seconds after VDA power on, at which stage the agent changes to online and the online cache can be accessed. Allowing access to the local cache in offline mode allows the agent to process on first log on within the 90-120 seconds after VDA power on.
Agent synchronisation failure when using PVS
A timing issue in PVS can occur that prevents the WEM Agent to properly sync upon logon. To fix:
Create a .cmd script as below and save it to C:\Windows\System32\GroupPolicy\Machine\Scripts\Startup:
net stop “Norskale Agent Host Service” /y
net start “Norskale Agent Host Service”
net start "Netlogon"
cd “C:\Program Files (x86)\Norskale\Norskale Agent Host\"
AgentCacheUtility.exe –refreshcache
Set this script to run as a startup task via Group Policy under Computer Configuration -> Windows Settings -> Scripts -> Startup.