Unidesk is a leader in layering technologies. Using Unidesk you can layer applications right on top of a gold OS image layer. This seriously simplifies application and desktop management within Citrix environments such as solving the extra overhead often seen with managing multiple gold images/silos for different applications or departments.
Note: Unidesk was bought over by Citrix in January 2017.
You might want to read
https://jgspiers.com/unidesk-os-layer-creation-process/
https://jgspiers.com/creating-unidesk-desktops/
https://jgspiers.com/updating-unidesk-os-layer/
https://jgspiers.com/creating-unidesk-application-layers/
https://jgspiers.com/unidesk-maintenance-schedules/
https://jgspiers.com/unidesk-high-availability/
How often have you had to create a new Citrix PVS vDisk because you need it to be separate from the Desktop vDisk? Multiple vDisks mean more management such as more Windows update patching resulting in ultimately more of your time. Unidesk instead brings the ability to layer applications with ease allowing you to have multiple Desktops or Session Hosts each using the same base OS image however uniquely using different application layers to suit the needs of the end-user.
What about these layers?
Layers are basically virtual disk files that are made up of files and registry entries. As a desktop boots it uses a boot file and a Unidesk Filter Driver is loaded in to the boot process which gathers all assigned virtual disks (layers) that makes up the desktop. The layers themselves can contain Operating Systems, applications or in the persistent world user changes. The Unidesk Composite File System (CFS) merged all layers that are required to make up a desktop. For example with a base OS layer, the CFS can merge an application layer such as Adobe Reader on top of the OS layer. To the eye it looks like Adobe Reader was manually physically installed on the desktop. If talking about precedence then precedence takes the order of OS -> App -> User Layer. For example, if the OS Layer contains a C:\Test.txt file and the App and User Layer contain the same file the user will only see one as expected but it will be from the User Layer. Also note that Application Layers can trump other Application Layers if they have a more recent creation date, version numbers or are made to have a higher priority by the administrator.
Layers can be anything from a Windows 7 OS, to Windows 8 and then Microsoft Office, to Adobe Reader, to Google Chrome and so on layered on top of the OS. The User Personlization Layer is another layer that keeps track of any change to a desktop giving a persistent desktop to users. Personlization Layers are created automatically when you created when desktops are created even for non-persistent machines whose changes are wiped during reboot. As layers are removed, updated etc. on a desktop the User Personlization Layer remains untouched. Layers are attached to Pooled/Persistent Desktops and Session Hosts as separate virtual hard disks that stores the file system and registry settings for that layer. As several layers can be attached to a single machine, the layers are merged (by priority) together to make it look as if all the applications provisioned by layers and the OS layer had been installed physically together. All of this is achievable by Unidesk’s Composite Virtualization technology. Applications reside in C:\Program Files\, Add/Remove Programs and so on.
What components make up the Unidesk environment?
In Unidesk 3.x Linux virtual appliances make up the Unidesk environment outside of the standard desktops that are created by Unidesk.
Management Appliance – Stores all configruation about the environment, manages tasks and communicates with CachePoint appliances. You create OS/Application layers and manage desktops using the UMC on the Management Appliance.
Master CachePoint Appliance – Stores a copy of all OS and Application layers, replicating them out to Secondary CachePoint appliances if the SCP needs them. Managed and hosts installation machines that are used to create layers. The first CachePoint you deploy becomes the Master CachePoint.
Secondary CachePoint Appliance – Desktops and Session Hosts are assigned to and managed by particular Secondary CachePoint Appliances. Secondary CachePoints add and remove layers from desktops and create/recreate boot images as desktops are created or edited. This means the SCP is responsible for desktop creation and configuration thereafter. If a SCP needs layers to build a desktop it requests them from the Master CachePoint.
All these above components make up CacheCloud, the term used by Unidesk to describe the management components that work together to achieve application and desktop virtualization.
What types of layers are available?
OS Layer – Contains the base OS image i.e. Windows 7, Wnidows 8, Windows Server 2012 R2. The OS layer is read-only and shared between many different virtual machines.
Application Layer – Contains the applications such as Adobe Reader, Office, Firefox etc. which is layered on top of the OS layer to achieve a complete desktop build. Application layers are also read-only and shared between many different virtual machines.
Personalization Layer – This layer is attached to each desktop and captures all writes. Since the OS and Application layers are read only the personlization layer stores any change that is made to a desktop or file in an OS or Application layer. The personlization layer is what makes the desktop unique and keeps changes on persistent desktops even after reboot.
Unidesk deploys persistent and non-persistent virtual machines to XenApp/XenDesktop as if the virtual machines had been manually built. PVS/MCS is not used in this version. In Unidesk v4.x things change and MCS/PVS are selected as the deployment methods however we will leave that for another day.
Unidesk 3.x runs on Hyper-V and is to be used (integrated) with RDS or Citrix XenDesktop.
Hardware/Sofware Requirements:
Supported Hypervisors:
- Hyper-V on Microsoft Windows Server 2012 R2
- Microsoft Hyper-V Server 2012 R2
Supported Desktop OS (Generation 1 VMs):
- Windows 10 version 1511 Build 10586 (64bit Education, Professional, Enterprise)
- Windows 8.1 (64bit Professional, Enterprise)
- Windows 7 SP1 (64bit Professional, Ultimate, Enterprise)
- Windows Server 2012 R2 (64bit Standard, Datacenter)
Supported Session Host OS:
- Windows Server 2012 R2 (64bit Standard, Datacenter)
- Windows Server 2008 R2 (64bit Standard, Enterprise, Datacenter)
Supported Brokers for Unidesk Desktops:
- Remote Desktop Connection Broker (RDCB)
- Citrix XenDesktop 7.6
Supported Brokers for Unidesk Session Hosts:
- Remote Desktop Connection Broker (RDCB)
- Citrix XenApp 7.6
Supported Directory Service:
- Microsoft Active Directory
What else do you need?
IP addresses (statically assigned or reserved) for all MA, MCP and SCP appliances.
DHCP server/separate vLAN for Desktops
Firewall ports configured for Unidesk communication
Firewall Port Configuration:
| Source | Destination | Purpose | Protocol & Port |
| UMC User | All CachePoints | Log delivery from CachePoints | TCP 8888 |
| Any Unidesk Appliance | VMware Studio Console that comes with Unidesk. Allows you to manage appliance settings. | TCP 5480 | |
| Management Appliance | UMC | TCP 80, 443 | |
| Management Appliance | CachePoint Appliance | ActiveMQ Service | TCP 61616 |
| CachePoint Appliance | NFS | TCP/UDP 111, 2049, 892, 662 | |
| CachePoint Appliance | NFS | TCP 32803 | |
| CachePoint Appliance | NFS | UDP 32769 | |
| Management Appliance | ActiveMQ Console | TCP 8161 | |
| Management Appliance | Log deliveries from Unidesk Hyper-V Agent and Broker Agent | TCP 8787 | |
| Management Appliance | Log deliveries from users | TCP 8888 | |
| Unidesk Hyper-V Agent | Communication | TCP 8014*, 14243** | |
| Unidesk Broker Agent | Communication | TCP 8015* | |
| AD-DC/LDAP | LDAP | TCP 389, 636 | |
| Unidesk Appliance | api.unidesk.com | Logs and Phone Home data uploads from the Unidesk ELM (optional) | TCP 443 |
| CachePoint Appliance | Management Appliance | ActiveMQ Service | TCP 61616 |
| Management Appliance | NFS | TCP/UDP 111, 2049, 892, 662 | |
| Management Appliance | NFS | TCP 32803 | |
| Management Appliance | NFS | UDP 32769 | |
| CachePoint Appliance | ActiveMQ Console | TCP 8161 | |
| CachePoint Appliance | Log Delivery | TCP 8888 | |
| Unidesk Hyper-V Agent | Communication | TCP 8014* | |
| Unidesk Broker Agent | Communication | TCP 8015*, 14243* | |
| Gold Image VM | Management Appliance | Unidesk Tools | TCP 80 |
| Unidesk Desktops | CachePoint Appliance, Management Appliance | Uniservice | TCP 61616 |
* = The agent installer enables this port by default. If you specify a different port whilst installing the Unidesk Broker Agent you must remember to use the new port number when configuring the Broker settings in the Unidesk Management Console -> System -> Settings and Configuration.
** = This port must be opened manually before installing the agent and it is not configurable.
Unidesk Service accounts:
- One for joining computers to domain.
- One that can read from Active Directory.
- One for XenDesktop which is a local administrator on Delivery Controller servers and is a XenDesktop administrator.
Steps to get Unidesk 3.x up and running:
- Deploy Unidesk Management Appliance. The UMA should be deployed on the Desktop cluster on centralized highly available storage which also provides for fast recovery time. The UMC needs to be able to communicate with CachePoints and SCVMM.
- Deploy Master CachePoint Appliance. The UMC should be deployed on the Desktop cluster on centralized highly available storage which also provides for fast recovery time. Keep in mind that the MCP stores a copy of all OS and Application layers for the environment so disk space is needed more so for this appliance than the others.
- Deploy Secondary CachePoint Appliance. Should be deployed on fast storage and there should be one per datastore.
The following storage sizes should be catered for:
- CachePoint and Layers Tier
- OS Layers – 20GB per layer.
- Application Layers – 10GB per layer.
- Personlization Layers – 10GB per layer.
- CachePoint Appliances – 17GB for the Master CachePoint and each Secondary CachePoint.
On the note of storage:
Each appliance comes with two storage tiers. Depending on what appliance (MCP/SCP) manage desktops and if desktops are persistent/non-persistent can affect what type of storage should be used.
- Boot Tier – Contains all your boot files and page files for the desktops. Non-persistent desktops write back to this tier so should be on fast storage. Persistent desktops use this tier and all desktops use the boot image file on startup. The boot file contains the composite registry, pagefile and windows boot files. If a boot file is lost or corrupted the CachePoint can safely recreate it using the OS and Application layers assigned to the desktop. If any change is made to the desktop i.e. new Application Layer assignment or removal, a new boot image for each affected desktop is created whilst the desktop is in a powered off state. It is important that the machine is not powered on whilst the new boot image is created. Keep in mind that for mass recreation of desktops or creation of desktops fast storage will be desireable.
- CachePoint and Layer Tier – Each OS, Application and User Layer virtual disk is stored on the CP & Layer Tier. When a desktop is being created both the Boot Tier and CP & Layers tier is used to pull the boot image, application and user layers together. Persistent desktops write to this tier also so the tier should be on fast storage. After a desktop has been created it doesn’t need the CachePoint to boot as it links directly to the virtual disks.
Installing Unidesk
To get started, download the Unidesk for Hyper-V 3.4 media from the Unidesk website, extract the zipped file and run the UnideskInstaller.exe as an administrator.![]() Agree to the EULA.
Agree to the EULA. 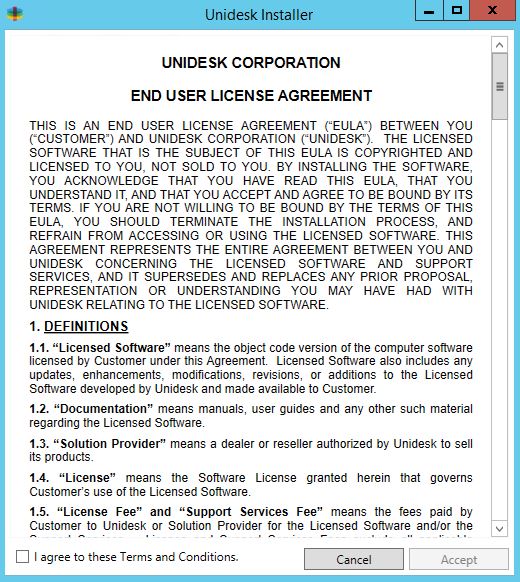 The Unidesk Hyper-V Agent is installed automatically and returns a status of Complete.
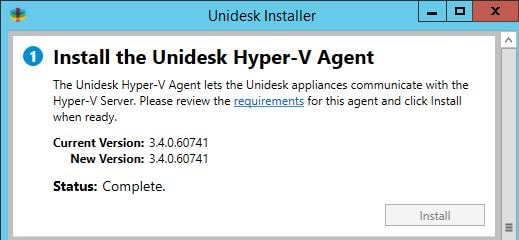
Looking on the Hyper-V server Add/Remove programs shows version 3.4.6 of the Unidesk Hyper-V Agent installed.![]() To begin we must deploy the Management Appliance. Enter a name for the virtual machine, location, and other bits of information as requested. The IP address for the Management Appliance should be either static of reserved via a DHCP reservation. When all information is entered click on Install.
To begin we must deploy the Management Appliance. Enter a name for the virtual machine, location, and other bits of information as requested. The IP address for the Management Appliance should be either static of reserved via a DHCP reservation. When all information is entered click on Install.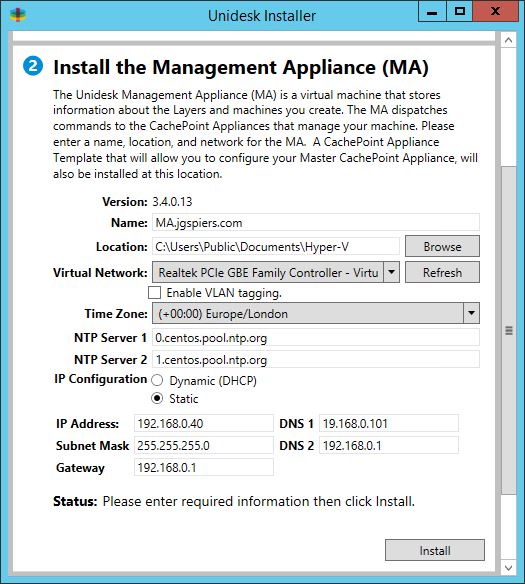
A progress bar shows the status of the Management Appliance deployment. Once the MA has deployed successfully, the installation wizard will return information such as the Management Console GUI URL, and the default password to log on. Also take note of the CachePoint Appliance template location as you will need this information when deploying your Master CachePoint.
 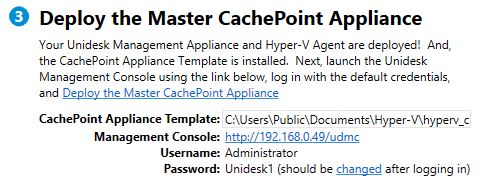 At this stage we can log on to the Unidesk Management Console which for now simply is http://managementapplianceIP/udmc. Once you reach the Unidesk Management Console log on with the default credentials of administrator/Unidesk1.
 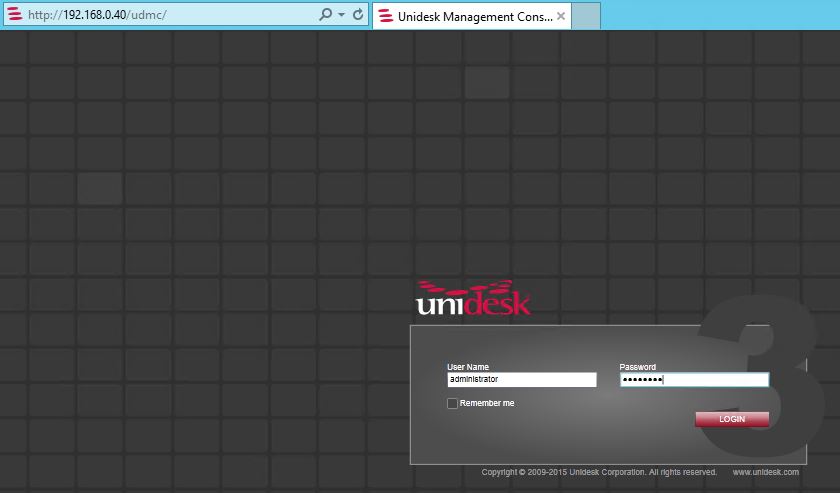 Click Close as we don’t want to perform these steps right now.
 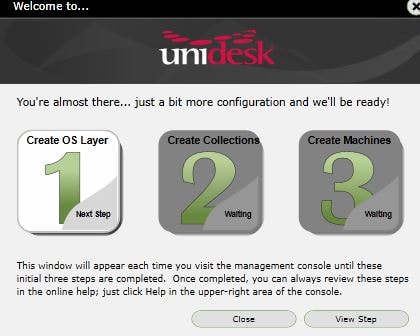 You will also get a prompt that no product license is installed yet. We can click later for now. I will show you how to install a license shortly.
 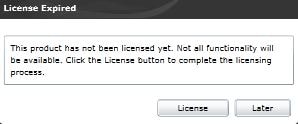 The first thing we want to do is change the default Unidesk administrator password. Navigate to Users -> Users -> Administrator -> Edit Properties.
 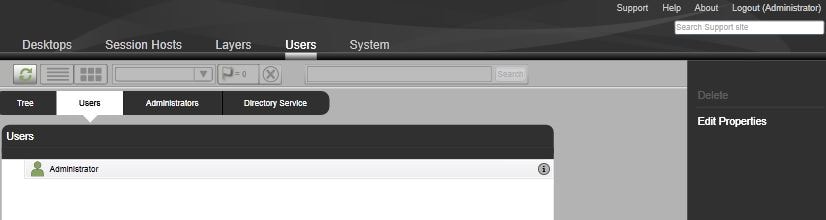 Enter a new password as below then click the down arrow.
 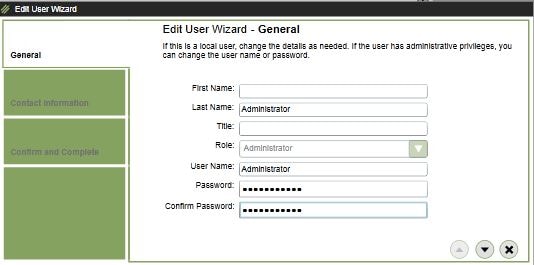 Click Update User.
 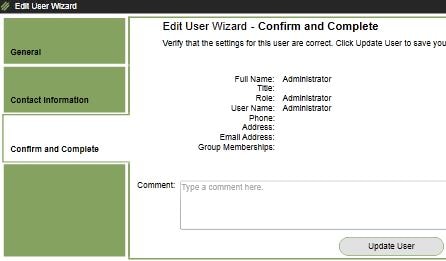 Now deploy the Master CachePoint. The MasterCachepoint will hold a copy of all OS and Application layers and serves other Secondary CachePoints (we will deploy one later) by replicating Application and OS layers out to them. Navigate to System -> Settings and Configuration and click Edit beside CachePoint Appliance Settings.
 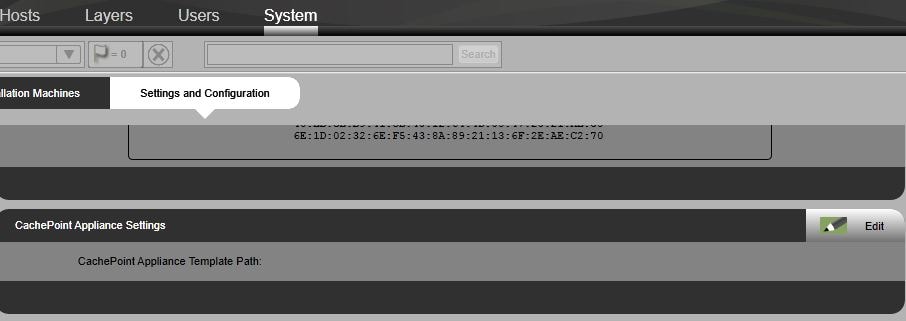 Click on Browse. Basically here we need to specify where the CachePoint template resides. Remember after the Management Appliance install we were given the template location.
  Select the template and click Choose.
 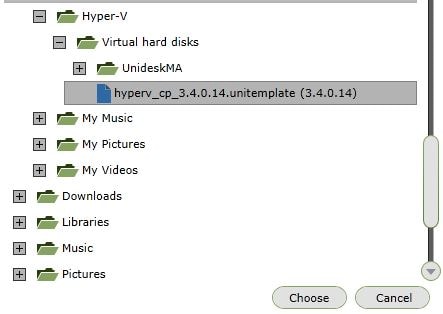 Now click Save.
  Navigate to System -> Manage Appliances -> Create CachePoint.
 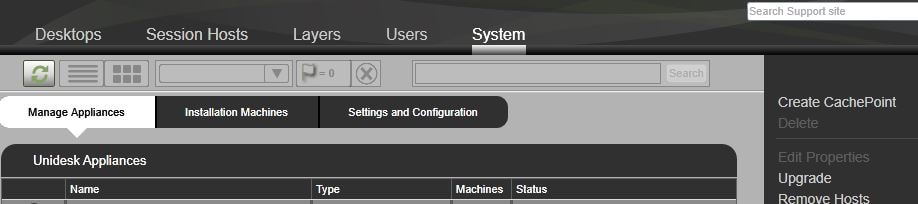 Enter a virtual machine name for the MCP and select the CachePoint Host. The default tick for Allow new machines to be deployed to this CachePoint Appliance is set however we will generally want to remove this so Desktops are created on Secondary CachePoints. Click the down arrow.
  Next select a location for your Storage Tiers which include the Boot images tier and CachePoint and Layers tier. The Boot image tier and CachePoint and Layers tier does not necessarily have to be on fast storage because the Master CachePoint will generally only replicate layers out to Secondary CachePoints but for replication reasons it is recommended to be on reasonably decent performing storage. Keep in mind that the MCA stores a copy of all OS and Application layers so adequate storage is needed. Click the down arrow.
 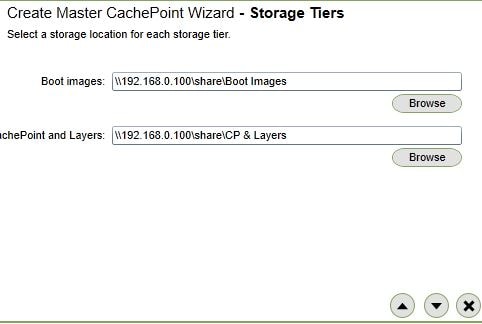 Select a Virtual Swtich, VLAN tag and IP information. Use either a static or DHCP reserved IP for the Master CachePoint Appliance. Click the down arrow.
  When satisfied with all information, click Create CachePoint Appliance.
 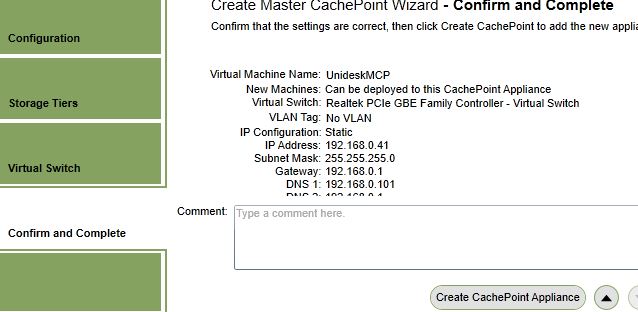 The creation of the MCP does not take long. If you expand the Tasks area within the Unidesk Management Console you can see that the task has already been completed and the UnideskMCP appliance is now running.
  By default, the Unidesk Master CachePoint also comes with a default password. To change this, we need to shell on to the MCP using Putty and change the password from there. To obtain the default root password refer to the Unidesk documentation. Log on with putty then type passwd. Enter the new password and you should be returned a message all authentication tokens updated successfully.
 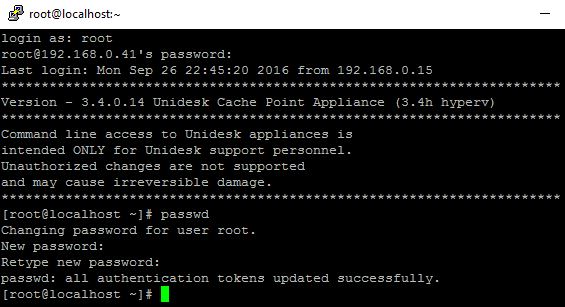 Back on the Unidesk Management Console, if you navigate to System -> Manage Appliances you can perform some edits on the MA, MCP and CP appliances using Edit Properties.
 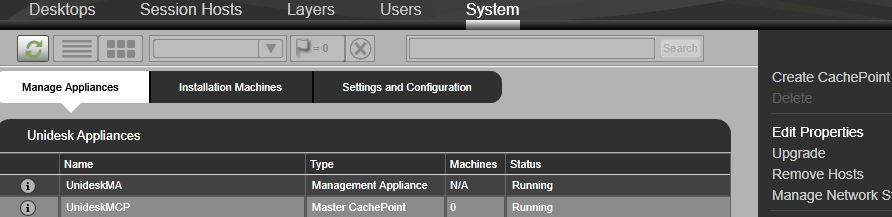 For example, if you want to enable machines to be deployed from CachePoints or not you have the option just like we had during the CachePoint deployment. Click the down arrow.
  Click Update CachePoint Appliance.
 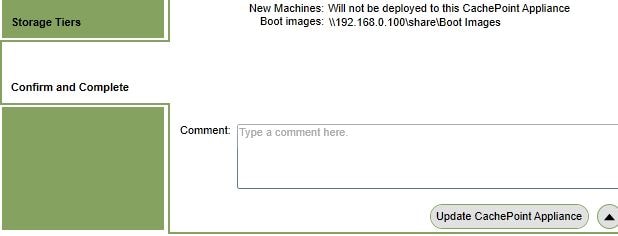 On the same Manage Appliances screen, click on Create CachePoint to deploy a Secondary CachePoint. Enter a name, select a host and leave the default box ticked to allow machine creation on this appliance.
 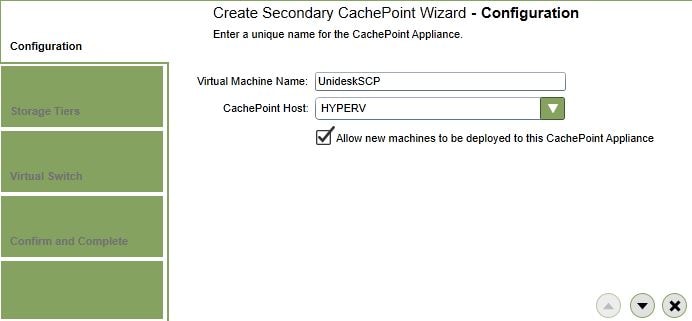 Specify storage locations for the Boot images tier and CachePoint and Layers tier. The storage locations should be on fast storage, centralized and highly available.
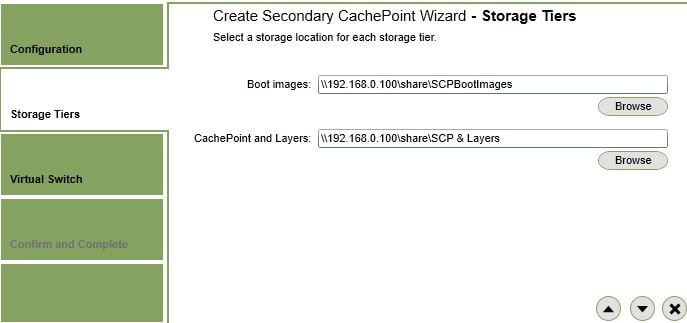 Enter network information and a static of DHCP reserved IP.
 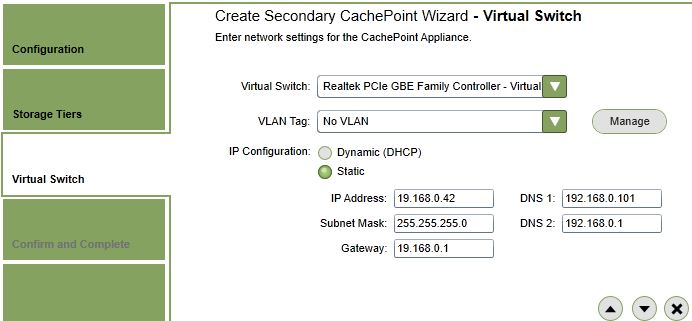 Click Create CachePoint Appliance.
 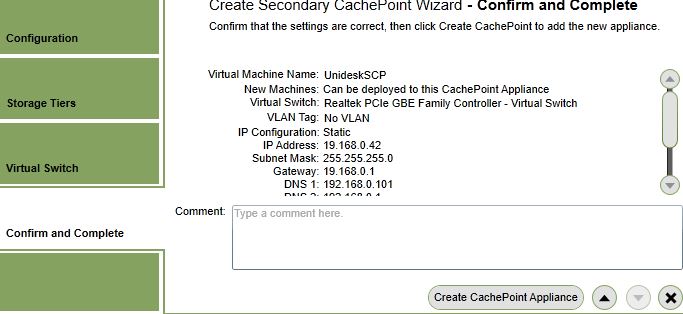 Expand tasks to see the status of the Secondary CachePoint deployment.
 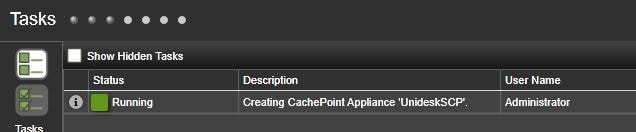 After a few moments the deployment will return as Done.
 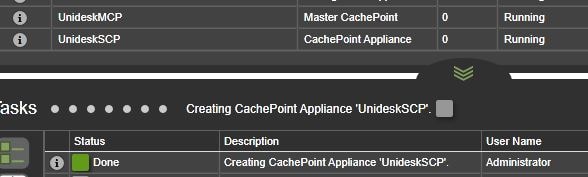 If you look at your Hyper-V hosts now you will have a Management Appliance, Master CachePoint and Secondary Cachepoint. Each appliance is configured with RAM/CPU as recommended by Unidesk.
Click on About within the Unidesk Management Console.  The Version tab shows the current Unidesk version and Hypervisor being used.
 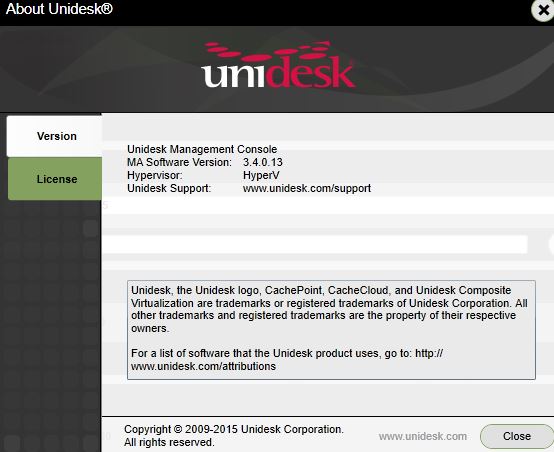 The License tab allows you to upload a Unidesk license and toggle wether to send usage statistics to Unidesk. Click License.
 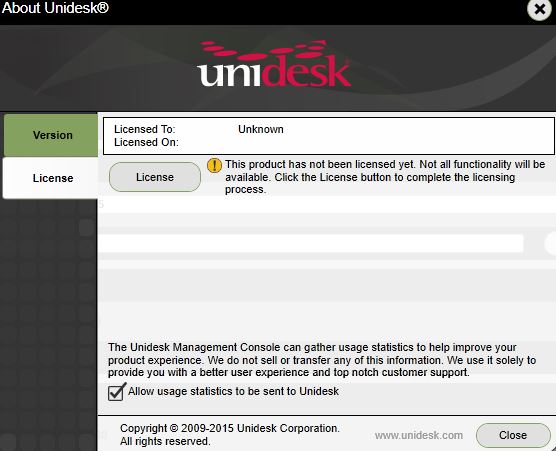 You can either upload a license file or enter your Unidesk credentials to upload a license direct from the Unidesk website.
 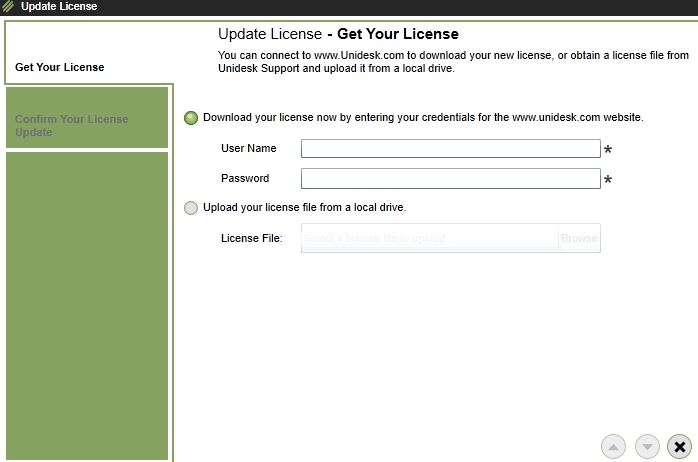 To configure Unidesk Management Console session timeouts navigate to System -> Settings and Configuration -> Security Settings -> Edit. By default the timeout is 15 minutes. A value of 0 disables session timeouts. The maximum session timeout value is 1000 minutes. Click Save.
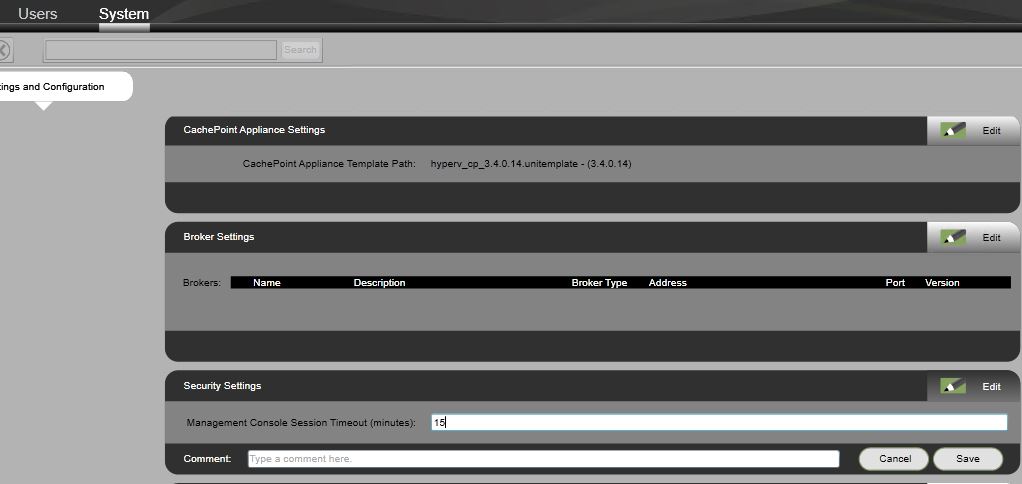 To upload a certificate for HTTPS communication with UDMC navigate to System -> Settings and Configuration -> HTTP Certificate Settings -> Edit.
 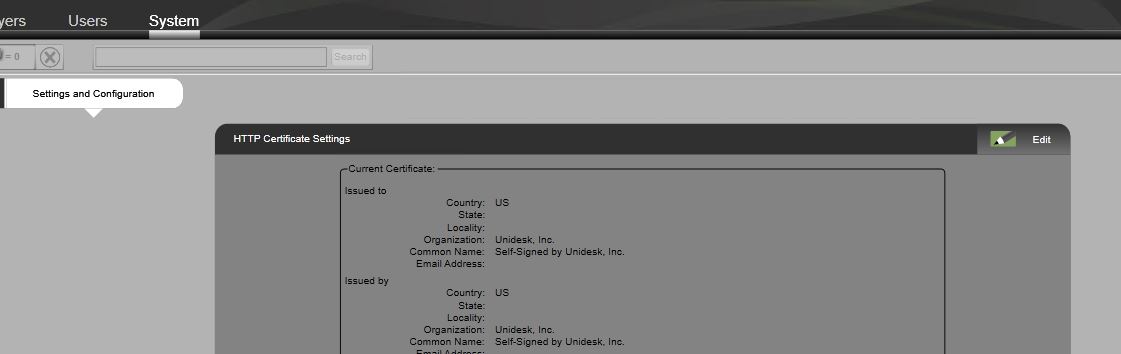 Click Upload.
 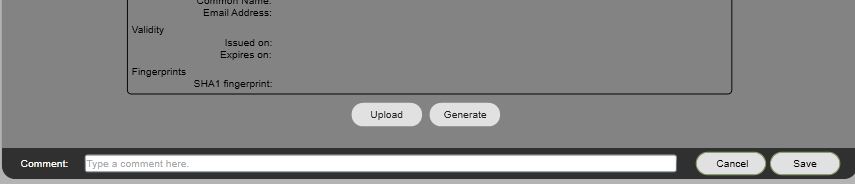 Navigate and select your PEM certificate. The private key of the certificate must be present and the certificate must not be password protected.
 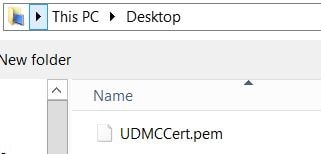 Click Upload.
 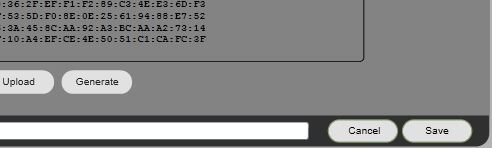 Click Yes.
 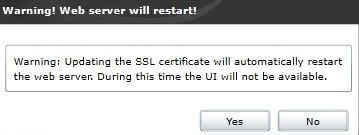 Unidesk performs the certificate update.
 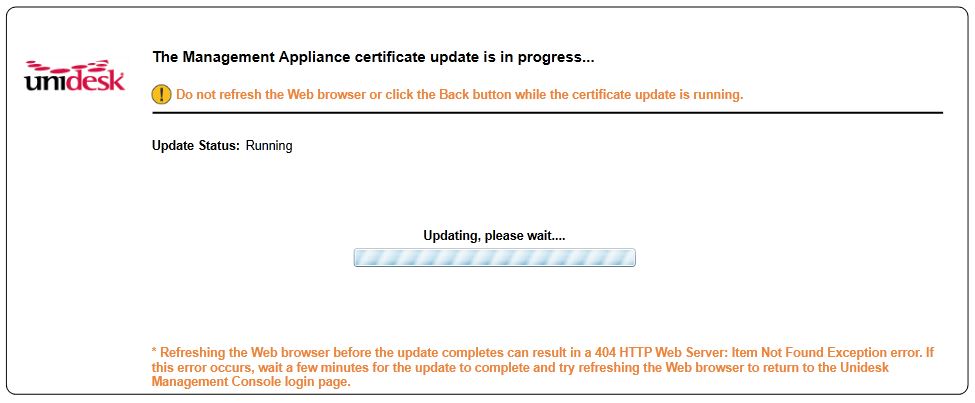 Now we can access the Unidesk Management Console via HTTPS using a secure certificate.
 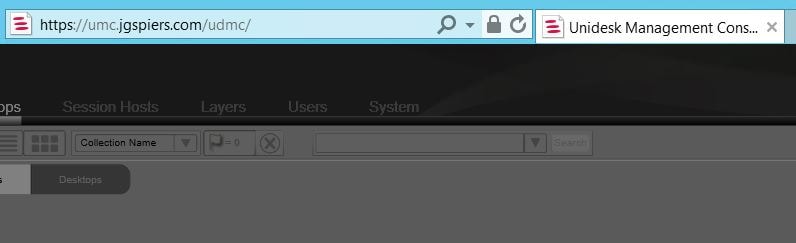 To connect Unidesk to your XenApp or XenDesktop environment you must install the Unidesk Broker Agent on all Delivery Controllers in your Citrix farm. Firstly on your Delivery Controller set the PowerShell execution policy to Unrestricted or Bypass.
Next launch the Unidesk Broker Agent install file found included with the downloaded Unidesk media. ![]() Click Next.
Click Next. 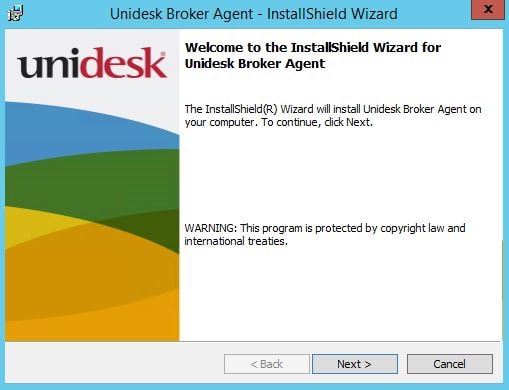 Accept the license agreement. Click Next.
 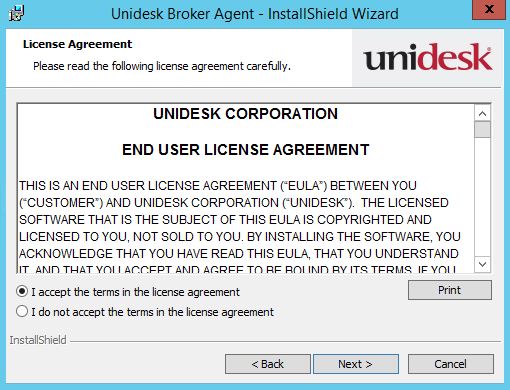 Specify the Unidesk Broker Agent install location. Click Next.
 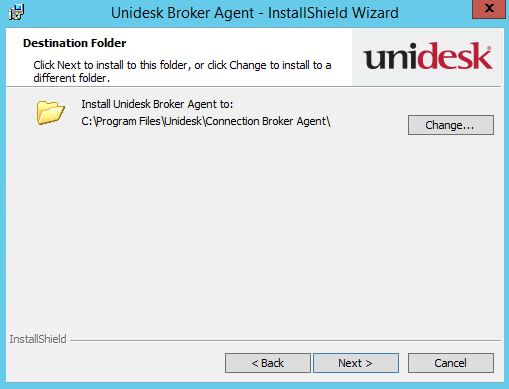 Enter a username to be used for the Unidesk Broker Agent. This user must be a local administrator on the Delivery Controller and a member of the Citrix Full Administrator group.
 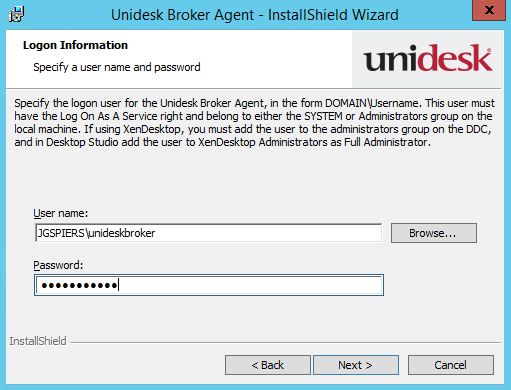 Specify the broker agent port. By default the port number is 8015 however this can be changed. Click Next.
 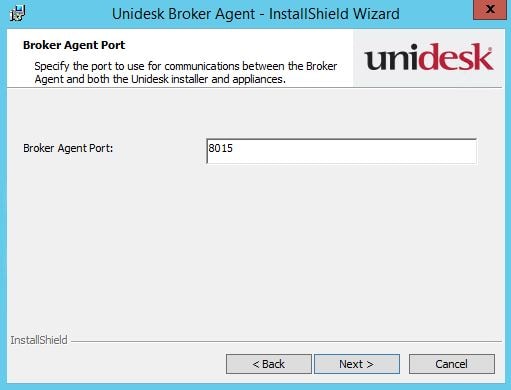 Click Install.
 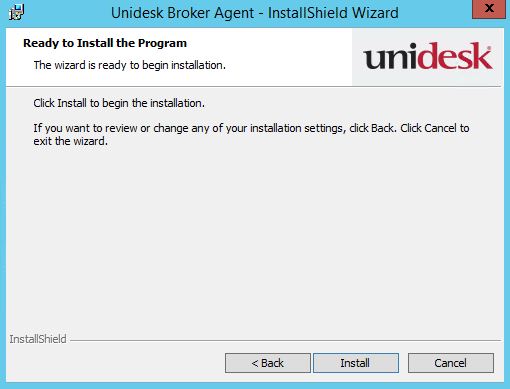 Click Finish.
 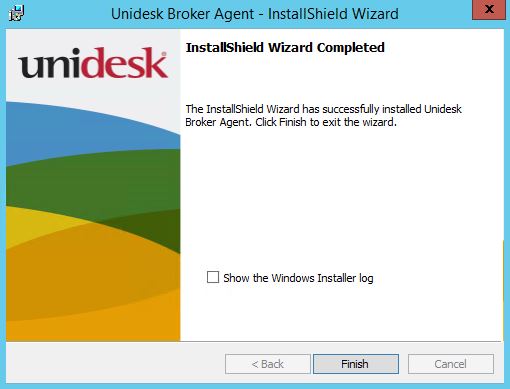 On the Unidesk Management Console navigate to System -> Settings and Configuration -> Broker Settings -> Edit -> Add.
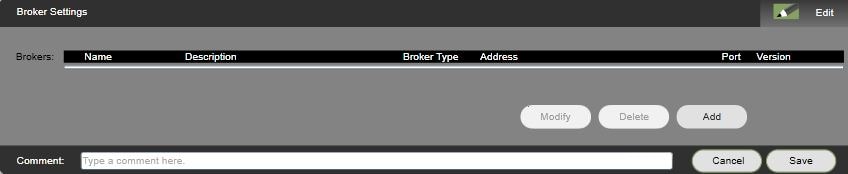 Enter your Delivery Controller server name and click Test Connection.
 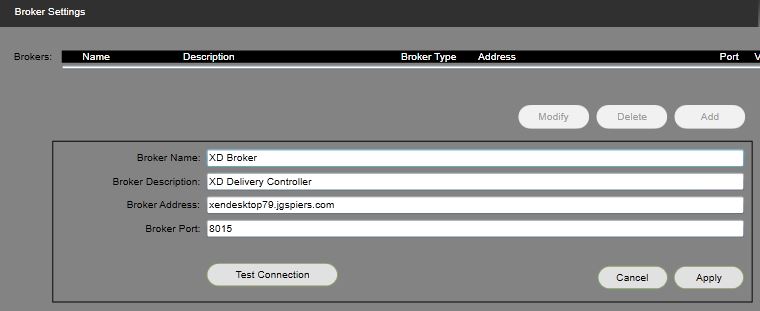 Once testing it successful use the Broker Virtualization Server dropdown to select your hosting connection. This connection will be SCVMM, vSphere etc. Click Apply. The connection to your hypervisor needs to be created using Citrix Studio. For information on how to integrate Citrix 7.x with SCVMM see https://jgspiers.com/attach-scvmm-connection-to-studio/
 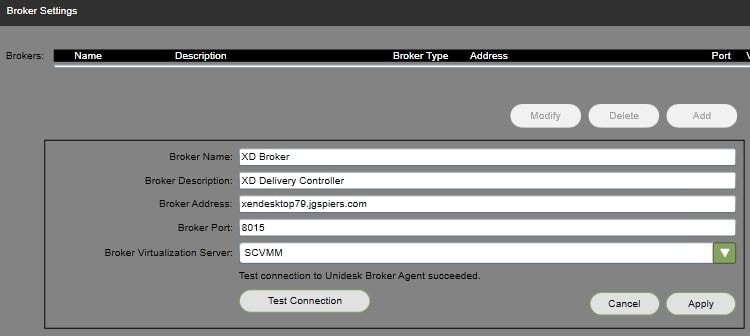 Click Add if you have multiple Delivery Controllers. When done, click Save.
 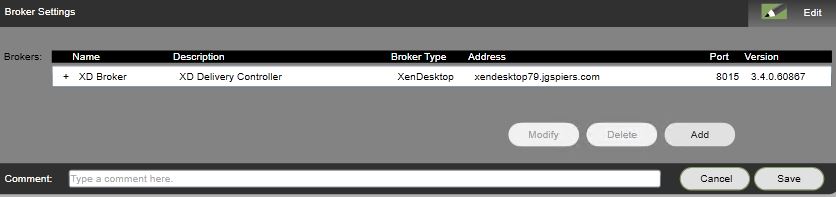 If you ever want to change the IP addresses on any of the appliances connect to them using a web browser via HTTPS and on port 5480. Log on with the default or changed credentials.
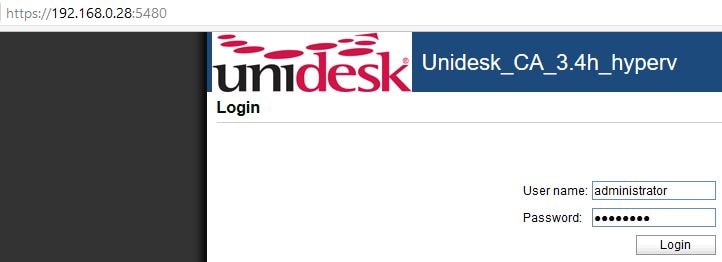 Click on the Network tab.
 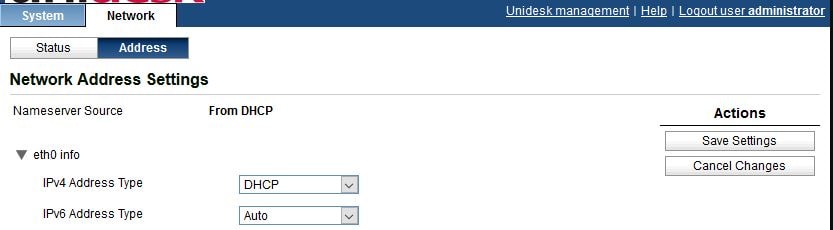 Assign a static IP address. Change or assign a hostname, assign DNS servers etc. Click Save Settings when done. Now reboot the appliance. The new changes should reflect within the Unidesk Management Console.
 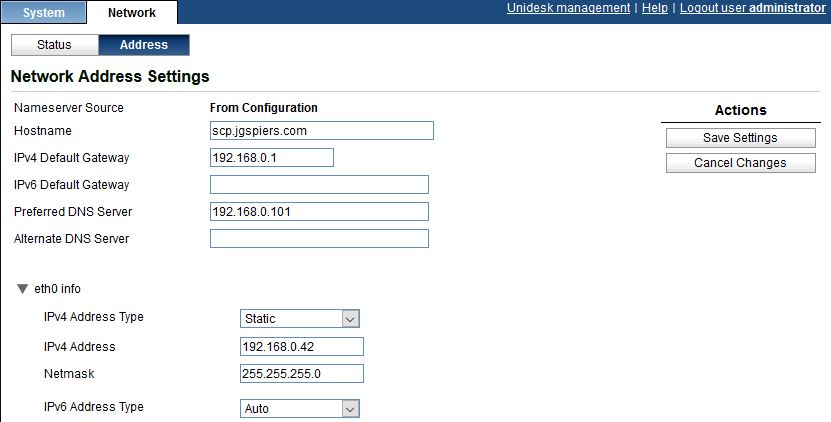 Integrating Unidesk with Active Directory is essential so that you can assign desktops and layers to users and assign administrative roles to users. To integrate Unidesk with your Active Directory instance you have to create a Directry Junction. Unidesk stores a read-only copy of Active Directory users and groups. Navigate to Users -> Directory Service -> Create Directory Junction.
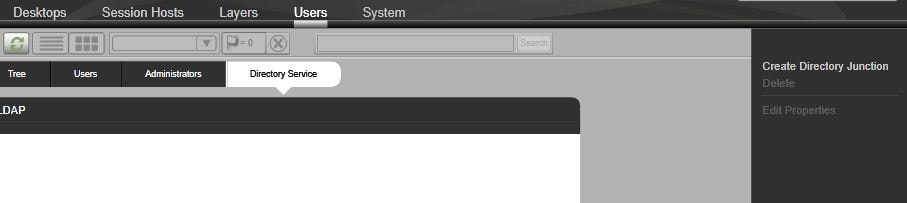 Enter a name, the domain controller server address and either port 389 or 636 (secure LDAP). Click Test Connection and confirm you get the Connection succeeded message. Click the down arrow. Note that for the server address it is possible to just input the FQDN of your domain name i.e. jgspiers.com. This means all DCs will be queried providing high availability if one becomes unavailable.
 Enter a username and password which will be used to bind to LDAP. You should create a specific service account for this purpose. Click Test Authentication and confirm you receive the Authentication succeeded message.
 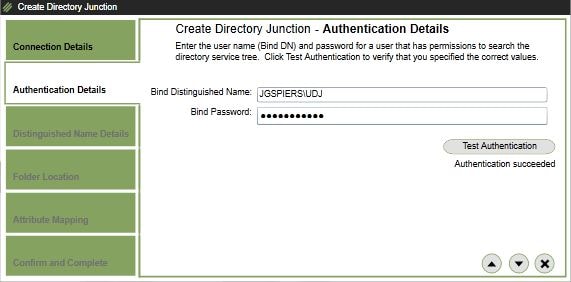 Specify the distinguished name that Unidesk will use to start user and group searches in. In this example my main users and groups reside in the UsersOU Organizational Unit. Click Test Base DN and confirm you receive the Base DN is valid message. Avoid creating overlapping Directory Junctions for example creating this one then creating another Directory Junction at a higher OU level which contains the UserOU Organizational Unit.
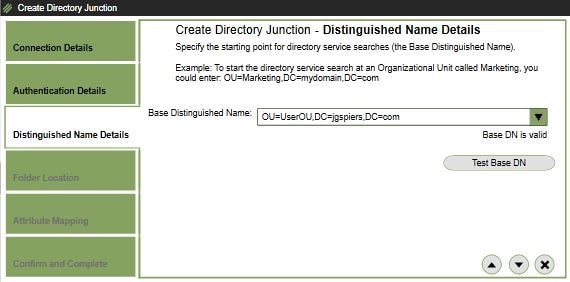 Select the location that will hold the Dirtectory Junction folder.
 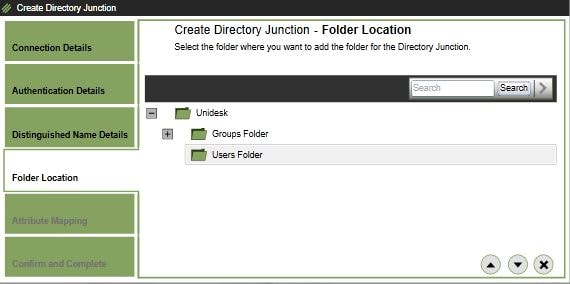 Leave the User Attributes at default. These attributes are specifically for use with Active Directory so you should not have any reason to change for the majority of times.
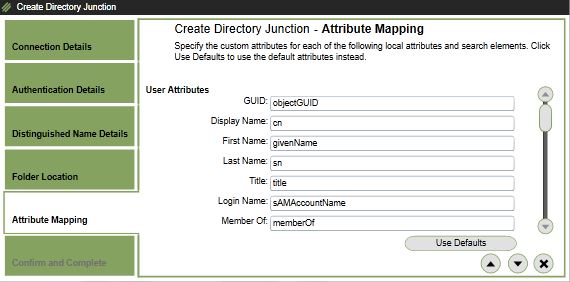 Click Create Directory Junction.
 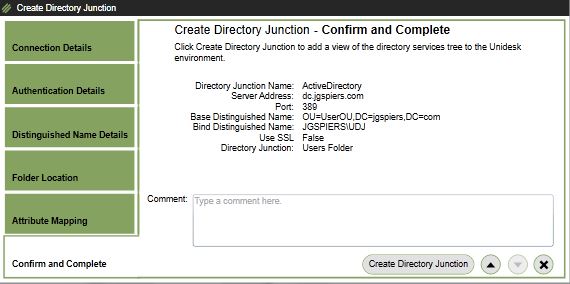 The new Directory Junction shows as below. You can edit the properties using the Edit Properties button.
  Click on the Tree tab and you can drill down in to the new Directory Junction which displays any users and groups available. Click on a user and then click Edit Properties.
 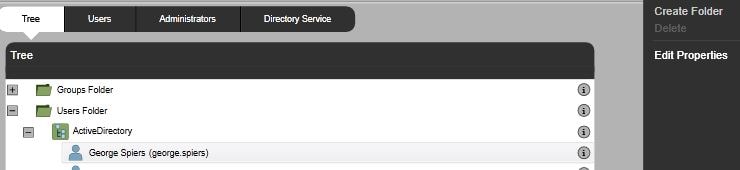 Here you can set the user as a Unidesk Administrator or Desktop Administrator. Any user who has administrative rights will receive a green people icon rather than the blue icon and will be placed under the Administrators tab. This gives easy viewing of Unidesk administrators. Administrative roles cannot be assigned to user security groups. If you change a user’s name in Active Directory desktop assignment is unnafected and the assignment continues to use the old username. Unidesk will continue to use the old name. Also Unidesk synchronizes with Active Directory every 11 hours.
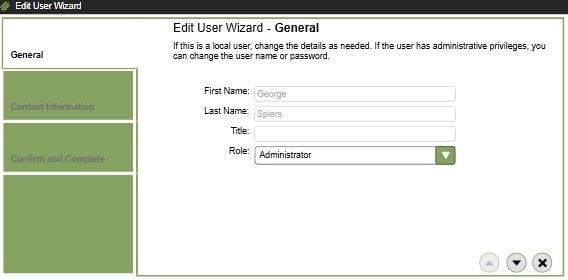 If a user from Active Directory is deleted and had a assignment within Unidesk, that user is marked as Abandoned.
Two Unidesk administrative groups are available:
- Administrator – Can perform all Unidesk related tasks.
- Desktop Administrator – Can perform tasks on Desktops/Session Hosts or Installation Machines. Can log on to Unidesk Management Console but can only perform tasks on the mentioned machines. Can create application layers.
An Active Directory synchronization runs as a task every 11 hours.![]() Any user within Active Directory that has a desktop assignment will appear on the Users tab.
Any user within Active Directory that has a desktop assignment will appear on the Users tab.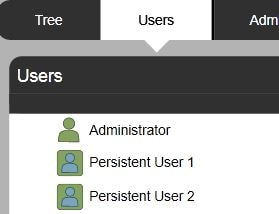
Jason
January 11, 2018JG,
Do you know how you can copy the contents of layers on the ELM appliance in /mnt/repository
and copy to them a new vmdk or disk and attach that disk to a new ELM appliance to copy the contents to /mnt/repository and have the layers show up in the new appliance
George Spiers
January 11, 2018There was a Unidesk Appliance Move Utility but I am not sure where you could download that now or if there is one that supports your ELM appliance version. You should start a thread on Citrix Discussions on the App Layering section and see if someone comes back with anything.